Content .. 1105 1106 1107 1108 ..
Dodge Caliber. Manual - part 1107
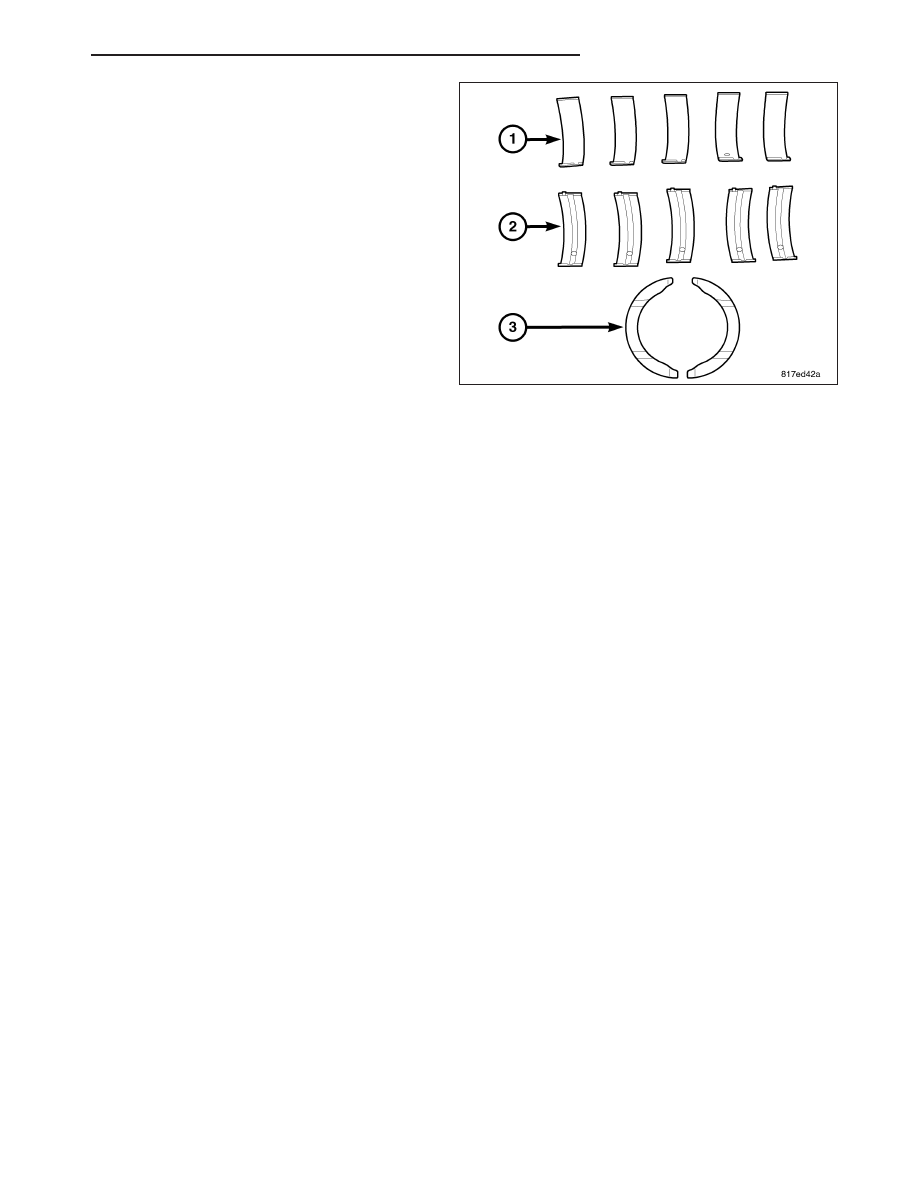
6. Install thrust bearings (3) in block.
CAUTION: Do not get oil on the ladder frame mat-
ing surface. It will affect the ability of the RTV to
seal the ladder frame to cylinder block.
7. Oil the bearings and journals. Install crankshaft in
engine block.
8. Install lower main bearings (1) into main bearing
cap. Make certain the bearing tabs are seated into
the bearing cap slots.
9. Before installing the bolts the threads should be
clean and dry.
10.
Install main bearing caps to engine block, install
bolts finger tight.
11. To ensure correct thrust bearing alignment, per-
form the following steps:
•
Step 1: Rotate crankshaft until number 4 piston is at TDC.
•
Step 2: Move crankshaft rearward to limits of travel.
•
Step 3: Then, move crankshaft forward to limits of travel.
•
Step 4: Wedge an appropriate tool between the rear of the cylinder block and the rear crankshaft counter-
weight. This will hold the crankshaft in it’s furthest forward position.
12. Tighten bolts (1–10) again to 41 N·m (30 ft. lbs.) in sequence shown.
13. Remove wedge tool used to hold crankshaft.
14.
Check the crankshaft turning torque, it should not exceed 5.6 N·m (50 in. lbs.).
15. Check crankshaft end play (Refer to 9 - ENGINE/ENGINE BLOCK/CRANKSHAFT - STANDARD PROCE-
DURE).
16. Install connecting rod bearings and caps. Do Not Reuse Connecting Rod Bolts. Torque connecting rod bolts
to 27 N·m (20 ft. lbs.) plus 1/4 turn.
17. Install the ladder frame assembly (Refer to 9 - ENGINE/ENGINE BLOCK/LADDER FRAME - INSTALLATION).
18. Install the balance shaft module (Refer to 9 - ENGINE/LUBRICATION/OIL PUMP - INSTALLATION).
19. Install the oil pan (Refer to 9 - ENGINE/LUBRICATION/OIL PAN - INSTALLATION).
20. Install crankshaft position sensor.
21. Install cylinder head if it was removed (Refer to 9 - ENGINE/CYLINDER HEAD - INSTALLATION).
22. Install front crankshaft sprocket.
23. Install the timing chain (Refer to 9 - ENGINE/VALVE TIMING/TIMING BELT/CHAIN AND SPROCKETS -
INSTALLATION).
24. Install the timing chain front cover.
25. Install front crankshaft oil seal.
26. Install engine mount support bracket.
27. Install crankshaft vibration damper (Refer to 9 - ENGINE/ENGINE BLOCK/VIBRATION DAMPER - INSTALLA-
TION).
28. Remove engine from repair stand and position on Special Tools 6135 and 6710 Engine Dolly and Cradle. Install
safety straps around the engine to cradle and tighten and lock them into position.
29. Install crankshaft rear oil seal (Refer to 9 - ENGINE/ENGINE BLOCK/CRANKSHAFT OIL SEAL - REAR -
INSTALLATION).
30. Install drive plate/flex plate. Apply Mopar
T
Lock & Seal Adhesive to bolt threads and tighten to 95 N·m (70 ft.
lbs.).
31. Attach transaxle to engine. Tighten attaching bolts to 101 N·m (75 ft. lbs.).
32. Install the engine assembly (Refer to 9 - ENGINE - INSTALLATION).
33. Install new oil filter and fill with oil.
34. Start engine and check for leaks.
PM
ENGINE 2.4L WORLD
9 - 1715