Dodge Dakota (ND). Manual - part 1182


  Index      Dodge     Dodge Dakota (ND) 2005 - service repair manual 2005 year


Search            


Content   ..  1180  1181  1182  1183   ..


Dodge Dakota (ND). Manual - part 1182


7. Lower the hood. Inspect clearance between the hood and the cowl cover.

8. Adjust the hood latch as necessary and tighten the bolts to 11 N·m (8 ft. lbs.).

9. Align the latch striker so that striker enters the latch squarely and without binding.

LATCH

REMOVAL

1. Remove the push pin fasteners and remove the

upper radiator shroud.

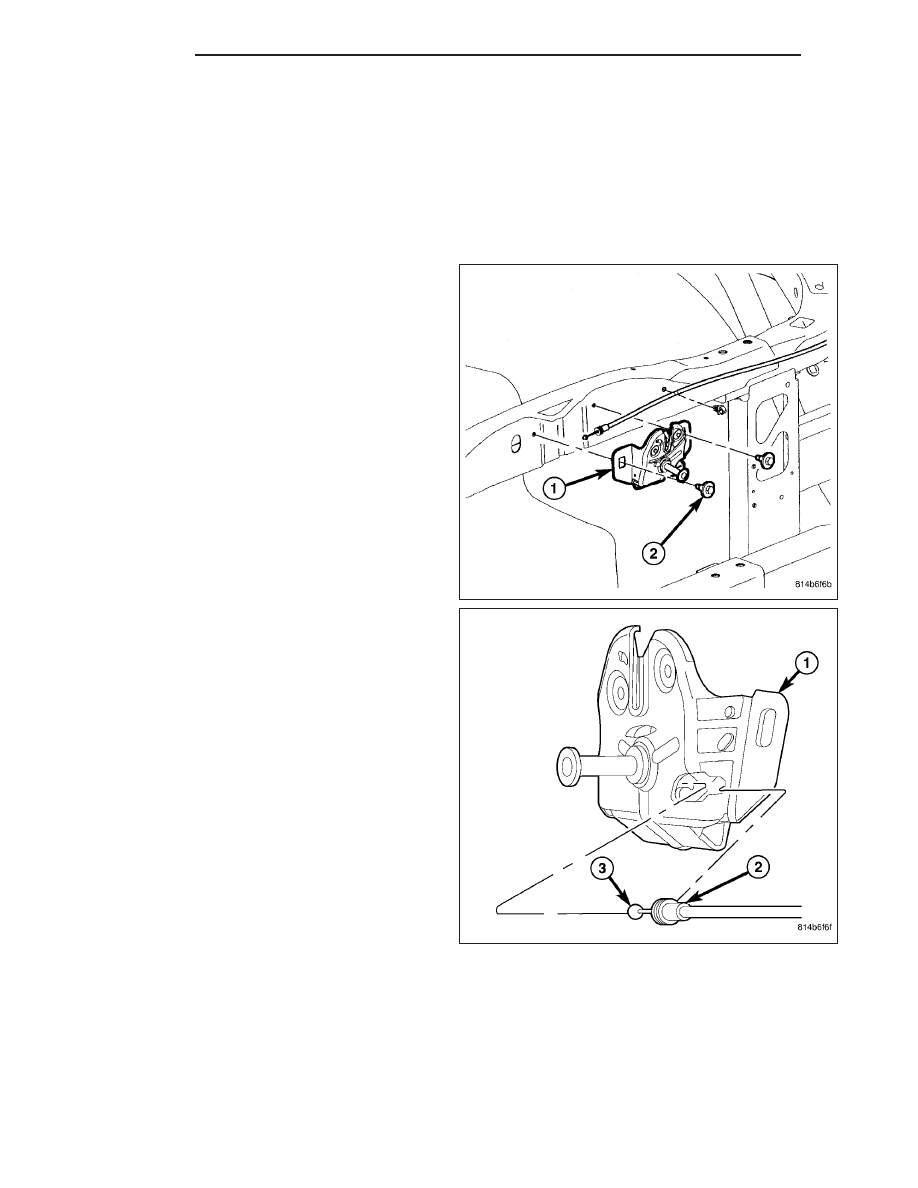
2. Using a grease pencil or equivalent, mark latch

position for installation alignment.

3. Remove bolts (2) attaching hood latch (1) to upper

radiator crossmember.

4. Separate hood latch (1) from crossmember and

disconnect the release cable (2).

23 - 140

HOOD

ND

INSTALLATION

1. Connect release cable (2) to the hood latch (1).

2. Install the latch (1) lining up the marks made pre-

viously and install the bolts (2).

3. Tighten the bolts to 11 N·m (8 ft. lbs.).

4. Close hood and adjust latch as necessary. (Refer

to 23 - BODY/HOOD/LATCH - ADJUSTMENTS)

ADJUSTMENTS

1. Check and adjust the hood if required. (Refer to 23 - BODY/HOOD/HOOD - ADJUSTMENTS)

2. Remove the push pin fasteners and remove the upper radiator shroud.

3. Loosen the hood latch bolts.

4. Move the latch to the correct location and lightly tighten the bolts.

5. Close the hood slowly and observe the latching operation.

6. If necessary, adjust the latch position and tighten the bolts to 11 N·m (8 ft. lbs.).

ND

HOOD

23 - 141

RELEASE-HOOD LATCH

REMOVAL

1. Remove hood latch (3). (Refer to 23 - BODY/

HOOD/LATCH - REMOVAL)

2. Detach the release cable (1) and the retainer clips

(2) in the engine compartment.

3. Separate the release cable grommet (3) from the

dash panel hole.

4. Detach the release cable (2) and the retainer clips

(4).

5. From the inside of the vehicle, remove the screws

attaching the hood release handle to the bottom of
the instrument panel (1).

6. Pull/route the hood release cable (2) through the

dash panel hole and remove it from the inside of
the vehicle.

23 - 142

HOOD

ND

INSTALLATION

NOTE: If replacement hood latch is also being
installed, ensure that it is thoroughly lubricated.

1. From inside the vehicle, pull/route the hood release

cable (2) through the dash panel hole and into the
engine compartment.

2. Install the hood release handle and install the

screws.

3. Install the cable grommet (3) in the dash panel

hole.

4. Attach the retainer clip (4) to the release cable and

install.

5. Attach the retainer clips (2) to the release cable

and install them into the holes in the engine com-
partment.

6. Install hood latch (3). (Refer to 23 - BODY/HOOD/

LATCH - INSTALLATION)

ND

HOOD

23 - 143


Content   ..  1180  1181  1182  1183   ..