Chery A11. Manual - part 147
Maintenance Manual for Chery·Windcloud
.
.
.
.
.
.
.
.
.
.
.
.
.
.
.
.
.
.
.
.
.
.
.
.
.
.
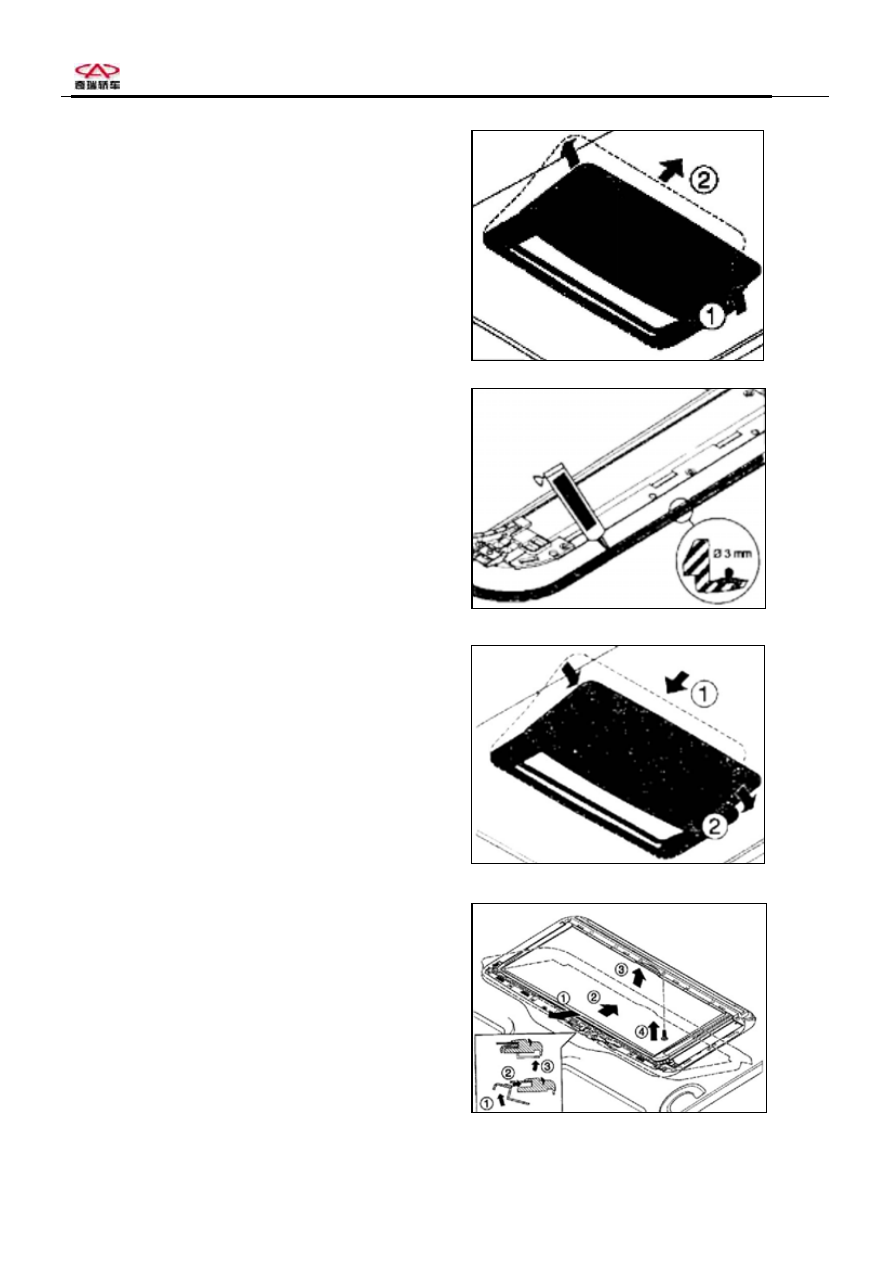
Sunroof
4.2.9 Take off sunroof as shown in the figure.
Assembling procedure
4.2.10 Apply a layer of undry-glue with diameter of 3cm
at the position shown in the figure.
4.2.11 Insert the upper frame assembly into the opening
in vehicle roof.
4.2.12 Install interior fixing frame with the front end
higher than rear (about 45º inclination) to fix
front end first, and then push the rear end
backward. Tighten a fixing bolt in the middle part
of rear end to prevent the frame from dropping.
Page 13 of 37