Porshe 911 (997). Manual - part 1028


  Index      Hummer     Porshe 911 997 series - service repair manual 2004-2008 year


Search            


Content   ..  1026  1027  1028  1029   ..


Porshe 911 (997). Manual - part 1028


8. Push on connector for antenna amplifier, left and right -89 to 93- . → 918419 Removing and installing

antenna amplifier - chapter on "Installing"

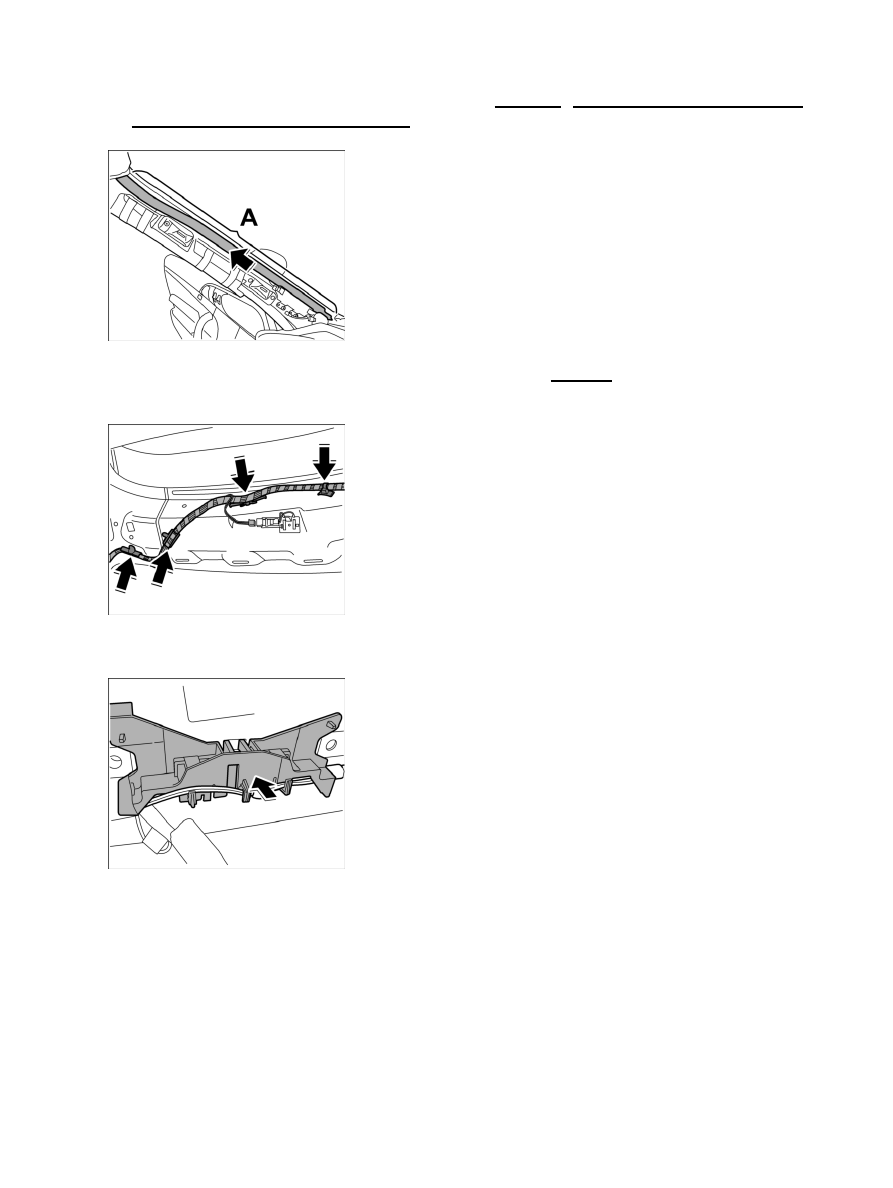
Affixing main wire harness to A-pillar

9. Remove protective film of adhesive strip on main wire harness -Area A- and affix main wire harness to

A-pillar.

Clipping in main wire harness at front of roof frame

10. Clip in main wire harness at front of roof frame.

Clipping in cable duct at front of roof frame

11. Clip in cable duct at front of roof frame.

Diagnostic system: reading out fault memory and activating systems

Installing main wire harness in passenger compartment

4269

Connecting plug connection of make-up mirror

12. Connect plug connection of make-up mirror, left and right -87 and 88- .

12.1. Push together plug connection -Arrows A- until it is felt to engage.

12.2. Clip plug connection into console -Arrow B- .

13. Push together plug connection -86- until it is felt to engage. → 921219 Removing and installing rain

sensor - chapter on "Installing"

Fastening electric line

14. Connect plug connections between main wire harness and wire harness for heater/air-conditioning unit

-79 and 80-

 .

14.1. Lay main wire harness to heater/air-conditioning unit wire harness and fix with a tie-wrap.

Diagnostic system: reading out fault memory and activating systems

Installing main wire harness in passenger compartment

4270

Connecting upper electrical plug connection

14.2. Push in upper electric plug connection at heater/air-conditioning unit until it is felt to engage.

Connecting lower electrical plug connection

14.3. Push in lower electric plug connection at heater/air-conditioning unit until it is felt to engage.

15. Push on connector for tilt sensor control unit -77- until it is felt to engage. → 966319 Tilt sensor control

unit - chapter on "Removing"

Securing ground point

16. Fasten ground point under the unit carrier -76- .

16.1. Connect ground straps and tighten with the fastening nut. → Tightening torque: 9 (6.5 ftlb.) Nm

Diagnostic system: reading out fault memory and activating systems

Installing main wire harness in passenger compartment

4271

17. Push on connector for pedal sensor -69- until it is felt to engage. → 207819 23 Removing and

installing pedal sensor - chapter on "Installing"

18. Push on connector for stop light switch -68- until it is felt to engage. → 943619 Removing and installing

stop light switch - chapter on "Installing".

19. Push on connectors of KESSY/PAS control unit -66 and 67- until they are felt to engage. → 966619

Removing and installing KESSY control unit - chapter on "Installing"

20. Push on connector of Gateway control unit -65- until it is felt to engage. → 903519 Removing and

installing gateway control unit - chapter on "Installing"

21. Push together plug connection between main wire harness and wire harness for door, left and right

-59 und 60-

 until they are felt to engage. → 973219 Removing and installing wire harness for door -

chapter on "locking"

Clipping in wire harness at door sill

22. Clip in wire harness at door sill.

Securing ground point

23. Fasten ground point under the passenger seat -54- .

23.1. Connect ground straps and tighten with the fastening nut. → Tightening torque: 9 (6.5 ftlb.) Nm

Clipping in wire harness for telephone control unit

Diagnostic system: reading out fault memory and activating systems

Installing main wire harness in passenger compartment

4272


Content   ..  1026  1027  1028  1029   ..