Volvo V60 Plug-in Hybrid (2015 year). Instruction - part 1


  Index      Volvo     Volvo V60 Plug-in Hybrid - instruction 2015 year in english


Search            


Content   ..    1  2   ..


Volvo V60 Plug-in Hybrid (2015 year). Instruction - part 1


01 Introduction

01

}}

*


Option/accessory, for more information, see Introduction.

13

Owner information

Your car is fitted with a screen which shows
information on how your car is working

1

.

For cars with owner information in the screen,

the printed owner's manual is a supplement

and contains important text, the latest

updates, as well as instructions that can be

useful when, for practical reasons, you are

unable to read the information on the screen.
Changing the screen's language may mean

that certain information is no longer in

accordance with national or local laws and

regulations.

IMPORTANT

The driver is always responsible that the

vehicle is driven safely in traffic and that

applicable laws and regulations are fol-

lowed. It is also important that the car is

maintained and handled in accordance

with Volvo's recommendations in the

owner's information.
If there should be a difference between the

information on the screen and in the prin-

ted manual then it is always the printed

information that applies.

Reading the owner's manual

A good way of getting to know your new car

is to read the owner's manual, ideally before

your first journey.

Reading the owner's manual will give you the

opportunity to familiarise yourself with new

functions, advice on how best to handle the

car in different situations and to make the

best use of all the car's features. Please pay

attention to the safety instructions contained

in the owner's manual.
The specifications, design features and illus-

trations in the owner's manual are not bind-

ing. We reserve the right to make modifica-

tions without prior notice.
© Volvo Car Corporation

IMPORTANT

Do not remove this manual from the car -

should a problem arise then the informa-

tion required about where and how to seek

professional help would be missing.

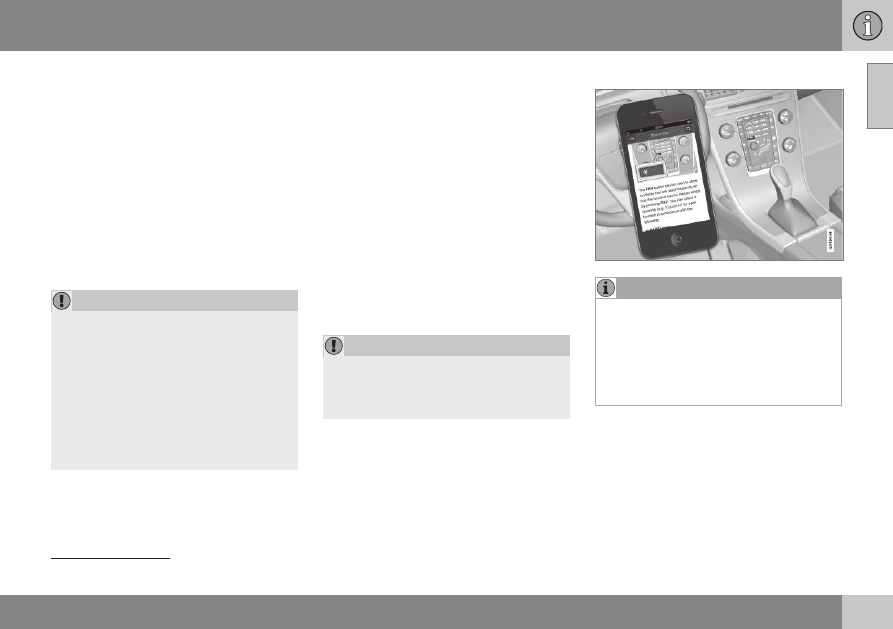
Owner's Manual in mobile devices

NOTE

The owner's manual is available for down-

load as a mobile application (applies for

certain car models and mobile devices),

see www.volvocars.com.
The mobile application also includes video

and searchable content and easy naviga-

tion between different sections.

Options/accessories
All types of option/accessory are marked with

an asterisk*.
In addition to standard equipment, the

owner's manual also describes options (fac-

tory fitted equipment) and certain accessories

(retrofitted extra equipment).

1

Applies to certain car models.

||

01 Introduction

01

14

The equipment described in the owner's

manual is not available in all cars - they have

different equipment depending on adapta-

tions for the needs of different markets and

national or local laws and regulations.
In the event of uncertainty over what is stand-

ard or an option/accessory, contact a Volvo

dealer.

Special texts

WARNING

Warning texts appear if there is a risk of

injury.

IMPORTANT

"Important" texts appear if there is a risk of

damage.

NOTE

NOTE texts give advice or tips that facili-

tate the use of e.g. features and functions.

Footnote
There is footnote information in the owner's

manual that is located at the bottom of the

page. This information is an addition to the

text that it refers to via a number. If the foot-

note refers to text in a table then letters are

used instead of numbers for referral.

Message texts
In the car there are displays that show menu

texts and message texts. In the owner's man-

ual the appearance of these texts differs from

the normal text. Examples of menu texts and

message texts: 

Media

Sending location

.

Decals
The car contains different types of decal

which are designed to convey important

information in a simple and clear manner. The

decals in the car have the following descend-

ing degree of importance for the warning/

information.

Warning for personal injury

G031590

Black ISO symbols on yellow warning field,

white text/image on black message field.

Used to indicate the presence of danger

which, if the warning is ignored, may result in

serious personal injury or fatality.

Risk of property damage

G

0

3

1

5

9

2

White ISO symbols and white text/image on

black or blue warning field and message field.

Used to indicate the presence of danger

which, if the warning is ignored, may result in

damage to property.

01 Introduction

01

15

Information

G

0

3

1

5

9

3

White ISO symbols and white text/image on

black message field.

NOTE

It is not intended that the decals illustrated

in the owner's manual should be exact

replicas of those in the car. They are

included to show their approximate

appearance and location in the car. The

information that applies to your particular

car is available on the respective decals

for your car.

Procedure lists
Procedures where action must be taken in a

certain sequence are numbered in the

owner's manual.

When there is a series of illustrations for

step-by-step instructions each step is

numbered in the same way as the corres-

ponding illustration.
There are numbered lists with letters

adjacent to the series of illustrations

where the order of the instructions is not

significant.
Arrows appear numbered and unnum-

bered and are used to illustrate a move-

ment.
Arrows with letters are used to clarify a

movement when the reciprocal order is of

no relevance.

If there is no series of illustrations for step-by-

step instructions then the different steps are

numbered with normal numbers.

Position lists

Red circles containing a number are used

in overview images where different com-

ponents are pointed out. The number

recurs in the position list featured in con-

nection with the illustration that describes

the item.

Bulleted lists
A bulleted list is used when there is a list of

points in the owner's manual.
Example:

Coolant

Engine oil

Related information
Related information refers to other articles

containing closely-associated information.

Images
The manual's images are sometimes sche-

matic and may deviate from the car's appear-

ance depending on equipment level and mar-

ket.

To be continued

}} 

This symbol is located furthest down to

the right when an article continues on the fol-

lowing page.

Continued from previous page

|| 

This symbol is located furthest up to the

left when an article continues from the previ-

ous page.

Related information

The owner's manual and the environment

(p. 23)

Information on the Internet (p. 19)

01 Introduction

01

16

Digital owner's manual in the car

The owner's manual can be read on the
screen in the car

2

. The content is searchable

and it is easy to navigate between different

sections.

Open the digital owner's manual - press the

MY CAR button in the centre console, press

OK/MENU and select 

Owner's manual

.

For basic navigation, see Operating the sys-

tem. See below for a more detailed descrip-

tion.

Owner's manual, start page.

There are four options for finding information

in the digital owner's manual:

Search

 - Search function for finding an

article.

Categories

 - All articles sorted into cate-

gories.

Favourites

 - Quick access to favourite-

bookmarked articles.

Quick Guide

 - A selection of articles for

common functions.

Select the information symbol in the lower

right-hand corner in order to obtain informa-

tion about the digital owner's manual.

NOTE

The digital owner's manual is not available

while driving.

Search

Searching using the character wheel.

Character list.

Changing the input mode (see following

table).

Use the character wheel to enter a search

term, e.g. "seatbelt".
1. Turn TUNE to the desired letter, press

OK/MENU to confirm. The number and

letter buttons on the control panel in the

centre console can also be used.

2. Continue with the next letter and so on.

2

Applies to certain car models.

01 Introduction

01

}}

17

3. To change the input mode to numbers or

special characters, or to perform a

search, turn TUNE to one of the options

(see explanation in the following table) in

the list for changing the input mode (2),

press OK/MENU.

123

/

AB

C

Change between letters and

numbers with OK/MENU.

MORE

Change to special characters

with OK/MENU.

OK

Perform the search. Turn TUNE

to select a search result article,

press OK/MENU to go to the

article.

a|A

Changes between lowercase

and uppercase letters with OK/

MENU.

| | }

Changes from the character

wheel to the search field. Move

the cursor with TUNE. Delete

any misspelling with EXIT. To

return to the character wheel,

press OK/MENU.
Note that the digit and letter

buttons on the control panel

can be used for editing in the

search field.

Enter with the numerical keyboard

Numerical keyboard.

Another way of entering characters is to use

the centre console's buttons 0-9* and #.
When e.g. 9 is pressed, a bar appears with all
characters

3

 under the button, e.g. 

W

x

y

z

and 

9

. Quick presses on the button move the

cursor through these characters.

Stop with the cursor on the desired char-

acter in order to select it - the character is

shown on the enter line.

Delete/undo using EXIT.

To enter a number, hold in the corresponding

number key.

Categories
The articles in the owner's manual are struc-

tured into main categories and subcategories.

The same article can be in several appropri-

ate categories in order to be found more

easily.
Turn TUNE to navigate in the category tree

and press OK/MENU to open a category -
selected 

 - or article - selected 

. Press

EXIT to go back to the previous view.

Favourites
Located here are the articles that are saved

as favourites. To select an article as a favour-

ite, see the heading "Navigating in an article"

below.
Turn TUNE to navigate in the favourite list

and press OK/MENU to open an article.

Press EXIT to go back to the previous view.

Quick Guide
Located here is a selection of articles for get-

ting to know the car's most common func-

tions. The articles can also be accessed via

categories, but are collected here for quick

access.
Turn TUNE to navigate in the Quick Guide

and press OK/MENU to open an article.

Press EXIT to go back to the previous view.

3

The character for each button may vary depending on market/country/language.

||

01 Introduction

01

18

Navigating in an article

Home - leads to the start page for the

owner's manual.
Favourite - adds/removes an article as a

favourite. You can also press the FAV

button in the centre console to add/

remove an article as a favourite.
Highlighted link - leads to linked article.

Special texts - if the article contains

warnings, important or note texts then an

associated symbol is shown here as well

as the number of such texts in the article.

Turn TUNE to navigate between the links or

scroll in an article. When the screen has

scrolled to the start/end of an article the

home and favourite options are accessed by

scrolling a further step up/down. Press OK/

MENU to activate the selection/highlighted

link. Press EXIT to go back to the previous

view.

Recording data

Certain information about the vehicle's opera-

tion and functionality, and any incidents, are

recorded in the car.

Your vehicle contains a number of computers

whose function is to continuously check and

monitor the vehicle's operation and function-

ality. Some of the computers can record

information during normal driving if they

detect an error. In addition, information is

recorded in the event of a collision or inci-

dent. Parts of the recorded information are

required so that technicians can diagnose

and rectify faults in the vehicle during servic-

ing and maintenance and so that Volvo can

fulfil legal requirements and other regulations.

In addition to this, the information is used for

research purposes by Volvo in order to con-

tinually develop quality and safety, as the

information can contribute to a better under-

standing of the factors that cause accidents

and injuries. The information includes details

of the status and functionality of various sys-

tems and modules in the vehicle with regard

to engine, throttle, steering and brake sys-

tems, amongst other things. This information

may include details regarding the way the

driver drives the vehicle, such as vehicle

speed, brake and accelerator pedal use,

steering wheel movement and whether or not

the driver and passengers have used their

seatbelts. For the reasons given this informa-

tion may be stored in the vehicle's computers

for a certain length of time, but also as a

result of a collision or incident. This informa-

tion may be stored by Volvo as long as it can

help to further develop and further enhance

safety and quality and as long as there are

legal requirements and other regulations that

Volvo needs to consider.
Volvo will not contribute to the above-descri-

bed information being disclosed to third par-

ties without the vehicle owner's consent.

However, due to national legislation and reg-

ulations Volvo may be required to disclose

such information to authorities such as police

authorities, or others who may assert a legal

right to have access to it.
To be able to read and interpret the informa-

tion recorded by the computers in the vehicle

requires special technical equipment that

Volvo, and workshops that have entered into

agreements with Volvo, have access to. Volvo

is responsible that the information, which is

transferred to Volvo during servicing and

maintenance, is stored and handled in a

secure manner and that the handling com-

plies with applicable legal requirements. For

further information - contact a Volvo dealer.

01 Introduction

01

*


Option/accessory, for more information, see Introduction.

19

Accessories and extra equipment

The incorrect connection and installation of

accessories and extra equipment can nega-

tively affect the car's electronic system.

Certain accessories only function when asso-

ciated software is installed in the car's com-

puter system. Volvo therefore recommends

that you always contact an authorised Volvo

workshop before installing accessories or

extra equipment which are connected to or

affect the electrical system.

Heat-reflecting windscreen*
The windscreen is equipped with a heat-

reflecting film (IR) that reduces the solar heat

radiation into the passenger compartment.
The positioning of electronic equipment, such

as a transponder, behind a glass surface with

heat-reflecting film may affect its function and

performance.
For the optimal function of electronic equip-

ment, it should be positioned on the part of

the windscreen with no heat-reflecting film

(see the highlighted area in the illustration).

Areas where IR film is not applied.

A is the distance from the top edge of the

windscreen down to the start of the field. B is

the distance from the top edge of the wind-

screen down to the end of the field.

Dimensions

A

40 mm

B

80 mm

Information on the Internet

At www.volvocars.com there is further infor-

mation concerning your car.
With a personal Volvo ID it is possible to log in

to My Volvo web, which is a personal web

page for you and your car.

QR code

A QR code reader is required to read the QR

code, which is available as a supplemental

program (app) for several mobile phones. The

QR code reader can be downloaded from e.g.

App Store, Windows Phone or Google Play.

01 Introduction

01

20

*


Option/accessory, for more information, see Introduction.

Volvo ID

Volvo ID is your personal ID that provides
access to various services

4

.

Examples of services:

My Volvo - Your personal web page for

you and your car.

In an Internet-connected car* - Certain

functions and services require that you

have registered your car to a personal

Volvo ID, for example to be able to send a

new address from a map service on the

Internet directly to the car.

Volvo On Call, VOC* - Volvo ID is used

when logging in to the Volvo On Call

mobile app.

Advantages of Volvo ID

One user name and one password to

access online services, i.e. only one user-

name and one password to remember.

When changing the username/password

for a service (e.g. VOC) it will also be

changed automatically for other services

(e.g. My Volvo)

Create a Volvo ID
To create a Volvo ID you need to enter a per-

sonal e-mail address. Then follow the instruc-

tions in the e-mail message that is automati-

cally sent to the specified address in order to

complete the registration. It is possible to cre-

ate a Volvo ID via one of the following serv-

ices:

My Volvo - Enter your e-mail address and

follow the instructions.

For an Internet-connected car* - Enter

your e-mail address in the app that

requires Volvo ID and follow the instruc-

tions. Alternatively press the Connect
button 

 in the centre console and

select 

Apps

Settings

 and follow the

instructions.

Volvo On Call, VOC* - Download the lat-

est version of the VOC app. Choose to

create a Volvo ID from the start page,

enter e-mail address and follow the

instructions.

Related information

Information on the Internet (p. 19)

4

The services available may vary over time and vary depending on equipment level and market.

||

01 Introduction

01

22

*


Option/accessory, for more information, see Introduction.

A sophisticated air quality system, IAQS*

(Interior Air Quality System) ensures that the

incoming air is cleaner than the air in the traf-

fic outside.
The system consists of an electronic sensor

and a carbon filter. The incoming air is moni-

tored continuously and if there is an increase

in the level of certain unhealthy gases such as

carbon monoxide then the air intake is

closed. Such a situation may arise in heavy

traffic, queues and tunnels for example.
The entry of nitrous oxides, ground-level

ozone and hydrocarbons is prevented by the

carbon filter.

Interior
The interior of a Volvo is designed to be plea-

sant and comfortable, even for people with

contact allergies and for asthma sufferers.

Extreme attention has been given to choosing

environmentally-compatible materials.

Volvo workshops and the environment
Regular maintenance creates the conditions

for a long service life and low fuel consump-

tion for your car. In this way you contribute to

a cleaner environment. When Volvo's work-

shops are entrusted with the service and

maintenance of your car it becomes part of

our system. Volvo makes clear demands

regarding the way in which our workshops

are designed in order to prevent spills and

discharges into the environment. Our work-

shop staff have the knowledge and the tools

required to guarantee good environmental

care.

Reducing environmental impact
You can easily help reduce environmental

impact - here are a few tips:

Avoid letting the engine idle - switch off

the engine when stationary for longer

periods. Pay attention to local regula-

tions.

Drive economically - think ahead.

Perform service and maintenance in

accordance with the instructions in the

owner's manual - follow the Service and

Warranty Booklet's recommended inter-

vals.

If the car is equipped with an engine

block heater*, use it before starting from

cold - it improves starting capacity and

reduces wear in cold weather and the

engine reaches normal operating tem-

perature more quickly, which lowers con-

sumption and reduces emissions.

High speed increases consumption con-

siderably due to increased wind resis-

tance - a doubling of speed increases

wind resistance 4 times.

Always dispose of environmentally hazar-

dous waste, such as batteries and oils, in

an environmentally safe manner. Consult

a workshop in the event of uncertainty

about how this type of waste should be

discarded - an authorised Volvo work-

shop is recommended.

Following this advice can save money, the

planet's resources are saved, and the car's

durability is extended. For more information

and further advice, see Eco guide (p. 71) ,

Economical driving (p. 292) and Fuel con-

sumption (p. 407).

Recycling
As a part of Volvo's environmental work, it is

important that the car is recycled in an envi-

ronmentally sound manner. Almost all of the

car can be recycled. The last owner of the car

is therefore requested to contact a dealer for

referral to a certified/approved recycling

facility.

Related information

The owner's manual and the environment

(p. 23)

01 Introduction

01

*


Option/accessory, for more information, see Introduction.

23

The owner's manual and the

environment

The paper pulp in a printed owner's manual
comes from FSC

®

 certified forests or other

controlled sources.

The Forest Stewardship Council

®

 symbol

shows that the paper pulp in a printed
owner's manual comes from FSC

®

 certified

forests or other controlled sources.

Related information

Volvo Car Corporation's environmental

philosophy (p. 21)

Laminated glass

Laminated glass

The glass is reinforced which pro-

vides better protection against

break-ins and improved sound insu-

lation in the passenger compart-

ment. The windscreen and other windows*

have laminated glass.

01 Introduction

01

24

Plug-in hybrid - overview

Overview of the V60 PLUG-IN HYBRID unique

functions.

 Charging the hybrid battery (p. 292).

 Hybrid battery (p. 371).

01 Introduction

01

25

 Electric motor (p. 262) with drive on the

rear wheels.

 Drive modes (p. 263).

 Combined instrument panel (p. 67) with

unique information for the plug-in hybrid.

Related information

Plug-in hybrid - introduction (p. 26)

01 Introduction

01

26

Plug-in hybrid - introduction

The car is driven as a completely normal car.

The electric motor drives the car mostly at low

speeds, the diesel engine at higher speeds, as

well as during more active driving.

Important to know

WARNING

Remember that the car does not emit any

engine noise when it is only powered by

the electric motor and may therefore be

difficult to notice by children, pedestrians,

cyclists and animals. This applies in partic-

ular at low speeds, such as in car parks.

High-voltage current

Several components in the

car work with high-voltage

current that could be danger-

ous in the event of incorrect

intervention. Do not touch

anything that is not clearly

described in the owner's

manual. Read more about the engine com-

partment (p. 350).

WARNING

Orange-coloured cables must only be han-

dled by qualified personnel.

Driving the car
The car is driven as a completely normal car.

The electric motor drives the car mostly at

low speeds, the diesel engine at higher

speeds, as well as during more active driving.

Read more about Economical driving

(p. 292).

Drive modes
It is possible to set the car in different drive

modes while driving, e.g. electric operation

only or, when power is required, both electric

motor and diesel engine. The car calculates

an optimal combination of driveability, driving

experience, environmental impact and fuel

economy according to the drive mode

selected. Read more about Drive system -

drive modes (p. 263).

Combined instrument panel
Two fields in the combined instrument panel

show unique information for the V60 PLUG-IN

HYBRID; hybrid battery gauge (current energy

level), active drive mode, symbol that is illumi-

nated when the diesel engine is operating,

Hybrid Guide as well as energy recovery.

Read more about the combined instrument

panel (p. 67).

Preconditioning
In order that the car should have optimal

function it is important that the hybrid battery

with associated electrical drive systems, as

well as the diesel engine and its drive sys-

tems, have the correct operating temperature.

Battery capacity is reduced considerably if

the battery is too cold or too hot. Precondi-

tioning prepares the car's drive systems and

the passenger compartment before departure

so that both wear and energy needs during

the journey are reduced. Read more about

General information about preconditioning

(p. 136).

Charging the hybrid battery

IMPORTANT

Never connect the charging cable when

there is a risk of lightning.

The hybrid battery is the Lithium-ion type and

can be recharged in different ways. A charg-

ing cable with control unit can be connected

between the car and a 230V AC socket, see

Charging cable with control unit (p. 295).

Charging time depends on charging current

(p. 293).
The electric motor is used as an engine brake

during light braking and the car's kinetic

energy is converted to electrical energy which

is used to charge the hybrid battery. Read

more about recycling the brake force energy

(p. 274).
In addition, the diesel engine can charge the

electric motor's hybrid battery with a special

high-voltage generator when the need arises,

see drive system and drive modes (p. 263).

02 Safety

02

29

General information on seatbelts

Heavy braking can have serious consequen-

ces if the seatbelts are not used. Ensure that

all passengers are using their seatbelts during

the journey.

Tension the hip strap over the lap by pulling the

diagonal shoulder belt up towards the shoulder.

The hip strap must be positioned low down (not

over the abdomen).

It is important that the seatbelt lies against

the body so it can provide maximum protec-

tion. Do not lean the backrest too far back.

The seatbelt is designed to protect in a nor-

mal seating position.
Unbelted occupants will be reminded to fas-

ten their (p. 30) seatbelt by means of an

audio and visual reminder (p. 32).

Remember

Do not use clips or anything else that can

prevent the seatbelt from fitting properly.

The seatbelt must not be twisted or

caught on anything.

WARNING

The seatbelts and airbags interact. If a

seatbelt is not used or is used incorrectly,

this may diminish the protection provided

by the airbag in the event of a collision.

WARNING

Each seatbelt is designed for only one per-

son.

WARNING

Never modify or repair the seatbelts your-

self. Volvo recommends that you contact

an authorised Volvo workshop.
If a seatbelt has been subjected to a major

load, such as in conjunction with a colli-

sion, the entire seatbelt must be replaced.

Some of the protective characteristics of

the seatbelt may have been lost, even if it

appears to be undamaged. In addition,

replace the seatbelt if the belt is worn or

damaged. The new seatbelt must be type-

approved and intended for installation in

the same position as the replaced seatbelt.

Related information

Seatbelt - pregnancy (p. 31)

Seatbelt - loosening (p. 31)

Seatbelt tensioner (p. 32)

02 Safety

02

30

Seatbelt - putting on

Put on the seatbelt (p. 29) before driving

starts.

Pull the belt out slowly and secure it by

pressing its locking tab into the seatbelt

buckle. A loud "click" indicates that the belt

has locked.

Correctly fitted seatbelt.

Incorrectly fitted seatbelt. The belt must rest on

the shoulder.

Seatbelt height adjustment. Press the button and

move the belt vertically. Position the belt as high

as possible without it chafing against your throat.

The buckles only fit the intended lock in the
rear seat

1

.

Remember
The seatbelt locks and cannot be withdrawn:

if it is pulled out too quickly

during braking and acceleration

if the car leans heavily.

Related information

Seatbelt - pregnancy (p. 31)

Seatbelt - loosening (p. 31)

Seatbelt tensioner (p. 32)

Seatbelt reminder (p. 32)

1

Certain markets.

02 Safety

02

31

Seatbelt - loosening

Loosen the seatbelt (p. 29) when the car is

stationary.

Press the red button on the seatbelt buckle

and then let the belt retract. If the seatbelt

does not retract fully, feed it in by hand so

that it does not hang loose.

Related information

Seatbelt - putting on (p. 30)

Seatbelt reminder (p. 32)

Seatbelt - pregnancy

Seatbelt (p. 29) must always be worn during

pregnancy. But it is crucial that it be worn in

the correct way.

G020998

The diagonal section should wrap over the

shoulder then be routed between the breasts

and to the side of the abdomen.
The lap section should lay flat over the thighs

and as low as possible under the abdomen. –

It must never be allowed to ride upward.

Remove the slack from the seatbelt and

ensure that it fits as close to the body as pos-

sible. In addition, check that there are no

twists in the seatbelt.
As the pregnancy progresses, pregnant dri-

vers must adjust the seat (p. 82) and steer-

ing wheel (p. 87) such that they can easily

maintain control of the vehicle as they drive

(which means that they must be able to easily

operate the foot pedals and steering wheel).

The aim should be to position the seat with as

large a distance as possible between abdo-

men and steering wheel.

Related information

Seatbelt - putting on (p. 30)

Seatbelt - loosening (p. 31)


Content   ..    1  2   ..