Volkswagen EOS (2015 year). Instruction - part 13


  Index      Volkswagen     Volkswagen EOS - instruction 2015 year in english


Search            copyright infringement  


Content   ..  11  12  13  14   ..


Volkswagen EOS (2015 year). Instruction - part 13


Tire Pressure Monitoring System (TPMS) 


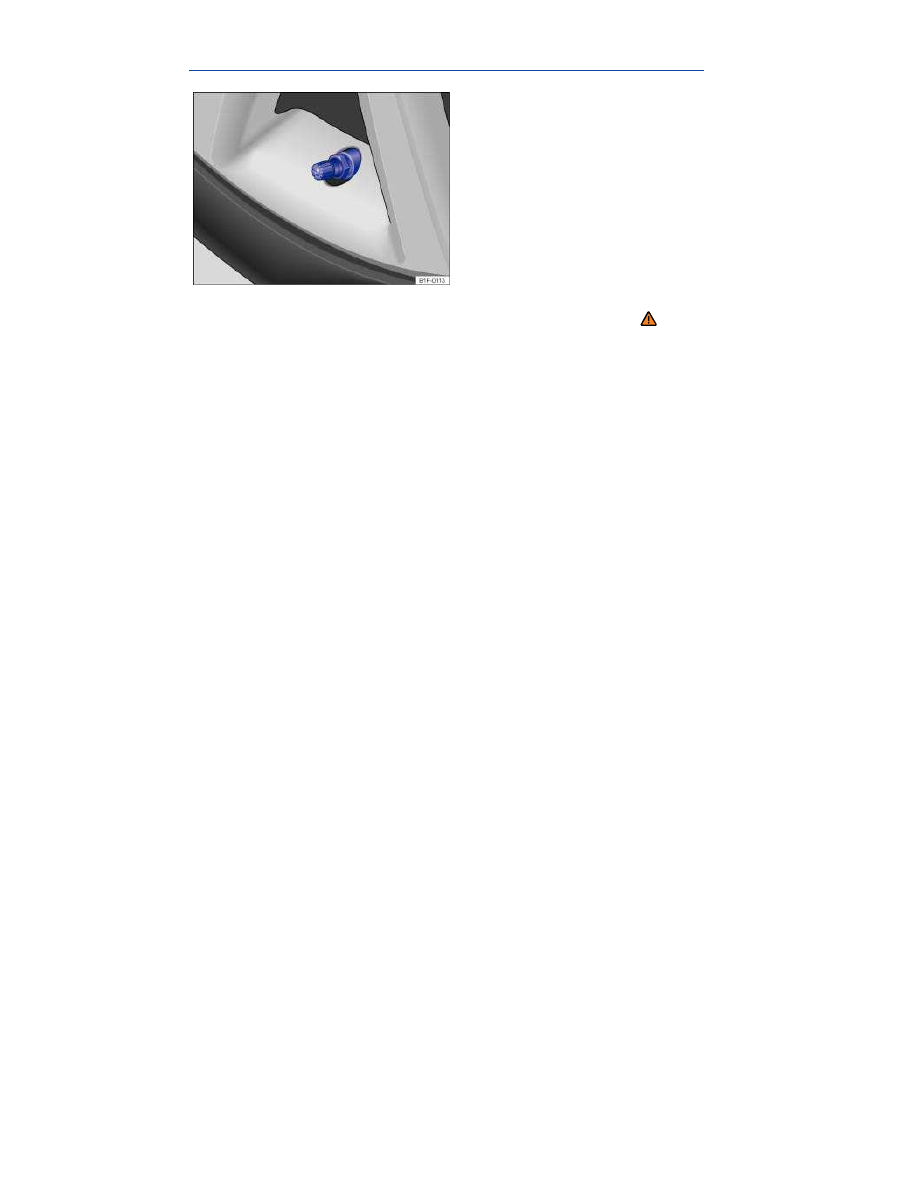
Fig. 109 The Tire Pressure Monitoring system (TPMS) uses a pressure sensor in each read wheel. 

 Please first read and note the introductory information and heed the WARNINGS 


The Tire Pressure Monitoring System uses a pressure sensor in each wheel. Signals from the sensors 

are transmitted to the TPMS. 

⇒ 

fig. 109

The TPMS checks the tire pressure of all 4 tires while you are driving and warns if there is a loss of 
pressure while the vehicle is moving. Pressure loss that is 25% or more of the benchmark value 
programmed into the system is signaled by the indicator light (telltale) described above, by acoustic 
warnings, and by text messages in the instrument cluster display. 

If you mount tires of a different size than the factory installed tires, an authorized Volkswagen dealer or 
an authorized Volkswagen Service Facility can adjust the benchmark TPMS tire pressure to match the 
new tires. Without this adjustment, TPMS may not work correctly or at all. 

The tire pressure recommended for the tires originally installed on the vehicle is on a sticker on the 

driver door jamb 

⇒ Tire inflation pressure ⇒ 

fig. 105

Each tire, including the spare (if provided), should be checked monthly when cold and inflated to the 
inflation pressure recommended by the vehicle manufacturer on the vehicle placard or tire inflation 
pressure label. (If your vehicle has tires of a different size than the size indicated on the vehicle 
placard or tire inflation pressure label, you should determine the proper tire inflation pressure for those 
tires.) 

As an added safety feature, your vehicle has been equipped with a Tire Pressure Monitoring System 
(TPMS) that illuminates a low tire pressure telltale when one or more of your tires is significantly 
underinflated. Accordingly, when the low tire pressure telltale illuminates, you should stop and check 
your tires as soon as possible, and inflate them to the proper pressure. Driving on a significantly 
underinflated tire causes the tire to overheat and can lead to tire failure. Underinflated tires also 
reduce fuel efficiency and tire tread life, and may affect the vehicle's handling and stopping ability. 

Please note that the TPMS is not a substitute for proper tire maintenance, and it is the driver's 
responsibility to maintain correct tire pressure, even if underinflated tires have not reached the level to 
trigger illumination of the TPMS low tire pressure telltale. 

Your vehicle has also been equipped with a TPMS malfunction indicator to indicate when the system 
is not operating properly. The TPMS malfunction indicator is combined with the low tire pressure 
telltale. When the system detects a malfunction, the telltale will flash for approximately 1 minute and 
then remain continuously illuminated. This sequence will continue upon subsequent vehicle start-ups 
as long as the malfunction exists. 

When the malfunction indicator is illuminated, the system may not be able to detect or signal low tire 
pressure as intended. TPMS malfunctions may occur for a variety of reasons, including the installation 
of replacement or alternate tires or wheels on the vehicle that prevent the TPMS from functioning 
properly. Always check the TPMS malfunction telltale after replacing one or more tires or wheels on 


your vehicle to ensure that the replacement or alternate tires and wheels allow the TPMS to continue 
to function properly. 

Spare wheel or compact spare wheel 

The spare wheel or compact spare wheel has no tire pressure sensor. When the spare or compact 
spare wheel is mounted on the vehicle, the Tire Pressure Monitoring System (TPMS) indicator light will 
flash in the instrument cluster display. The TPMS continues to monitor the other 3 wheels. 

Tire storage 

If the tires do not move for an extended period of time, the sensors will not transmit tire pressures to 
the system. This saves sensor battery life. The sensors are reactivated by driving the vehicle again. 

  WARNING 

Incorrect tire pressure can cause sudden tire failure, loss of vehicle control and serious 
personal injury. 

  Always check and correct air pressure in all 4 tires, particularly after changing, 

exchanging, or repairing tires. 

  After that, always make sure that all 4 tires are inflated to the correct tire pressure for the 

tires installed on the vehicle. 

  See the tire pressure label 

⇒ 

fig. 105


⇒  Tire inflation pressure and the Owner's Literature 

for recommended cold tire inflation pressure and other important information. 

  When replacing tires or wheel rims on vehicles equipped with TPMS, always read and 

heed all of the information and WARNINGS 

⇒  Tires and wheels


  NOTICE 

  The wheel electronics are attached to special aluminum valves on the wheels. These valves 

are screwed on rigidly. Never bend the valves “into position” when checking and adjusting tire 
pressure.
 

  Missing tire air valve caps could result in damage to the valves, as well as to the sensors on 

the Tire Pressure Monitoring System. Therefore, make sure your valve caps conform to the 
specifications of those originally installed on the vehicle and that they are always tightly and 
properly screwed on to the valves. Do not use metallic valve caps
 

  Do not use “comfort valve caps.” They do not seal properly and can damage the sensors. 
  When changing or rotating the tires, be careful not to damage the valves or sensors. 
  The aluminum valves that are installed should be replaced after about 6 years of use due to 

aging of the rubber seals. The valves can be replaced when a tire is changed. Do not reuse 
aluminum valves after they are removed. They must be replaced. The tire pressure sensors can 
be reused.


Storage areas 

 Introduction 

In this section you’ll find information about: 

Storage compartment in the doors


Storage compartment on the driver side


Storage compartment in the front center console


Storage compartment in the front center armrest


Glove compartment


Glove compartment


Storage compartment in the rear center console


Other storage compartments


Store only lightweight or small objects in storage compartments. 

Depending on options, there may be a factory-installed AUX-IN jack or Media Device Interface 
(MDI)/(MEDIA-IN)
 in the storage compartment in the front center armrest. 

More information: 

  Passenger compartment  
  Power locking system  
  Driver assistance systems  
  Interior care and cleaning  


⇒ Booklet 

Radio or ⇒ Booklet Navigation system 

  WARNING 

Loose objects can be thrown around the inside of the vehicle when the vehicle is moving, 
especially during sudden maneuvers and hard braking. This can cause serious personal 
injuries and even make the driver lose control of the vehicle. 

  Never let animals ride in the vehicle's open storage compartments, on top of the 

instrument panel, or on the shelf behind the rear seat backrest. 

  Never put hard, heavy or sharp objects in these places or in articles of clothing or bags in 

the passenger compartment. 

  Always keep storage compartments closed while driving. 


  WARNING 

Objects in the area behind the rear seat backrest can restrict the function of the Automatic 
Rollover Support System. This can lead to serious injuries or death in a collision. 

  Never place objects in the area behind the rear seat backrests. 

  Keep objects out of the area where the Automatic Rollover Support System deploys. 


  WARNING 

Objects in the driver foot well can prevent the pedals from moving freely. This can cause loss 
of vehicle control and increase the risk of serious personal injuries. 

  Always make sure that nothing can interfere with the pedals. 
  Always fasten floor mats securely to the floor. 
  Never put floor mats or other floor coverings on top of already installed floor mats. 
  Always make sure that nothing can fall into the driver foot well while the vehicle is 

moving. 


  WARNING 

Some kinds of cigarette lighters can be lit unintentionally, or crushed causing a fire that can 
result in serious burns and vehicle damage. 

  Always make sure that there are no lighters in the seat tracks or near other moving parts 

before adjusting the seats. 

  Before closing a storage compartment, always make sure that no cigarette lighter can be 

activated, crushed, or otherwise damaged. 

  Never leave a cigarette lighter in a storage compartment, on the instrument panel, or in 

other places in the vehicle. Heat buildup in the passenger and luggage compartment of a 
parked vehicle can result in temperatures in the vehicle that are much higher than the outside 
temperatures, particularly in summer. High temperatures could cause the cigarette lighter to 
catch fire. 


  NOTICE 

  The defroster heating wires in the rear window can be damaged by hard or sharp things on 

the shelf below the rear window. 

  Do not keep any food, medicine, or other items sensitive to heat or cold in the vehicle. They 

can be damaged or made unusable by heat or cold. 

  Things that are made of transparent materials (such as eyeglasses, magnifying glasses, or 

transparent suction cups on the windows) can magnify sunlight and damage the vehicle. 


Storage compartment in the doors 


Fig. 111 In the driver door: Storage compartment. 

 Please first read and note the introductory information and heed the WARNINGS 


There is a storage compartment in each vehicle door 

⇒ 

fig. 111


(1)

Storage compartment on the driver side 


Fig. 112 On the driver side: Storage compartment. 

 Please first read and note the introductory information and heed the WARNINGS 


To open the compartment, push the release and pull the handle in the direction of the arrow 

⇒ 

fig. 112

To close, push the lid up until it latches. 


Storage compartment in the front center console 


Fig. 113 In the front center console: Storage compartment. 

 Please first read and note the introductory information and heed the WARNINGS 


To open, briefly press the cover in the direction of the arrow 

⇒ 

fig. 113

To close, press the lid down completely. 

  The front center console storage compartment may have a 12 Volt socket 

⇒ page 204, Power 

outlets

Storage compartment in the front center armrest 


Fig. 114 In the front center armrest: Storage compartment. 


Fig. 115 Inside the front center armrest storage compartment: Jacks for MDI and AUX-IN. 

 Please first read and note the introductory information and heed the WARNINGS 


To open, lift up the center armrest as far as it will go in the direction of the arrow 

⇒ 

fig. 114

To close, put the center armrest down. 

There may be an AUX-IN jack and a Media Device Interface (MDI)/(MEDIA-IN) in the center armrest 

storage compartment 

⇒ 

fig. 115

. See 

⇒ Booklet 

Radio or ⇒ Booklet Navigation system. 

  WARNING 

The center armrest can restrict the driver's arm movement and cause crashes and serious 
personal injury. 

  Always keep storage compartments in the center armrest closed while driving. 


  WARNING 

Never let a passenger, especially a child, ride on the center armrest. 

Glove compartment 


Fig. 116 On the passenger side: Glove compartment. 


Fig. 117 Inside the glove compartment. 

 Please first read and note the introductory information and heed the WARNINGS 


Key to 

⇒ 

fig. 117

(1)


Owner's Manual in Owner's Manual slot 

(2)


Air vent       

⇒  Heating and air conditioning 

Opening and closing the glove compartment 

If necessary, unlock the glove compartment. It is locked when the key slot is vertical. 

To open, pull the handle 

⇒ 

fig. 116

To close, push the lid up. 

Owner's Manual slot 

The slot at the top of the glove compartment is designed to hold the Owner's Manual. 

The Owner's Manual is in this glove compartment slot 

⇒ 

fig. 117


(1)

Always keep the Owner's Manual in this slot. 

Cooling the glove compartment 

There is an air vent 

(2)

 in the back of the glove compartment. Cool air can be directed into the glove 

compartment if the air conditioner is on. Open or close the air vent by turning it. 

  WARNING 

An open glove compartment door can increase the risk of serious injury during sudden 
braking or driving maneuvers or in a crash. 

  Always keep the glove compartment closed while the vehicle is moving. 


  NOTICE 

In some vehicle models, design considerations have made it necessary to have openings in the 
glove compartment behind the Owner's Manual slot, for example. Small items may fall through 
these openings and get behind the instrument panel. This can cause unusual noises and 
damage the vehicle. Never put any small objects in the glove compartment for this reason.


Storage compartment in the rear center console 


Fig. 120 In the rear center console: Storage compartment. 

 Please first read and note the introductory information and heed the WARNINGS 


There may be a storage compartment for stowing small objects 

⇒ 

fig. 120

 in the back of the center 

console. 

Other storage compartments 

 Please first read and note the introductory information and heed the WARNINGS 


Additional storage: 

  Pockets in the backrests of the front seats. 

  WARNING 

Never store items on the area behind the rear seat backrest. 

  Always keep the area around the Automatic Rollover Support System supports free of 

anything that could interfere with their deployment or fly about and injure occupants when 
the supports deploy. 

  Clothes or other items on the shelf behind the rear seat backrest could also limit visibility, 

and cause accidents and severe personal injuries. 


Cup holders 

 Introduction 

In this section you’ll find information about: 

Cup holders in the front center console


Cup holder between the rear seats


Beverage bottle holders 

There is a place for bottles in the open compartments in the driver and passenger doors. The bottle 

volume must not exceed 24 oz (0.5 liter) 

⇒ 

More information: 

  Interior care and cleaning 

  WARNING 

Improper use of beverage holders can cause injuries. 

  Never put hot drinks in the cup holders. During normal or sudden maneuvers, sudden 

braking or in a collision, hot liquid can be spilled and cause burns! 

  Make certain that bottles or other items cannot fall into the driver's foot well while the 

vehicle is moving and interfere with the movement of the pedals. 

  Never put heavy cups, food or other heavy items in the cup holders. Heavy items can fly 

through the passenger compartment in a crash and cause serious injury. 


  WARNING 

Hot or freezing temperatures in the passenger compartment can cause closed bottles to 
explode or break. 

  Never leave closed bottles in a very hot or cold vehicle. 


  WARNING 

Bottles and other things can fall into the driver's foot well and interfere with the pedals while 
driving. 

  Make sure that bottles cannot fall into the driver's foot well during driving to avoid 

obstructing the pedals. 

  Use the bottle holders only for standard beverage bottles holding no more than 24 oz 

(0.5 liter). 


  NOTICE 

Never put open drinks in the cup holder when the vehicle is moving. The drinks can spill and 
damage the vehicle, including the electrical system.
 

  The cup holder inserts can be removed for cleaning. 


Cup holders in the front center console 


Fig. 121 In the front center console: Cup holders. 

 Please first read and note the introductory information and heed the WARNINGS 


Place the drink in the cup holder 

⇒ 

fig. 121

Cup holder between the rear seats 


Fig. 122 Cup holder between the rear seats. 

 Please first read and note the introductory information and heed the WARNINGS 


There are 2 cup holders between the rear seats 

⇒ 

fig. 122


Power outlets 

 Introduction 

In this section you’ll find information about: 

12 Volt sockets in the vehicle


Electrical devices can be connected to the vehicle 12 Volt sockets. 

The connected devices must be in good working order. 

More information: 

  Parts, accessories, repairs and modifications  
  Consumer information  

  WARNING 

Improper use of electrical sockets and electrical devices may start a fire and cause severe 
personal injury. 

  Never leave children unattended in the vehicle. Sockets and connected devices can be 

used when the ignition is switched on. 

  If the connected device gets warm, immediately switch it off and disconnect the power 

supply. 


  NOTICE 

  To help prevent damage to the electrical system, never connect any accessories such as a 

solar panel or vehicle battery charger to a 12 Volt socket. 

  Only use accessories which have been tested for electromagnetic compatibility with a 

motor vehicle. 

  To help prevent damage from voltage fluctuations, switch off all electrical consumers 

connected to the 12 Volt socket before switching the ignition on or off or starting the engine. 

  Never connect devices to a 12 Volt socket that draw more than the maximum wattage the 

socket can supply. Drawing too much power can damage the vehicle electrical system. 

  Please turn off the engine when you stop for any length of time. 

  The vehicle battery will drain if you use electrical equipment when the engine is not running. 

  Unshielded devices may interfere with radio reception or the vehicle's electrical system. 

  Operating electrical devices near the luggage compartment lid may interfere with AM radio 

reception. 


12 Volt sockets in the vehicle 


Fig. 123 Front center console: 12 Volt socket in the storage compartment. 


Fig. 124 Rear center console: 12 Volt socket. 

 Please first read and note the introductory information and heed the WARNINGS 


Maximum power draw 
 

Socket  

Maximum power draw  

12 Volts  

120 watts  


The maximum power draw at any one socket must never be exceeded. Electrical devices should have 
information on them that says how much power they draw. 

If 2 or more electrical devices are connected at the same time, the total power draw of all connected 

devices must never be more than 190 watts 

⇒  . 

12 Volt socket 

The 12 Volt socket works only when the ignition is switched on. 

If the ignition is on but the engine is not running, the vehicle battery will be drained by any device that 
is plugged in and turned on. For this reason, never use the electrical sockets unless the engine is 
running. 

To help prevent damage from voltage fluctuations, switch off all electrical devices connected to a 
12 Volt socket before switching the ignition on or off or starting the engine. 

The vehicle may have 12 Volt sockets at the following places: 

  In the storage compartment 

⇒ 

fig. 123

 in the lower center console in front of the gear selector 

lever. 


  In the rear center console 

⇒ 

fig. 124

  NOTICE 

  Follow the manufacturer's instructions for connected devices! 
  Never exceed the maximum power consumption, or the entire vehicle electrical system may 

be damaged. 

  12 Volt socket: 

–  Only use equipment that has been tested for electromagnetic compatibility and complies 
with applicable guidelines.
 
–  Never feed current into the socket, with a solar panel, for example. 

  Unshielded devices may interfere with radio reception or the vehicle's electrical system. 


Starting and stopping the engine 

 Introduction 

In this section you’ll find information about: 

Indicator lights


Vehicle key positions in the ignition switch


Starter button


Starting the engine


Stopping the engine


Electronic immobilizer


Explanatory notes in this section regarding automatic transmissions also apply to the DSG

®


Direct Shift Gearbox automatic transmission. 

Immobilizer display 

If an unauthorized vehicle key is used or the system malfunctions, Immobilizer active! may 
appear on the instrument cluster display. The engine cannot be started. 

Push-starting and tow-starting 

For technical reasons, never try to push-start or tow-start the vehicle. Jump-start the vehicle instead 
while following proper and safe procedures. 

More information: 

  Vehicle key set  
  Shifting  
  Steering  
  Braking and parking  
  Starting assistance systems  
  Refueling 
  Fuel  
  Emergency closing and opening  
  Jump-starting  
  Towing  

  WARNING 

Switching off the engine while the vehicle is moving can make the vehicle harder to stop and 
result in loss of vehicle control, leading to collisions and severe personal injuries. 

  Brake and steering assistance systems, the airbag system, safety belt pretensioners, and 

other vehicle safety features only work when the engine is running. 

  Switch off the engine only when the vehicle is not moving. 


  WARNING 

To reduce the risk of serious personal injury when starting and running the vehicle's engine: 

  Never start the engine or let it run in a confined or enclosed area. Engine exhaust contains 

carbon monoxide, a poisonous, colorless, and odorless gas. Carbon monoxide can cause 
unconsciousness and death. 

  Never start the engine or let it run if oil, fuel, or other flammable substances are under, 

around, or have leaked from the vehicle, for example, due to vehicle damage. 

  Never leave the vehicle unattended with the engine running, especially when it is in gear. 

The vehicle could move suddenly or some other unexpected event could occur, resulting in 
property damage, fire, or personal injury. 

  Never use starting assist fluids. Starting fluids can explode and can cause a “run-away” 

vehicle condition. 


  WARNING 

The vehicle exhaust system and the catalytic converter get very hot. They can cause fires and 
serious personal injury. 

  Never park the vehicle where the hot exhaust system or catalytic converter could ignite 

flammable materials, such as brush, leaves, dry grass, spilled fuel, etc. 

  Never apply additional undercoating or rust proofing on or near the exhaust manifold, 

exhaust pipes, catalytic converter, or heat shields. 

Indicator lights 

 Please first read and note the introductory information and heed the WARNINGS 


Lights 

up  

Possible cause  

Proper response  


Brake pedal not depressed.  

Apply the brake pedal to start the engine  


Flashes   Possible cause  

Proper response  


The release button in the selector lever 
did not engage. Vehicle movement is 
prevented.  

Engage the selector lever release button  


When the ignition is switched on, several warning and indicator lights come on briefly for a function 
check. They go out after a few seconds. 


Content   ..  11  12  13  14   ..