Volkswagen Golf / Golf GTI / Golf Variant. Manual - part 233
 

  Index      Volkswagen     Volkswagen Golf / Golf GTI / Golf Variant - service repair manual 2013 year


Search            copyright infringement  


Content   ..  231  232  233  234   ..


Volkswagen Golf / Golf GTI / Golf Variant. Manual - part 233


Installing
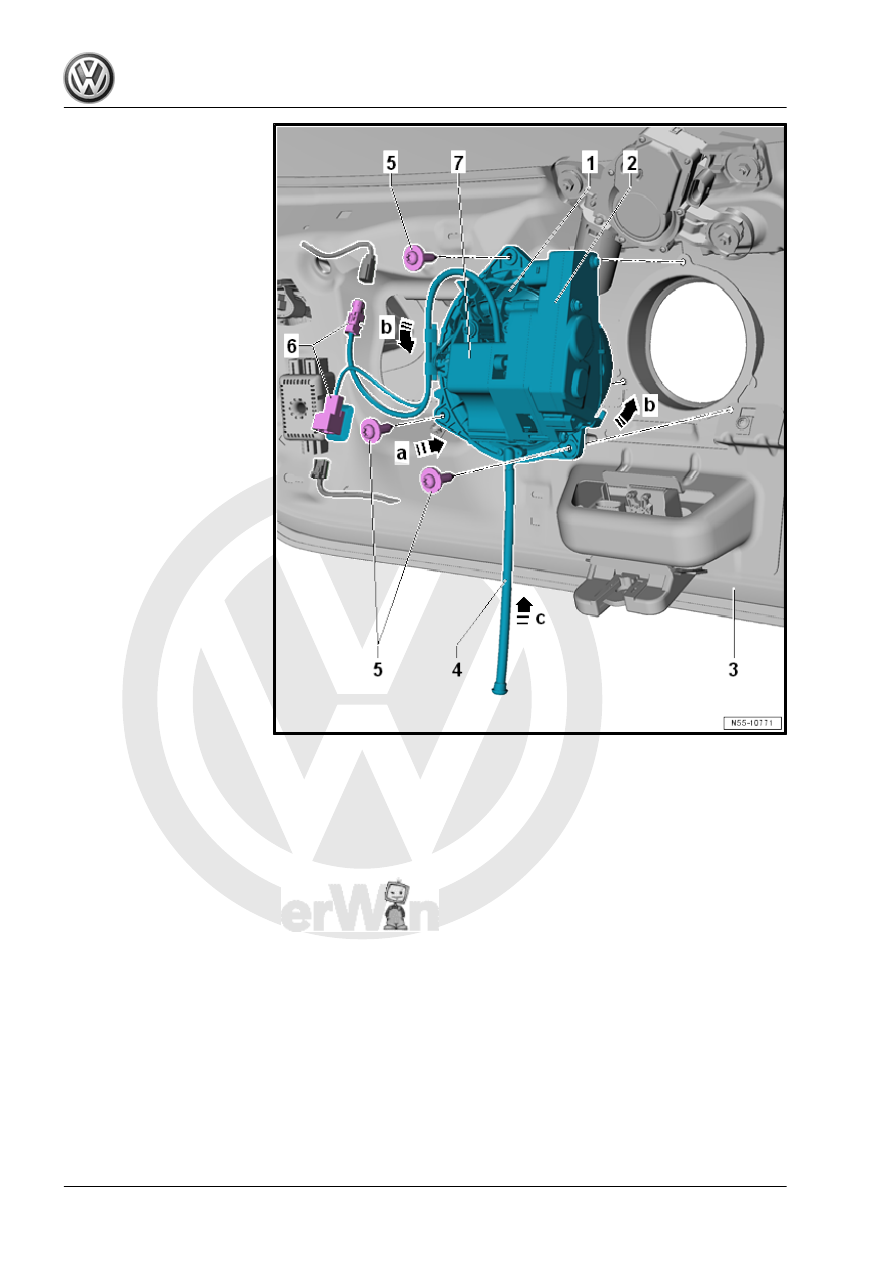
– Insert the actuator -1- into the rear lid -3- in direction of

-arrow a- and turn it slightly in direction of -b arrows-.

– Secure the water drain hose -4- on the actuator in direction of

-arrow c-.

– Tighten the bolts -5-.
– Secure the connectors -6-.
– Install the rear lid lower trim panel. Refer to ⇒  Body Interior;

Rep. Gr.  70 ; Luggage Compartment Trim Panels; Rear Lid

Lower Trim Panel, Removing and Installing .

Tightening Specifications

2.8

Hinges, Removing and Installing

Special tools and workshop equipment required
♦ Torque Wrench 1331 5-50Nm - VAG1331-

Removing
– Lower the headliner near the hinge mount. Refer to ⇒  Body

Interior; Rep. Gr.  70 ; Roof Trim Panels; Headliner, Removing

and Installing .

– The headliner can now be lowered far enough so that the hex

nut -4- can be removed without damaging the headliner.

– Loosen the hex nuts -4- and bolts -2-, but do not remove them.

Note

Tape off the roof edge and the upper edge of the rear lid, to prevent paint damage.

For the following work procedures, a second technician must hold the rear lid in at the bottom -arrow-.

The gas-filled struts remain installed.

– Remove the hex nut -4- and bolts -2-.
– Remove the hinge -1-.

Installing
Install the hinge -1- in reverse order of removal.

Note

Make sure that the washer -3- is seated correctly.

Recreate the observed sealing procedures.

Tightening Specifications

2.9

Catch, Removing and Installing

Special tools and workshop equipment required
♦ Torque Wrench 1331 5-50Nm - VAG1331-

Removing
– Remove the lock carrier trim panel. Refer to ⇒  Body Interior;

Rep. Gr.  70 ; Luggage Compartment Trim Panels; Lock Car‐

rier Trim Panel, Removing and Installing .

– Remove the hex nuts -2- and remove the catch -1- from the

lock carrier.

Installing
– Install the catch -1- with the hex nuts -2- on the lock carrier.
– Adjust the catch. Refer to

⇒ “2.10 Catch, Adjusting”, page 67

 .

– Install the lock carrier trim panel. Refer to ⇒  Body Interior; Rep.

Gr.  70 ; Luggage Compartment Trim Panels; Lock Carrier

Trim Panel, Removing and Installing .

Tightening Specifications

2.10

Catch, Adjusting

Special tools and workshop equipment required
♦ Torque Wrench 1331 5-50Nm - VAG1331-


Content   ..  231  232  233  234   ..