Volkswagen Jetta / Jetta Hybrid. Manual - part 22
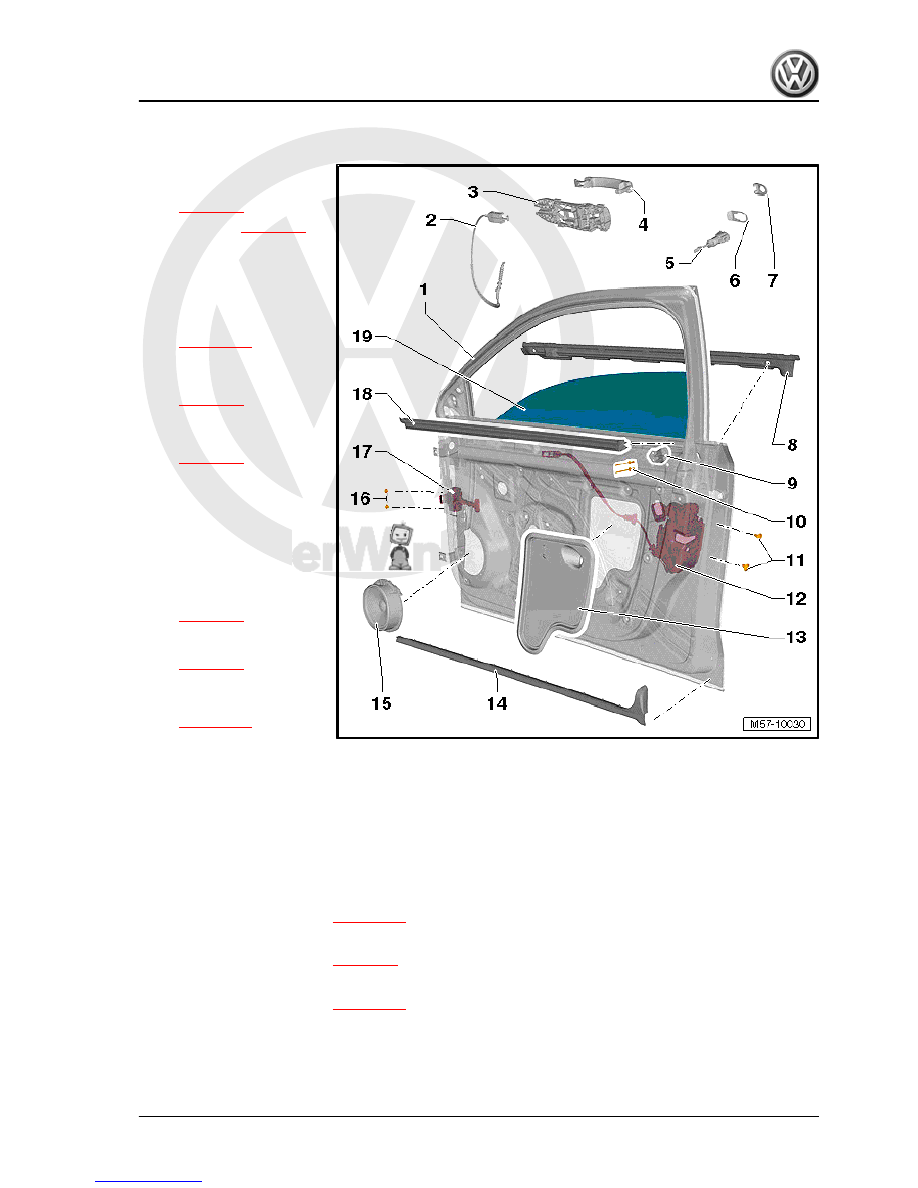
1 - Door
❑ Removing and installing
⇒ page 78
❑ Adjusting
⇒ page 82
2 - Cable
❑ From bearing bracket
-3- to door lock -12-
3 - Bearing bracket
❑ Removing and installing
⇒ page 103
4 - Door handle
❑ Removing and installing
⇒ page 98
5 - Lock cylinder
❑ Removing and installing
⇒ page 93
❑ Not always installed in
front passenger door,
depending on the extras
in vehicle
6 - Base
7 - Cover
❑ Removing and installing
with lock cylinder
⇒ page 92
.
❑ Removing and installing
without lock cylinder
⇒ page 95
.
8 - Window slot outer seal
❑ Removing and installing
⇒ page 108
9 - Retaining bracket
❑ For door trim panel threaded connections.
10 - Securing rivet
❑ For retaining bracket -9-
11 - Bolt
❑ Qty. 2.
❑ Specified torque: 18 Nm
12 - Door lock
❑ Removing and installing
⇒ page 100
13 - Cover
❑ Removing and installing
⇒ page 86
14 - Door joint seal
❑ Removing and installing
⇒ page 112
15 - Loudspeaker
❑ Riveted into door.
16 - Bolt
❑ Qty. 2.
Jetta 2011 ➤ , Jetta Hybrid 2013 ➤
2. Door components
85