Toyota Supra (2023 year). Manual in english - page 5
 

  Index      Toyota     Toyota Supra (2023 year). Manual in english


Search            copyright infringement  


Content      ..     3      4      5      6     ..


Toyota Supra (2023 year). Manual in english - page 5


73

3-1. CONTROLS

3

CON

T

ROLS

Via Toyota Supra Command:

1

"My Vehicle"

2

"System settings"

3

"Mobile devices"

4

"Settings"

5

"Bluetooth

®

"

To use all supported functions of 
a mobile phone, the following 
functions must be activated prior 
to pairing the mobile phone with 
the vehicle.
Via Toyota Supra Command:

1

"My Vehicle"

2

"System settings"

3

"Mobile devices"

4

"Settings"

5

Select desired setting:

• "Office"

Activate function to transmit short 
messages, e-mails, calendars, 
tasks, notes, and reminders to the 
vehicle. Costs can be incurred by 
transmitting all data to the vehicle.

• "Contact images"

Activate function to show the con-
tact pictures.

6

Move the Controller to the 
left.

Via Toyota Supra Command:

1

"My Vehicle"

2

"System settings"

3

"Mobile devices"

4

"Connect new device"

5

Select functions:

 "Telephone"

 "Bluetooth

®

 audio"

 "Apps"

 "Apple CarPlay"

 "Screen Mirroring"

The Bluetooth name of the vehicle 

is displayed on the Control Display.

6

On the mobile device, search 
for Bluetooth devices in the 
vicinity.

The Bluetooth name of the vehicle 

appears on the mobile device dis-

play.
Select the Bluetooth name of the 

vehicle.

7

Depending on the mobile 
device, a control number is 
displayed or the control num-
ber must be entered.

• Compare the control number 

displayed on the Control Dis-
play with the control number 
on the display of the device.

Confirm the control number on the 
device and on the Control Display.

• Enter and confirm the same 

control number on the device 
and via Toyota Supra Com-
mand.

The device is connected and dis-

Switching on Bluetooth

Activating/deactivating 
telephone functions

Pairing the mobile device 
with the vehicle

74

3-1. CONTROLS

played in the device list, refer to 

page 78.

All requirements are met and all 
required steps were completed 
in the specified order. Despite 
that, the mobile device does not 
function as expected.
In this case, the following expla-
nations can help:
Why could the mobile phone not 
be paired or connected?
• There are too many Bluetooth 

devices connected to the 
mobile phone or vehicle.

In the vehicle, delete Bluetooth 
connections with other devices.
Delete all known Bluetooth connec-
tions from the device list on the 
mobile phone and start a new 
device search.

• The mobile phone is in 

power-save mode or has only 
a limited remaining battery 
life.

Charge mobile phone.

Why does the mobile phone no 
longer react?
• The applications on the 

mobile phone do not function 
anymore.

Switch the mobile phone off and on 
again.

• Too high or too low ambient 

temperature for mobile phone 
operation.

Do not subject the mobile phone to 
extreme ambient temperatures.

Why can phone functions not be 
used via Toyota Supra Com-
mand?
• The mobile phone may not be 

properly configured, for 
instance as Bluetooth audio 
device.

Connect the mobile phone with the 
telephone or additional phone func-
tion.

Why are no or not all phone 
book entries displayed or why 
are they incomplete?
• Transmission of the phone 

book entries is not yet com-
plete.

• It is possible that only the 

phone book entries of the 
mobile phone or the SIM card 
are transmitted.

• It may not be possible to dis-

play phone book entries with 
special characters.

• It may not be possible to 

transmit contacts from social 
networks.

• The number of phone book 

entries to be stored is too 
high.

• Data volume of the contact 

too large, for instance due to 
stored information such as 
notes.

Reduce the data volume of the con-
tact.

• A mobile phone can only be 

connected as audio source or 
as telephone.

Frequently asked ques-
tions

75

3-1. CONTROLS

3

CON

T

ROLS

Configure the mobile phone and 
connect it with the telephone or 
additional phone function.

How can the phone connection 
quality be improved?
• Adjust the strength of the 

Bluetooth signal on the mobile 
phone, depending on the 
mobile phone.

• Insert mobile phone into the 

wireless charging tray.

• Adjust the volume of the 

microphone and loudspeak-
ers separately in the sound 
settings.

If all points in this list have been 
checked and the required func-
tion is still not available, contact 
the Toyota dealer.

Mobile devices with a USB port 
are connected to the USB port.
• Mobile phones.
• Audio devices such as MP3 

players.

• USB storage devices.

Common file systems are sup-
ported. FAT32 and exFAT are the 
recommended formats.

A connected USB storage 
device will be supplied with 
charge current via the USB port 
if the device supports this. Fol-
low the maximum charge cur-
rent of the USB port.

The following uses are possible 
on USB ports with data transfer:
• Exporting and importing driver 

profiles, refer to page 68.

• Playing music files via USB 

audio.

• Playing videos via USB video.
Follow the following when con-
necting:
• Do not use force when plug-

ging the connector into the 
USB port.

• Use a flexible adapter cable.
• Protect the USB storage 

device against mechanical 
damage.

• Due to the large number of 

USB media available on the 
market, it cannot be guaran-
teed that every device is oper-
able on the vehicle.

• Do not expose USB media to 

extreme environmental condi-
tions, such as very high tem-
peratures; refer to the owner's 
manual of the device.

• Due to the many different 

compression techniques, 
proper playback of the media 
stored on the USB storage 
device cannot be guaranteed 
in all cases.

• To ensure proper transmis-

sion of the stored data, do not 
charge a USB storage device 
via the onboard socket, when 
it is connected to the USB 
port.

• Depending on how the USB 

storage device is being used, 

USB connection

General information

76

3-1. CONTROLS

settings may be required on 
the USB storage device, refer 
to the owner's manual of the 
device.

Not compatible USB media:
• USB hard drives.
• USB hubs.
• USB memory card readers 

with multiple inserts.

• HFS-formatted USB media.
• Devices such as fans or 

lamps.

Compatible device with USB 
port.

The USB storage device is dis-
played in the device list, refer to 
page 78.

*

: if equipped

CarPlay allows certain func-
tions of a compatible Apple 
iPhone to be used via Siri voice 
operation and Toyota Supra 
Command.

• Compatible iPhone.

iPhone 5 or later with iOS 7.1 or 
later.

• Corresponding mobile wire-

less contract.

• Bluetooth, Wi-Fi, and Siri 

voice operation are activated 
on the iPhone.

• Booking the Toyota Supra 

Connect service: Apple Car-
Play preparation.

Via Toyota Supra Command:

1

"My Vehicle"

2

"System settings"

3

"Mobile devices"

4

"Settings"

5

Select the following settings:

• "Bluetooth

®

"

• "Apple CarPlay"

Pair the iPhone with the vehicle 
via Bluetooth, refer to page 73.
Select CarPlay as the function: 

 "Apple CarPlay"

The iPhone is connected to the 
vehicle and displayed in the 
device list, refer to page 78.

For more information, refer to 
the NAVIGATION SYSTEM 
OWNER'S MANUAL.

Functional requirement

Connecting the device

Apple CarPlay prepara-
tion*

Concept

Functional requirements

Switching on Bluetooth 
and CarPlay

Pairing iPhone with Car-
Play

Operation

77

3-1. CONTROLS

3

CON

T

ROLS

All requirements are met and all 
required steps were completed 
in the specified order. Despite 
that, the mobile device does not 
function as expected.
In this case, the following expla-
nations can help:
The iPhone has already been 
paired with Apple CarPlay. 
When a new connection is 
established, CarPlay can no lon-
ger be selected.
• Delete the iPhone concerned 

from the device list.

• On the iPhone, delete the 

vehicle concerned from the 
list of stored vehicles under 
Bluetooth and under Wi-Fi.

• Pair the iPhone as a new 

device.

If the steps listed have been car-
ried out and the required func-
tion is still not available: contact 
the Toyota dealer.

Screen Mirroring enables mirror-
ing (outputting) of the smart-
phone display on the Control 
Display.

• Compatible smartphone with 

Screen Mirroring interface.

• Screen Mirroring is switched 

on on the smartphone.

• Wi-Fi is switched on in the 

vehicle.

Via Toyota Supra Command:

1

"My Vehicle"

2

"System settings"

3

"Mobile devices"

4

"Settings"

5

"Vehicle Wi-Fi

®

"

Via Toyota Supra Command:

1

"My Vehicle"

2

"System settings"

3

"Mobile devices"

4

"Connect new device"

5

 "Screen Mirroring"

The Wi-Fi name of the vehicle is 

displayed on the Control Display.

6

Search for Wi-Fi devices in 
the surroundings of the 
smartphone.

The Wi-Fi name of the vehicle 

appears on the device display. 

Select the Wi-Fi name of the vehi-

cle.

7

Confirm the connection via 
Toyota Supra Command.

Frequently asked ques-
tions

Screen Mirroring

General information

Functional requirements

Activating Wi-Fi

Pairing a smartphone with 
Screen Mirroring

78

3-1. CONTROLS

The device is connected and 
displayed in the device list, refer 
to page 78.

• After one-time pairing, the 

devices are automatically rec-
ognized and reconnected 
when standby state is 
switched on.

• The data stored on the SIM 

card or in the mobile phone 
are transferred to the vehicle 
after recognition.

• For some devices, certain set-

tings are necessary, for 
instance authorization; see 
the owner's manual of the 
device.

All devices paired with or con-
nected to the vehicle are dis-
played in the device list.
Via Toyota Supra Command:

1

"My Vehicle"

2

"System settings"

3

"Mobile devices"

A symbol indicates, for which 
function a device is used.

Functions can be activated or 
deactivated for paired and con-
nected devices.
Via Toyota Supra Command:

1

"My Vehicle"

2

"System settings"

3

"Mobile devices"

4

Select the desired device.

5

Select the desired setting.

If a function is assigned to a 
device, the function will be deac-
tivated where appropriate for a 
device that is already connected 
and the device will be discon-
nected.

Via Toyota Supra Command:

1

"My Vehicle"

2

"System settings"

3

"Mobile devices"

4

Select a device.

5

"Disconnect device"

The device remains paired and 
can be connected again, refer to 
page 79.

Managing mobile devices

General information

Displaying the device list

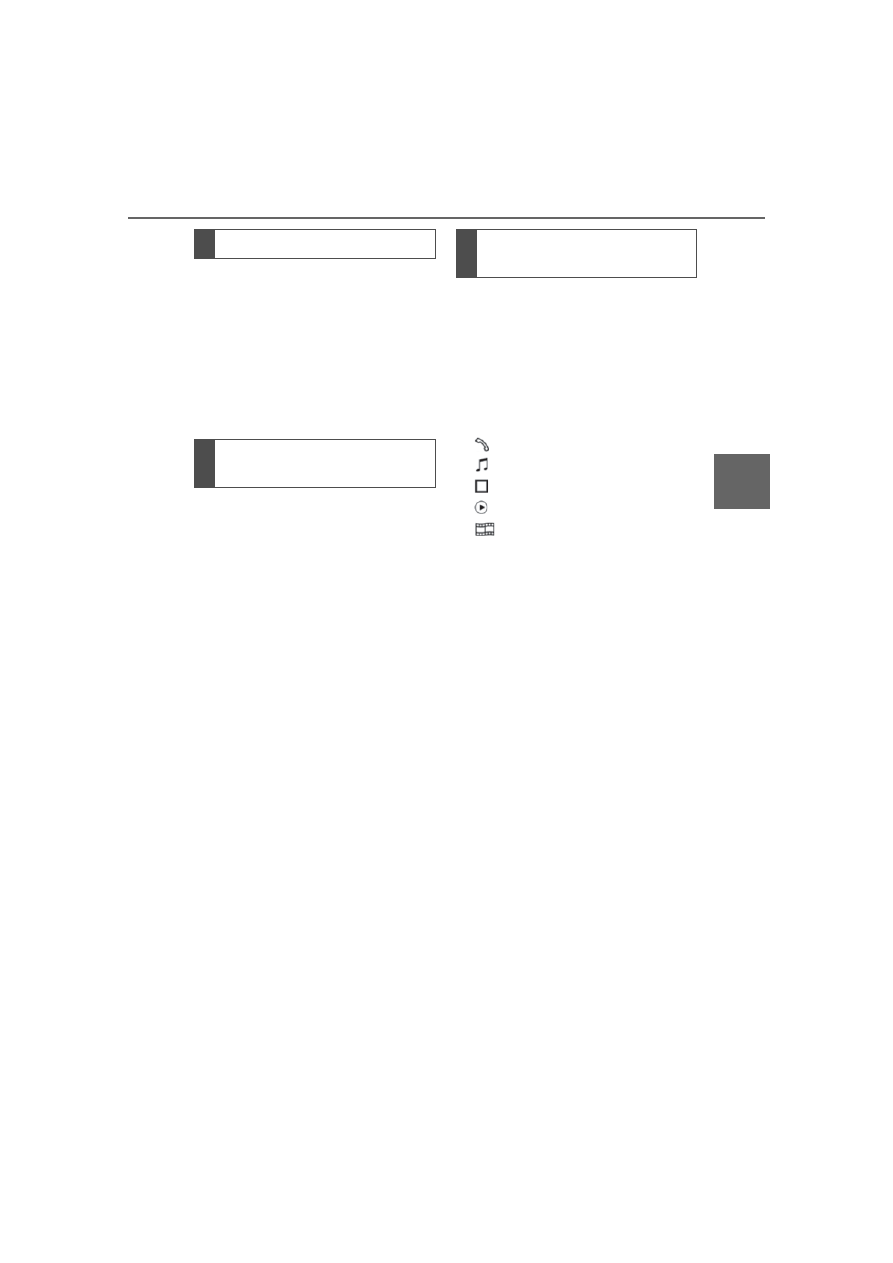
Symbol

Function

"Telephone"

"Additional telephone"

"Bluetooth

®

 audio"

"Apps"

"Apple CarPlay"

"Screen Mirroring"

Configuring the device

Disconnecting the device

Symbol

Function

79

3-1. CONTROLS

3

CON

T

ROLS

A disconnected device can be 
reconnected.
Via Toyota Supra Command:

1

"My Vehicle"

2

"System settings"

3

"Mobile devices"

4

Select device.

5

"Connect device"

The functions that were 
assigned to the device before 
disconnecting are assigned to 
the device when it is recon-
nected. The functions may be 
deactivated on a device already 
connected.

Via Toyota Supra Command:

1

"My Vehicle"

2

"System settings"

3

"Mobile devices"

4

Select device.

5

"Delete device"

The device is disconnected and 
removed from the device list.

When a second phone is paired 
with the vehicle, this phone is 
stored as an additional phone. 
The assignment of phone and 
additional phone can be 

changed.
Via Toyota Supra Command:

1

"My Vehicle"

2

"System settings"

3

"Mobile devices"

4

"Settings"

5

"Swap telephone/additional 
tel."

Connecting the device

Deleting the device

Swapping the telephone 
and additional phone

80

3-1. CONTROLS

This chapter describes all stan-
dard, country-specific and 
optional features offered with 
the series. It also describes fea-
tures and functions that are not 
necessarily available in your 
vehicle, e.g., due to the selected 
options or country versions. This 
also applies to safety-related 
functions and systems. When 
using these functions and sys-
tems, the applicable laws and 
regulations must be observed.

The vehicle is supplied with two 
remote controls with integrated 
key.
Each remote control contains a 
replaceable battery. Replacing 
the battery, refer to page 84.
Depending on the equipment 
and country version, various 
settings, refer to page 94, can 
be configured for the button 
functions.
A driver profile, refer to page 68, 
with personal settings can be 
assigned to a remote control.
To prevent possible locking in of 

the remote control, take the 
remote control with you when 
exiting the vehicle.

Opening and closing

Vehicle features and 
options

Remote control

General information

Safety information

WARNING

The vehicle key has a button cell 

battery. Batteries or button cells 

can be swallowed and lead to 

serious or fatal injuries within two 

hours, for example, due to internal 

burns or chemical burns. There is 

an injury hazard or danger to life. 

Keep the vehicle key and batter-

ies out of reach for children. 

Immediately seek medical help if 

there is any suspicion that a bat-

tery or button cell has been swal-

lowed or is located in any part of 

the body.

WARNING

People or animals in the vehicle 

can lock the doors from the inside 

and lock themselves in. In this 

case, the vehicle cannot be 

opened from the outside. There is 

a risk of injury. Take the remote 

control with you so that the vehi-

cle can be opened from the out-

side.

WARNING

For some country versions, 

unlocking from the inside is only 

possible with special knowledge.

Persons who spend a lengthy 

time in the vehicle while being 

exposed to extreme tempera-

tures are at risk of injury or death. 

Do not lock the vehicle from the 

outside when there are people in 

it.

81

3-1. CONTROLS

3

CON

T

ROLS

1

Unlocking

2

Locking

3

Unlocking the trunk lid

4

Panic mode, pathway lighting

The behavior of the vehicle 

when unlocking with the remote 
control depends on the following 
settings, refer to page 94, for 
unlocking and locking:
• If only the driver's door and 

the fuel filler flap or all access 
to the vehicle will be 
unlocked.

• If the unlocking of the vehicle 

is confirmed with a light signal 
or a sound signal.

• If the welcome light, refer to 

page 160, is switched on 
when the vehicle is being 
unlocked.

• If the exterior mirrors are 

automatically folded out and 
in when the vehicle is 
unlocked and locked.

• If the driver's seat is set to the 

last position saved in the 
driver's profile. P.68

If, due to the settings, only the 
driver's door and fuel filler flap 
were unlocked, press the button 
on the remote control again to 
unlock the other vehicle access 
points.
In addition, the following func-
tions are executed:
• If a driver profile, refer to page 

68, was assigned to the 
remote control, this driver pro-
file will be activated and the 
settings that are stored in it 

WARNING

Unattended children or animals in 

the vehicle can cause the vehicle 

to move and endanger them-

selves and traffic, for instance due 

to the following actions:

• Pressing the Start/Stop button.

• Releasing the parking brake.

• Opening and closing the doors 

or windows.

• Engaging selector lever position 

N.

• Using vehicle equipment.

There is a risk of accidents or inju-

ries. Do not leave children or ani-

mals unattended in the vehicle. 

Take the remote control with you 

when exiting and lock the vehicle.

Overview

Unlocking

General information

Unlocking the vehicle

Press the button on the 
remote control.

82

3-1. CONTROLS

will be applied.

• The interior lights are 

switched on, unless they were 
manually switched off. For 
switching the interior lights 
on/off manually, refer to page 
163.

• Folded in exterior mirrors are 

folded out.

If the exterior mirrors were folded in 
via the button in the car’s interior, 
they will not be folded out when 
unlocking.

• With alarm system: The alarm 

system, refer to page , will be 
switched off.

After opening one of the front 
doors, the vehicle is ready for 
operation, refer to page 46.
The light functions may depend 
on the ambient brightness.

The windows are opened, as 
long as the button on the remote 
control is pressed.

The behavior of the vehicle 
during locking with the remote 
control depends on the following 

settings, refer to page 94:
• If the locking of the vehicle is 

confirmed with a light signal 
or a sound signal.

• If the exterior mirrors are 

automatically folded in when 
the vehicle is locked. The 
exterior mirrors are not folded 
in when the hazard warning 
flashers are switched on.

• If the headlight courtesy delay 

feature is activated during 
locking.

1

Close the driver's door.

2

 Press the button on the 

remote control.

The following functions are exe-
cuted:
• All doors, the trunk lid, and 

the fuel filler flap are locked.

• With alarm system: The alarm 

system will be switched on.

If the drive-ready state is still 
switched on when you lock the 
vehicle, the vehicle horn honks 
twice. In this case, the 
drive-ready state must be 
switched off by means of the 
Start/Stop button.

Convenient opening

Opening

Press and hold the button 
on the remote control.

Locking

General information

Locking the vehicle

83

3-1. CONTROLS

3

CON

T

ROLS

The windows are closed in the 
area close to the vehicle, as 
long as the button on the remote 
control is pressed.

The function is not available for 
the first 10 seconds after lock-
ing.
• The interior lights are 

switched on, unless they were 
manually switched off. For 
switching the interior lights 
on/off manually, refer to page 
163.

• Depending on the settings, 

the exterior lighting, refer to 
page 160, will be switched on.

The light functions may depend 
on the ambient brightness.

To avoid locking the vehicle key 
in the vehicle, do not place the 
vehicle key in the cargo area.
You can set up if the doors will 
be unlocked when the trunk lid 
is opened with the remote con-
trol. Settings, refer to page 94.

You can trigger the alarm sys-

With Smart Key System: 
convenient closing

Safety information

WARNING

With convenient closing, body 

parts can be jammed. There is a 

risk of injury. Make sure that the 

area of movement of the doors is 

clear during convenient closing.

Closing

Press and hold the button 
on the remote control after 
locking.

Switching on the interior 
and exterior lights

Press the button on the 
remote control with the 
vehicle locked.

Trunk lid

General information

Safety information

WARNING

Body parts can be jammed when 

operating the trunk lid. There is a 

risk of injury. Make sure that the 

area of movement of the trunk lid 

is clear during opening and clos-

ing.

NOTICE

During opening, the trunk lid piv-

ots back and up. There is a risk of 

damage to property. Make sure 

that the area of movement of the 

trunk lid is clear during opening 

and closing.

Unlocking

Press and hold the button 
on the remote control for 
approx. 1 second.

Panic mode

84

3-1. CONTROLS

tem if you find yourself in a dan-
gerous situation.

To switch off the alarm: press 
any button.

Set the duration, refer to page 
160.

1

Remove the integrated key 
from the remote control, refer 
to page 87.

2

Place the integrated key 
underneath the battery com-
partment cover, arrow 

1

, and 

lift the cover with a lever 
movement of the integrated 
key, arrow 

2

.

3

Push battery in the direction 
of the arrow using a pointed 
object and lift it out.

• Press the button on the 

remote control and hold 
for at least 3 seconds.

• Briefly press the button 

on the remote control 
three times in succes-
sion.

Switching on the headlight 
courtesy delay feature

Press and hold the button 
on the remote control for 
approx. 1 second.

Replacing the battery

WARNING

The battery inside the vehicle key 

is a button cell. Batteries or button 

cells can be swallowed, causing 

serious or even fatal injuries 

within two hours, e.g. due to inter-

nal burns or cauterisations. There 

is a danger of injury or danger to 

life. Keep vehicle keys and batter-

ies out of the reach of children. 

Seek medical assistance immedi-

ately if you suspect that a battery 

or button cell has been swallowed 

or has got into a part of the body.

NOTICE

Using unsuitable batteries in a 

vehicle key can damage the vehi-

cle key. There is a risk of material 

damage. Discharged batteries 

should only ever be replaced with 

batteries of the same voltage, 

same size and same specifica-

tion.

85

3-1. CONTROLS

3

CON

T

ROLS

4

Insert a type CR 2032 3V 
battery with the positive side 
facing up.

5

Press the cover closed.

6

Push the integrated key into 
the vehicle key until the inte-
grated key engages.

Additional remote controls are 
available from your Toyota 
dealer.

A lost remote control can be 
blocked and replaced by your 
Toyota dealer.
If the lost remote control has an 
assigned driver profile, refer to 
page 68, the connection to this 
remote control must be deleted. 
A new remote control can then 
be assigned to the driver profile.

A vehicle message, refer to 
page 140, is displayed.
Remote control detection by the 
vehicle may malfunction under 

the following circumstances:
• The battery of the vehicle key 

is discharged. For replacing 
the battery, refer to page 84.

• Interference of the radio con-

nection from transmission 
towers or other equipment 
with high transmitting power.

• Shielding of the remote con-

trol due to metal objects.

Do not transport the remote control 
together with metal objects.

• Interference of the radio con-

nection from mobile phones 
or other electronic devices in 
direct proximity to the remote 
control.

Do not transport the remote control 
together with electronic devices.

• Interference of radio transmis-

sion by a charging process of 
mobile devices, for instance 
charging of a mobile phone.

• The remote control is in direct 

proximity of the wireless 
charging tray.

Place the remote control down at a 
different location.

In the case of interference, the 
vehicle can be unlocked and 
locked from the outside with the 
integrated key, refer to page 87.

Have old batteries dis-
posed of by your Toyota 
dealer or take them to a 
collection point.

Additional remote controls

Loss of the remote con-
trols

Malfunction

General information

86

3-1. CONTROLS

It is not possible to switch on the 
drive-ready state if the remote 
control has not been detected.
Proceed as follows in this case:

1

Hold the remote control with 
its back against the marked 
area on the steering column. 
Pay attention to the display in 
the instrument cluster.

2

If the remote control is 
detected: Switch on 
drive-ready state within 10 
seconds.

If the remote control is not 
detected, slightly change the 
position of the remote control 
and repeat the procedure.

What precautions can be taken 
to be able to open a vehicle with 
an accidentally locked in remote 
control?
• The options provided by the 

Remote Services of the Toy-
ota Supra Connect app 
include the ability to lock and 
unlock a vehicle.

This requires an active Toyota 
Supra Connect contract and the 
Toyota Supra Connect app must be 
installed on a smartphone.

• Unlocking the vehicle can be 

requested via the Concierge.

An active Toyota Supra Connect 
contract is required.

The driver's door can be locked 
and unlocked without remote 
control using the integrated key.
The integrated key also fits the 
glove compartment.

Switching the drive-ready 
state on via emergency 
detection of the remote con-
trol

Frequently asked ques-
tions

Integrated key

General information

Safety information

WARNING

For some country versions, 

unlocking from the inside is only 

possible with special knowledge.

Persons who spend a lengthy 

time in the vehicle while being 

exposed to extreme tempera-

tures are at risk of injury or death. 

Do not lock the vehicle from the 

outside when there are people in 

it.

87

3-1. CONTROLS

3

CON

T

ROLS

Press the button, arrow 

1

, and 

pull out the integrated key, arrow 

2

.

1

Pull and hold the door handle 
outward with one hand.

2

Guide one finger of your 
other hand from the back 

under the cover and push the 
cover out.

Use the thumb for counter support 

to prevent the cover from falling out 

of the door handle.

3

Remove the cover.

4

Unlock or lock the door lock 
using the integrated key.

The other doors must be 
unlocked or locked from the 
inside.

The activated alarm system is 
triggered when the door is 
opened, if the vehicle has been 
unlocked via the door lock.
The alarm system is not 
switched on if the vehicle is 
locked with the integrated key.

NOTICE

The door lock is permanently 

joined with the door. The door 

handle can be moved. When pull-

ing the door handle with the inte-

grated key inserted, paint or the 

integrated key can be damaged. 

There is a risk of damage to prop-

erty. Remove the integrated key 

before pulling the outside door 

handle.

Removing

Locking/unlocking via the 
door lock

Alarm system

88

3-1. CONTROLS

In the event of a severe acci-
dent, the vehicle is automatically 
unlocked. The hazard warning 
system and interior lights come 
on.

Buttons for the central locking 
system.

• The fuel filler flap remains 

unlocked.

• The vehicle is not secured 

against theft when locking.

• Pull the door handle on the 

door to open the door. The 
other doors remain locked.

 Press the button to 

unlock all the doors. Pull the 
door opener.

The vehicle can be accessed 
without operating the vehicle 
key.
Carrying the vehicle key with 
you, e.g., in your pants pocket, 
is sufficient.
The vehicle automatically 
detects the remote control when 
it is in close proximity or in the 
car's interior.

Comfort entry supports the fol-
lowing functions:
• Unlocking and locking the 

vehicle from the door handle.

• To lock the vehicle, the 

remote control must be 
located outside of the vehicle 
near the doors.

• The next unlocking and lock-

ing cycle is not possible until 

Buttons for the central 
locking system

General information

Overview

Locking

Press the button with the 
front doors closed.

Unlocking

Press the button.

Opening

Smart Key System

Concept

General information

Functional requirements


Content      ..     3      4      5      6     ..