Toyota Supra (2023 year). Manual in english - page 2
 

  Index      Toyota     Toyota Supra (2023 year). Manual in english


Search            copyright infringement  


Content      ..      1      2      3      ..


Toyota Supra (2023 year). Manual in english - page 2


24

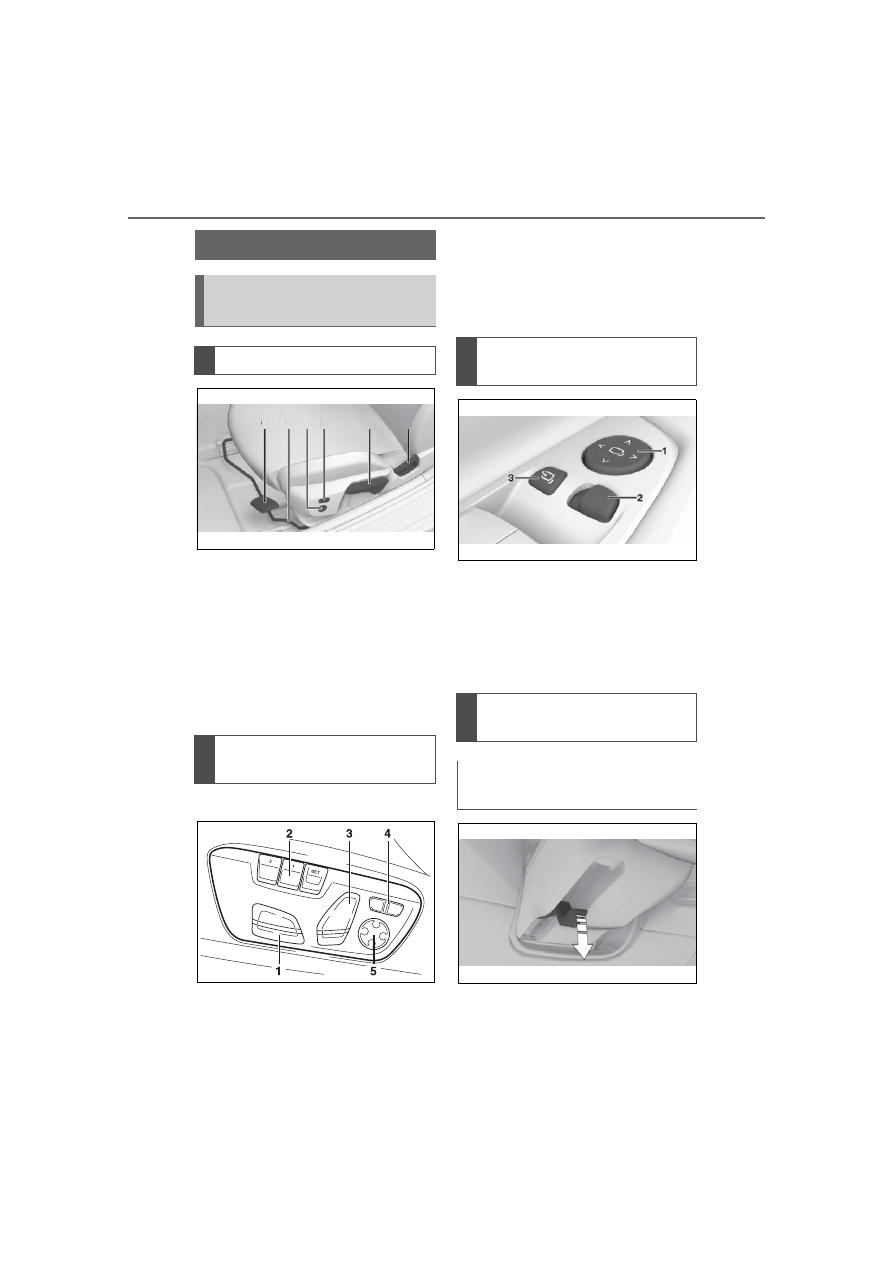
2-1. QUICK REFERENCE

1

Backrest angle

2

Height

3

Backrest width*

4

Lumbar support*

5

Forward/back

6

Seat angle*

*

: if equipped

*

: if equipped

1

Forward/backward, height, 
seat tilt

2

Driver's seat memory

3

Backrest tilt

4

Backrest width

5

Lumbar support

1

Adjusting

2

Selecting a mirror, Automatic 
Curb Monitor, refer to page 
111.

3

Folding in and out

1

Fold the lever down.

2

Move the steering wheel to 

Set-up and use

Seats, mirrors, and steer-
ing wheel

Manually adjustable seats

Electrically adjustable 
seats*

6

5

4 3

2

1

Adjusting the exterior mir-
rors

Adjusting the steering 
wheel

Manual steering wheel 
adjustment
25

2-1. QUICK REFERENCE

2

QUICK REFER

E

NCE

the preferred height and 
angle to suit your seating 
position.

3

Fold the lever back up.

The following settings can be 
stored and, if necessary, 
retrieved using the memory 
function:
• Seat position.
• Exterior mirror position.
• Height of the Head-up Dis-

play.

1

Set the desired position.

2

Press button on the 

driver's seat. The writing on 
the button lights up.

3

Press the desired button 1 or 
2 at the door while the writing 
is lit. A signal sounds.

Press the desired button 1 or 2.

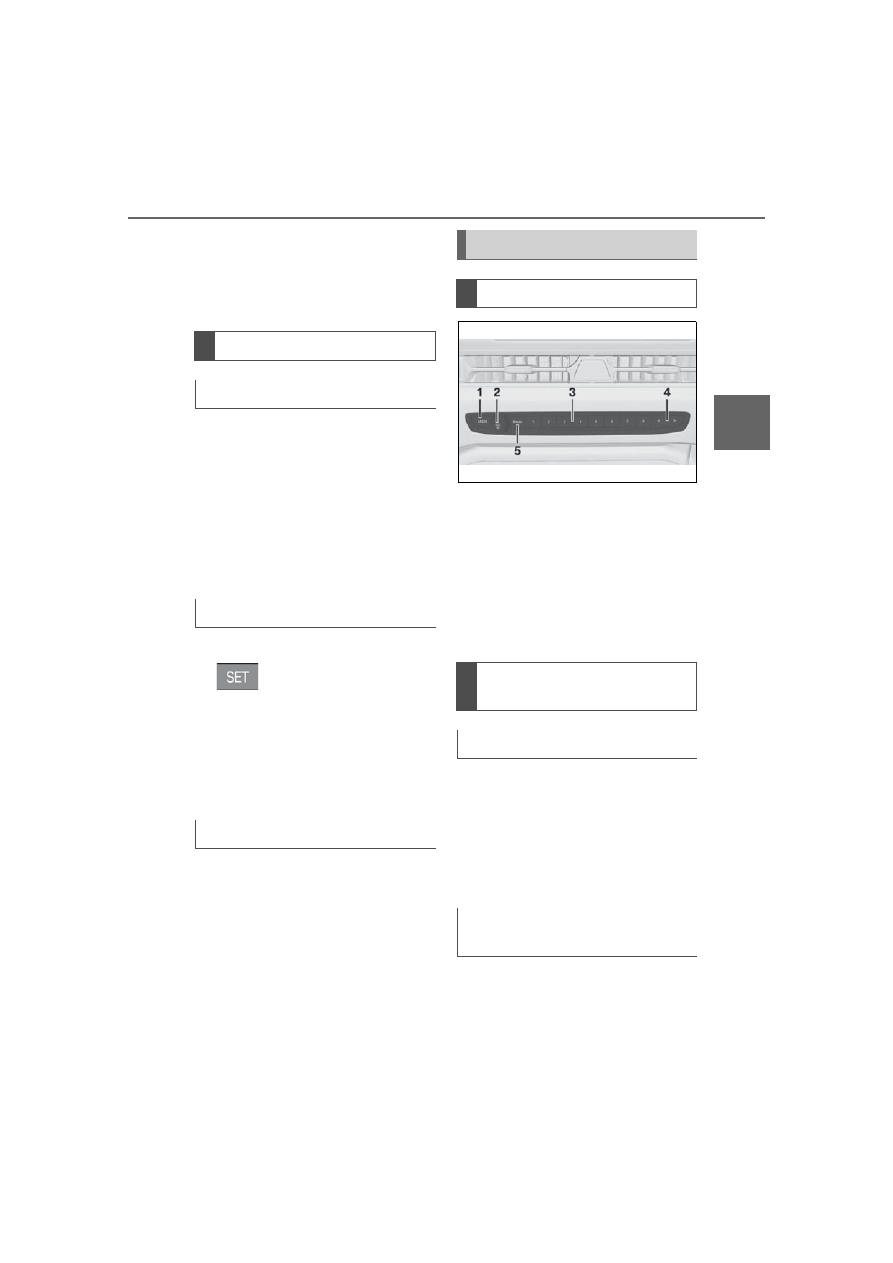
1

Changing the entertainment 
source

2

Sound output on/off, volume

3

Programmable memory but-
tons

4

Changing the station/track

5

Waveband/satellite radio

After the mobile phone is con-
nected once to the vehicle, the 
mobile phone can be operated 
using Toyota Supra Command, 
the steering wheel buttons and 
voice activation.

Via Toyota Supra Command:

1

"My Vehicle"

2

"System settings"

Memory function

Concept

Storing

Calling up settings

Infotainment

Radio

Connecting a mobile 
phone

General information

Connecting the mobile 
phone via Bluetooth

26

2-1. QUICK REFERENCE

3

"Mobile devices"

4

"Connect new device"

5

Select the functions for which 
the mobile phone is to be 
used.

The Bluetooth name of the vehicle 

is displayed on the Control Display.

6

To perform additional steps 
on the mobile phone, refer to 
the mobile phone owner's 
manual: e.g., search for or 
connect the Bluetooth device 
or a new device.

The Bluetooth name of the vehicle 

appears on the mobile phone dis-

play. Select the Bluetooth name of 

the vehicle.

7

Depending on the mobile 
device, a control number is 
displayed or the control num-
ber must be entered.

• Compare the control number 

displayed on the Control Dis-
play with the control number 
on the display of the device.

Confirm the control number on the 
device and on the Control Display.

• Enter and confirm the same 

control number on the device 
and via Toyota Supra Com-
mand.

The device is connected and 
displayed in the device list.

Incoming calls can be answered 

in several ways.
• Via Toyota Supra Command:

"Accept"

Press the button on the 

steering wheel.

• Via the selection list in the 

instrument cluster:

Use the thumbwheel on the steer-
ing wheel to select: "Accept"

Via Toyota Supra Command:

1

"Communication"

2

"Dial number"

3

Enter the numbers.

4

Select the symbol. The 

connection is established via 
the mobile phone to which 
this function has been 
assigned.

Establish the connection via the 
additional phone:

1

Press the button.

2

"Call via"

*

: if equipped

CarPlay allows certain func-
tions of a compatible Apple 
iPhone to be used via Siri voice 
operation and Toyota Supra 

Using the phone

Accepting a call

Dialing a number

Apple CarPlay prepara-
tion*

Concept

27

2-1. QUICK REFERENCE

2

QUICK REFER

E

NCE

Command.

• Compatible iPhone, iPhone 5 

or later with iOS 7.1 or later.

• Corresponding mobile wire-

less contract.

• Bluetooth, Wi-Fi, and Siri 

voice operation are switched 
on on the iPhone.

Via Toyota Supra Command:

1

"My Vehicle"

2

"System settings"

3

"Mobile devices"

4

"Settings"

5

Select the following setting:

• "Bluetooth

®

"

• Corresponding mobile wire-

less contract.

Pair iPhone via Bluetooth with 
the vehicle.
Select CarPlay as the function:

"Apple CarPlay"

The iPhone is connected to the 
vehicle and displayed in the 
device list.

1

Depress the brake pedal.

2

Manual transmission: step on 
the clutchpedal and shift to 
Neutral.

3

Press the Start/Stop button.

Manual transmission:

1

With the vehicle at a stand-
still, press the Start/Stop but-
ton.
The engine is switched off.

2

Shift into first gear or reverse.

3

Set the parking brake.

Automatic transmission:

1

Engage selector lever posi-
tion P with the vehicle 
stopped.

2

Press the Start/Stop button.

The engine is switched off.

3

Set the parking brake.

Functional requirements

Switching on Bluetooth and 
CarPlay

Pairing iPhone with CarPlay

In transit

Driving

Drive-ready state

Switching on drive-ready 
state

Switching off drive-ready 
state

28

2-1. QUICK REFERENCE

The Auto Start/Stop function 
switches the engine off automat-
ically while stationary to save 
fuel. The engine starts automati-
cally under the following precon-
ditions:
Manual transmission:
• By pressing the clutch pedal.
Automatic transmission:
• By releasing the brake pedal.

The LED and indicator light go 
out.
The parking brake is released.

When shifting to a lower gear, 
excessive RPM can damage the 
engine. There is a risk of dam-
age to property, among other 
potential damage. When shifting 
into 5th or 6th gear,press the 
gear shift lever to the right.

Select only when the vehicle is 
stationary.

• Drive mode D.
• Neutral N.
• Reverse R.
With the driver's safety belt fas-
tened, briefly push the selector 
lever in the desired direction, 
past a resistance point, if 
needed. The selector lever 
returns to the center position in 

Auto Start/Stop function

Parking brake

Setting

Pull the switch.
The LED on the switch 
and the indicator light in 
the instrument cluster 
are illuminated.

Releasing

With drive-ready state 
switched on:
Manual transmission: 
press the switch while 
the brake pedal is 
pressed.
Automatic transmis-
sion: press the switch 
while the brake is 
pressed or selector 
lever position P is set.

Manual transmission

Shifting

Reverse gear

Automatic transmission

Engaging selector lever 
position D, N, R

29

2-1. QUICK REFERENCE

2

QUICK REFER

E

NCE

each case.
To prevent the vehicle from 
creeping after you select a drive 
mode or reverse, maintain pres-
sure on the brake pedal until 
you are ready to start.
A selector lever lock prevents 
the inadvertent shifting to selec-
tor lever position R or the inad-
vertent shifting from selector 
lever position P.
Engage selector lever position R 
only when the vehicle is station-
ary.

Press and hold the button to 
release the selector lever lock.

Engage selector lever position P 
only when the vehicle is station-
ary.

Press button P.

Activate the manual mode:
Press the selector lever to the 
left from selector lever position 
D.
Manual mode:
• To shift down: press the 

selector lever forward.

• To shift up: pull the selector 

lever rearwards.

End the manual mode:
Push the selector lever to the 
right.

Releasing the selector lever 
lock

Engaging P

Automatic transmission, 
manual mode

30

2-1. QUICK REFERENCE

Push the lever forward or pull it 
backward.
• High beams on, arrow 

1

. The 

high beams light up when the 
low beams are switched on.

• High beams off/headlight 

flasher, arrow 

2

.

1

Right turn

2

Lane change to the right 
(movethe lever partway and 
release it)

The right hand signals will flash 3 

times.

3

Lane change to the left 
(movethe lever partway and 
release it)

The left hand signals will flash 3 

times.

4

Left turn

The wipers can be operated in 
the standby state.

High beams, headlight 
flasher, turn signal

High beams, headlight 
flasher

Turn signal

2

1

3

4

Lights and lighting

Light functions

Symbol

Function

Lights off.

Daytime running lights.

Parking lights.

Automatic headlight 

control.

Low beams.

Instrument lighting.

Right roadside parking 

light.

Left roadside parking 

light.

Washer/wiper system

31

2-1. QUICK REFERENCE

2

QUICK REFER

E

NCE

Switching on

Press the lever up until the 
desired position is reached.
• Resting position of the wipers: 

position 

0

.

• Rain sensor: position 

1

.

• Normal wiper speed: position 

2

.

• Fast wiper speed: position 

3

.

Brief wipe and switching off

Press the lever down.
• Switching off: press the lever 

down until it reaches its stan-
dard position (position 0).

• Brief wipe: press the lever 

down from the standard posi-
tion (position 0).

Activating/deactivating

To activate: press the lever up 
once from its standard position, 
arrow 

1

.

To deactivate: press the lever 
back into the standard position.

Adjusting the sensitivity

Turn the thumbwheel on the 
wiper lever.

Switching the wipers on/off 
and brief wipe

Rain sensor

Cleaning the windshield

32

2-1. QUICK REFERENCE

Pull the wiper lever towards you.

1

Press the rear edge of the 
fuel filler flap to open it.

2

Turn the fuel cap counter-
clockwise.

3

Place the fuel cap in the 
bracket attached to the fuel 
filler flap.

For the best fuel efficiency, the 

Climate control

Button

Function

Temperature.

Recirculated-air mode.

Maximum cooling.

AUTO program.

Air distribution, manual.

Switching off.

Defrost and defog the 

windshield.

Rear window defroster.

Seat heating.

Climate control opera-

tion.

Air flow, manual.

Refueling

Refueling

Fuel cap

Gasoline

Button

Function

33

2-1. QUICK REFERENCE

2

QUICK REFER

E

NCE

gasoline should be sulfur-free or 
very low in sulfur content.
Fuels that are marked on the 
gas pump as containing metal 
must not be used. 

P.301

The tire inflation pressure speci-
fications can be found in the tire 
inflation pressure table in the 
printed Owner's Manual.

With Tire Pressure Monitor 
TPM:
The corrected tire inflation pres-
sures are applied automatically. 
Make sure that the correct tire 
settings have been made.
With tires that cannot be found 
in the tire pressure values on 
the Control Display, reset the 
Tire Pressure Monitor TPM.

Regularly check the tire inflation 
pressure and correct it as 
needed:
• At least twice a month.
• Before embarking on an 

extended trip.

The friction during hard braking 
may produce brake dust and 
make the rims dirty. Brake dust 
can be removed by cleaning the 
rims. Toyota recommends using 
vehicle care and cleaning prod-
ucts from Toyota.

Depending on the previous dis-
plays, the status display 
appears when the engine is run-
ning or after the vehicle has 
been driven for at least 30 min-
utes.

Via Toyota Supra Command:

1

"My Vehicle"

2

"Vehicle status"

3

"Engine oil level"

Different messages appear on 
the Control Display depending 
on the engine oil level. Pay 
attention to these messages.

Safely park the vehicle and 

Wheels and tires

Tire inflation pressure speci-
fications

After correcting the tire infla-
tion pressure

Checking the tire inflation 
pressure

Cleaning the wheels

Electronic oil measure-
ment

Functional requirements

Displaying the engine oil 
level

Adding engine oil

General information

34

2-1. QUICK REFERENCE

switch off drive-ready state 
before adding engine oil.

Only add engine oil when the 
message is displayed in the 
instrument cluster.
Observe the quantity to be 
added in the message.
Take care not to add too much 
engine oil.
Observe recommended engine 
oil types, refer to page 305.

The button is located in the cen-
ter console.

Via Toyota Supra Command:

1

"Toyota Supra Connect"

2

"Toyota Supra Assistance"

3

"Roadside assistance"

A voice connection is established.

The Concierge offers informa-
tion on events, gas stations or 
hotels, and provides phone 
numbers and addresses. Many 
hotels can be booked directly by 
the Concierge.
Via Toyota Supra Command:

1

"Toyota Supra Connect"

2

"Toyota Supra Assistance"

3

"Concierge"

A voice connection to the Con-
cierge is established.

Remote maintenance are ser-
vices that help to maintain vehi-
cle mobility.
Remote maintenance can com-
prise the following services:
• Roadside assistance.

Adding

Providing assistance

Hazard warning flashers

Roadside assistance

Toyota Supra Connect

Concierge

Remote maintenance

35

2-1. QUICK REFERENCE

2

QUICK REFER

E

NCE

When leaving the vehicle, turn 
the engine switch off, apply the 
parking brake and lock the 
doors.

When parking, stop the vehicle 
in a safe and appropriate park-
ing area, operate the “P” (park-
ing) switch on the selector lever 
and turn the engine switch off.

After driving

When parking

WARNING

When taking a nap in the vehicle, 

make sure to turn the engine 

switch off.

When taking a nap in the vehicle 

is unavoidable, park the vehicle in 

a safe place, turn the engine 

switch off, and if possible, sleep in 

the passenger seat. If the engine 

is left running, the accelerator 

pedal may be depressed or selec-

tor lever may be operated unin-

tentionally, possibly leading to an 

accident. Also, if the engine is run 

at a high speed for a long time, 

the exhaust system and engine 

may become extremely hot, pos-

sibly causing to a fire.

WARNING

Be careful when parking, as to not 

park the vehicle near flammable 

materials.

Do not park the vehicle near flam-

mable materials, such as dry 

grass, leaves, paper, oil, etc. If 

these kinds of material touch a 

part of the exhaust system, it may 

cause a fire.

37

3

3

CON

T

ROLS

CONTROLS

.

3-1. CONTROLS

Cockpit ...........................

38

Sensors of the vehicle....

42

Operating state of the vehi-

cle.................................

45

Toyota Supra Command

.....................................

49

General settings.............

63

Personal settings ...........

67

Connections ...................

72

Opening and closing ......

80

Seats, mirrors, and steering 

wheel.........................

100

Transporting children safely

..................................

114

Driving.........................

120

Displays ......................

139

Lights ..........................

157

Safety..........................

164

Driving stability control sys-

tems ..........................

200

Driver assistance systems

..................................

205

Driving comfort............

233

Climate control ............

234

Interior equipment .......

243

Storage compartments

..................................

252

Cargo area ..................

254

38

3-1. CONTROLS

3-1.CONTROLS

This chapter describes all stan-
dard, country-specific and 
optional features offered with 
the series. It also describes fea-
tures and functions that are not 
necessarily available in your 
vehicle, e.g., due to the selected 

options or country versions. This 
also applies to safety-related 
functions and systems. When 
using these functions and sys-
tems, the applicable laws and 
regulations must be observed.

1

Central locking system

 Unlock P.88

 Lock P.88

2

 Power windows P.98

3

Exterior mirror operation 
P.109

4

Lights

 Lights off P.157

Daytime running lights P.160

 Parking lights P.159

 Automatic headlight 

control P.158

Cockpit

Vehicle features and options

In the vicinity of the steering wheel

39

3-1. CONTROLS

3

CON

T

ROLS

Automatic high-beam P.161

 Low beams P.159

 Instrument lighting 

P.163

 Right roadside parking 

light P.159

 Left roadside parking 

light P.159

5

Steering column stalk, left

 Turn signal P.126

 High beams, headlight 

flasher P.127

 Automatic high-beam 

P.161

 Onboard Computer 

P.139

6

Shift paddle P.135

7

Steering wheel buttons, left

 Cruise control on/off 

P.207

 Dynamic radar cruise 

control on/off P.211

 Cruise control: store 

speed
Speed Limit Assist: take over 
suggested speed P.219

 Continuing cruise con-

trol/Pausing cruise control 

P.205

 Dynamic radar cruise 

control: increase distance 
P.205

 Dynamic radar cruise 

control: reduce distance 
P.205
Cruise control rocker switch 
P.205

8

Instrument cluster P.139

9

Steering wheel buttons, right

 Selection lists P.149

 Volume, see Owner's 

Manual for Navigation, Enter-
tainment and Communication

 Voice activation system 

P.60

 Telephone, see 

Owner's Manual for Naviga-
tion, Entertainment and Com-
munication
Thumbwheel for selection 
lists P.149

10

Shift paddle P.135

11

Steering column stalk, right

 Wiper P.127

 Rain sensor P.128

 Clean the windshield 

P.129

12

Adjust the steering wheel 

P.111

40

3-1. CONTROLS

13

 Horn, entire surface

14

 Unlock hood P.300

15

 Unlocking the trunk lid 

P.84

1

Control Display P.52

2

 Hazard warning sys-

tem P.323

3

Ventilation P.240

4

Glove compartment P.253

5

Radio/multimedia, see 
Owner's Manual for Naviga-
tion, Entertainment, and 
Communication

6

Automatic air conditioning 
P.234

7

Controller with buttons P.52

8

 Sport mode button 

P.137
SPORT driving mode

 Toyota Supra Safety  

P.177

 Auto Start/Stop func-

tion P.120

 Parking Sensors P.42

Rearview cameraP.227
RCTA (Rear cross trafficalert) 
functionP.230

 VSC Vehicle Stability 

Control System P.201

In the vicinity of the center console

1

4

2
3

5

6

7

8

9

10

11


Content      ..      1      2      3      ..