Toyota Corolla Hatchback (2023 year). Manual in english - page 22
352
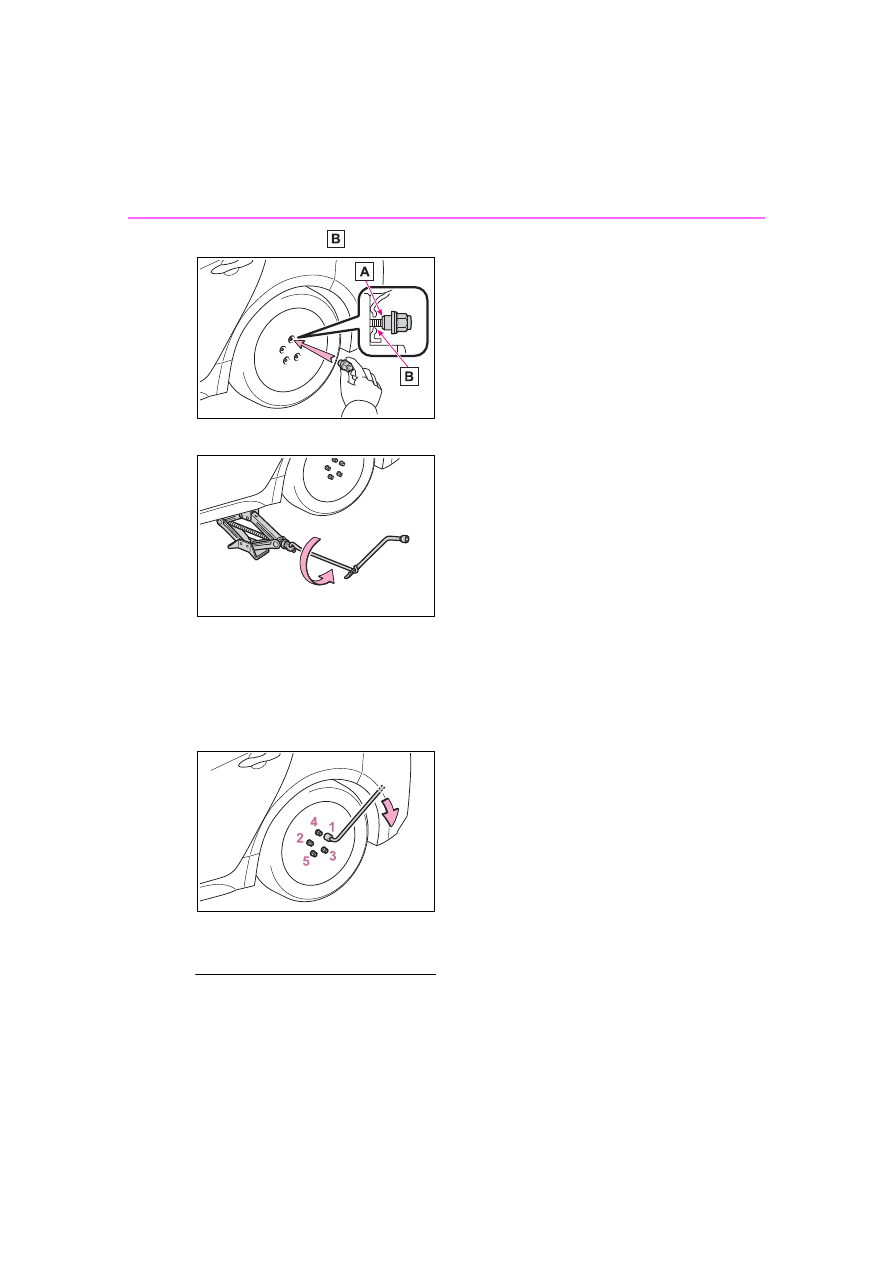
7-2. Steps to take in an emergency
the disc wheel seat
.
3
Lower the vehicle.
4
Firmly tighten each wheel nut
two or three times in the
order shown in the illustra-
tion.
Tightening torque:
76 ft•lbf (103 N•m, 10.5 kgf•m)
5
Stow the flat tire, tire jack and
all tools.
■
The compact spare tire
●
The compact spare tire is identi-
fied by the label “TEMPORARY
USE ONLY” on the tire sidewall.
Use the compact spare tire tempo-
rarily, and only in an emergency.
●
Make sure to check the tire infla-
tion pressure of the compact
spare tire. (
■
When the compact spare tire is
equipped
The vehicle becomes lower when
driving with the compact spare tire
compared to when driving with stan-
dard tires.
■
After completing the tire
change
The tire pressure warning system
must be reset. (
■
When using the compact spare
tire
As the compact spare tire is not
equipped with a tire pressure warn-
ing valve and transmitter, low infla-
tion pressure of the spare tire will
not be indicated by the tire pressure
warning system. Also, if you replace
the compact spare tire after the tire
pressure warning light comes on,
the light remains on.
■
If you have a flat front tire on a
road covered with snow or ice
(vehicles with a compact spare
tire)
Install the compact spare tire on one
of the rear wheels of the vehicle.
Perform the following steps and fit
tire chains to the front tires:
1
Replace a rear tire with the com-
pact spare tire.
2
Replace the flat front tire with the
tire removed from the rear of the
vehicle.
3
Fit tire chains to the front tires.
■
When reinstalling the wheel
ornament (steel wheels except
compact spare tire)
Align the cutout of the wheel orna-
ment with the valve stem as shown
in the illustration.