Toyota Camry (2023 year). Manual in english - page 4
64
1-2. Child safety
While pushing the child
restraint system down into
the rear seat, allow the
shoulder belt to retract until
the child restraint system is
securely in place.
After the shoulder belt has
retracted to a point where there
is no slack in the belt, pull the
belt to check that it cannot be
extended.
After installing the child restraint system, rock it back and forth to
ensure that it is installed securely. (
■
Forward-facing — Convertible seat
When using the front passenger seat: Adjust the seatback
If installing the child restraint system to the front passenger seat
is unavoidable, refer to P. 60 for the front passenger seat adjust-
ment.
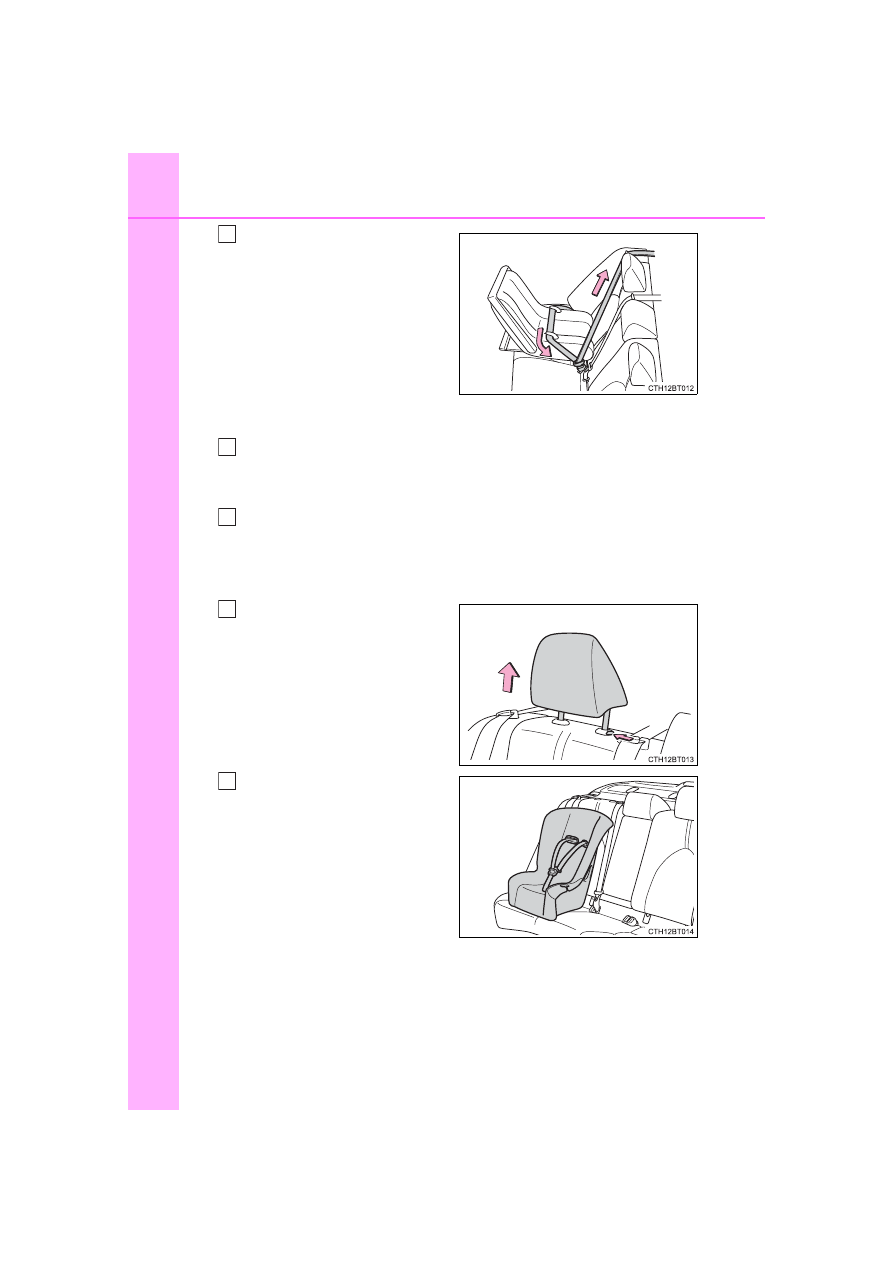
If the head restraint interferes
with the child restraint sys-
tem installation and the head
restraint can be removed,
remove the head restraint.
(
Place the child restraint sys-
tem on the seat facing the
front of the vehicle.
4
5
1
2
3