Toyota Yaris (2020 year). Manual in english - part 4
 

  Index      Toyota     Toyota Yaris (2020 year). Manual in english


Search            copyright infringement  


Content      ..     2      3      4      5     ..


Toyota Yaris (2020 year). Manual in english - part 4


204

YARIS_YARIS HATCHBACK_OM_OM99V59z_(U)

3-4. Switches and Controls

Switching  the  auto-wiper  lever  from  the  OFF  to  the AUTO  position  while
driving  activates  the  windshield  wipers  once,  after  which  they  operate
according to the rainfall amount.

The auto-wiper control may not operate when the rain sensor temperature is
about -10 °C (14 °F) or lower, or about 85 °C (185 °F) or higher.

If the windshield is coated with water repellent, the rain sensor may not be
able to sense the amount of rainfall correctly and the auto-wiper control may
not operate properly.

If dirt or foreign matter (such as ice or matter containing salt water) adheres
to the windshield above the rain sensor, or if the windshield is iced, it could
cause  the  wipers  to  move  automatically.  However,  if  the  wipers  cannot
remove this ice, dirt or foreign matter, the auto-wiper control will stop opera-
tion. In this case, set the wiper lever to the low speed position or high speed
position  for  manual  operation,  or  remove  the  ice,  dirt  or  foreign  matter  by
hand to restore the auto-wiper operation.

If the auto-wiper lever is left in the AUTO position, the wipers could operate
automatically from the effect of strong light sources, electromagnetic waves,
or infrared light because the rain sensor uses an optical sensor. It is recom-
mended that the auto-wiper lever be switched to the OFF position other than
when driving the vehicle under rainy conditions.

The auto-wiper control functions can be turned off. Refer to Customizable
Features on P. 555

NOTICE

When the wiper lever is in the AUTO position and the ignition is switched
ON, the wipers may move automatically in the following cases:
• If the windshield above the rain sensor is touched or wiped with a cloth.
• If the windshield is struck with a hand or other object from either outside

or inside the vehicle.

Keep hands and scrapers clear of the windshield when the wiper lever is
in the AUTO position and the ignition is switched ON as fingers could be
pinched or the wipers and wiper blades damaged when the wipers acti-
vate automatically. If you are going to clean the windshield, be sure the
wipers are turned off completely (when it is most likely that the engine is
left running) this is particularly important when clearing ice and snow.

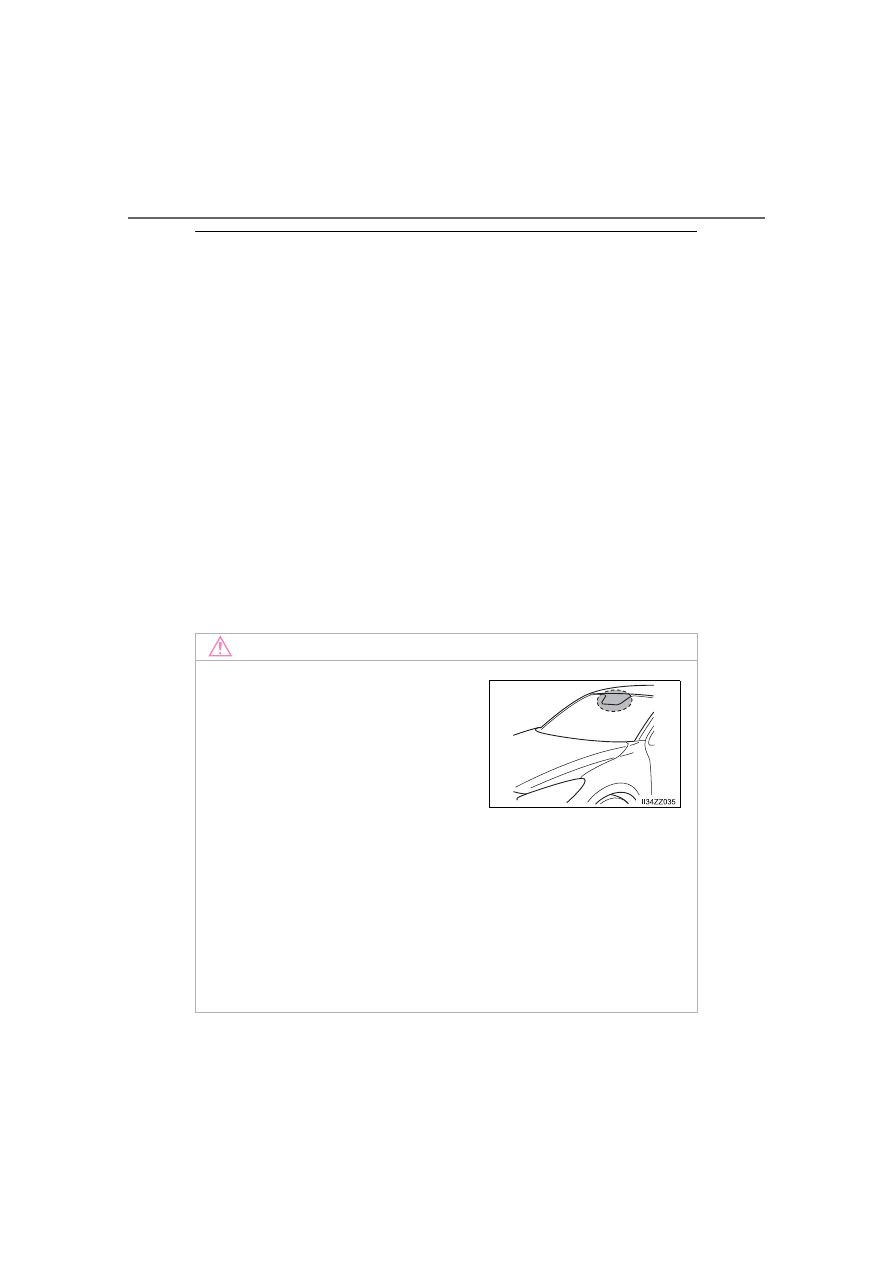
Do not shade the rain sensor by adher-
ing  a  sticker  or  a  label  on  the  wind-
shield.  Otherwise  the  rain  sensor  will
not operate correctly.

-------------------------------------------------------------------------------------------------------------------------------------------------------------

YARIS_YARIS HATCHBACK_OM_OM99V59z_(U)

205

3-4. Switches and Controls

3

Wh
en Drivin

g

OFF
Washer

Pull the lever toward you and hold
it to spray washer fluid.

If the washer does not work, inspect the fluid level (

P. 402). If the

fluid level is normal, consult your Toyota dealer.

With the wiper lever in the OFF or INT position/AUTO position, the wipers will
operate continuously until the lever is released.

Windshield Washer

1
2

-------------------------------------------------------------------------------------------------------------------------------------------------------------

206

YARIS_YARIS HATCHBACK_OM_OM99V59z_(U)

3-4. Switches and Controls

Rear Window Wiper and Washer

The ignition must be switched ON to use the wiper.

Turn  the  wiper  on  by  turning  the
rear wiper/washer switch.

To spray washer fluid, turn the rear wiper/washer switch to either of
the 

 position. After the switch is removed, the washer will stop.

If the washer does not work, inspect the fluid level (

P. 402). If the

fluid level is normal and the washer still does not work, consult your
Toyota dealer.

: If equipped

Rear Window Wiper

Switch Position

Wiper operation

OFF

Stop

INT

Intermittent

ON

Normal

Rear Window Washer

-------------------------------------------------------------------------------------------------------------------------------------------------------------

207

YARIS_YARIS HATCHBACK_OM_OM99V59z_(U)

3-4. Switches and Controls

3

Wh
en Drivin

g

Rear Window Defogger

The ignition must be switched ON to use the defogger.
Press the switch to turn on the rear window defogger. The rear win-
dow defogger operates for about 15 minutes and then turns off auto-
matically.
The indicator light illuminates when the defogger is operating.
To  turn  off  the  rear  window  defogger  before  the  15  minutes  has
elapsed, press the switch again.

This defogger is not designed for melting snow. If there is an accumulation of
snow on the rear window, remove it before using the defogger.

To turn on the mirror defoggers, switch the ignition ON and press the
rear window defogger switch (

P. 207).

The rear window defogger clears fog from the rear window.

Manual Climate Control

Fully  Automatic  Climate  Con-
trol

NOTICE

Do not use sharp instruments or window cleaners with abrasives to clean
the inside of the rear window surface. They may damage the defogger grid
inside the window.

Mirror Defogger (if equipped)

Indicator light

Indicator light

-------------------------------------------------------------------------------------------------------------------------------------------------------------

208

YARIS_YARIS HATCHBACK_OM_OM99V59z_(U)

3-4. Switches and Controls

Hazard Warning Flasher

The  hazard  warning  lights  warn
other drivers that your vehicle is a
traffic  hazard  and  that  they  must
take  extreme  caution  when  near
it.

Depress  the  hazard  warning
flasher and all the turn signals will
flash. The hazard warning indica-
tor lights in the combination meter
flash simultaneously.

The turn signals do not work when the hazard warning lights are on.

Check  local  regulations  about  the  use  of  hazard  warning  lights  while  the
vehicle is being towed to verify that it is not in violation of the law.

The hazard warning lights should always be used when you stop
on or near a roadway in an emergency.

-------------------------------------------------------------------------------------------------------------------------------------------------------------

209

YARIS_YARIS HATCHBACK_OM_OM99V59z_(U)

3-5. Brake

3

Wh
en Drivin

g

Brake System

This  vehicle  has  power-assisted  brakes  that  adjust  automatically
through normal use.
Should power-assist fail, you can stop by applying greater force than
normal  to  the  brake  pedal.  But  the  distance  required  to  stop  will  be
greater than usual.

Foot Brake

WARNING

Do not coast with the engine stalled or turned off, find a safe place to
stop

Coasting  with  the  engine  stalled  or  turned  off  is  dangerous.  Braking  will
require more effort, and the brake’s power-assist could be depleted if you
pump the brake. This will cause longer stopping distances or even an acci-
dent.

Shift to a lower gear when going down steep hills

Driving with your foot continuously on the brake pedal or steadily applying
the brakes for long distances is dangerous. This causes overheated brakes,
resulting in longer stopping distances or even total brake failure. This could
cause  loss  of  vehicle  control  and  a  serious  accident.  Avoid  continuous
application of the brakes.

Dry off brakes that have become wet by driving slowly, releasing  the
accelerator  pedal  and  lightly  applying  the  brakes  several  times  until
the brake performance returns to normal

Driving  with  wet  brakes  is  dangerous.  Increased  stopping  distance  or  the
vehicle pulling to one side when braking could result in a serious accident.
Light braking will indicate whether the brakes have been affected.

To apply the brakes correctly

Wear shoes appropriate for driving in order to avoid your shoe contacting
the brake pedal when depressing the accelerator pedal.

Always  depress  the  brake  pedal  with
the  right  foot. Applying  the  brakes  with
the  unaccustomed  left  foot  could  slow
your reaction time to an emergency sit-
uation  resulting  in  insufficient  braking
operation.

-------------------------------------------------------------------------------------------------------------------------------------------------------------

210

YARIS_YARIS HATCHBACK_OM_OM99V59z_(U)

3-5. Brake

Setting the parking brake

Depress  the  brake  pedal  and
then  firmly  pull  the  parking
brake  lever  fully  upwards  with
sufficient force to hold the vehi-
cle in a stationary position.

Releasing the parking brake

Depress  the  brake  pedal  and
pull  the  parking  brake  lever
upwards, 

then 

press 

the

release  button.  While  holding
the  button,  lower  the  parking
brake lever all the way down to
the released position.

NOTICE

Do not drive with your foot held on the clutch pedal or brake pedal, or hold
the clutch pedal depressed halfway unnecessarily. Doing so could result in
the following:

The clutch and brake parts will wear out more quickly.

The brakes can overheat and adversely affect brake performance.

Parking Brake

-------------------------------------------------------------------------------------------------------------------------------------------------------------

YARIS_YARIS HATCHBACK_OM_OM99V59z_(U)

211

3-5. Brake

3

Wh
en Drivin

g

For  parking  in  snow,  refer  to  Winter  Driving  (

P.  146)  regarding  parking

brake use.

The warning light turns on when the system has a malfunction.
Refer to Contact Your Toyota Dealer and Have Vehicle Inspected on
P. 493.

When  the  disc  brake  pads
become  worn,  the  built-in  wear
indicators contact the disc plates.
This causes a screeching noise to
warn  that  the  pads  should  be
replaced.

When you hear this noise, consult your Toyota dealer as soon as pos-
sible.

In high humidity weather conditions, brake noises, such as brake squeak or
brake squeal can be heard. It does not indicate a malfunction.

NOTICE

Driving  with  the  parking  brake  on  will  cause  excessive  wear  of  the  brake
parts.

Warning Light

Brake Pad Wear Indicator

WARNING

Do not drive with worn disc pads

Driving with worn disc pads is dangerous. The brakes could fail and cause a
serious  accident. As  soon  as  you  hear  a  screeching  noise  consult  your
Toyota dealer.

-------------------------------------------------------------------------------------------------------------------------------------------------------------

212

YARIS_YARIS HATCHBACK_OM_OM99V59z_(U)

3-5. Brake

During emergency braking situations when it is necessary to depress
the brake pedal with greater force, the brake assist system provides
braking assistance, thus enhancing braking performance.
When the brake pedal is depressed hard or depressed more quickly,
the brakes apply more firmly.

When  the  brake  pedal  is  depressed  hard  or  depressed  more  quickly,  the
pedal will feel softer but the brakes will apply more firmly. This is a normal
effect of the brake assist operation and does not indicate a malfunction.

When  the  brake  pedal  is  depressed  hard  or  depressed  more  quickly,  a
motor/pump  operation  noise  may  be  heard. This  is  a  normal  effect  of  the
brake assist and does not indicate a malfunction.

The  brake  assist  equipment  does  not  supersede  the  functionality  of  the
vehicle’s main braking system.

Brake Assist

-------------------------------------------------------------------------------------------------------------------------------------------------------------

213

YARIS_YARIS HATCHBACK_OM_OM99V59z_(U)

3-5. Brake

3

Wh
en Drivin

g

Hill Launch Assist (HLA)

For vehicles with a manual transaxle, Hill Launch Assist (HLA) oper-
ates on a downward slope when the shift lever is in the reverse (R)
position, and on an upward slope when the shift lever is in a position
other than the reverse (R) position.
For  vehicles  with  an  automatic  transaxle,  Hill  Launch Assist  (HLA)
operates on a downward slope when the shift lever is in the reverse
(R) position, and on an upward slope when the shift lever is in a for-
ward gear.

Hill Launch Assist (HLA) does not operate on a gentle slope. In addition, the
gradient of the slope on which the system will operate changes depending
on the vehicle’s load.

Hill Launch Assist (HLA) does not operate if the parking brake is applied, the
vehicle has not stopped completely, or the clutch pedal is released.

While Hill Launch Assist (HLA) is operating, the brake pedal may feel stiff
and vibrate, however, this does not indicate a malfunction.

Hill Launch Assist (HLA) does not operate while the TCS/DSC indicator light
is illuminated.
Refer to Contact Your Toyota Dealer and Have Vehicle Inspected on P. 493.

Hill  Launch Assist  (HLA)  does  not  turn  off  even  if  the  DSC  OFF switch  is
pressed to turn off the TCS/DSC.

: If equipped

Hill Launch Assist (HLA) is a function which assists the driver in
accelerating  from  a  stop  while  on  a  slope.  When  the  driver
releases  the  brake  pedal  and  depresses  the  accelerator  pedal
while on a slope, the function prevents the vehicle from rolling.
The  braking  force  is  maintained  automatically  after  the  brake
pedal is released on a steep grade.

-------------------------------------------------------------------------------------------------------------------------------------------------------------

214

YARIS_YARIS HATCHBACK_OM_OM99V59z_(U)

3-5. Brake

WARNING

Do not rely completely on Hill Launch Assist (HLA)

Hill Launch Assist (HLA) is an auxiliary device for accelerating from a stop
on a slope. The system only operates for about 2 seconds and therefore,
relying  only  on  the  system,  when  accelerating  from  a  stop  is  dangerous
because the vehicle may move (roll) unexpectedly and cause an accident.
The vehicle could roll depending on the vehicle’s load or if it is towing some-
thing. In addition, for vehicles with a manual transaxle, the vehicle could still
roll depending on how the clutch pedal or the accelerator pedal is operated.
Always  confirm  the  safety  around  the  vehicle  before  starting  to  drive  the
vehicle.

-------------------------------------------------------------------------------------------------------------------------------------------------------------

215

YARIS_YARIS HATCHBACK_OM_OM99V59z_(U)

3-6. ABS/TCS/DSC

3

Wh
en Drivin

g

Antilock Brake System (ABS)

The driver will feel a slight vibration in the brake pedal and may hear a
chattering noise from  the  brake  system. This  is  normal ABS  system
operation. Continue to depress the brake pedal without pumping the
brakes.
The warning light turns on when the system has a malfunction.
Refer to Contact Your Toyota Dealer and Have Vehicle Inspected on
P. 493.

Braking  distances  may  be  longer  on  loose  surfaces  (snow  or  gravel,  for
example)  which  usually  have  a  hard  foundation. A  vehicle  with  a  normal
braking  system  may  require  less  distance  to  stop  under  these  conditions
because  the  tires  will  build  up  a  wedge  of  surface  layer  when  the  wheels
skid.

The sound of the ABS operating may be heard when starting the engine or
immediately after starting the vehicle, however, it does not indicate a mal-
function.

The ABS control unit continuously monitors the speed of each
wheel.  If  one  wheel  is  about  to  lock  up,  the ABS  responds  by
automatically releasing and reapplying that wheel’s brake.

WARNING

Do not rely on ABS as a substitute for safe driving

The ABS  cannot  compensate  for  unsafe  and  reckless  driving,  excessive
speed, tailgating (following another vehicle too closely), driving on ice and
snow, and hydroplaning (reduced tire friction and road contact because of
water on the road surface). You can still have an accident.

-------------------------------------------------------------------------------------------------------------------------------------------------------------

216

YARIS_YARIS HATCHBACK_OM_OM99V59z_(U)

3-6. ABS/TCS/DSC

Traction Control System (TCS)

The warning light turns on when the system has a malfunction.
Refer to Contact Your Toyota Dealer and Have Vehicle Inspected on
P. 493.

To turn off the TCS, press the DSC OFF switch (

P. 219).

The Traction Control System (TCS) enhances traction and safety
by controlling engine torque and braking. When the TCS detects
driving wheel slippage, it lowers engine torque and operates the
brakes to prevent loss of traction.
This means that on a slick surface, the engine adjusts automati-
cally  to  provide  optimum  power  to  the  drive  wheels,  limiting
wheel spin and loss of traction.

WARNING

Do  not  rely  on  the  Traction  Control  System  (TCS)  as  a  substitute  for
safe driving

The  Traction  Control  System  (TCS)  cannot  compensate  for  unsafe  and
reckless driving, excessive speed, tailgating (following another vehicle too
closely), and hydroplaning (reduced tire friction and road contact because
of water on the road surface). You can still have an accident.

Use snow tires or tire chains and drive at reduced speeds when roads
are covered with ice and/or snow

Driving without proper traction devices on snow and/or ice-covered roads is
dangerous. The Traction Control System (TCS) alone cannot provide ade-
quate traction and you could still have an accident.

-------------------------------------------------------------------------------------------------------------------------------------------------------------

YARIS_YARIS HATCHBACK_OM_OM99V59z_(U)

217

3-6. ABS/TCS/DSC

3

Wh
en Drivin

g

This  indicator  light  stays  on  for  a
few  seconds  when  the  ignition  is
switched ON. If the TCS or DSC is
operating,  the  indicator  light
flashes.

If  the  light  stays  on,  the TCS,  DSC  or  the  brake  assist  system  may
have  a  malfunction  and  they  may  not  operate  correctly.  Take  your
vehicle to your Toyota dealer.

In  addition  to  the  indicator  light  flashing,  a  slight  lugging  sound  will  come
from the engine. This indicates that the TCS/DSC is operating properly.

On slippery  surfaces, such  as fresh snow, it  will  be impossible  to achieve
high rpm when the TCS is on.

TCS/DSC Indicator Light

-------------------------------------------------------------------------------------------------------------------------------------------------------------

218

YARIS_YARIS HATCHBACK_OM_OM99V59z_(U)

3-6. ABS/TCS/DSC

Dynamic Stability Control (DSC)

DSC operation is possible at speeds greater than 12 mph (20 km/h).
The warning light turns on when the system has a malfunction. 
Refer to Contact Your Toyota Dealer and Have Vehicle Inspected on
P. 493.

The  Dynamic  Stability  Control  (DSC)  automatically  controls
braking and engine torque in conjunction with systems such as
ABS and TCS to help control side slip when driving on slippery
surfaces, or during sudden or evasive maneuvering, enhancing
vehicle safety.
Refer to ABS (

P. 215) and TCS (

P. 216).

WARNING

Do  not  rely  on  the  Dynamic  Stability  Control  as  a  substitute  for  safe
driving

The  Dynamic  Stability  Control  (DSC)  cannot  compensate  for  unsafe  and
reckless driving, excessive speed, tailgating (following another vehicle too
closely), and hydroplaning (reduced tire friction and road contact because
of water on the road surface). You can still have an accident.

NOTICE

The DSC may not operate correctly unless the following are observed:
• Use tires of the correct size specified for your Toyota on all 4 wheels.
• Use  tires  of  the  same  manufacturer,  brand  and  tread  pattern  on  all  4

wheels.

• Do not mix worn tires.

The DSC may not operate correctly when tire chains are used or a tempo-
rary spare tire is installed because the tire diameter changes.

-------------------------------------------------------------------------------------------------------------------------------------------------------------

YARIS_YARIS HATCHBACK_OM_OM99V59z_(U)

219

3-6. ABS/TCS/DSC

3

Wh
en Drivin

g

This  indicator  light  stays  on  for  a
few  seconds  when  the  ignition  is
switched ON. If the TCS or DSC is
operating,  the  indicator  light
flashes.

If  the  light  stays  on,  the TCS,  DSC  or  the  brake  assist  system  may
have  a  malfunction  and  they  may  not  operate  correctly.  Take  your
vehicle to your Toyota dealer.

This  indicator  light  stays  on  for  a
few  seconds  when  the  ignition  is
switched ON. 
It  also  illuminates  when  the  DSC
OFF  switch  is  pressed  and  TCS/
DSC is switched off.
Refer to DSC OFF Switch on P. 219.

If the light remains illuminated and the TCS/DSC is not switched off,
take  your  vehicle  to  your Toyota  dealer. The  DSC  may  have  a  mal-
function.

Press the DSC OFF switch to turn
off  the  TCS/DSC.  The  DSC  OFF
indicator  light  in  the  combination
meter will illuminate.

Press the switch again to turn the TCS/DSC back on. The DSC OFF
indicator light will turn off.

TCS/DSC Indicator Light

DSC OFF Indicator Light

DSC OFF Switch

-------------------------------------------------------------------------------------------------------------------------------------------------------------

220

YARIS_YARIS HATCHBACK_OM_OM99V59z_(U)

3-6. ABS/TCS/DSC

When  DSC  is  on  and  you  attempt  to  free  the  vehicle  when  it  is  stuck,  or
drive it out of freshly fallen snow, the TCS (part of the DSC system) will acti-
vate. Depressing the accelerator will not increase engine power and freeing
the vehicle may be difficult. When this happens, turn off the TCS/DSC.

If the TCS/DSC is off when the engine is turned off, it automatically activates
when the ignition is switched ON.

Leaving the TCS/DSC on will provide the best traction.

If the DSC OFF switch is pressed and held for 10 seconds or more, the DSC
OFF  switch  malfunction  detection  function  operates  and  the  DSC  system
activates automatically. The DSC OFF indicator light turns off while the DSC
system is operative.

If the Low Speed Pre-Collision System operates with the TCS/DSC turned
off, the TCS/DSC becomes operational automatically.

-------------------------------------------------------------------------------------------------------------------------------------------------------------

221

YARIS_YARIS HATCHBACK_OM_OM99V59z_(U)

3-7. Fuel Economy Monitor

3

Wh
en Drivin

g

Fuel Economy Monitor

Select the 

 icon on the home screen to display the Applications

screen.
Select the “Fuel Economy Monitor”.
Operate the commander switch or touch the screen and display the
menu.

When the menu is displayed by touching the screen, the display is hidden
automatically after 6 seconds.

Select the icon in the menu and perform the operation. Each icon
operates as follows:

Hides the menu display.
Displays  the  Applications
screen.
Resets  the  fuel  economy
data.
Displays  the  following  set-
ting screen.

• Ending 

display 

on/off

switching

• On/off  switching  for  function  which  synchronizes  (links)  reset

of fuel economy data with trip meter (TRIP A)

: If equipped

The  Fuel  Consumption  information  is  displayed  by  operating
each icon in the display.
In addition, after completing a trip, the total energy efficiency to
date is displayed in the ending display when the ending display
is turned on.

1

2

3

4

1
2

3

4

-------------------------------------------------------------------------------------------------------------------------------------------------------------

222

YARIS_YARIS HATCHBACK_OM_OM99V59z_(U)

3-7. Fuel Economy Monitor

Information regarding the fuel economy is displayed.

Displays  the  fuel  economy  for
the past 60 minutes.

• Displays  the  fuel  economy

every minute for the past 1 to
10 minutes.

• Displays  the  fuel  economy

every 10 minutes for the past
10 to 60 minutes.

Displays the average fuel economy over the past 5 resets and after
the current reset.
Calculates  the  average  fuel  economy  every  minute  after  vehicle
travel begins, and displays it.

The fuel economy data is synchronized (linked) with the average fuel econ-
omy displayed in the trip computer.

To reset the fuel economy data, press the 

 icon in the menu. (The aver-

age fuel economy displayed in the trip computer resets at the same time.)

After resetting the fuel economy data, “-- -” is displayed while the average
fuel economy is being calculated.

If the ending display on the fuel economy monitor is on when the igni-
tion  is  switched  from  ON  to  OFF,  the  information  regarding  the  fuel
economy is displayed.

Fuel Consumption Display

1

Ending Screen Display

2

3

-------------------------------------------------------------------------------------------------------------------------------------------------------------

YARIS_YARIS HATCHBACK_OM_OM99V59z_(U)

223

3-7. Fuel Economy Monitor

3

Wh
en Drivin

g

Because the average fuel economy indication on the instrument clus-
ter  display  is  linked  with  the  “Average  Fuel  Economy  History”  (Cur-
rent) indication on the center display, when one is reset the other is
also reset.
In addition, switching between reset and no reset of the average fuel
economy indication  on  the instrument cluster  display and  the “Aver-
age Fuel Economy History” (Current) indication on the center display
when resetting the trip meter (Trip A) is possible.

X: Reset

-: Not reset

*

1

: Can be personalized. 

Refer to Customizable Features on P. 555.

Fuel Economy Data Reset and Trip Meter (TRIP A) Synchroniza-
tion (Linking)

Reset operation item

Synchronized (linked) and reset information

Trip meter 

(Trip A)

Average fuel 

economy on 

instrument 

cluster display

“Average Fuel 

Economy 

History” 

(Current) indi-

cation on the 

center display

Trip meter (Trip A)

X

X/-

*

1

X/-

*

1

Average fuel economy on
instrument cluster display

-

X

X

“Average  Fuel  Economy
History”  (Current)  indica-
tion on the center display

-

X

X

-------------------------------------------------------------------------------------------------------------------------------------------------------------

224

YARIS_YARIS HATCHBACK_OM_OM99V59z_(U)

3-8. Drive Selection

Drive Selection (Automatic Transaxle)

When the sport mode is selected, driving at higher engine speeds increases
and it may increase fuel consumption. Toyota recommends that you cancel
the sport mode on normal driving.

Drive mode cannot be switched in the following conditions:
• ABS/TCS/DSC is operating
• Cruise control is operating.
• Steering wheel is being operated abruptly

Press the drive selection switch to
the 

 side (forward) to select

the sport mode.
Pull  the  drive  selection  switch  to
the 

 side (backward) to cancel

the sport mode.

In the following cases, the drive selection is canceled.
• The ignition is switched OFF.
• Cruise control is set.

Depending on the driving conditions when sport mode is selected, the vehi-
cle may perform shift-down or slightly accelerate.

Drive selection is a system to switch the vehicle’s drive mode.
When  the  sport  mode  is  selected,  vehicle’s  response  against
accelerator  operation  is  enhanced.  This  provides  additional
quick acceleration which may be needed to safely make maneu-
vers such as lane changes, merging onto free ways, or passing
other vehicles.

WARNING

Do not use the sport mode when driving on slippery roads such as wet or
snow-covered roads. It may cause tire slipping.

Drive Selection Switch

-------------------------------------------------------------------------------------------------------------------------------------------------------------

YARIS_YARIS HATCHBACK_OM_OM99V59z_(U)

225

3-8. Drive Selection

3

Wh
en Drivin

g

When the sport mode is selected,
the  select  mode  indicator  light
turns on in the combination meter.

If the mode cannot be switched to drive mode, the select mode indicator light
flashes to notify the driver.

Select Mode Indicator Light

-------------------------------------------------------------------------------------------------------------------------------------------------------------

226

YARIS_YARIS HATCHBACK_OM_OM99V59z_(U)

3-9. Power Steering

Power Steering

• Power steering is only operable when the engine is running. If the

engine is off or if the power steering system is inoperable, you can
still steer, but it requires more physical effort.
If the steering feels stiffer than usual during normal driving  or the
steering vibrates, consult your Toyota dealer.

• The  warning  light  notifies  the  driver  of  system  abnormalities  and

operation conditions. 
In addition, the buzzer may also activate depending on the system
abnormality or operation condition.
Refer to Stop Vehicle in Safe Place Immediately on P. 489. 
Refer to Power Steering Warning Buzzer on P. 505.

NOTICE

Never hold the steering wheel to the extreme left or right for more than 5
seconds  with  the  engine  running.  This  could  damage  the  power  steering
system.

-------------------------------------------------------------------------------------------------------------------------------------------------------------

227

YARIS_YARIS HATCHBACK_OM_OM99V59z_(U)

3-10. Active Safety System

3

Wh
en Drivin

g

Active Safety System

Pre-Crash Safety Technology

Pre-crash  safety  technology  is  designed  to  assist  the  driver  in
averting collisions or reduce their severity in situations where they
cannot be avoided.

Collision damage reduction in low vehicle speed range
Forward driving:
Low Speed Pre-Collision System (

P. 228)

Sensor

Laser sensor
The laser sensor emits a near-infrared laser beam and receives
the  beam  reflected  off  the  reflective  surface  of  a  vehicle  or
obstruction in front, and the detected beam is then used for mea-
surement. The laser sensor is used for the Low Speed Pre-Colli-
sion System.
The laser sensor is installed at the top of the windshield near the
rearview mirror. 
Refer to Laser Sensor on P. 234.

-------------------------------------------------------------------------------------------------------------------------------------------------------------

228

YARIS_YARIS HATCHBACK_OM_OM99V59z_(U)

3-10. Active Safety System

Low Speed Pre-Collision System

The  Low  Speed  Pre-Collision  System  is  designed  to  reduce
damage in the event of a collision by operating the brake control
(Low  Speed  Pre-Collision  System  brake)  when  the  system’s
laser sensor detects a vehicle ahead and determines that a colli-
sion with a vehicle ahead is unavoidable. It may also be possible
to  avoid  a  collision  if  the  relative  speed  between  your  vehicle
and a vehicle ahead is less than about 12 mph (20 km/h).
In addition, when the driver depresses the brake pedal while the
system  is  in  the  operation  range  at  about  2  to  18  mph  (4  to
30 km/h),  the  brakes  are  applied  firmly  and  quickly  to  assist.
(Brake Assist (Low Speed Pre-Collision System brake assist))

Laser sensor

-------------------------------------------------------------------------------------------------------------------------------------------------------------

YARIS_YARIS HATCHBACK_OM_OM99V59z_(U)

229

3-10. Active Safety System

3

Wh
en Drivin

g

The Low Speed Pre-Collision System will not operate if the driver is deliber-
ately performing driving operations (accelerator pedal and steering wheel).

The Low Speed Pre-Collision System will operate under the following condi-
tions.
• The engine is running.
• The Low Speed Pre-Collision System warning light (amber) does not illu-

minate.

• The vehicle speed is between about 2 to 18 mph (4 to 30 km/h).
• The Low Speed Pre-Collision System is not turned off.
• The DSC is not malfunctioning.

The Low Speed Pre-Collision System detects a vehicle ahead by emitting a
near-infrared laser beam and receiving the beam reflected off the reflector
of the vehicle ahead, and then using it for the measurement. Consequently,
the Low Speed Pre-Collision System may not operate under the following
conditions:
• Reflection of the laser is poor due to the shape of the vehicle ahead.
• The vehicle ahead is significantly dirty.
• Under bad weather condition, such as rain, fog and snow.
• The window washer is being used or the windshield wipers are not used

when it’s raining.

• The windshield is dirty.
• The  steering  wheel  is  turned  completely  left  or  right,  or  the  vehicle  is

accelerated rapidly and comes close to the vehicle ahead.

• Trucks with low loading platforms and vehicles with an extremely low or

high profile.

• Vehicles with certain shapes such as a vehicle carrier.

Under  the  following  conditions,  the  Low  Speed  Pre-Collision  System  may
not operate normally.
• Heavy luggage is loaded in the luggage compartment or on the rear seat.
• If there is the possibility of partial contact with a vehicle ahead.
• When  driving  on  continuously  curving  roads,  and  entering  and  exiting

exits.

• Elongated luggage or cargo is loaded onto installed roof rails and covers

the laser sensor.

• Exhaust gas from the vehicle in front, sand, snow, and water vapor rising

from manholes and grating, and water splashed into the air.

• When towing a malfunctioning vehicle.
• When driving with tires having significantly different wear.

-------------------------------------------------------------------------------------------------------------------------------------------------------------

230

YARIS_YARIS HATCHBACK_OM_OM99V59z_(U)

3-10. Active Safety System

In  the  following  cases,  the  laser  sensor  may  inadvertently  determine  that
there is a vehicle ahead and the Low Speed Pre-Collision System may oper-
ate.
• Objects on the road at the entrance to a curve.
• Vehicles passing in the opposite lane while making a curve.
• Metal objects, bumps, or protruding objects on the road.
• When passing through a toll gate equipped with a bar.
• When passing under a vinyl curtain or flag.
• Plastic objects such as pylons.
• Two-wheeled vehicles, pedestrians, animals or standing trees.

Manual transaxle:
If the vehicle is stopped by the Low Speed Pre-Collision System operation
and the clutch pedal is not depressed, the engine stops.

The Low Speed Pre-Collision System warning light (amber) turns on when
the system has a malfunction.
Refer to Warning Lights on P. 173.

-------------------------------------------------------------------------------------------------------------------------------------------------------------

YARIS_YARIS HATCHBACK_OM_OM99V59z_(U)

231

3-10. Active Safety System

3

Wh
en Drivin

g

WARNING

Do not rely on the Low Speed Pre-Collision System as a substitute for
safer driving

The  Low  Speed  Pre-Collision  System  cannot  compensate  for  unsafe  and
reckless driving, excessive speed, tailgating (following another vehicle too
closely), and driving on slippery roads such as wet, snowy, and icy roads
(reduced  tire  friction  and  road  contact  because  of  water  on  the  road  sur-
face). You can still have an accident.

Do not rely completely on the Low Speed Pre-Collision System

The Low Speed Pre-Collision System is only designed to reduce damage
in  the  event  of  a  collision.  Over  reliance  on  the  system  leading  to  the
accelerator pedal or brake pedal being mistakenly operated could result in
an accident.

The  Low  Speed  Pre-Collision  System  is  a  system  which  operates  in
response  to  a  vehicle  ahead.  The  system  may  not  be  able  to  detect  or
react to two-wheeled vehicles or pedestrians.

The laser sensor for the Low Speed Pre-Collision System is installed near
the rearview mirror. To assure the correct operation of the Low Speed Pre-
Collision System, heed the following cautions.
• Do  not  apply  stickers  to  the  surface  of  the  windshield  near  the  laser

sensor  (including  transparent  stickers).  Otherwise,  the  laser  sensor
may not be able to detect vehicles ahead which could result in an acci-
dent.

• Do not apply coating agent to the windshield. Otherwise, the laser sen-

sor  may  not  be  able  to  detect  vehicles  or  obstructions  in  front  which
could result in an accident.

• Do not disassemble the laser sensor.
• If cracks or damage caused by flying gravel or debris is visible near

the  laser  sensor,  stop  using  the  Low  Speed  Pre-Collision  System
immediately and have your vehicle inspected by your Toyota dealer. If
the vehicle continues to be driven with cracks or scratch marks left on
the windshield near the laser sensor, the system may operate unnec-
essarily and cause an unexpected accident.
Refer to Stopping The Low Speed Pre-Collision System Operation on
P. 233.

• When  replacing  the  windshield  wipers  or  windshield,  consult  your

Toyota dealer.

The laser sensor includes a function for detecting a soiled windshield and
informing  the  driver,  however,  depending  on  the  conditions,  it  may  not
detect  plastic  shopping  bags,  ice  or  snow  on  the  windshield.  In  such
cases, the system cannot accurately determine a vehicle ahead and may
not be able to operate normally. Always drive carefully and pay attention to
the road ahead.

-------------------------------------------------------------------------------------------------------------------------------------------------------------

232

YARIS_YARIS HATCHBACK_OM_OM99V59z_(U)

3-10. Active Safety System

If  the  Low  Speed  Pre-Collision
System is operating, the indicator
light (red) flashes.

WARNING

Do not modify the suspension

If the vehicle height or inclination is changed, the system will not be able to
correctly detect vehicles ahead. This will result in the Low Speed Pre-Colli-
sion  System  not  operating  normally  or  mistakenly  operating,  which  could
cause a serious accident.

Turn off the Low Speed Pre-Collision System when the vehicle is run-
ning on a chassis roller or being towed

Turn off the Low Speed Pre-Collision System to prevent mistaken operation
when the vehicle is running on a chassis roller or being towed. 
Refer to Stopping The Low Speed Pre-Collision System Operation on P. 233.

NOTICE

When driving off-road in areas where there is grass or forage, it is recom-
mended that the Low Speed Pre-Collision System be turned off.

Always use tires for all wheels that are of the specified size, and the same
manufacturer, brand, and tread pattern. In addition, do not use tires with
significantly different wear patterns on the same vehicle as the Low Speed
Pre-Collision System may not operate normally.

Low Speed Pre-Collision System Indicator Light (Red)

-------------------------------------------------------------------------------------------------------------------------------------------------------------

YARIS_YARIS HATCHBACK_OM_OM99V59z_(U)

233

3-10. Active Safety System

3

Wh
en Drivin

g

The Low Speed Pre-Collision System can be temporarily deactivated.
When  the  Low  Speed  Pre-Colli-
sion System is turned off, the Low
Speed  Pre-Collision  System  OFF
indicator light turns on.

When  the  engine  is  restarted,  the
system becomes operational.

Without Low Speed Pre-Collision System OFF switch

Refer to Customizable Features on P. 555.

With Low Speed Pre-Collision System OFF switch

Press  the  Low  Speed  Pre-Colli-
sion System OFF switch to turn off
the  system. The  Low  Speed  Pre-
Collision  System  OFF  indicator
light in the combination meter will
illuminate.

Press  the  switch  again  to  turn  the
system  back  on.  The  Low  Speed
Pre-Collision System OFF indicator
light will turn off.

Stopping the Low Speed Pre-Collision System Operation

-------------------------------------------------------------------------------------------------------------------------------------------------------------

234

YARIS_YARIS HATCHBACK_OM_OM99V59z_(U)

3-10. Active Safety System

Laser Sensor

Always  keep  the  surface  of  the
windshield  around  the  laser  sen-
sor clean to assure proper opera-
tion  of  the  Low  Speed  Pre-
Collision System.

The Low Speed Pre-Collision System laser sensor is installed at
the top of the windshield near the rearview mirror.

WARNING

As  there  is  the  possibility  of  eye  damage  occurring  from  the  laser,
always heed the following precautions

Never remove the sensor.

A removed sensor will not meet the conditions for a class 1M laser under
the IEC 60825-1 specification and therefore eye safety cannot be assured.

Do not peer into the sensor using optical instruments with a magnification
function  such  as  magnifying  glasses,  and  microscopic  and  objective
lenses within a distance of 3.94 in. (100 mm) from the sensor.

-------------------------------------------------------------------------------------------------------------------------------------------------------------

YARIS_YARIS HATCHBACK_OM_OM99V59z_(U)

235

3-10. Active Safety System

3

Wh
en Drivin

g

WARNING

Laser sensor radiation data 
Maximum average power: 45 mW 
Pulse duration: 33 ns 
Wavelength: 905 nm 
Divergence angle (horizontal 

 vertical): 28 degrees 

 12 degrees

-------------------------------------------------------------------------------------------------------------------------------------------------------------

236

YARIS_YARIS HATCHBACK_OM_OM99V59z_(U)

3-11. Cruise Control

Cruise Control

OFF/CAN switch
ON switch
RES/+ switch
SET/- switch

With cruise control, you can set and automatically maintain any
speed of more than about 16 mph (25 km/h).

WARNING

Do not use the cruise control under the following conditions

Using  the  cruise  control  under  the  following  conditions  is  dangerous  and
could result in loss of vehicle control.

Hilly terrain

Steep inclines

Heavy or unsteady traffic

Slippery or winding roads

Similar restrictions that require inconsistent speed

Cruise Control Switch

1
2
3
4

-------------------------------------------------------------------------------------------------------------------------------------------------------------

YARIS_YARIS HATCHBACK_OM_OM99V59z_(U)

237

3-11. Cruise Control

3

Wh
en Drivin

g

Cruise main indication (white)

The  cruise  main  indication
(white)  is  displayed  in  the
instrument  cluster  when  the
cruise  control  system  is  acti-
vated.

Cruise set indication (white)/indicator light (green)

The cruise set indication (white)
is  displayed  in  the  instrument
cluster  and  the  cruise  set  indi-
cator  light  (green)  turns  on
when  a  cruising  speed  has
been set.

To activate the system, press the ON switch. The cruise main indica-
tion (white) is displayed.
To deactivate the system, press the OFF/CAN switch.
The cruise main indication (white) turns off.

When the ignition is switched OFF, the system status before it was turned off
is  maintained.  For  example,  if  the  ignition  is  switched  OFF  with  the  cruise
control  system  operable,  the  system  will  be  operable  when  the  ignition  is
switched ON the next time.

Cruise  Main  Indication  (White),  Cruise  Set  Indication  (White)/
Indicator Light (Green)

Activation/Deactivation

WARNING

Always turn off the cruise control system when it is not in use

Leaving  the  cruise  control  system  in  an  activation-ready  state  while  the
cruise control is not in use is dangerous as the cruise control could unex-
pectedly activate if the activation button is accidentally pressed, and result
in loss of vehicle control and an accident.

-------------------------------------------------------------------------------------------------------------------------------------------------------------

238

YARIS_YARIS HATCHBACK_OM_OM99V59z_(U)

3-11. Cruise Control

Activate the cruise control system by pressing the ON switch. The
cruise main indication (white) is displayed.
Accelerate to the desired speed, which must be more than 16 mph
(25 km/h).
Set the cruise control by pressing the SET/  switch at the desired
speed. The cruise control is set at the moment the SET/  switch is
pressed. Release the accelerator pedal simultaneously. The cruise
set indication (white) is displayed and the cruise set indicator light
(green) turns on.

The  cruise control speed  setting cannot be  performed under  the following
conditions:
• Manual transaxle: The shift lever is in the neutral position.
• Automatic transaxle: The selector lever is in the P or N position.
• The parking brake is applied.

Release  the  SET/   or  RES/   switch  at  the  desired  speed,  otherwise  the
speed will continue increasing while the RES/  switch is pressed and held,
and  continue  decreasing  while  the  SET/   switch  is  pressed  and  held
(except when the accelerator pedal is depressed).

On a steep grade, the vehicle may momentarily slow down while ascending,
or speed up while descending.

The cruise control will cancel if the vehicle speed decreases below 13 mph
(21 km/h) when climbing a steep grade.

The cruise control may cancel at about 9 mph (15 km/h) below the preset
speed such as when climbing a long, steep grade.

To Set Speed

1

2

3

-------------------------------------------------------------------------------------------------------------------------------------------------------------

YARIS_YARIS HATCHBACK_OM_OM99V59z_(U)

239

3-11. Cruise Control

3

Wh
en Drivin

g

Follow either of these procedures.

To increase speed using cruise control switch

Press  the  RES/   switch  and  hold  it. Your  vehicle  will  accelerate.
Release the switch at the desired speed.
Press  the  RES/   switch  and  release  it  immediately  to  adjust  the
preset  speed.  Multiple  operations  will  increase  the  preset  speed
according to the number of times it is operated.

Increasing speed with a single RES/  switch operation
Instrument cluster display for vehicle speed indicated in mph: 
1 mph (1.6 km/h)
Instrument cluster display for vehicle speed indicated in km/h: 
1 km/h (0.6 mph)

To increase speed using accelerator pedal

Depress the accelerator pedal to accelerate to the desired speed.
Press the SET/  switch and release it immediately.

Accelerate if you want to speed up temporarily when the cruise control
is  on.  Greater  speed  will  not  interfere  with  or  change  the  set  speed.
Take your foot off the accelerator to return to the set speed.

Press the SET/  switch and hold it. The vehicle will gradually slow.
Release the switch at the desired speed.
Press the SET/  switch and release it immediately to adjust the pre-
set speed. Multiple operations will decrease the preset speed accord-
ing to the number of times it is operated.

Decreasing speed with a single SET/  switch operation
Instrument cluster display for vehicle speed indicated in mph: 
1 mph (1.6 km/h)
Instrument cluster display for vehicle speed indicated in km/h: 
1 km/h (0.6 mph)

To Increase Cruising Speed

To Decrease Cruising Speed

-------------------------------------------------------------------------------------------------------------------------------------------------------------

240

YARIS_YARIS HATCHBACK_OM_OM99V59z_(U)

3-11. Cruise Control

If  the  cruise  control  system  temporarily  canceled  (such  as  applying
the brake pedal) and the system is still activated, the most recent set
speed will automatically resume when the RES/  switch is pressed.
If  vehicle  speed  is  below  16  mph  (25  km/h),  increase  the  vehicle
speed up to 16 mph (25 km/h) or more and press the RES/  switch.

To temporarily cancel the system, use one of these methods:

• Slightly depress the brake pedal.
• Manual transaxle: Depress the clutch pedal.
• Press the OFF/CAN switch.

If the RES/  switch is pressed when the vehicle speed is 16 mph (25
km/h) or higher, the system reverts to the previously set speed.

If any of the following conditions occur, the cruise control system is tempo-
rarily canceled.
• The parking brake is applied.
• Manual transaxle: The shift lever is in the neutral position.
• Automatic transaxle: The selector lever is in the P or N position.

When the cruise control system is temporarily canceled by even one of the
applicable cancel conditions, the speed cannot be re-set.

Automatic transaxle:
The cruise control cannot be cancelled while driving in manual mode (selec-
tor lever shifted from D to M position). Therefore, engine braking will not be
applied even if the transaxle is shifted down to a lower gear. If deceleration
is required, lower the set speed or depress the brake pedal.

When  a  cruising  speed  has  been  set  (cruise  set  indication
(white) is displayed/cruise set indicator light (green) turns on)

Long-press  the  OFF/CAN  switch  or  press  the  OFF/CAN  switch  2
times.

When a cruising speed has not been set (cruise main indica-
tion (white) is displayed)

Press the OFF/CAN switch.

To Resume Cruising Speed at More Than 16 mph (25 km/h)

To Temporarily Cancel

To Deactivate

-------------------------------------------------------------------------------------------------------------------------------------------------------------

241

YARIS_YARIS HATCHBACK_OM_OM99V59z_(U)

3-12. Tire Pressure Monitoring System

3

Wh
en Drivin

g

Tire Pressure Monitoring System

The system monitors the tire pres-
sures  indirectly  using  the  data
sent  from  the  ABS  wheel  speed
sensors.

To allow the system to operate correctly, the system needs to be ini-
tialized  with  the  specified  tire  pressure  (value  on  the  tire  pressure
label). Follow the procedure and perform the initialization.
Refer to Tire Pressure Monitoring System Initialization on P. 244
The warning light flashes when the system has a malfunction.
Refer to Warning Lights on P. 173.

: If equipped

The  Tire  Pressure  Monitoring  System  (TPMS)  monitors  the  air
pressure of all four tires. If the air pressure of one or more tires
is  too  low,  the  system  warns  the  driver  by  indicating  the  tire
pressure  monitoring  system  warning  light  in  the  combination
meter and operating a beep sound. 

ABS wheel speed sensor

-------------------------------------------------------------------------------------------------------------------------------------------------------------

242

YARIS_YARIS HATCHBACK_OM_OM99V59z_(U)

3-12. Tire Pressure Monitoring System

Because this system detects slight changes in tire conditions, the timing

of the warning may be faster or slower in the following cases:

The size, manufacturer, or the type of tires is different from the specifica-

tion.

The size, manufacturer, or the type of a tire is different from the others,

or the level of tire wear is excessively different between them.

A run-flat tire, studless tire, snow tire, or tire chains are used.

An emergency tire is used (The tire pressure monitoring system warning

light may flash and then continue illuminating).

A tire is repaired using the emergency flat tire repair kit.

The tire pressure is excessively higher than the specified pressure, or

the  tire  pressure  is  suddenly  lowered  for  some  reason  such  as  a  tire

burst during driving.

The  vehicle  speed  is  lower  than  about  9.3  mph  (15  km/h)  (including

when the vehicle is stopped), or the drive period is shorter than 5 min-

utes.

The vehicle is driven on an extremely rough road or a slippery, icy road.

Hard steering and rapid acceleration/deceleration are repeated such as

during aggressive driving on a winding road.

Load on the vehicle is applied to a tire such as by loading heavy luggage

to one side of the vehicle.

System  initialization  has  not  been  implemented  with  the  specified  tire

pressure.

-------------------------------------------------------------------------------------------------------------------------------------------------------------

YARIS_YARIS HATCHBACK_OM_OM99V59z_(U)

243

3-12. Tire Pressure Monitoring System

3

Wh
en Drivin

g

NOTICE

Each tire, including the spare (if provided), should be checked monthly

when cold and inflated to the inflation pressure recommended by the

vehicle  manufacturer  on  the  vehicle  placard  or  tire  inflation  pressure

label. (If your vehicle has tires of a different size than the size indicated

on the vehicle placard or tire inflation pressure label, you should deter-

mine the proper tire inflation pressure for those tires.)

As an added safety feature, your vehicle has been equipped with a tire

pressure  monitoring  system  (TPMS)  that  illuminates  a  low  tire  pres-

sure  telltale  when  one  or  more  of  your  tires  is  significantly  under-

inflated. Accordingly,  when  the  low  tire  pressure  telltale  illuminates,

you should stop and check your tires as soon as possible, and inflate

them  to  the  proper  pressure.  Driving  on  a  significantly  under-inflated

tire causes the tire to overheat and can lead to tire failure. Under-infla-

tion also reduces fuel efficiency and tire tread life, and may affect the

vehicle’s handling and stopping ability.

Please note that the TPMS is not a substitute for proper tire mainte-

nance, and it is the driver’s responsibility to maintain correct tire pres-

sure,  even  if  under-inflation  has  not  reached  the  level  to  trigger

illumination of the TPMS low tire pressure telltale.

Your vehicle has also been equipped with a TPMS malfunction indica-

tor to indicate when the system is not operating properly.

The TPMS malfunction indicator is combined with the low tire pressure

telltale. When the system detects a malfunction, the telltale will flash

for  approximately  one  minute  and  then  remain  continuously  illumi-

nated. This sequence will continue upon subsequent vehicle start-ups

as  long  as  the  malfunction  exists.  When  the  malfunction  indicator  is

illuminated,  the  system  may  not  be  able  to  detect  or  signal  low  tire

pressure as intended. TPMS malfunctions may occur for a variety of

reasons, including the installation of replacement or alternate tires or

wheels on the vehicle that prevent the TPMS from functioning properly.

Always  check  the  TPMS  malfunction  telltale  after  replacing  one  or

more tires or wheels on your vehicle to ensure that the replacement or

alternate tires and wheels allow the TPMS to continue to function prop-

erly.

To  avoid  false  readings,  the  system  samples  for  a  little  while  before

indicating a problem. As a result it will not instantaneously register a

rapid tire deflation or blow out.

-------------------------------------------------------------------------------------------------------------------------------------------------------------

244

YARIS_YARIS HATCHBACK_OM_OM99V59z_(U)

3-12. Tire Pressure Monitoring System

In the following cases, system initialization must be performed so that
the system operates normally.

• A tire pressure is adjusted.
• Tire rotation is performed.
• A tire or wheel is replaced.
• The battery is replaced or completely drained.
• The tire pressure monitoring system warning light is illuminated.

Initialization method

Park the car in a safe place and firmly apply the parking brake.
Let the tires cool, then adjust the tire pressure of all four (4) tires
to  the  specified  pressure  indicated  on  the  tire  pressure  label
located on the door jamb of the driver’s door (door open).
Refer to Tires on P. 553.
Switch the ignition ON.
While  the  vehicle  is  parked,
press and hold the tire pres-
sure  monitoring  system  set
switch and verify that the tire
pressure  monitoring  system
warning light in the combina-
tion  meter  flashes  twice  and
a beep sound is heard once.

Tire Pressure Monitoring System Initialization

1

2

3

4

NOTICE

If the system initialization is performed without  adjusting the tire pres-

sure, the system cannot detect the normal tire pressure and it may not

illuminate the tire pressure monitoring system warning light even if a tire

pressure is low, or it may illuminate the light even if the pressures are

normal.
Adjust the tire pressure on all four tires and initialize the system when

the warning light is turned on. If the warning light turns on for a reason

other  than  a  flat  tire,  the  tire  pressure  of  all  four  tires  may  have

decreased naturally.
The system initialization will not be performed if the switch is pressed

while the vehicle is being driven.

-------------------------------------------------------------------------------------------------------------------------------------------------------------

245

YARIS_YARIS HATCHBACK_OM_OM99V59z_(U)

3-13. Rear View Monitor

3

Wh
en Drivin

g

Rear View Monitor

If water, snow, or mud is stuck on the camera lens, wipe it off using a soft
cloth. If it cannot be wiped off, use a mild detergent.

If the camera temperature changes rapidly (Hot to cold, cold to hot), the rear
view monitor may not operate correctly.

When  replacing  the  tires,  consult  your  Toyota  dealer.  Replacing  the  tires
could result in deviation of the guide lines which appear on the display.

If the vehicle’s front, side, or rear has been involved in a collision, the align-
ment of the rear view parking camera (location, installation angle) may have
deviated. Always consult your Toyota dealer to have the vehicle inspected.

If  “No  Video  Signal Available”  is  indicated  in  the  display,  there  could  be  a
problem  with  the  camera.  Have  your  vehicle  inspected  at  your  Toyota
dealer.

The rear view monitor provides visual images of the rear of the
vehicle when reversing.

WARNING

Always  drive  carefully  confirming  the  safety  of  the  rear  and  the  sur-
rounding conditions by looking directly with your eyes

Reversing the vehicle by only looking at the screen is dangerous as it may
cause an accident or a collision with an object. The rear view monitor is only
a visual assist device when reversing the vehicle. The images on the screen
may be different from the actual conditions.

Do not use the rear view monitor under the following conditions

Using the rear view monitor under the following conditions is dangerous and
could result in injury or vehicle damage or both.

Icy or snow-covered roads.

Tire chains or a temporary spare tire is installed.

The liftgate/trunk lid is not fully closed.

The vehicle is on a road incline.

Rear view monitor display precautions in cold temperatures

When  the  display  is  cold,  images  may  course  across  the  monitor  or  the
screen and may be dimmer than usual, which could cause difficulty in con-
firming the surrounding conditions of the vehicle. Always drive carefully con-
firming  the  safety  of  the  rear  and  the  surrounding  conditions  by  looking
directly with your eyes.

-------------------------------------------------------------------------------------------------------------------------------------------------------------

246

YARIS_YARIS HATCHBACK_OM_OM99V59z_(U)

3-13. Rear View Monitor

Shift the shift lever to R with the ignition switched ON to switch the dis-
play to the rear view monitor display.

When  the  shift  lever  is  shifted  from  R  to  another  shift  lever  position,  the
screen returns to the previous display.

NOTICE

Do  not  apply  excessive  force  to  the  camera.  The  camera  position  and
angle may deviate.

Do  not  disassemble,  modify,  or  remove  it  as  it  may  no  longer  be  water-
proof.

The  camera  cover  is  made  of  plastic.  Do  not  apply  degreasing  agents,
organic solvents, wax, or glass coating agents to the camera cover. If any
are spilled on the cover, wipe off with a soft cloth immediately.

Do not rub the camera cover forcefully with an abrasive or hard brush. The
camera cover or lens may be scratched which might affect the images.

Rear View Parking Camera Location

4-Door

5-Door

Switching to the Rear View Monitor Display

Rear View Parking Camera

Rear View Parking Camera

-------------------------------------------------------------------------------------------------------------------------------------------------------------

YARIS_YARIS HATCHBACK_OM_OM99V59z_(U)

247

3-13. Rear View Monitor

3

Wh
en Drivin

g

The images on the screen may be different from the actual conditions.

Screen display

Actual view

Displayable Range on the Screen

Trunk lid

Bumper

Object

-------------------------------------------------------------------------------------------------------------------------------------------------------------

248

YARIS_YARIS HATCHBACK_OM_OM99V59z_(U)

3-13. Rear View Monitor

The displayable range varies depending on the vehicle and road conditions.

The displayable range is limited. Objects under the bumper or around the
bumper ends cannot be displayed.

The distance appearing in the displayed image is different from the actual
distance because the rear view parking camera is equipped with a specific
lens.

Some optionally installed vehicle accessories may be picked up by the cam-
era. Do not install any optional parts that can interfere with the camera view,
such as illuminating parts or parts made of reflective material.

It may be difficult to see the display under the following conditions, however,
it does not indicate a malfunction.
• In darkened areas.
• When the temperature around the lens is high/low.
• When the camera is wet such as on a rainy day or during periods of high

humidity.

• When foreign material such as mud is stuck around the camera.
• When the camera lens reflects sunlight or headlight beams.

Image display may be delayed if the temperature around the camera is low.

-------------------------------------------------------------------------------------------------------------------------------------------------------------

YARIS_YARIS HATCHBACK_OM_OM99V59z_(U)

249

3-13. Rear View Monitor

3

Wh
en Drivin

g

Guide  lines  which  indicate  the  width  of  the  vehicle  (yellow)  are  dis-
played on the screen as a reference to the approximate width of the
vehicle in comparison to the width of the parking space you are about
to back into.
Use this display view for parking your vehicle in a parking space or
garage.

Vehicle  width  guide  lines  (yel-
low)
These  guide  lines  serve  as  a
reference  to  the  approximate
width of the vehicle.
Distance guide lines
These  guide  lines  indicate  the
approximate distance to a point
measured  from  the  vehicle’s
rear  (from  the  end  of  the
bumper).

The red and yellow lines indicate the points about 19 in. (500 mm)
for the red line and 39.3 in. (1000 mm) for the yellow lines from the
rear bumper (at the center point of each of the lines).

Viewing the Display

1

2

WARNING

The guide lines on the screen are fixed lines. They are not synced to the
driver’s turning of the steering wheel. Always be careful and check the area
to the vehicle’s rear and the surrounding area directly with your eyes while
backing up.

-------------------------------------------------------------------------------------------------------------------------------------------------------------

250

YARIS_YARIS HATCHBACK_OM_OM99V59z_(U)

3-13. Rear View Monitor

The operation of the rear view monitor when reversing the vehicle var-
ies depending on the traffic, road, and vehicle conditions. The amount
of  steering  and  the  timing  also  varies  depending  on  conditions,  so
confirm the surrounding conditions directly with your eyes and  steer
the vehicle in accordance with the conditions.
Be well aware of the above cautions prior to using the rear view moni-
tor.

Shift the shift lever to R to switch the display to the rear view moni-
tor display.
Confirming the surrounding conditions, reverse the vehicle.

After  your  vehicle  begins  entering  the  parking  space,  continue
backing  up  slowly  so  that  the  distance  between  the  vehicle  width
lines  and  the  sides  of  the  parking  space  on  the  left  and  right  are
roughly equal.
Continue to adjust the steering wheel until the vehicle width guide
lines are parallel to the left and right sides of the parking space.

Rear View Monitor Operation

1

2

(Display condition)

(Vehicle condition)

3

4

-------------------------------------------------------------------------------------------------------------------------------------------------------------

YARIS_YARIS HATCHBACK_OM_OM99V59z_(U)

251

3-13. Rear View Monitor

3

Wh
en Drivin

g

Once they are parallel, straighten the wheels and back your vehicle
slowly into the parking space. Continue checking the vehicle’s sur-
roundings and then stop the vehicle in the best possible position. (If
the  parking  space  has  division  lines,  check  whether  the  vehicle
width guide lines are parallel to them.)

When the shift lever is shifted from R to another shift lever position,
the screen returns to the previous display.

Images  displayed  on  the  monitor  from  the  rear  view  parking  camera  are
reversed images (mirror images).

Because there may be a difference between the displayed image, such as
indicated below, and the actual conditions when parking, always verify the
safety at the rear of the vehicle and the surrounding area directly with your
eyes.
• In  the  image  of  the  parking  space  (or  garage)  displayed  below,  even

though the back end and distance guide lines appear parallel in the mon-
itor, they may not actually be parallel on the ground.

5

(Display condition)

(Vehicle condition)

6

-------------------------------------------------------------------------------------------------------------------------------------------------------------

252

YARIS_YARIS HATCHBACK_OM_OM99V59z_(U)

3-13. Rear View Monitor

Some  variance  occurs  between  the  actual  road  and  the  displayed
road. Such variance in distance perspective could lead to an accident.
Note the following conditions that may cause a variance in distance
perspective.

When the vehicle is tilted due to the weight of passengers and
load

When  the  vehicle  rear  is  lowered,  the  object  displayed  on  the
screen appears farther than the actual distance.

• When parking in a space with a divi-

sion line on only one side of the park-
ing  space,  the  division  line  and  the
vehicle  width  guide  line  may  appear
parallel on the monitor, but they may
not actually be parallel on the ground.

Variance Between Actual Road Conditions and Displayed Image

Object

Variance

-------------------------------------------------------------------------------------------------------------------------------------------------------------

YARIS_YARIS HATCHBACK_OM_OM99V59z_(U)

253

3-13. Rear View Monitor

3

Wh
en Drivin

g

When there is a steep grade behind the vehicle

When there is a steep upgrade (downgrade) behind the vehicle, the
object displayed on the screen appears farther (downgrade: closer)
than the actual distance.

Three-dimensional object on vehicle rear

Because the distance guide lines are displayed based on a flat sur-
face, the distance to the three-dimensional object displayed on the
screen is different from the actual distance.

Sensed distance on screen: 

>

>

Actual distance: 

>

=

Appears 
farther than 
actual distance

Appears 
closer than 
actual distance

Object at actual position

Object on screen

Object at actual position

Object on screen

A: Distance between the vehicle and object displayed on the screen. 
B: Actual distance between the vehicle and object.

A

B

B

A

(Actual condition)

(Screen display)

1

2

3

2

3

1

-------------------------------------------------------------------------------------------------------------------------------------------------------------

254

YARIS_YARIS HATCHBACK_OM_OM99V59z_(U)

3-13. Rear View Monitor

Picture  quality  adjustment  can  be  done  while  the  shift  lever  is  in
reverse (R).
There are four settings which can be adjusted including, brightness,
contrast, tint, and color. When adjusting, pay sufficient attention to the
vehicle surroundings.

Select the 

 icon on the screen to display the tabs.

Select the desired tab item.
Adjust the brightness, contrast, tint, and color using the slider. 
If you need to reset, press the reset button.
Select the 

 icon on the screen to close the tab.

Picture Quality Adjustment

WARNING

Always  adjust  the  picture  quality  of  the  rear  view  monitor  while  the
vehicle is stopped

Do not adjust the picture quality of the rear view monitor while driving the
vehicle. Adjusting the picture quality of the rear view monitor such as bright-
ness,  contrast,  color,  and  tint  while  driving  the  vehicle  is  dangerous  as  it
could distract your attention from the vehicle operation which could lead to
an accident.

1

2

3

4

-------------------------------------------------------------------------------------------------------------------------------------------------------------

255

YARIS_YARIS HATCHBACK_OM_OM99V59z_(U)

4

Interior Features

4-1. Climate Control System

Operating Tips .................. 256
Vent Operation.................. 257
Manual Type ..................... 259
Fully Automatic Type ........ 266

4-2. Audio System

Antenna............................. 271
Operating Tips for Audio 

System............................ 273

Audio Set .......................... 283
Audio Control Switch 

Operation ........................ 304

AUX/USB mode ................ 307

4-3. Bluetooth

®

Bluetooth

®

......................... 327

Bluetooth

®

 Hands-Free..... 339

Bluetooth

®

 Audio .............. 353

Troubleshooting ................ 366

4-4. Interior Equipment

Sunvisors .......................... 374
Interior Lights .................... 375
Accessory Socket ............. 378
Cup Holder........................ 379
Bottle Holder ..................... 380
Storage Compartments..... 381

-------------------------------------------------------------------------------------------------------------------------------------------------------------

256

YARIS_YARIS HATCHBACK_OM_OM99V59z_(U)

4-1. Climate Control System

Operating Tips

• Operate the climate control system with the engine running.
• To prevent the battery from being discharged, do not leave the fan

control  dial on for a  long  period of  time  with the  ignition  switched
ON when the engine is not running.

• Clear all obstructions such as leaves, snow and ice from the hood

and the air inlet in the cowl grille to improve the system efficiency.

• Use the climate control system to defog the windows and dehumid-

ify the air.

• The recirculate mode should be used when driving through tunnels

or while in a traffic jam, or when you would like to shut off outside
air for quick cooling of the interior.

• Use the outside air position for ventilation or windshield defrosting.
• If the vehicle has been parked in direct sunlight during hot weather,

open the windows to let warm air escape, then run the climate con-
trol system.

• Run the air conditioner about 10 minutes at least once a month to

keep internal parts lubricated.

• Have the air conditioner checked before the weather gets hot. Lack

of refrigerant may make the air conditioner less efficient.
The  refrigerant  specifications
are  indicated  on  a  label
attached  to  the  inside  of  the
engine  compartment.  Check
the  label  before  refilling  the
refrigerant. If the wrong type of
refrigerant  is  used,  it  could
result  in  a  serious  malfunction
of the air conditioner.
For details, consult your Toyota
dealer.

Label

-------------------------------------------------------------------------------------------------------------------------------------------------------------

257

YARIS_YARIS HATCHBACK_OM_OM99V59z_(U)

4-1. Climate Control System

4

In

te

rior 

F

ea

tu

res

Vent Operation

Air vent open/close

The air vents can be fully opened and closed by operating the knob.

Directing airflow

To adjust the direction of airflow, move the adjustment knob.

When using the air conditioner under humid ambient temperature conditions,
the system may blow fog from the vents. This is not a sign of trouble but a
result of humid air being suddenly cooled.

Adjusting the Vents

Center  vents  (driver)  and  Side
vents

Center vents (front passenger)

Open
Close

Open
Close

Knob

Knob

1
2

1
2

Center  vents  (driver)  and  Side
vents

Center vents (front passenger)

Knob

Knob

-------------------------------------------------------------------------------------------------------------------------------------------------------------

258

YARIS_YARIS HATCHBACK_OM_OM99V59z_(U)

4-1. Climate Control System

Selecting the Airflow Mode

Dashboard Vents

Dashboard and Floor Vents

Floor Vents

Defroster and Floor Vents

Defroster Vents

-------------------------------------------------------------------------------------------------------------------------------------------------------------

259

YARIS_YARIS HATCHBACK_OM_OM99V59z_(U)

4-1. Climate Control System

4

In

te

rior 

F

ea

tu

res

Manual Type

Temperature control dial
A/C switch
Fan control dial
Rear window defogger switch

Mode selector dial
Air intake selector 
(recirculated air position)
Air intake selector 
(outside air position)

1
2
3
4

5
6

7

-------------------------------------------------------------------------------------------------------------------------------------------------------------

260

YARIS_YARIS HATCHBACK_OM_OM99V59z_(U)

4-1. Climate Control System

Temperature control dial

This dial controls temperature. Turn it clockwise for hot and coun-
terclockwise for cold.

Fan control dial

This dial allows variable fan speeds.
The fan has seven speeds.

Mode selector dial

Turn the mode selector dial to select airflow mode (

P. 258).

A/C switch

Press  the A/C  switch  to  turn  the  air  conditioner  on. The  indicator
light on the switch will illuminate when the fan control dial is in any
position except OFF.

Air intake selector

This switch controls the source of air entering the vehicle.
Press the air intake selector switch to alternate between the outside
air and recirculated air positions.

Recirculated air position (

)

Outside air is shut off. Air within the vehicle is recirculated.

Outside air position (

)

Outside air is allowed to enter the cabin. Use this mode for venti-
lation or windshield defrosting.

Control Switches

-------------------------------------------------------------------------------------------------------------------------------------------------------------

YARIS_YARIS HATCHBACK_OM_OM99V59z_(U)

261

4-1. Climate Control System

4

In

te

rior 

F

ea

tu

res

Temperature control dial

When the mode is set to 

 or 

 with the fan control dial in a position

other than 0 and the temperature control dial in the maximum cold position,
the  air  intake  selector  switches  to  the  recirculated  air  position  and  the A/C
turns on automatically. If A/C is not desired, press the A/C switch to turn it off.

Mode selector dial

The  mode  selector  dial  can  be  set  at  the  intermediate  positions  (

)

between each mode. Set the dial to an intermediate position if you want to
split the airflow between the two modes.

For example, when the mode selector dial is at the 

 position between

the 

 and 

 positions, airflow from the floor vent is less than that of

the 

 position.

A/C switch

The  air  conditioner  may  not  function  when  the  outside  temperature
approaches 32 °F (0 °C).

WARNING

Do not use the recirculated air position in cold or rainy weather

Using the recirculated air position in cold or rainy weather is dangerous as it
will cause the windows to fog up. Your vision will be hampered, which could
lead to a serious accident.

-------------------------------------------------------------------------------------------------------------------------------------------------------------

262

YARIS_YARIS HATCHBACK_OM_OM99V59z_(U)

4-1. Climate Control System

Set the mode selector dial to the 

 position.

Set the air intake selector to the outside air position.
Set the temperature control dial to the hot position.
Set the fan control dial to the desired speed.
If dehumidified heating is desired, turn on the air conditioner.

If the windshield fogs up easily, set the mode selector dial to the 

 posi-

tion.

If cooler air is desired at face level, set the mode selector dial to the 
position and adjust the temperature control dial to maintain maximum com-
fort.

The air to the floor is warmer than air to the face (except when the tempera-
ture control dial is set at the extreme hot or cold position).

Heating

1

2

3

4

5

-------------------------------------------------------------------------------------------------------------------------------------------------------------

YARIS_YARIS HATCHBACK_OM_OM99V59z_(U)

263

4-1. Climate Control System

4

In

te

rior 

F

ea

tu

res

Set the mode selector dial to the 

 position.

Set the temperature control dial to the cold position.
Set the fan control dial to the desired speed.
Turn on the air conditioner by pressing the A/C switch.
After  cooling  begins,  adjust  the  fan  control  dial  and  temperature
control dial as needed to maintain maximum comfort.

When maximum cooling is desired, set the temperature control dial to the
extreme cold position and set the air intake selector to the recirculated air
position, then turn the fan control dial fully clockwise.

If warmer air is desired at floor level, set the mode selector dial to the 
position and adjust the temperature control dial to maintain maximum com-
fort.

The air to the floor is warmer than air to the face (except when the tempera-
ture control dial is set at the extreme hot or cold position).

Cooling

NOTICE

If  the  air  conditioner  is  used  while  driving  up  long  hills  or  in  heavy  traffic,
monitor  the  engine  coolant  temperature  warning  light  to  see  if  it  is  illumi-
nated or flashing (

P. 164).

The  air  conditioner  may  cause  engine  overheating.  If  the  warning  light  is
illuminated or flashing, turn the air-conditioning off (

P. 484).

1

2

3

4

5

-------------------------------------------------------------------------------------------------------------------------------------------------------------

264

YARIS_YARIS HATCHBACK_OM_OM99V59z_(U)

4-1. Climate Control System

Set the mode selector dial to the 

 position.

Set the air intake selector to the outside air position.
Set the temperature control dial to the desired position.
Set the fan control dial to the desired speed.

Set the mode selector dial to the 

 position.

Set the temperature control dial to the desired position.
Set the fan control dial to the desired speed.
If dehumidified heating is desired, turn on the air conditioner.

For  maximum  defrosting,  turn  on  the  air  conditioner,  set  the  temperature
control  dial  to  the  extreme  hot  position,  and  turn  the  fan  control  dial  fully
clockwise.

If warm air is desired at the floor, set the mode selector dial to the 
position.

In the 

 or 

 position, the air conditioner is automatically turned on

and  the  outside  air  position  is  automatically  selected  to  defrost  the  wind-
shield.  In  the 

  or 

  position,  the  outside  air  position  cannot  be

changed to the recirculated air position.

Ventilation

Windshield Defrosting and Defogging

WARNING

Do not defog the windshield using the 

 position with the tempera-

ture control set to the cold position

Using the 

 position with the temperature control set to the cold posi-

tion  is  dangerous  as  it  will  cause  the  outside  of  the  windshield  to  fog  up.
Your vision will be hampered, which could lead to a serious accident. Set
the temperature control to the hot or warm position when using the 
position.

1

2

3

4

1

2

3

4

-------------------------------------------------------------------------------------------------------------------------------------------------------------

YARIS_YARIS HATCHBACK_OM_OM99V59z_(U)

265

4-1. Climate Control System

4

In

te

rior 

F

ea

tu

res

Operate the air conditioner in cool or cold weather to help defog the
windshield and side windows.

Set the mode selector dial to the desired position.
Set the air intake selector to the outside air position.
Set the temperature control dial to the desired position.
Set the fan control dial to the desired speed.
Turn on the air conditioner by pressing the A/C switch.

One of the functions of the air conditioner is dehumidifying the air and, to use
this function, the temperature does not have to be set to cold. Therefore, set
the temperature control dial to the desired position (hot or cold) and turn on
the air conditioner when you want to dehumidify the cabin air.

Dehumidifying

1

2

3

4

5

-------------------------------------------------------------------------------------------------------------------------------------------------------------

266

YARIS_YARIS HATCHBACK_OM_OM99V59z_(U)

4-1. Climate Control System

Fully Automatic Type

Type A

Type B

Temperature control dial
Fan control dial
Mode selector dial

Rear window defogger switch
Air intake selector switch
A/C switch

1
2
3

4
5
6

-------------------------------------------------------------------------------------------------------------------------------------------------------------

YARIS_YARIS HATCHBACK_OM_OM99V59z_(U)

267

4-1. Climate Control System

4

In

te

rior 

F

ea

tu

res

Temperature control dial

This dial controls temperature. Turn it clockwise for hot and coun-
terclockwise for cold.

Fan control dial

The fan has seven speeds.

AUTO position
The  amount  of  airflow  will  be  automatically  controlled  in  accor-
dance with the set temperature.

Except AUTO position
The airflow amount can be adjusted to the desired level by turn-
ing the dial.

0 position
To turn off the system, set the dial to 0 position.

Mode selector dial

Turn the mode selector dial to select airflow mode (

P. 258).

AUTO position
The airflow mode automatically adjusts to the selected tempera-
ture.

Except AUTO position
The desired airflow position can be selected by turning the dial.

A/C switch

The air conditioner (cooling/dehumidifying functions) can be turned
on  or  off  by  pressing  the  switch  while  the  fan  control  dial  is  at  a
position other than 0.
The indicator light turns on while the air conditioner is operating.

Control Switches

-------------------------------------------------------------------------------------------------------------------------------------------------------------


Content      ..     2      3      4      5     ..