Toyota RAV4 (2021 year). Manual in english - part 7
394
5-3. Connectivity settings
5-3.Connectivity settings
■
Registering from the sys-
tem
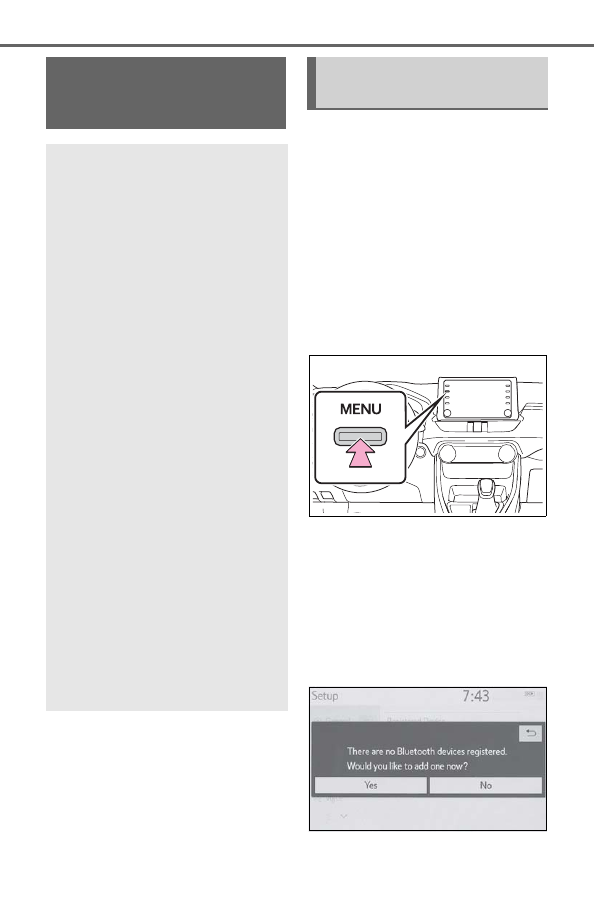
1
Turn the Bluetooth
®
connec-
tion setting of your cellular
phone on.
This function is not available
when Bluetooth
®
connection
setting of your cellular phone
is set to off.
2
Press the “MENU” button.
3
Select “Phone”.
Operations up to this point
can also be performed by
pressing the “PHONE” button
on the instrument panel.
4
Select “Yes” to register a
phone.
Registering/Connect-
ing a Bluetooth
®
device
To use the hands-free sys-
tem, it is necessary to regis-
ter a Bluetooth
®
phone with
the system.
Once the phone has been
registered, it is possible to
use the hands-free system.
This operation cannot be
performed while driving.
When an Apple CarPlay
connection is established,
Bluetooth
®
functions of the
system will become unavail-
able and any connected
Bluetooth
®
devices will be
disconnected.
When connecting to
Android Auto, a Bluetooth
®
connection will be made
automatically.
When an Android Auto con-
nection is established,
some Bluetooth
®
functions
other than hands-free sys-
tem cannot be used.
Registering a Bluetooth
®
phone for the first time