содержание .. 8 9 10 11 ..
Toyota Sequoia (2005). Manual - part 10
Z17004
Fig. 1
OPEN
ECU
2
Sensor
2
2
2
1
1
1
1
A
B
C
Z17005
Fig. 2
ECU
Sensor
2
1
A
B
C
1
1
2
2
B04722
Fig. 3
ECU
Sensor
2
1
A
B1
C
1
1
2
2
1
2
B2
–
INTRODUCTION
HOW TO TROUBLESHOOT ECU CONTROLLED
SYSTEMS
IN–37
37
(d)
Prepare a test male terminal and insert it in the female ter-
minal, then pull it out.
NOTICE:
When testing a gold–plated female terminal, always use a
gold–plated male terminal.
HINT:
When the test terminal is pulled out more easily than others,
there may be poor contact in that section.
6.
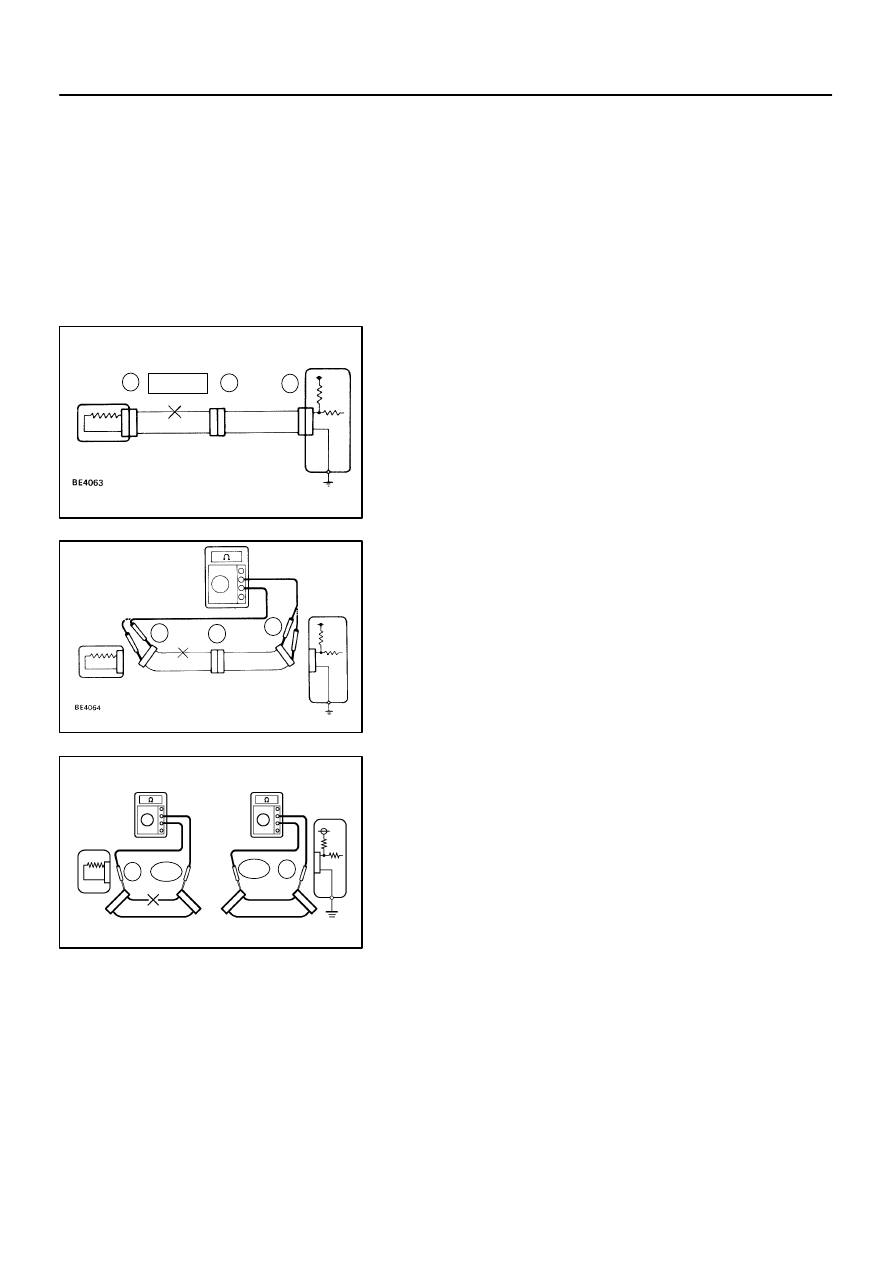
CHECK OPEN CIRCUIT
For an open circuit in the wire harness in Fig. 1, perform ”(a)
Continuity Check” or ”(b) Voltage Check” to locate the section.
(a)
Check the continuity.
(1)
Disconnect connectors ”A” and ”C” and measure
the resistance between them.
In the case of Fig. 2:
Between terminal 1 of connector ”A” and terminal 1
of connector ”C”
→
No continuity (open)
Between terminal 2 of connector ”A” and terminal 2
of connector ”C”
→
Continuity
Therefore, it is found out that there is an open circuit
between terminal 1 of connector ”A” and terminal 1
of connector ”C”.
(2)
Disconnect connector ”B” and measure the resis-
tance between the connectors.
In the case of Fig. 3:
Between terminal 1 of connector ”A” and terminal 1
of connector ”B1”
→
Continuity
Between terminal 1 of connector ”B2” and terminal
1 of connector ”C”
→
No continuity (open)
Therefore, it is found out that there is an open circuit
between terminal 1 of connector ”B2” and terminal
1 of connector ”C”.