Toyota Tundra. Manual - part 622
 

  Index      Toyota     Toyota Tundra (2007-2010 year) - Service and Repair Manual


Search            copyright infringement  


Content   ..  620  621  622  623   ..


Toyota Tundra. Manual - part 622


Tape the screwdriver tip before use. 

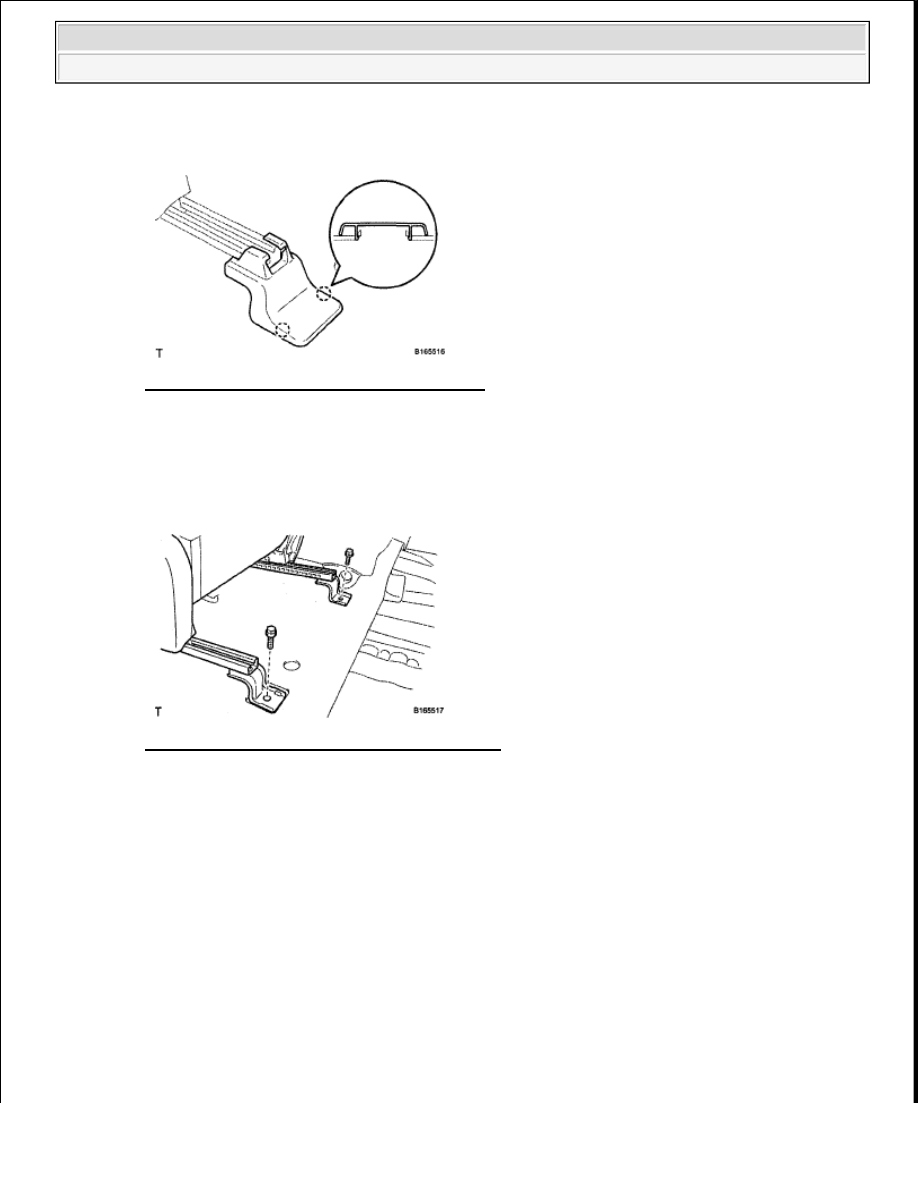
Fig. 39: Identifying Seat Track Cover Claws 
Courtesy of TOYOTA MOTOR SALES, U.S.A., INC. 

4. REMOVE FRONT SEAT ASSEMBLY LH 

a. Remove the 2 bolts.  

b. Operate the seat track adjusting handle to move the seat to the rearmost position. 

Fig. 40: Identifying Front Seat Assembly Bolts 
Courtesy of TOYOTA MOTOR SALES, U.S.A., INC. 

c. Remove the 2 bolts.  

d. Operate the seat track adjusting handle to move the seat to the center position.  

e. Disconnect the seat wire connectors under the seat.  

f. Remove the front seat. 

NOTE:

Be careful not to damage the vehicle body.


2009 Toyota Tundra 

2009 ACCESSORIES AND EQUIPMENT Seat - Tundra


Fig. 41: Identifying Front Seat Assembly Bolts 
Courtesy of TOYOTA MOTOR SALES, U.S.A., INC. 

DISASSEMBLY 

HINT: 

Use the same procedures for the LH side and RH side.  

The procedures listed below are for the LH side.  

1. REMOVE VERTICAL ADJUSTING HANDLE LH (for 8 Way Seat Type) 

a. Using a screwdriver, detach the 2 claws and remove the vertical adjuster handle cap. 

HINT: 

Tape the screwdriver tip before use. 

Fig. 42: Identifying Vertical Adjuster Handle Cap Claws 
Courtesy of TOYOTA MOTOR SALES, U.S.A., INC. 

b. Remove the 2 screws and vertical adjuster handle. 

CAUTION: Wear protective gloves. Sharp areas on the seat frame and adjuster may 

injure your hands.


2009 Toyota Tundra 

2009 ACCESSORIES AND EQUIPMENT Seat - Tundra


Fig. 43: Identifying Vertical Adjuster Handle Screws 
Courtesy of TOYOTA MOTOR SALES, U.S.A., INC. 

2. REMOVE VERTICAL SEAT ADJUSTER KNOB LH (for 8 Way Seat Type) 

a. Remove the snap ring and vertical seat adjuster knob. 

Fig. 44: Identifying Snap Ring And Vertical Seat Adjuster Knob 
Courtesy of TOYOTA MOTOR SALES, U.S.A., INC. 

3. REMOVE RECLINING ADJUSTER RELEASE HANDLE LH 

a. Lift the reclining adjuster release handle.  

b. Using a screwdriver, detach the claw and remove the reclining adjuster release handle. 

HINT: 

Tape the screwdriver tip before use. 


2009 Toyota Tundra 

2009 ACCESSORIES AND EQUIPMENT Seat - Tundra


Fig. 45: Identifying Reclining Adjuster Release Handle Claw 
Courtesy of TOYOTA MOTOR SALES, U.S.A., INC. 

4. REMOVE FRONT SEAT CUSHION SHIELD LH 

a. Remove the hog rings and rubber bands of the seatback cover from the seat frame. 

Fig. 46: Identifying Hog Rings Of Seatback Cover 
Courtesy of TOYOTA MOTOR SALES, U.S.A., INC. 

b. Remove the 2 screws.  

c. Detach the 3 claws in the order shown in the illustration, and then remove the cushion shield. 

Fig. 47: Identifying Front Seat Cushion Shield Claws 
Courtesy of TOYOTA MOTOR SALES, U.S.A., INC. 

d. w/ Lumbar Support Adjuster: Disconnect the switch connector.  

5. REMOVE FRONT POWER SEAT LUMBAR SWITCH (w/ Lumbar Support Adjuster) 

a. Remove the 2 screws and switch.  

6. REMOVE INNER FRONT SEAT CUSHION SHIELD LH 

a. Remove the screw.  

b. Detach the 3 claws in the order shown in the illustration, and then remove the cushion shield. 


2009 Toyota Tundra 

2009 ACCESSORIES AND EQUIPMENT Seat - Tundra


Content   ..  620  621  622  623   ..