Toyota Tundra. Manual - part 2935


  Index      Toyota     Toyota Tundra (2007-2010 year) - Service and Repair Manual


Search            copyright infringement  


Content   ..  2933  2934  2935  2936   ..


Toyota Tundra. Manual - part 2935


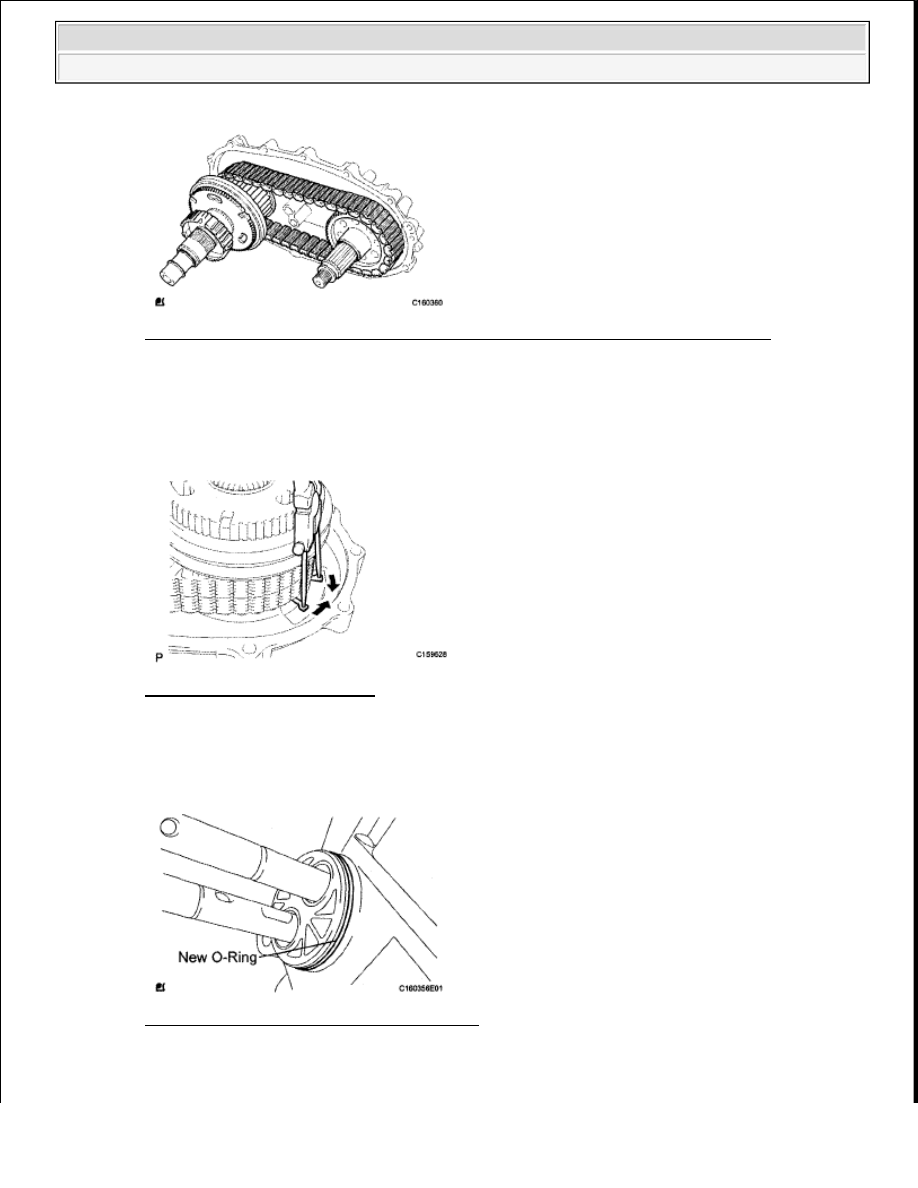
Fig. 103: Identifying Rear Output Shaft, Front Drive Chain And Driven Sprocket 
Courtesy of TOYOTA MOTOR SALES, U.S.A., INC. 

e. Using a snap ring expander, install the snap ring. 

Fig. 104: Installing Snap Ring 
Courtesy of TOYOTA MOTOR SALES, U.S.A., INC. 

25. INSTALL TRANSFER SHIFT ACTUATOR ASSEMBLY 

a. Install a new O-ring to the shift actuator. 

Fig. 105: Identifying Shift Actuator O-Ring 
Courtesy of TOYOTA MOTOR SALES, U.S.A., INC. 

b. Set the No. 1 gear shift fork and No. 2 gear shift fork to the rear case. Then install the shift actuator 

NOTE:

Make sure that the snap ring is firmly installed to the groove.


2009 Toyota Tundra 

2009 TRANSMISSION JF1A Transfer - Tundra


to the rear case with the 3 bolts. 

Torque: 20 N*m (204 kgf*cm, 15 ft.*lbf)  

Fig. 106: Identifying Shift Actuator Bolts 
Courtesy of TOYOTA MOTOR SALES, U.S.A., INC. 

26. INSTALL NO. 1 TRANSFER GEAR SHIFT FORK 

a. Install the No. 1 gear shift fork to the shift actuator with the bolt. 

Torque: 24 N*m (245 kgf*cm, 18 ft.*lbf)  

Fig. 107: Identifying No. 1 Gear Shift Fork Bolt 
Courtesy of TOYOTA MOTOR SALES, U.S.A., INC. 

27. INSTALL NO. 2 TRANSFER GEAR SHIFT FORK 

a. Install the No. 2 gear shift fork to the shift actuator with the bolt. 

Torque: 24 N*m (245 kgf*cm, 18 ft.*lbf)  


2009 Toyota Tundra 

2009 TRANSMISSION JF1A Transfer - Tundra


Fig. 108: Identifying No. 2 Gear Shift Fork Bolt 
Courtesy of TOYOTA MOTOR SALES, U.S.A., INC. 

b. Using a screwdriver and hammer, tap the 3 shift fork shaft snap rings into the shift fork shaft. 

Fig. 109: Identifying Shift Fork Shaft Snap Rings 
Courtesy of TOYOTA MOTOR SALES, U.S.A., INC. 

28. INSTALL REAR TRANSFER CASE 

a. Install the output shaft front needle roller bearing and No. 3 synchronizer ring outer to the output 

shaft. 

Fig. 110: Identifying Output Shaft Front Needle Roller Bearing And No. 3 Synchronizer Ring 
Outer
 
Courtesy of TOYOTA MOTOR SALES, U.S.A., INC. 

b. Apply seal packing to the rear case as shown in the illustration. 


2009 Toyota Tundra 

2009 TRANSMISSION JF1A Transfer - Tundra


Seal packing:  

Toyota Genuine Seal Packing 1281, Three Bond 1281 or equivalent  

Fig. 111: Identifying Seal Packing To Rear Case 
Courtesy of TOYOTA MOTOR SALES, U.S.A., INC. 

c. Install the rear case with the 14 bolts. 

Torque: 28 N*m (286 kgf*cm, 21 ft.*lbf)  

Fig. 112: Identifying Rear Case Bolts 
Courtesy of TOYOTA MOTOR SALES, U.S.A., INC. 

29. INSTALL TRANSFER CASE PLUG 

a. Apply adhesive to the threads of the plug. 

Adhesive:  

NOTE:

If the removed rear case will be reused: After removing the rear case, 
be sure to perform the following before reinstalling it: 1) using a 
knife, cut off any old FIPG on the rear case's contact surface, 2) clean 
off any remaining old FIPG from the rear case's contact surface, and 
3) reapply seal packing to the rear case.

NOTE:

Tighten the bolts of the rear case within 10 minutes of applying the 
seal packing. The seal packing will dry very quickly.


2009 Toyota Tundra 

2009 TRANSMISSION JF1A Transfer - Tundra


Content   ..  2933  2934  2935  2936   ..