Toyota Tundra. Manual - part 2652


  Index      Toyota     Toyota Tundra (2007-2010 year) - Service and Repair Manual


Search            copyright infringement  


Content   ..  2650  2651  2652  2653   ..


Toyota Tundra. Manual - part 2652


c. Using a service-purpose wire harness for the vehicle, tie down the steering pad to the disc wheel. 

Wire harness:  

Stripped wire harness section 1.25 mm

2

 or more (0.00193 in.

2

 or more) 


Fig. 253: Identifying Wire Harness Diameter 
Courtesy of TOYOTA MOTOR SALES, U.S.A., INC. 

HINT: 

To calculate the area of the stripped wire harness section: 

CAUTION:

When removing the steering pad, work must be started 90 
seconds after the ignition switch is turned OFF and the 
negative (-) terminal cable is disconnected from the 
battery.  

When storing the steering pad, keep the airbag 
deployment side facing upward. 

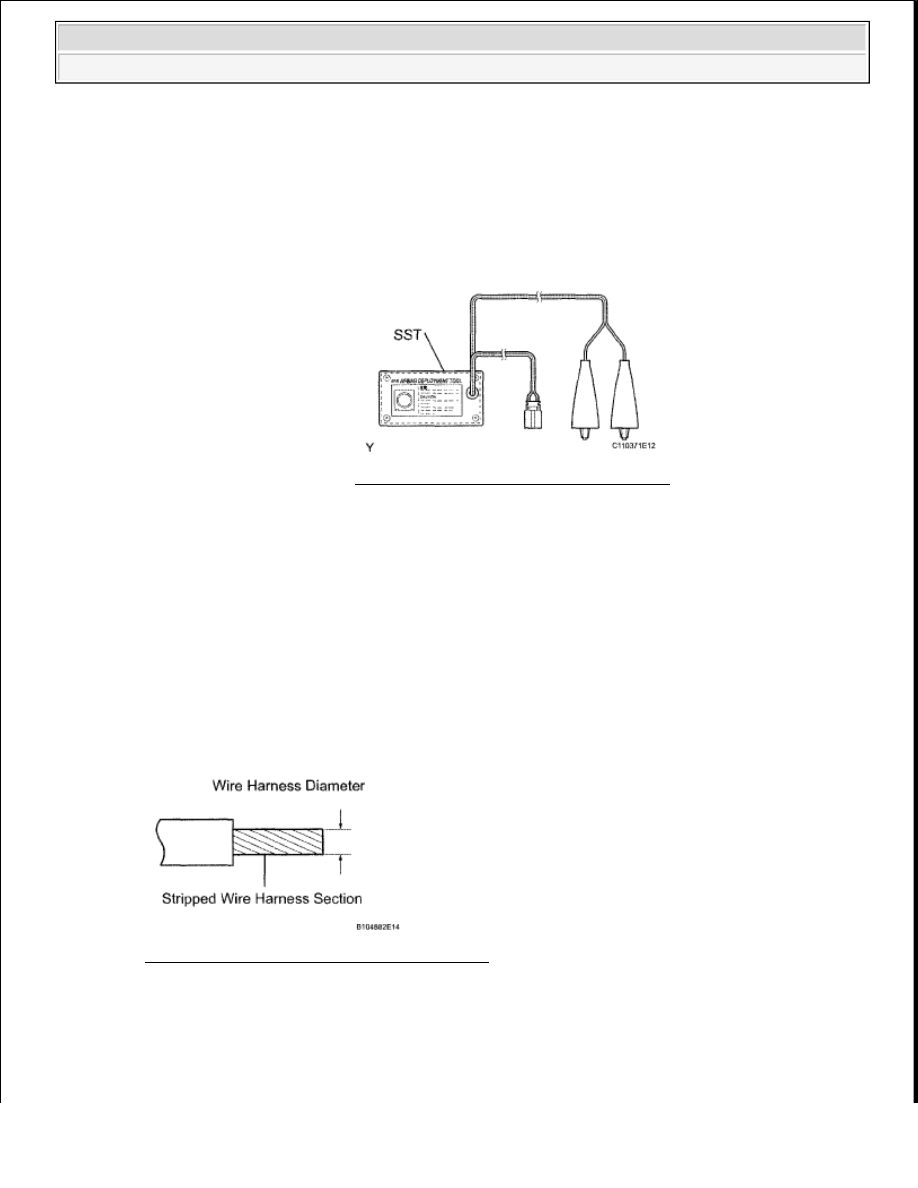
Fig. 252: Identifying Function Of SST 
Courtesy of TOYOTA MOTOR SALES, U.S.A., INC. 

CAUTION: If the wire harness is too thin or an alternative object is used to 

tie down the steering pad, it may be snapped by the shock when 
the airbag is deployed. Always use a wire harness for vehicle 
use with an area of at least 1.25 mm

2

 (0.00193 in.

2

 ).


2009 Toyota Tundra 

2009 RESTRAINTS Supplemental Restraint System - Tundra


Area = 3.14 x (Diameter)

2

 divided by 4 

1. Install the 2 bolts with washers into the 2 bolt holes on the steering pad. 

Bolt:  

L: 35.0 mm (1.38 in.)  

M:  

6.0 mm (0.236 in.)  

Pitch:  

1.0 mm (0.0394 in.)  

2. After connecting SST each other, connect them to the steering pad. 

SST 09082-00820  

NOTE:

Tighten the bolts by hand until they become difficult to 
turn.  

Do not tighten the bolts excessively. 

Fig. 254: Identifying Steering Pad Bolt Length 
Courtesy of TOYOTA MOTOR SALES, U.S.A., INC. 


2009 Toyota Tundra 

2009 RESTRAINTS Supplemental Restraint System - Tundra


Fig. 255: Connecting SST To Steering Pad 
Courtesy of TOYOTA MOTOR SALES, U.S.A., INC. 

3. Wind 3 wire harnesses at least 2 times each around the bolts installed on the left and right 

sides of the steering pad. 

4. Face the airbag deployment side of the steering pad upward. Separately tie the left and right 

sides of the steering pad to the disc wheel through the hub nut holes. Position SST connector 
so that it hangs downward through the hub hole of the disc wheel. 

CAUTION:

Tightly wind the wire harnesses around the bolts so 
that there is no slack.  

Make sure that the wire harnesses are tight. If there is 
slack in the wire harnesses, the steering pad may 
become loose due to the shock when the airbag is 
deployed. 

Fig. 256: Winding Wire Harnesses Around Bolts 
Courtesy of TOYOTA MOTOR SALES, U.S.A., INC. 

CAUTION:

Make sure that the wire harnesses are tight. If there is 
slack in the wire harnesses, the steering pad may 
become loose due to the shock when the airbag is 
deployed.  

Always tie down the steering pad with the airbag 
deployment side facing upward.  


2009 Toyota Tundra 

2009 RESTRAINTS Supplemental Restraint System - Tundra


Fig. 257: Tying Steering Pad & Disc Wheel 
Courtesy of TOYOTA MOTOR SALES, U.S.A., INC. 

d. Install SST. 

1. Connect SST connector. 

SST 09082-00700  

Fig. 258: Identifying SST Connector 
Courtesy of TOYOTA MOTOR SALES, U.S.A., INC. 

2. Move SST at least 10 m (32.8 ft.) away from the steering pad tied down to the disc wheel. 

NOTE:

As the disc wheel may be damaged by the airbag deployment, 
use a disc wheel that you are planning to throw away.

CAUTION: Place the disc wheel on level ground.

NOTE:

To avoid damaging SST connector and wire harness, do not 
lock the secondary lock of the twin lock. Also, secure some 
slack for SST wire harness inside the disc wheel.


2009 Toyota Tundra 

2009 RESTRAINTS Supplemental Restraint System - Tundra


Content   ..  2650  2651  2652  2653   ..