Toyota Tundra. Manual - part 234


  Index      Toyota     Toyota Tundra (2007-2010 year) - Service and Repair Manual


Search            copyright infringement  


Content   ..  232  233  234  235   ..


Toyota Tundra. Manual - part 234


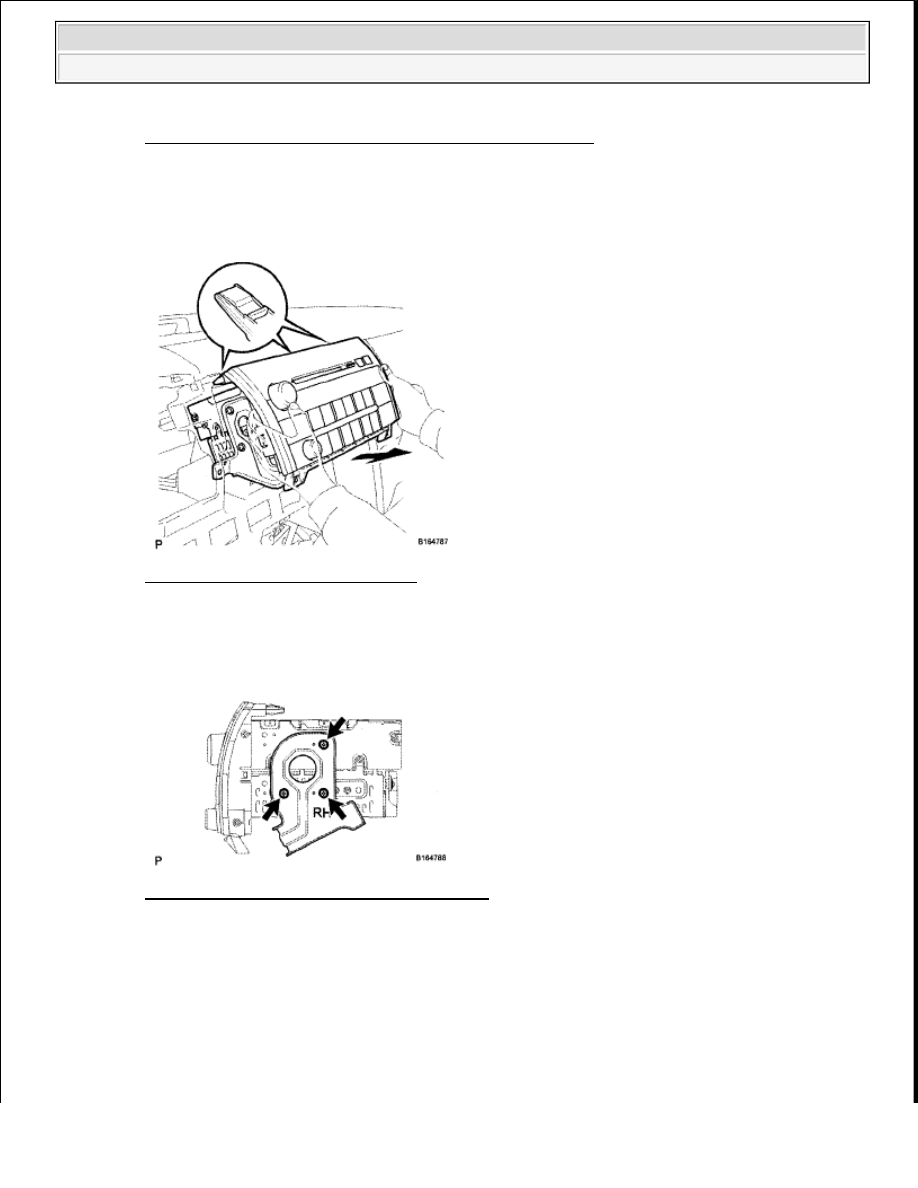
Fig. 290: Locating Radio Receiver Assembly Bracket Bolts 
Courtesy of TOYOTA MOTOR SALES, U.S.A., INC. 

b. Pull the radio receiver to detach the 3 clips on the backside of the radio receiver.  

c. Disconnect the connectors and remove the radio receiver. 

Fig. 291: Removing Radio Receiver 
Courtesy of TOYOTA MOTOR SALES, U.S.A., INC. 

14. REMOVE NO. 1 RADIO BRACKET 

a. Remove the 3 bolts and bracket. 

Fig. 292: Locating No. 1 Radio Bracket Bolts 
Courtesy of TOYOTA MOTOR SALES, U.S.A., INC. 

15. REMOVE NO. 2 RADIO BRACKET 

a. Remove the 3 bolts and bracket. 


2009 Toyota Tundra 

2009 ACCESSORIES AND EQUIPMENT Audio/Visual - Tundra


Fig. 293: Locating No. 2 Radio Bracket Bolts 
Courtesy of TOYOTA MOTOR SALES, U.S.A., INC. 

INSTALLATION 

1. INSTALL NO. 2 RADIO BRACKET 

a. Install the bracket with the 3 bolts. 

Fig. 294: Locating No. 2 Radio Bracket Bolts 
Courtesy of TOYOTA MOTOR SALES, U.S.A., INC. 

2. INSTALL NO. 1 RADIO BRACKET 

a. Install the bracket with the 3 bolts. 

Fig. 295: Locating No. 1 Radio Bracket Bolts 
Courtesy of TOYOTA MOTOR SALES, U.S.A., INC. 

3. INSTALL RADIO RECEIVER ASSEMBLY WITH BRACKET 


2009 Toyota Tundra 

2009 ACCESSORIES AND EQUIPMENT Audio/Visual - Tundra


a. Connect the connectors. 

Fig. 296: Installing Radio Receiver Assembly 
Courtesy of TOYOTA MOTOR SALES, U.S.A., INC. 

b. Insert the radio receiver and attach the 3 clips on its backside. 

c. Install the radio receiver with the 4 bolts. 

Fig. 297: Locating Radio Receiver Assembly Bracket Bolts 
Courtesy of TOYOTA MOTOR SALES, U.S.A., INC. 

4. INSTALL INTEGRATION CONTROL AND PANEL ASSEMBLY (for Manual Air Conditioning 

System) (See INSTALLATION )  

NOTE:

When inserting the radio receiver, do not press its knobs.


2009 Toyota Tundra 

2009 ACCESSORIES AND EQUIPMENT Audio/Visual - Tundra


5. INSTALL INTEGRATION CONTROL AND PANEL ASSEMBLY (for Automatic Air 

Conditioning System) (See INSTALLATION )  

6. INSTALL INSTRUMENT PANEL CUP HOLDER ASSEMBLY (See INSTALLATION )  

7. INSTALL LOWER INSTRUMENT CLUSTER FINISH PANEL (See INSTALLATION )  

8. INSTALL FRONT ASH RECEPTACLE BOX SUB-ASSEMBLY  

9. INSTALL CENTER LOWER INSTRUMENT COVER (See INSTALLATION )  

10. INSTALL INSTRUMENT CLUSTER FINISH PANEL ASSEMBLY (See INSTALLATION )  

11. INSTALL LOWER INSTRUMENT PANEL FINISH PANEL SUB-ASSEMBLY LH (See 

INSTALLATION )  

12. INSTALL INSTRUMENT SIDE PANEL LH (See INSTALLATION )  

13. INSTALL COWL SIDE TRIM BOARD LH (See INSTALLATION )  

14. INSTALL FRONT DOOR SCUFF PLATE LH 

a. for Double Cab: 

Install the front door scuff plate LH (See INSTALLATION ). 

b. for Regular Cab: 

Install the front door scuff plate LH (see INSTALLATION ). 

c. for CrewMax: 

Install the front door scuff plate LH (see INSTALLATION ). 

15. CONNECT CABLE TO NEGATIVE BATTERY TERMINAL 

RADIO RECEIVER (FOR FLOOR SHIFT TYPE) 

COMPONENTS 

NOTE:

Some systems need to be initialized after the cable is reconnected (see 
INITIALIZATION ).


2009 Toyota Tundra 

2009 ACCESSORIES AND EQUIPMENT Audio/Visual - Tundra


Content   ..  232  233  234  235   ..