Toyota Tundra. Manual - part 1887


  Index      Toyota     Toyota Tundra (2007-2010 year) - Service and Repair Manual


Search            copyright infringement  


Content   ..  1885  1886  1887  1888   ..


Toyota Tundra. Manual - part 1887
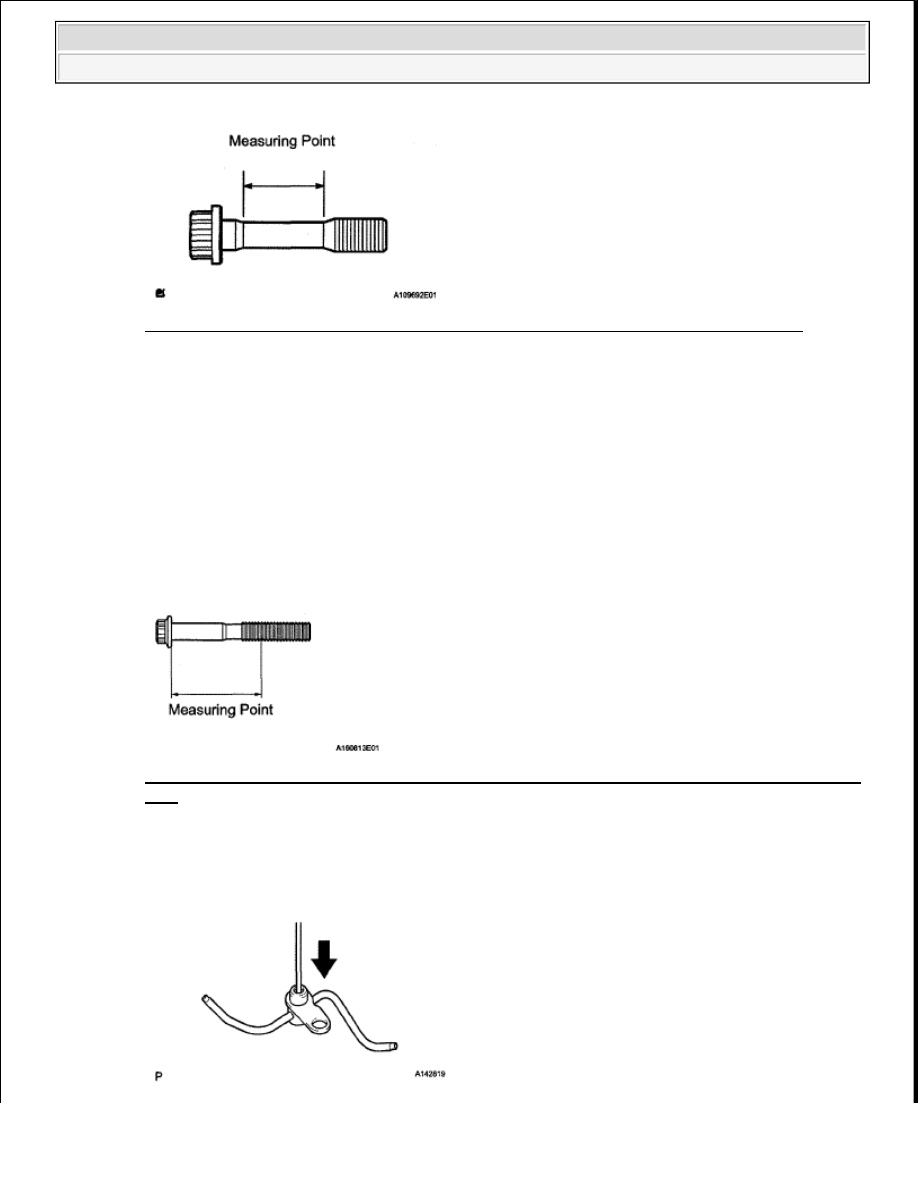


Fig. 286: Using Vernier Caliper To Measure Tension Portion Of Connecting Rod Bolt 
Courtesy of TOYOTA MOTOR SALES, U.S.A., INC. 

9

INSPECT CRANKSHAFT BEARING CAP BOLT 

a

Using a vernier caliper, measure the tension portion diameter of the main bearing cap bolt  

Measuring point: 67.0 mm (2.64 in.)  

Standard diameter: 10.760 to 10.970 mm (0.424 to 0.432 in.)  

Minimum diameter: 10.40 mm (0.409 in.)  

If the diameter is less than the minimum, replace the cap bolt  

Fig. 287: Using Vernier Caliper To Measure Tension Portion Diameter Of Main Bearing Cap 
Bolt
 
Courtesy of TOYOTA MOTOR SALES, U.S.A., INC. 

10

INSPECT NO. 1 OIL NOZZLE SUB-ASSEMBLY 

a

Push the check valve with a pin to check if it is stuck  If stuck, replace the oil nozzle  


2009 Toyota Tundra 

2009 ENGINE Engine Mechanical (2UZ-FE) - Tundra


Fig. 288: Identifying No. 1 Oil Nozzle Sub-Assembly 
Courtesy of TOYOTA MOTOR SALES, U.S.A., INC. 

b

While covering A, apply air into B  Then check the oil nozzle for damage or clogging  Perform the 
check again while covering B and applying air into A  

If there is an air leak, repair or replace the oil nozzle  If the oil nozzle is clogged, clean or replace it  

Fig. 289: Checking Oil Nozzle For Damage Or Clogging 
Courtesy of TOYOTA MOTOR SALES, U.S.A., INC. 

c

Push the check valve while covering A, and apply air into B  Check that air passes through the oil 
nozzle  Perform the check again while covering B, pushing the check valve and applying air into A  
If air cannot pass through, clean or replace the oil nozzle  

Fig. 290: Checking Air Passes Through Oil Nozzle 
Courtesy of TOYOTA MOTOR SALES, U.S.A., INC. 

REPLACEMENT 

1

REPLACE RING PIN 

a

Remove the ring pin   

b

Using a plastic-faced hammer, tap in new ring pins until they stop  

NOTE:

It is not necessary to remove the ring pin unless it is being replaced.


2009 Toyota Tundra 

2009 ENGINE Engine Mechanical (2UZ-FE) - Tundra


Fig. 291: Identifying Ring Pin Dimension 
Courtesy of TOYOTA MOTOR SALES, U.S.A., INC. 

2

REPLACE STRAIGHT PIN 

a

Remove the straight pin   

b

Using a plastic-faced hammer, tap in new straight pins until they stop  

Fig. 292: Identifying Straight Pins Dimension 
Courtesy of TOYOTA MOTOR SALES, U.S.A., INC. 

3

REPLACE CYLINDER BLOCK TIGHT PLUG 

NOTE:

It is not necessary to remove the straight pin unless it is being replaced.


2009 Toyota Tundra 

2009 ENGINE Engine Mechanical (2UZ-FE) - Tundra


a

Remove the tight plugs   

b

Apply adhesive to the holes' inner circumference where the tight plugs contact  

Adhesive: Toyota Genuine Adhesive 1324, Three Bond 1324 or equivalent  

Fig. 293: Applying Adhesive To Holes' Inner Circumference 
Courtesy of TOYOTA MOTOR SALES, U.S.A., INC. 

c

Using SST and a hammer, tap in new tight plugs as shown below  

SST 09950-60010 (09951-00340), 09950-70010 (09951-07100)  

NOTE:

If water leaks from the tight plug or the plug corrodes, replace it.


2009 Toyota Tundra 

2009 ENGINE Engine Mechanical (2UZ-FE) - Tundra


Content   ..  1885  1886  1887  1888   ..