Toyota Tundra. Manual - part 1019


  Index      Toyota     Toyota Tundra (2007-2010 year) - Service and Repair Manual


Search            copyright infringement  


Content   ..  1017  1018  1019  1020   ..


Toyota Tundra. Manual - part 1019
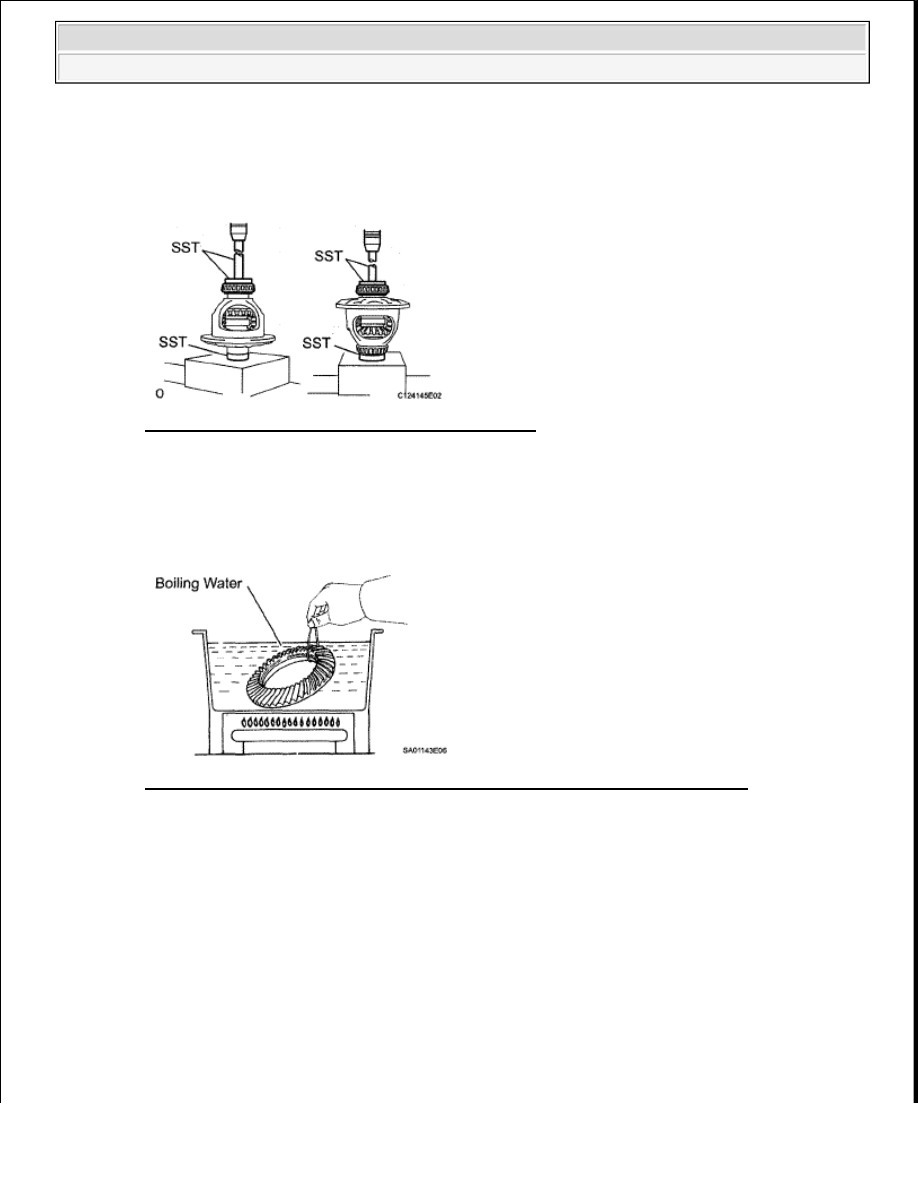


a. Using SST and a press, press in the 2 bearings. 

SST 09950-60010 (09951 -00480, 09951 -00640), 09950-70010 (09951-07150)  

Fig. 65: Identifying Rear Differential Case Bearing 
Courtesy of TOYOTA MOTOR SALES, U.S.A., INC. 

5. INSTALL DIFFERENTIAL RING GEAR 

a. Clean the contact surfaces of the differential case and ring gear.  

b. Heat the ring gear to approximately 100°C (212°F) in boiling water. 

Fig. 66: Heating Ring Gear To Approximately 100°C (212°F) In Boiling Water 
Courtesy of TOYOTA MOTOR SALES, U.S.A., INC. 

c. Carefully take the ring gear out of the boiling water.  

d. After the moisture on the ring gear has completely evaporated, quickly set the ring gear onto the 

differential case. 

HINT: 

Align the matchmarks on the ring gear and differential case. 


2009 Toyota Tundra 

2009 DRIVELINE/AXLES Differential - Tundra


Fig. 67: Aligning Matchmarks On Ring Gear And Differential Case 
Courtesy of TOYOTA MOTOR SALES, U.S.A., INC. 

e. After the ring gear cools down sufficiently, apply adhesive to the bolts and install them. 

Adhesive: Toyota Genuine Adhesive 1360K, Three Bond 1360K or equivalent  

Torque: 137 N*m (1397 kgf*cm, 101 ft.*lbf)  

6. INSPECT DIFFERENTIAL RING GEAR RUNOUT 

a. Install the differential case onto the carrier, and install the 2 adjusting nuts so that there is no play in 

the bearing.  

b. Install the 2 bearing caps with the 4 bolts.  

c. Install the 2 adjusting nut locks with the 2 bolts.  

d. Using a dial indicator, measure the runout of the ring gear. 

Maximum runout: 0.05 mm (0.00197 in.)  

If the runout is greater than the maximum, replace the ring gear. 

Fig. 68: Measuring Runout Of Ring Gear 
Courtesy of TOYOTA MOTOR SALES, U.S.A., INC. 

e. Remove the 2 bolts and adjusting nut locks.  

f. Remove the 2 bearing caps, 2 adjusting nuts and differential case assembly.  

7. INSTALL REAR DRIVE PINION FRONT TAPERED ROLLER BEARING 


2009 Toyota Tundra 

2009 DRIVELINE/AXLES Differential - Tundra


a. Using SST and a press, press in the bearing (outer race). 

SST 09950-60020 (09951 -00710), 09950-70010 (09951-07150)  

Fig. 69: Pressing In Bearing (Outer Race) 
Courtesy of TOYOTA MOTOR SALES, U.S.A., INC. 

8. INSTALL REAR DRIVE PINION REAR TAPERED ROLLER BEARING 

a. Using SST and a press, press in the bearing (outer race). 

SST 09950-60020 (09951-00910), 09950-70010 (09951-07150)  

Fig. 70: Pressing In Bearing Using SST (Outer Race) 
Courtesy of TOYOTA MOTOR SALES, U.S.A., INC. 

9. INSTALL REAR DRIVE PINION REAR TAPERED ROLLER BEARING 

a. Install the plate washer onto the drive pinion. 

HINT: 

First fit a washer with the same thickness as the removed washer, and then check the tooth contact 
pattern. Replace the washer with one of a different thickness if necessary. 

b. Using SST and a press, press in the rear bearing (inner race). 

SST 09506-35010  


2009 Toyota Tundra 

2009 DRIVELINE/AXLES Differential - Tundra


Fig. 71: Press In Rear Bearing Using SST (Inner Race) 
Courtesy of TOYOTA MOTOR SALES, U.S.A., INC. 

10. INSPECT DIFFERENTIAL DRIVE PINION PRELOAD 

a. Install the drive pinion, front bearing (inner race) and oil slinger. 

HINT: 

Assemble the spacer and oil seal after adjusting the gear contact pattern. 

Fig. 72: Identifying Drive Pinion, Front Bearing (Inner Race) And Oil Slinger 
Courtesy of TOYOTA MOTOR SALES, U.S.A., INC. 

b. Using SST, install the companion flange. 

SST 09950-30012 (09951-03010, 09953-03010, 09954-03010, 09955-03030, 09956-03050)  

Fig. 73: Installing Companion Flange Using SST 


2009 Toyota Tundra 

2009 DRIVELINE/AXLES Differential - Tundra


Content   ..  1017  1018  1019  1020   ..