Suzuki Grand Vitara JB416 / JB420 / JB419. Manual - part 232
3A-8 Drive Shaft / Axle: Rear
Rear Drive Shaft Assembly Removal and
Installation
S6JB0A3126002
Removal
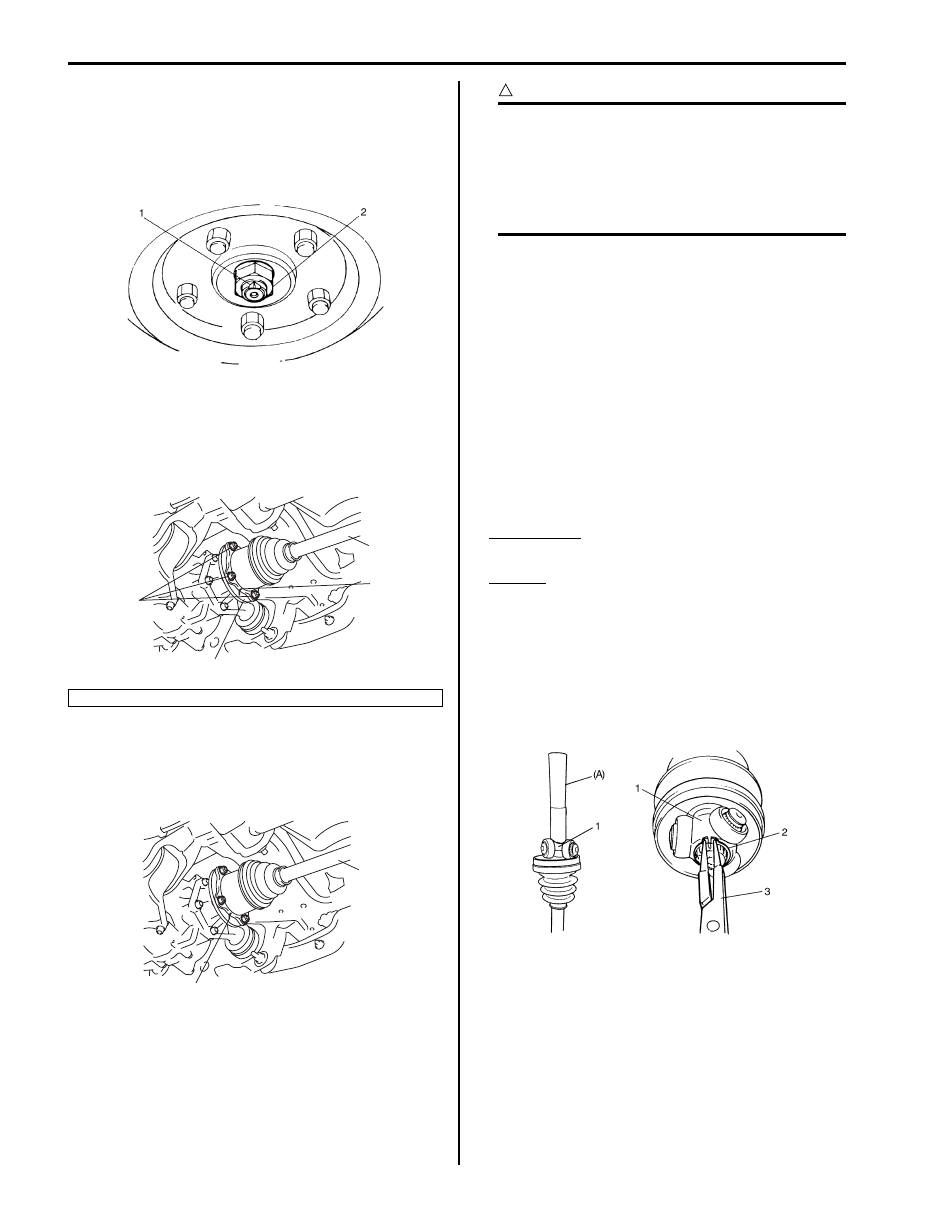
1) Undo caulking (1) of drive shaft nut (2) and then
remove drive shaft nut.
2) Hoist vehicle and remove wheel.
3) Give match mark rear drive shaft flange (3) and rear
drive shaft (4) as shown in figure, and then remove
rear drive shaft flange nuts (1), and then remove rear
drive shaft.
Installation
Install drive shaft assembly by reversing removal
procedure and noting the following points.
• Install rear drive shaft (1) aligning match marks (2).
CAUTION
!
• Protect oil seals and boots from any
damage, preventing them from
unnecessary contact while installing drive
shaft.
• Do not hit joint boot with hammer.
Inserting joint only by hands is allowed.
• Tighten each nuts to specified torque referring to
“Rear Drive Shaft Components: Rear”.
Rear Drive Shaft Disassembly and Assembly
S6JB0A3126003
Disassembly
Refer to “Front Drive Shaft Disassembly and Assembly:
Front”.
Assembly
Assemble rear drive shaft assembly referring to “Front
Drive Shaft Disassembly and Assembly: Front” and
noting the following points which are different from that
of the front drive shaft assembly.
• Apply grease to differential side joint.
Grease color
: Yellow
Amount
: 197 – 207 g (6.9 – 7.3 oz)
• Install tripod joint spider (1) on shaft by using special
tool with hammer, directing its chamfered spline
toward wheel side, and then fasten it with new snap
ring (2) using snap ring plier (3).
Special tool
(A): 09913–84510
2. Match mark
I5JB0A311003-01
1
3
2
4
I5JB0A312002-02
2
1
I5JB0A312003-01
I5JB0A312004-03