Subaru Legacy (2023 year). Manual in english - page 5
 

  Index      Manuals     Subaru Legacy (2023 year). Manual in english


Search            copyright infringement  


Content      ..     3      4      5      6     ..


Subaru Legacy (2023 year). Manual in english - page 5


(68,1)

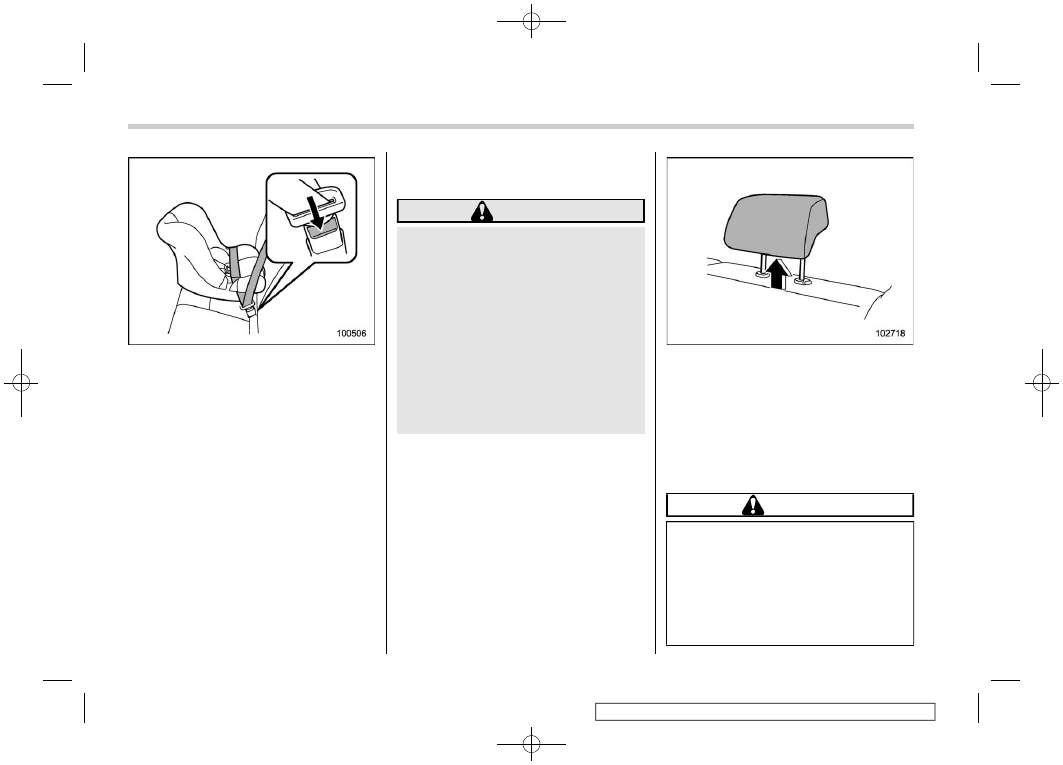
8. To remove the child restraint system,
press the release button on the seatbelt
buckle and allow the belt to retract
completely. The belt will return to the
ELR mode.

NOTE

When the child restraint system is no
longer in use, remove it and restore the
ELR function of the retractor. That
function is restored by allowing the
seatbelt to retract fully.

!

Installing a forward facing child
restraint system

WARNING

.

NEVER INSTALL A CHILD RE-

STRAINT SYSTEM IN THE FRONT
PASSENGER’S SEAT. DOING SO
RISKS SERIOUS INJURY OR
DEATH TO THE CHILD BY PLA-
CING THE CHILD’S HEAD TOO
CLOSE TO THE SRS AIRBAG.

.

Before installing a child restraint

system, be sure to confirm that
the seatback is securely locked
into place. Otherwise, in an acci-
dent, serious injury or death
could result.

1. Place the child restraint system in the
rear seating position.

2. If the child restraint system makes
contact with the head restraint of the rear
seating position where the child restraint
system is to be installed, raise the head
restraint to the extended position. If the
child restraint system still makes contact,
remove the head restraint. For details,
refer to “Head Restraint Adjustment”

P45.

CAUTION

Store the head restraint that has
been removed in the trunk (Legacy)
or cargo area (Outback/Subaru
Outback Wilderness). Do not place
the head restraint in the passenger
compartment to prevent it from
being thrown around in the passen-
ger compartment in a sudden stop

Child Restraint Systems

66

(69,1)

or a sharp turn.

3. F o r O u t b a c k / S u b a r u O u t b a c k
Wilderness models, adjust the seatback
to the upright position.

WARNING

When you intend to install a child
restraint system on the rear center
seating position, if the child restraint
system does not fit snugly against
the contours of the rear center seat
cushion, install the child restraint
system on the window-side seating
position to be safe. For details, refer
to “Where to Place a Child Restraint
System”

P61.

4. Run the lap and shoulder belt through
or around the child restraint system follow-
ing the instructions provided by its manu-
facturer.

– When a child restraint system is
installed in the rear center seating
position of an Outback/Subaru
Outback Wilderness, pass the rear
center seatbelt through the belt guide
properly. For details, refer to “Rear
center seatbelt on Outback/Subaru
Outback Wilderness”

P52.

5. Insert the tongue plate into the buckle
until you hear a click.

6. Take up the slack in the lap belt.
7. Pull out the seatbelt fully from the
retractor to change the retractor over from
the Emergency Locking Retractor (ELR) to
the Automatic Locking Retractor (ALR)

function. Then, allow the belt to rewind into
the retractor. As the belt is rewinding,
clicks will be heard which indicate the
retractor functions as ALR.

8. Before having a child sit in the child
restraint system, try to move it back and
forth and right and left to check if it is firmly
secured. Sometimes a child restraint
system can be more firmly secured by
pushing it down into the seat cushion and
then tightening the seatbelt. It should not
be possible to move the child restraint
system more than 1 in (2.5 cm) in any
direction along the seatbelt path.
9. Pull at the shoulder portion of the belt
to confirm that it cannot be pulled out (ALR
properly functioning).

– CONTINUED –

Child Restraint Systems

67

1

Seat,

Seatbelt

and

SRS

Airbags

(70,1)

Legacy

Outback/Subaru Outback Wilderness

10. Latch the top tether hook onto the
tether anchorage that is located behind the
rear seat and tighten the top tether firmly.
For additional instructions, refer to “Top

Tether Anchorages”

P75.

11. To remove the child restraint system,
press the release button on the seatbelt
buckle and allow the belt to retract
completely. The belt will return to the
ELR mode.

Remember that the head restraint is not
intended to be used at the lowest position
(retracted position). Therefore, when the
rear center seat is occupied (including
when a child restraint system is installed)
next time, be sure to raise the head
restraint to the extended position.

NOTE

When the child restraint system is no
longer in use, remove it and restore the
ELR function of the retractor. That
function is restored by allowing the

seatbelt to retract fully.

&

Installing a Booster Seat or
Booster Cushion

Booster seat

Booster cushion

Child Restraint Systems

68

(71,1)

WARNING

Before installing a booster seat/
cushion, be sure to confirm that the
seatback is securely locked into
place. Otherwise, in an accident,
serious injury or death could result.

1. Adjust the head restraint as follows.
For booster seat:

Raise the head restraint to the extended
position. If the booster seat still makes
contact, remove the head restraint. For
details, refer to “Head Restraint Adjust-
ment”

P45.

CAUTION

Store the head restraint that has

been removed in the trunk (Legacy)
or cargo area (Outback/Subaru
Outback Wilderness). Do not place
the head restraint in the passenger
compartment to prevent it from
being thrown around in the passen-
ger compartment in a sudden stop
or a sharp turn.

For booster cushion:
Raise the head restraint to the extended
position. Do not remove the head restraint.
2. F o r O u t b a c k / S u b a r u O u t b a c k
Wilderness models, adjust the seatback
to the upright position.

3. Place the booster seat/cushion in the
rear seating position and sit the child on it.
The child should sit well back on the
booster seat/cushion.

4. If there is a gap between the booster
seat/cushion and the seatback, adjust the
seatback angle until good contact is
achieved.
5. Run the lap and shoulder belt through
or around the booster seat/cushion and
the child following the instructions pro-
vided by its manufacturer. For booster
seat/cushion with a belt guide, use the
seatbelt through the belt guide.
6. Insert the tongue plate into the buckle
until you hear a click. Take care not to twist
the seatbelt.
Make sure the shoulder belt is positioned
across the center of child’s shoulder and
that the lap belt is positioned as low as
possible on the child’s hips.

7. To remove the booster seat/cushion,
press the release button on the seatbelt

– CONTINUED –

Child Restraint Systems

69

1

Seat,

Seatbelt

and

SRS

Airbags

(72,1)

buckle and allow the belt to retract.

WARNING

.

Never use a belt that is twisted or

reversed. In an accident, this can
increase the risk or severity of
injury to the child.

.

Never place the shoulder belt

under the child’s arm or behind
the child’s back. If an accident
occurs, this can increase the risk
or severity of injury to the child.

.

The seatbelt should fit snugly in

order to provide full restraint.
Loose fitting belts are not as
effective in preventing or redu-
cing injury.

.

Place the lap belt as low as

possible on the child’s hips. A
high-positioned lap belt will in-
crease the risk of sliding under
the lap belt and of the lap belt
sliding up over the abdomen, and
both can result in serious injury
or death.

.

Make sure the shoulder belt is

positioned across the center of
child’s shoulder. Placing the
shoulder belt over the neck may
result in neck injury during sud-

den braking or in a collision.

&

Installation of Child Restraint
Systems by Use of Lower and
Tether Anchorages (LATCH)

!

Lower and tether anchorages

Legacy

Outback/Subaru Outback Wilderness

WARNING

.

Attach the child restraint system

to the anchors properly. When
using the LATCH anchors, be
sure that there are no foreign
objects around the anchors.
Make sure the child restraint
system is securely attached.
Otherwise it may cause death or
serious injury to children or other
passengers in sudden braking,
swerving, or accidents.

.

When installing a child restraint

system using LATCH anchors
with the rear seatbelt fastened,
ensure that the rear seatbelt does

Child Restraint Systems

70

(73,1)

not become caught in the child
restraint system or the lower
LATCH anchorages.

NOTE

The seatbelt warning system of the rear
seats detects if any of the seats are
occupied by a passenger. Installing a
child restraint system in the rear seat-
ing area, using the LATCH anchors,
may result in the activation of the
passenger seatbelt warning light and
chime. Fastening the rear seatbelt prior
to installing the child restraint system
will avoid activating the passenger
seatbelt warning light and chime. For
details, refer to “Rear passenger’s
seats”

P181.

Some types of child restraint systems can
be installed on the rear seat of your vehicle
without use of the seatbelts. Such child
restraint systems are secured to the
dedicated anchorages provided on the
vehicle body.
The lower and tether anchorages are
sometimes referred to as the LATCH
system (

L

ower

A

nchors and

T

ethers for

CH

ildren).

Your vehicle is equipped with five lower
anchorages (bars) (U.S.-spec. models)
four lower anchorages (bars) (other mod-
els) and three upper anchorages (tether
anchorages) for accommodating such
child restraint systems.

!

Lower anchorages

U.S.-spec. models

WARNING

Do not connect two or more lower
hooks onto the same anchorage
(bar).

There are a total of 5 lower anchorages at
the rear seat. The second lower ancho-
rage from the right side is used for both the
right seat and center seat. Each lower
anchorage is located where the seat
cushion meets the seatback.

– CONTINUED –

Child Restraint Systems

71

1

Seat,

Seatbelt

and

SRS

Airbags

(74,1)

Other models

WARNING

Do not connect two or more lower
hooks onto the same anchorage
(bar).

Two lower anchorages (bars) are provided
for installing a child restraint system on the
rear seat window-side seating positions.
Lower anchorages (bars) for window-side
seating positions may be used for a seat in
the center seating position if a child
restraint system manufacturer’s instruc-
tions permit and specify using anchors as
far apart as those in this vehicle. Each
lower anchorage is located where the seat
cushion meets the seatback.

!

Tether anchorages

Legacy

1)

For right seat

2)

For center seat

3)

For left seat

Outback/Subaru Outback Wilderness

1)

For left seat

2)

For center seat

3)

For right seat

The tether anchorages (upper an-
chorages) are provided at the locations
shown in the above illustration. For details,

Child Restraint Systems

72

(75,1)

refer to “Top Tether Anchorages”

P75.

!

To install a child restraint system
using lower and tether an-
chorages

WARNING

Before installing a child restraint
system, be sure to confirm that the
seatback is securely locked into
place. Otherwise, in an accident,
serious injury or death could result.

1. Move the seatback back and forth to
confirm that it is securely locked into place.

– Check that the red colored unlock-
ing marker on the lock release button is
not visible. For details, refer to “Folding
Down the Rear Seatback”

P42.

For U.S.-spec. models

Other models

2. You will find “ ” marks at the bottoms
of the rear seatback. These marks indicate
the positions of the lower anchorages
(bars).

Each lower anchorage is located behind
the cover of seatback bottom.

CAUTION

When you install a child restraint
system, follow the manufacturer’s
instructions supplied with it. After
installing the child restraint system,
check to ensure that it is held
securely in position. If it is not held
tight and secure, the danger of your
child suffering personal injury in the
event of an accident may be in-
creased.

Peel off the anchorage cover completely
from the selected side of the rear seatback
to expose the anchorages (bars) to be
used for installation of the child restraint

– CONTINUED –

Child Restraint Systems

73

1

Seat,

Seatbelt

and

SRS

Airbags

(76,1)

system.
If it is hard to install the child restraint
system because the anchorage cover
returns to the original position, press the
anchorage cover to the seat cushion until it
is flat.

3. If the child restraint system makes
contact with the head restraint of the rear
seating position where the child restraint
system is to be installed, raise the head
restraint to the extended position. If the
child restraint system still makes contact,
remove the head restraint. For details,
refer to “Head Restraint Adjustment”

P45.

CAUTION

Store the head restraint that has
been removed in the trunk (Legacy)
or the cargo area (Outback/Subaru
Outback Wilderness). Do not place
the head restraint in the passenger
compartment to prevent it from
being thrown around in the passen-
ger compartment in a sudden stop
or a sharp turn.

4. F o r O u t b a c k / S u b a r u O u t b a c k
Wilderness models, adjust the seatback
to the upright position.
5. While following the instructions sup-
plied by the child restraint system manu-
facturer, connect the lower hooks onto the
lower anchorages located at “ ” marks on

the bottom of the rear seatback. When the
hooks are connected, make sure the
adjacent seatbelts are not caught.

6. If your child restraint system is a
flexible attachment type (which uses tether
belts), push the child restraint system into
the seat cushion and pull both left and right
lower tether belts up to secure the child
restraint system by taking up the slack in
the belt.
7. Latch the top tether hook onto the
tether anchorage that is located on the rear
shelf (Legacy)/behind the rear seat
(Outback/Subaru Outback Wilderness)
and tighten the top tether firmly. For
additional instructions, refer to “Top Tether
Anchorages”

P75.

Child Restraint Systems

74

(77,1)

8. Before having a child sit in the child
restraint system, try to move it back and
forth and right and left to check if it is firmly
secured. Sometimes a child restraint
system can be more firmly secured by
pushing it down into the seat cushion. It
should not be possible to move the child
restraint system more than 1 in (2.5 cm).
9. To remove the child restraint system,
follow the reverse procedures of installa-
tion.

SUBARU recommends that you check
with a certified Child Passenger Safety
Technician to ensure the proper installa-
tion of your child restraint system. For
more information, and to locate the closest
inspection location in the U.S., refer to the
National Highway Traffic Safety Adminis-
tration (NHTSA) website. In Canada,

check with Transport Canada.

&

Top Tether Anchorages

Your vehicle is equipped with three top
tether anchorages so that a child restraint
system having a top tether can be installed
in the rear seat. When installing a child
restraint system using top tether, proceed
as follows, while observing the instructions
by the child restraint system manufacturer.

Since a top tether can provide additional
stability by offering another connection
between a child restraint system and the
vehicle, we recommend that you use a top
tether whenever one is required or avail-
able.

!

Tether anchorage location

!

Legacy

1)

For right seat

2)

For center seat

3)

For left seat

– CONTINUED –

Child Restraint Systems

75

1

Seat,

Seatbelt

and

SRS

Airbags

(78,1)

Three tether anchorages are installed on
the rear shelf behind the rear seat head
restraint. Open the cover flap to use each
anchorage.

!

O u t b a c k / S u b a r u O u t b a c k
Wilderness

1)

For left seat

2)

For center seat

3)

For right seat

Three tether anchorages, i.e., ones for the

right, center and left positions, are already
installed on the back side of the rear
seatback.

!

To hook the top tether

CAUTION

.

Always raise the head restraint

when mounting a child restraint
system with a top tether. Failure
to do so may prevent the top
tether from being fastened
tightly.

.

If the head restraint is removed,

store the head restraint in the
trunk (Legacy) or the cargo area
( O u t b a c k / S u b a r u O u t b a c k
Wilderness).

.

Do not place the head restraint in

the passenger compartment to
prevent it from being thrown
around in the passenger com-
partment in a sudden stop or a
sharp turn.

Child Restraint Systems

76

(79,1)

!

Legacy

1)

When installing on the window-side
seating position

2)

When installing on the rear center seating
position

1. Raise the head restraint at the seating
position where the child restraint system is
to be installed with the seatbelt or lower
anchorages.

2. Open the cover flaps to use the
anchorages.
3. Pass the top tether between the head
restraint and seatback.

4. Fasten the top tether hook of the child
restraint system to the appropriate upper

anchorage.
5. Tighten the top tether securely.

SUBARU recommends that you check
with a certified Child Passenger Safety
Technician to ensure the proper installa-
tion of your child restraint system. For
more information, and to locate the closest
inspection location in the U.S., refer to the
National Highway Traffic Safety Adminis-
tration (NHTSA) website. In Canada,
check with Transport Canada.

!

O u t b a c k / S u b a r u O u t b a c k
Wilderness

1)

When installing on the window-side
seating position

2)

When installing on the rear center seating
position

– CONTINUED –

Child Restraint Systems

77

1

Seat,

Seatbelt

and

SRS

Airbags

(80,1)

1. Raise the head restraint at the seating
position where the child restraint system is
to be installed with the seatbelt or lower
anchorages.
2. Adjust the seatback to the upright
position.
3. Pass the top tether between the head
restraint and seatback.

4. Attach the top tether hook to the
appropriate upper anchorage.
5. Tighten the top tether securely.

SUBARU recommends that you check
with a certified Child Passenger Safety
Technician to ensure the proper installa-
tion of your child restraint system. For
more information, and to locate the closest
inspection location in the U.S., refer to the
National Highway Traffic Safety Adminis-

tration (NHTSA) website. In Canada,
check with Transport Canada.

1-9. SRS Airbag (Supplemen-
tal Restraint System Airbag)

Supplemental Restraint System (SRS)
name is used because the airbag system
supplements the vehicle’s seatbelts.

This vehicle is equipped with a supple-
mental restraint system which consists of
eight airbags.
The configurations are as follows.

.

Driver’s and front passenger’s

frontal

airbags

.

Driver’s and front passenger’s

side

airbags

.

Front passenger’s

seat cushion air-

bags

.

Curtain airbags

(for driver, front pas-

senger, and window-side rear passen-
gers)

.

Knee airbag

for driver

These SRS airbags are designed only
to be a supplement to the primary
protection provided by the seatbelt.

The system also controls front seatbelt
pretensioners. For operation instructions
and precautions concerning the seatbelt
pretensioner, refer to “Seatbelt Preten-
sioners”

P55.

SRS Airbag (Supplemental Restraint System Airbag)

78

(81,1)

&

General Precautions regard-
ing SRS Airbag System

WARNING

.

To obtain maximum protection in

the event of an accident, the
driver and all passengers must
always wear seatbelts when in
the vehicle. The SRS airbag is
designed only to be a supplement
to the primary protection pro-
vided by the seatbelt. It does not
eliminate the need to fasten seat-
belts. Used in combination with
the seatbelts, the SRS airbag
offers vehicle occupants the best
possible protection in the event
of a serious accident.

Not wearing a seatbelt increases
the chance of severe injury or
death in a crash even when the
vehicle has the SRS airbag.

For instructions and precautions
concerning the seatbelt system,
refer to “Seatbelts”

P47.

.

The SRS side airbags and SRS

curtain airbags are designed only
to be a supplement to the primary
protection provided by the seat-
belt. They do not eliminate the
need to fasten seatbelts. It is also

important to wear a seatbelt to
help avoid injuries that can result
when an occupant is not seated
in a proper upright position.

WARNING

The SRS airbags deploy with con-
siderable speed and force. Occu-
pants who are not seated in the
proper upright position when the
SRS airbag deploys could suffer
very serious injury. Because the
SRS airbag needs enough space
for deployment, the driver should
always sit upright and back in the
seat as far from the steering wheel
as practical while still maintaining
full vehicle control, and the front

passenger should move the seat as
far back as possible and sit upright
and well back in the seat.

WARNING

.

Do not sit or lean close to either

front door. The SRS side airbags
are stored in both front seat
seatbacks next to the door, and
they provide protection by de-
ploying rapidly in the event of a
side impact collision. However,
the force of SRS side airbag
deployment can injure an occu-
pant whose body is too close to
an SRS airbag.

.

Since this vehicle is equipped

– CONTINUED –

SRS Airbag (Supplemental Restraint System Airbag)

79

1

Seat,

Seatbelt

and

SRS

Airbags

(82,1)

with SRS curtain airbags, do not
sit or lean close to the front or
rear door on either side. Do not
put body parts out of the window.
The SRS curtain airbags on both
sides of the cabin are stored in
the roof side (between the front
pillar and a point behind the rear
quarter glass), and they provide
protection by deploying rapidly
in the event of a side impact,
rollover or an offset frontal colli-
sion. However, the force of its
deployment can injure an occu-
pant whose body is too close to
an SRS airbag.

.

Do not sit or lean close to the SRS

airbag. Because the SRS airbag
deploys with considerable speed
and force to protect in high speed
collisions, the force of an airbag
can injure an occupant whose
body is too close to SRS airbag.

It is also important to wear seat-
belts to help avoid injuries that
can result when the SRS airbag
contacts an occupant who is not
seated in the proper position.

Even when properly positioned,
there remains a possibility that
an occupant may suffer minor
injuries, such as abrasions and

bruises to the face or arms,
because of the SRS airbag de-
ployment force.

WARNING

.

Keep arms away from either door

or its internal trim. Vehicle occu-
pants could be injured in the
event of SRS side airbag deploy-
ment.

.

Do not place any objects over or

near the SRS airbag cover or
between you and the SRS airbag.
If the SRS airbag deploys, these
objects could interfere with its
proper operation and could be
propelled inside the vehicle,

causing injury.

CAUTION

.

When the SRS airbag deploys,

some smoke will be released.
This smoke could cause breath-
ing problems for people with a
history of asthma or other breath-
ing trouble. If you or your pas-
sengers have breathing pro-
blems after SRS airbag deploys,
get fresh air promptly.

.

A deploying SRS airbag releases

hot gas. Occupants could get
burned if they come into direct
contact with the hot gas.

NOTE

.

When you sell your vehicle, we urge

you to inform the buyer that the vehicle
is equipped with SRS airbags. Also,
notify the buyer of the applicable sec-
tion in this Owner’s Manual.

.

If the SRS airbag deploys, fuel

supply will be cut off to reduce the risk
of fire caused by leaking fuel. For
details about restarting of the engine,
refer to “If Your Vehicle Is Involved in an
Accident”

P500.

SRS Airbag (Supplemental Restraint System Airbag)

80

(83,1)

&

General Precautions regard-
ing SRS Airbag System for
Accessories and Any Objects

WARNING

.

Do not put any objects (including

straps or cords) over the steering
wheel pad, column cover, or
dashboard.

– These objects could be en-

tangled with the steering
wheel, preventing the SRS
frontal airbag, etc. from oper-
ating properly.

– If the SRS frontal airbag de-

ploys, these objects could be
propelled inside the vehicle,
causing injury.

.

Do not put any objects under the

driver’s side of the instrument
panel. If the SRS knee airbag
deploys, those objects could in-
terfere with its proper operation
and could be propelled inside the
vehicle, causing injury.

.

The key must not be attached to

heavy, sharp or hard acces-
sories, or another key. If the SRS
knee airbag deploys, those ob-
jects could interfere with its
proper operation and could be
propelled inside the vehicle and
cause injury.

WARNING

Do not attach accessories to the
windshield or fit an extra-wide mir-
ror over the inside rear view mirror. If
the SRS airbag deploys, those ob-
jects could become projectiles that
could seriously injure vehicle occu-
pants.

– CONTINUED –

SRS Airbag (Supplemental Restraint System Airbag)

81

1

Seat,

Seatbelt

and

SRS

Airbags


Content      ..     3      4      5      6     ..