Subaru Forester (2022 year). Manual in english - page 9
 

  Index      Manuals     Subaru Forester (2022 year). Manual in english


Search            copyright infringement  


Content      ..     7      8      9      10     ..


Subaru Forester (2022 year). Manual in english - page 9


(136,1)

&

Replacing the battery

Refer to “Replacing key battery”

F

P508.

&

Replacing lost transmitters

If you lose a transmitter or want to
purchase additional transmitters (up to
four can be programmed), your transmit-
ters should be reprogrammed for security
reasons. For details, contact your
SUBARU dealer and have the transmitters
programmed into the remote keyless entry
system.

&

Certification for remote key-
less entry system

!

U.S.-spec. models

FCC ID: CWTB1G077
FCC ID: CWTD1G141

CAUTION

FCC WARNING

Changes or modifications not ex-
pressly approved by the party re-
sponsible for compliance could void
the user’s authority to operate the
equipment.

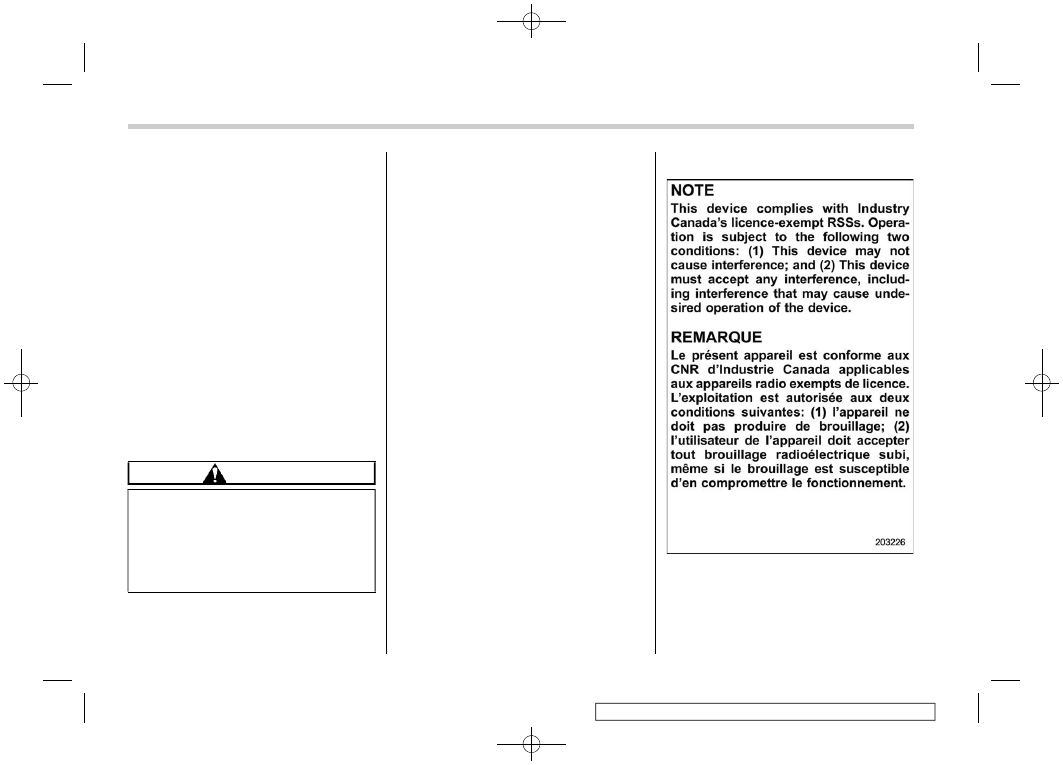
NOTE

This device complies with part 15 of the
FCC Rules. Operation is subject to the
following two conditions: (1) This de-
vice may not cause harmful interfer-
ence, and (2) this device must accept
any interference received, including
interference that may cause undesired
operation.

!

Canada-spec. models

Remote keyless entry system

134

(137,1)

!

Mexico-spec. models

IFETEL RLVSUTB15-1814
SUBARU
MODEL: TB1G077

IFETEL RLVSUTD18-0302
SUBARU
MODEL: TD1G141

2-5. Door locks

&

Locking and unlocking from
the outside

NOTE

If you unlock the driver’s door with a
key (including an emergency key) and
open the door while the alarm system is
armed, the alarm system is triggered
and the vehicle’s horn sounds. In this
case, perform any of the following
operations:

.

Models with “keyless access with

push-button start system”:

– Press any button on the access
key fob (except when the access
key fob battery is discharged).
– Press the push-button ignition
switch to “ACC”.
– Carry the access key fob and
perform either of the following pro-
cedures.

Grip the front door handle.

Press the rear gate opener

button.

.

Models without “keyless access

with push-button start system”:

– Press any button on the remote
transmitter (except when the trans-
mitter battery is discharged).

– Insert the key into the ignition
switch and turn the ignition switch
to “ON”.

For details about the alarm system,
refer to “Alarm system”

F

P139.

!

How to lock and unlock the vehicle
using the key

1)

Rotate the key toward the front to lock.

2)

Rotate the key toward the rear to unlock.

In this case, only the driver’s side door is
locked or unlocked.

NOTE

Models with “keyless access with
push-button start system”:
The emergency key is directional. If the
key cannot be inserted, change the

– CONTINUED –

Door locks

135

2

Keys

and

doors

(138,1)

direction that the grooved side is facing
and insert it again.

!

How to lock the vehicle without
using the key

To lock the door from outside without the
key, the following methods are available.

!

Locking using lock lever

1)

Rotate the lock lever forward.

2)

Close the door.

In this way, only the door that was operated
will be locked.

!

Locking using power door lock-
ing switch

1)

Press the lock side of the power door
locking switch.*

2)

Close the door.

*: For details about the power door locking

switch, refer to “How to operate the power
door locking switches”

F

P137.

In this case, all closed doors, the rear gate
and fuel filler lid are locked at the same
time.

NOTE

Make sure that you do not leave the key
inside the vehicle when locking the
doors from the outside without the key.

&

Locking and unlocking from
the inside

!

How to use the lock lever

1)

Rotate the lock lever rearward to unlock.

2)

Rotate the lock lever forward to lock.

Always make sure that all doors and the
rear gate are closed before starting to
drive.

The red mark on the lock lever appears
when the door is unlocked.
Pull the inside door handle to open an
unlocked door.

Door locks

136

(139,1)

WARNING

.

Keep all doors locked when you

drive, especially when small chil-
dren are in your vehicle.

Along with the proper use of
seatbelts and child restraints,
locking the doors reduces the
chance of being thrown out of
the vehicle in an accident.

It also helps prevent passengers
from falling out if a door is
accidentally opened, and intru-
ders from unexpectedly opening
doors and entering your vehicle.

.

Do not pull the front door handle

from inside while driving. The
door could open even if it is
locked.

!

How to operate the power door
locking switches

All doors, the rear gate and fuel filler lid can
be locked and unlocked using the power
door locking switches located on the
driver’s side and the front passenger’s
side doors.

Example

1)

Press to lock.

2)

Press to unlock.

NOTE

Make sure that you do not leave the key
inside the vehicle before locking the
doors from the outside using the power
door locking switches.

&

Automatic door locking/un-
locking

All doors, rear gate and the fuel filler lid are
automatically locked or unlocked under
the following conditions.

.

For automatic door locking

– When the vehicle speed reaches 12
mph (20 km/h) or higher (factory

default setting).
– When the select lever is shifted into
a position other than the “P” position.

.

For automatic door unlocking

– When the driver’s door is open
(factory default setting).
– When the ignition switch is turned to
OFF.
– When the select lever is shifted into
the “P” position.

NOTE

.

The user can change the automatic

door locking/unlocking setting with the
combination meter. Refer to “Menu
screens”

F

P200.

.

When locking the door by operating

power door locking switches, auto-
matic door locking will not operate.

.

When unlocking the door by operat-

ing power door locking switches, auto-
matic door unlocking will not operate.

.

When getting out of the vehicle from

a rear door, make sure to unlock all the
doors by pushing the unlock side of the
power door locking switch. If a rear
door is unlocked from the inside door
lever then the door is opened and
closed, the Key lock-in prevention
function will be triggered. All doors will
be unlocked, the Key lock-in prevention
warning indicator “

” will appear and

– CONTINUED –

Door locks

137

2

Keys

and

doors

(140,1)

the warning chime will also sound.

&

Key lock-in prevention func-
tion

Under the following conditions, all the
doors will not lock when the door lock
switch is pushed with the front door open.

.

The key is still in the ignition switch

(models without “keyless access with
push-button start system”).

.

The ignition switch is in the “ACC” or

“ON” position (models with “keyless ac-
cess with push-button start system”).

NOTE

.

When leaving the vehicle, make sure

you are holding the key before locking
the doors.

.

The factory setting (default setting)

for this function is set as “operational”.
This function’s operational/non-opera-
tional setting can be changed by a
SUBARU dealer. Contact a SUBARU
dealer for details.

.

When getting out of the vehicle from

a rear door, make sure to unlock all the
doors by pushing the unlock side of the
power door locking switch. If a rear
door is unlocked from the inside door
lever then the door is opened and
closed, the Key lock-in prevention

function will be triggered. All doors will
be unlocked, the Key lock-in prevention
warning indicator “

” will appear and

the warning chime will also sound.

!

Non-operation of key lock-in pre-
vention function

When the system is set so that it does not
operate, the doors are locked by the
following operation.

.

If the lock lever is turned to the front

(“LOCK”) position with the driver’s door
open and the driver’s door is then closed
with the lock lever in that position, the
driver’s door is locked.

.

If the spare key is used to lock the

driver’s door from the outside of the
vehicle, the door is locked.

&

Battery drainage prevention
function

If a door or the rear gate is not completely
closed, the interior lights will remain
illuminated as a result. However, several
lights are automatically turned off by the
battery drainage prevention function to
prevent the battery from discharging. The
following interior lights are affected by this
function.

Item

Switch

position

Automatically

turning off

Map lights

DOOR

Approximately 20

minutes later

Dome light

DOOR

Approximately 20

minutes later

Ignition switch
light

Approximately 20

minutes later

Cargo area light

DOOR

Approximately 20

minutes later

Rear gate light
(if equipped)

DOOR

Approximately 20

minutes later

NOTE

.

The default setting for this function

is set as “operational”. The operational/
non-operational setting of this function
can be changed by a SUBARU dealer.
Contact your SUBARU dealer to
change the setting.

.

When leaving the vehicle, please

make sure that all doors and the rear
gate are completely closed.

.

The battery drainage prevention

function does not operate while the
key is in the ignition switch.

Door locks

138

(141,1)

2-6. Alarm system

The alarm system helps to protect your
vehicle and valuables from theft. The horn
sounds and the hazard warning flashers
flash if someone attempts to break into
your vehicle.

For models with “keyless access with
push-button start system”:

The system can be armed or disarmed
with the keyless access function or access
key fob.
The system will not be activated when the
push-button ignition switch is in the “ACC”
or “ON” position.

For models without “keyless access
with push-button start system”:

The system can be armed or disarmed
with the remote transmitter.
The system will not be activated when the
key is inserted into the ignition switch.

Your vehicle’s alarm system has been set
for activation at the time of shipment from
the factory. You can set the system for
deactivation yourself or have it done by
your SUBARU dealer.

&

Alarm system operation

When the alarm system is armed, it is
triggered by the opening any of the doors,
the rear gate or engine hood.
The alarm system will activate the follow-
ing alarms when triggered.

.

The vehicle’s horn will sound for 30

seconds.

.

The hazard warning flashers will flash

for 30 seconds.

If any of the doors, the rear gate or engine
hood remains open after the 30-second
period, the horn will continue to sound for a
maximum of 3 minutes. If the door, rear
gate or engine hood is closed while the
horn is sounding, the horn will stop
sounding with a delay of up to 30 seconds.

NOTE

The alarm system can be set to trigger
the illumination of the following interior
lights.

.

Map lights (illuminates only when

the door interlock switch is in the
“DOOR” position)

.

Dome light (illuminates only when

the dome light switch is in the “DOOR”
position)

.

Cargo area light (illuminates only

when the cargo area light switch is in
the “DOOR” position)

The notifications regarding the map
lights, dome light and cargo area light
are deactivated as the factory setting. A
SUBARU dealer can activate the sys-
tem. Contact your SUBARU dealer for
details.

&

Arming the system

The alarm system becomes armed when
the following operation is performed.
1. Close all windows and the moonroof (if
equipped) and turn the ignition switch to
the “OFF” position.
2. Carry the key and get out of the
vehicle.
3. Make sure that the engine hood is
locked.
4. Lock the doors using any of the
following methods.

.

Locking using the remote keyless

entry system. For details, refer to
“Remote keyless entry system”

F

P131.

.

Locking using the keyless access

function (if equipped). For details, refer
to “Locking with the door lock sensor”

F

P119.

.

Locking using the power door lock-

ing switch. For details, refer to “Locking
using power door locking switch”

F

P136.

– CONTINUED –

Alarm system

139

2

Keys

and

doors

(142,1)

.

Locking using the rear lock button.

For details, refer to “Locking with the
rear lock button”

F

P119.

.

Locking using the power rear gate

lock button. For details, refer to “Lock-
ing with the power rear gate lock
button”

F

P120.

Security indicator light

NOTE

.

All doors, the rear gate and fuel filler

lid will lock, an electronic chirp will
sound once, the hazard warning
flashers will flash once, and the secur-
ity indicator light will start flashing
rapidly.

.

If any of the doors or the rear gate is

not fully closed, an electronic chirp
sounds five times and the hazard

warning flashers flash five times to
alert you that the doors (or the rear
gate) are not properly closed. When
you close the door, doors will automa-
tically lock and the system will auto-
matically arm in 30 seconds.

5. Approximately 30 seconds later, the
system will enter surveillance state.

When the system is in surveillance state,
the security indicator light will then flash
slowly (twice approximately every 2 sec-
onds), indicating that the system has been
armed for surveillance.

NOTE

.

The system can be armed even if the

windows and/or moonroof are open.
Always make sure that they are fully
closed before arming the system.

.

The 30-second standby time can be

eliminated if you prefer. Have it per-
formed by your SUBARU dealer.

.

If any of the following actions is

done during the standby period, the
system will not switch to the surveil-
lance state.

– Doors (including the rear gate)
are unlocked using the access key
fob/remote transmitter.
– Doors (including the rear gate)
are unlocked using the keyless

access function (models with “key-
less access with push-button start
system”).
– Any door (including the rear gate
and engine hood) is opened.
– The ignition switch is turned to
the “ON” position (models without
“keyless access with push-button
start system”).
– Push-button ignition switch is
turned to the “ACC” position (mod-
els with “keyless access with push-
button start system”).

&

Disarming the system

Perform either of the following procedures.

.

Briefly press a button (for less than 2

seconds) on the access key fob/remote
transmitter.

.

Carry the access key fob and perform

either of the following procedures (models
with “keyless access with push-button
start system”).

– Grip the front door handle.
– Press the rear gate opener button.
– Unlock using the PIN code access.

The flashing of the security indicator light
will then change slowly (once approxi-
mately every 3 seconds from twice ap-
proximately every 2 seconds), indicating
that the alarm system has been disarmed.

Alarm system

140

(143,1)

!

Emergency disarming

If you cannot disarm the system using the
access key fob/transmitter (i.e., the trans-
mitter is lost, broken or the transmitter
battery is too weak), you can disarm the
system without using the access key fob/
remote transmitter.
The system can be disarmed if you turn the
ignition switch from the “LOCK”/“OFF”
position to the “ON” position with a
registered key/access key fob.

NOTE

For models with “keyless access with
push-button start system”, if the ac-
cess key fob battery is discharged,
perform the procedure described in
“Switching power status”

F

P452. In

such a case, replace the battery im-
mediately. Refer to “Replacing battery
of access key fob”

F

P508.

&

Alarm system setting

To change the setting of your vehicle’s
alarm system for activation or deactiva-
tion, do the following.
1. Disarm the alarm system. Refer to
“Disarming the system”

F

P140.

2. Sit in the driver’s seat and shut all
doors, the rear gate and engine hood.

3. Turn the ignition switch to the “ON”
position.
4. Hold down “ ” of the driver’s power
door locking switch, open the driver’s door
within the following 1 second, and wait 10
seconds without releasing the switch. The
setting will then be changed as follows.

.

Type A combination meter

Setting

status

Combination

meter display

Horn

Activate

AL on

Once

Deactivate

AL off

Twice

.

Type B combination meter

Setting

status

Combination

meter display

Horn

Activate

AL ON

Once

Deactivate

AL OFF

Twice

NOTE

You may have the above setting change
done by your SUBARU dealer.

&

If you have accidentally trig-
gered the alarm system

!

To stop the alarm

Do any of the following operations:

.

Press any button on the access key fob/

remote transmitter.

.

Turn the ignition switch to the “ON”

position (models without “keyless access
with push-button start system”).

.

Turn the push-button ignition to the

“ACC” position (models with “keyless
access with push-button start system”).

NOTE

Only registered keys will stop the
alarm. If the immobilizer transponder
is not registered, the alarm will not
stop.

&

Valet mode

When you choose the valet mode, the
alarm system does not operate. In valet
mode, the remote transmitter is used only
for locking and unlocking the doors and
rear gate and panic activation.

To enter the valet mode, change the
setting of your vehicle’s alarm system to
deactivation mode. Refer to “Alarm system
setting”

F

P141. The security indicator

light will continue to flash once every 3
seconds, indicating that the system is in
the valet mode.

To exit valet mode, change the setting of
your vehicle’s alarm system to activation
mode. Refer to “Alarm system setting”

F

P141.

Alarm system

141

2

Keys

and

doors

(144,1)

2-7. Child safety locks

Each rear door has a child safety lock.
When the child safety lock lever is in the
lock position, the door cannot be opened
from the inside. The door can only be
opened from the outside.

WARNING

Always turn the child safety locks to
the “LOCK” position when children
sit in the rear seat. Serious injury
could result if a child accidentally
opens the door and falls out.

2-8. Windows

WARNING

To avoid serious personal injury
caused by entrapment, always con-
form to the following instructions
without exception.

.

When operating the power win-

dows, be extremely careful to
prevent anyone’s body parts or
any other objects from being
caught in the window.

.

Always lock the passengers’ win-

dows using the lock switch when
children are riding in the vehicle.

.

Always carry the key when you

leave the vehicle for safety rea-
sons and never allow an unat-
tended child to remain in the
vehicle. Failure to follow this
procedure could result in injury
to a child operating the power
window.

NOTE

.

If the power window system detects

resistance, an impact or abnormality,
the window operation may be automa-
tically stopped to prevent further jam-

ming, entrapment or malfunction.

– The closing window slides down
slightly and stops.
– The opening window stops slid-
ing down.

.

The power window system may

detect resistance, an impact or an
abnormality in the following cases.

– A substantial sized object is
caught between the window and
the window frame.
– A foreign object is caught be-
tween the window and the window
frame.
– The vehicle drives over a deep
pothole.

.

The window cannot be closed for a

few seconds after the window is auto-
matically stopped by the system.

Child safety locks

142

(145,1)

&

Power window operation

!

Power window switches

.

Driver’s side power window switches:

1)

For front left window (with one-touch auto
up and down feature)

2)

For front right window (with one-touch
auto up and down feature (if equipped))

3)

For rear left window

4)

For rear right window

5)

Lock switch

All door windows can be controlled by the
power window switch cluster on the driver
side door.
These switches illuminate when activated.

.

Passenger ’s side power window

switches:

Each passenger’s window can be con-
trolled by the power window switch located
on the door.
These switches illuminate when activated.

!

Operating the window

With one-touch auto up and down feature

1)

Automatically close*

2)

Close

3)

Open

4)

Automatically open*

*: To stop the window halfway, operate the

switch to the opposite side.

– CONTINUED –

Windows

143

2

Keys

and

doors

(146,1)

Without one-touch auto up and down
feature

1)

Close

2)

Open

NOTE

Avoid the following.

.

Continuously operating a switch in

the same direction after the window is
fully closed or fully opened.

.

Continuously operating three or

more switches all at once in the same
direction after the windows are fully
closed or fully opened.

Either of the operations described
above may cause the power window
breaker to operate making it impossible
to open or close the window. Be sure to
initialize the power windows. Refer to

“Initialization of power window (win-
dows with off delay function)”

F

P145.

!

Anti-entrapment function (windows
with one-touch auto up and down
function)

While closing the window automatically, if
the window senses a substantial enough
object trapped between the window and
the window frame, it automatically moves
down slightly and stops.
If a foreign object is caught while window is
opening automatically, the window will
stop.

CAUTION

.

Never attempt to test the power

window operation using body
parts.

.

If an object is caught just before

the window fully closes, the sys-
tem may not operate properly.

NOTE

.

If a window detects an impact similar

to that caused by trapping an object (for
example, when the vehicle encounters
a deep pothole), the anti-entrapment
function may operate.

.

You cannot close the window for a

few seconds after the anti-entrapment
function operates.

!

Off delay function (if equipped)

The windows can be operated for approxi-
mately 40 seconds even after the ignition
switch is turned to the “ACC” or “OFF”
position. If a front door is opened within 40
seconds, the off delay function is can-
celed.

!

Locking the passengers’ windows

1)

Lock

2)

Unlock

The lock switch is in the lock position, the
rear windows cannot be operated by the
driver’s side switches. The passenger’s
side switches and the rear seat side
switches are not operational either.

Windows

144

(147,1)

When the indicator on the window
switches does not illuminate, the window
switch cannot be operated.

&

Initialization of power window
(windows with off delay func-
tion)

If the one-touch auto up and down function
or off delay function does not operate
properly, operate each window according
to the following procedure in order to
initialize the power window system.
1. Close the door.
2. Turn the ignition switch to the “ON”
position.
3. Open the window completely and then
press and hold down the power window
switch for approximately 1 second.
4. Close the window completely and then
pull and hold the power window switch for
approximately 1 second.

2-9. Rear gate

CAUTION

When loading and unloading cargo,
be careful not to come in contact
with the hot engine exhaust gas or
the exhaust pipe, because they
could burn you.

&

Manual rear gate

The rear gate can be locked and unlocked
using any of the following systems.

.

Power door locking switch: Refer to

“Locking and unlocking from the inside”

F

P136.

.

Keyless access with the push-button

start system (if equipped): Refer to “Key-
less access with push-button start system”

F

P113.

.

Remote keyless entry system: Refer to

“Remote keyless entry system”

F

P131.

.

Automatic door locking/unlocking: Re-

fer to “Automatic door locking/unlocking”

F

P137.

To open:

Rear gate opener button

1. Unlock the rear gate.
2. Press and hold the rear gate opener
button. The rear gate will open slightly.
3. Hold the rear gate and lift it up slowly.

NOTE

If the rear gate cannot be opened due to
a discharged vehicle battery, a mal-
function in the door locking/unlocking
system or other causes, the rear gate
can be unlocked by manually operating
the rear gate lock release lever. For the
procedure, refer to “Rear gate – if the
rear gate cannot be opened”

F

P453.

– CONTINUED –

Rear gate

145

2

Keys

and

doors

(148,1)

To close:

Lower the rear gate slowly and push down
firmly until the latch engages.
The rear gate can be lowered easily if you
pull it down holding the handle.

WARNING

.

To prevent dangerous exhaust

gas from entering the vehicle,
always keep the rear gate closed
while the engine is running.

.

Do not attempt to shut the rear

gate while holding the handle.

.

Do not close the rear gate by

pulling the handle from inside the
cargo space. There is a danger of
your hand being caught and
injured.

CAUTION

.

Do not jam a plastic bag in or

place cellophane tape on the rear
gate stays or scratch the stays
while loading or unloading cargo.
Doing so could cause leakage of
gas from the stays, which may
result in their inability to hold the
rear gate open.

.

Be careful not to hit your head or

face on the rear gate when open-
ing or closing the rear gate and
when loading or unloading cargo.

&

Power rear gate (if equipped)

WARNING

.

When operating the power rear

gate, observe the following pre-
cautions. Ignoring the precau-
tions may result in an injury (e.
g., anyone’s body is hit against
the rear gate or is caught in the
rear gate, etc.)

– Make sure there are no people

around the rear gate.

– Never let anyone get close to

the rear gate.

.

When closing the rear gate, be

sure to prevent anyone’s body
parts or any other objects from
being caught in the rear gate.

Otherwise, serious personal in-
jury may be caused by entrap-
ment.

.

After opening the rear gate on a

slope using the power rear gate
feature, the rear gate may close.
Make sure that the rear gate has
stopped completely after open-
ing it.

.

When leaving the vehicle, always

carry the key for safety and never
allow an unattended child to

Rear gate

146

(149,1)

remain in the vehicle. Doing so
could result in injury to the child
operating the power rear gate.

.

The driver should be aware of and

pay careful attention to his/her
responsibilities.

.

Use the power rear gate only

when the area around the rear
gate is clearly visible and when
you have checked that there is no
danger of people being caught in
the gate.

CAUTION

.

When closing the rear gate after

opening it, make sure to use the
power rear gate. If the rear gate is
closed manually with extra force,
the power rear gate may be
damaged.

.

Do not install any accessories

other than genuine SUBARU
parts on the rear gate. If the
weight of rear gate increases
excessively, the rear gate stays
cannot support the rear gate
sufficiently when opening the
rear gate. Also, the power rear
gate may not function properly or
may malfunction.

The power rear gate operates only when
all of the following conditions are satisfied.

.

The vehicle is stopped completely.

.

The outside temperature is within a

range of −22

8

F to 140

8

F (from −30

8

C to

60

8

C).

.

The ignition switch is in the “LOCK”/

“OFF” or “ACC” position. Or, the ignition
switch is in the “ON” position and the select
lever is in the “P” position.

We recommend using the power rear gate
function in most circumstances instead of
manual operation.

NOTE

.

Do not press the power rear gate

button repeatedly while the power rear
gate is operating. Otherwise, the sys-
tem may ignore the button operation in
order to avoid being damaged.

.

If the vehicle starts to move while the

power rear gate is operating, the sys-
tem sounds a buzzer and closes the
rear gate automatically. At this time, if
the system detects jamming, it will
deactivate the power rear gate and the
rear gate will not be closed. If this
occurs, close the rear gate manually.
For details, refer to “Manual rear gate”

F

P145.

.

If you try to open the rear gate using

the power rear gate function immedi-
ately after closing the rear gate using
the power rear gate function, an elec-
tronic chirp will sound and the rear gate
will not open. Wait for a while before
trying to open the rear gate via the
power rear gate function.

.

If either of the operating conditions

has not been satisfied while operating
the power rear gate, an electronic chirp
will sound and the power rear gate will
be deactivated. In this case, the rear
gate may stop opening or closing
suddenly.

!

Operation

NOTE

.

The rear gate will remain unlocked

even after closing it. Always lock the
rear gate when leaving the vehicle.

.

If you cannot open/close the rear

gate by performing the operation de-
scribed here, a short electronic chirp
will sound three times (beep, beep,
beep).

– CONTINUED –

Rear gate

147

2

Keys

and

doors

(150,1)

!

By the power rear gate button
(other than the buttons on the
rear gate)

Power rear gate button on the instrument
panel

Power rear gate button on the access key
fob

Power rear gate button on the transmitter

To open the rear gate:

Press and hold the power rear gate button
when the rear gate is closed. The rear gate

will open automatically. Then an electronic
chirp and the hazard warning flashers will
operate as follows:

.

When operating the power rear gate

button on the instrument panel/transmitter:
sounds and flashes twice.

.

When operating the power rear gate

button on the access key fob: sounds and
flashes four times.

NOTE

.

If the rear gate cannot be opened by

operating the power rear gate button on
the instrument panel, unlock it with the
keyless access function or the remote
keyless entry system. Then, it will be
possible to open the power rear gate
using the power rear gate button on the
instrument panel.

.

The factory setting (default setting)

of the operation for the “

” button on

the access key fob or the transmitter is
pressing and holding. This setting can
be changed to non-operation or press-
ing twice at SUBARU dealers. For more
details, contact a SUBARU dealer.

To pause the opening rear gate:

Briefly press the power rear gate button
while the rear gate is being opened. Then
an electronic chirp will sound twice and the
hazard warning flashers will flash twice.

Rear gate

148

(151,1)

If you press the power rear gate button
again, the rear gate will close.
You can open the rear gate by pressing the
power rear gate button briefly while the
rear gate is being closed.

NOTE

The rear gate cannot be paused when it
is in the approximately 2 in (5 cm) range
from the fully closed position. The
system will ignore any button operation
and the rear gate will continue to open.

To close the rear gate:

Press and hold the power rear gate button.
Then an electronic chirp will sound twice
and the hazard warning flashers will flash
twice. If you briefly press the power rear
gate button again, the rear gate will open.

NOTE

The factory setting (default setting) of
the operation for the “

” button on

the access key fob or the transmitter is
pressing and holding. This setting can
be changed to non-operation or press-
ing twice at SUBARU dealers. For more
details, contact a SUBARU dealer.

!

By the buttons on the rear gate

NOTE

After performing the following proce-
dures, an electronic chirp will sound
twice and the hazard warning flashers
will flash twice.

Rear gate opener button

Power rear gate button on the inside edge
of the rear gate

1)

Power rear gate button

2)

Power rear gate lock button

To open the rear gate:

1. For models with “keyless access with
push-button start system”, carry the ac-
cess key fob. For models without “keyless
access with push-button start system”,
unlock the rear gate.
2. Briefly press the rear gate opener
button when the rear gate is closed.

The rear gate will open automatically.

To pause the opening rear gate:

Briefly press either of the following buttons
while the rear gate is being opened.

.

Rear gate opener button

– CONTINUED –

Rear gate

149

2

Keys

and

doors


Content      ..     7      8      9      10     ..