Subaru Tribeca (2014 year). Instruction - part 2
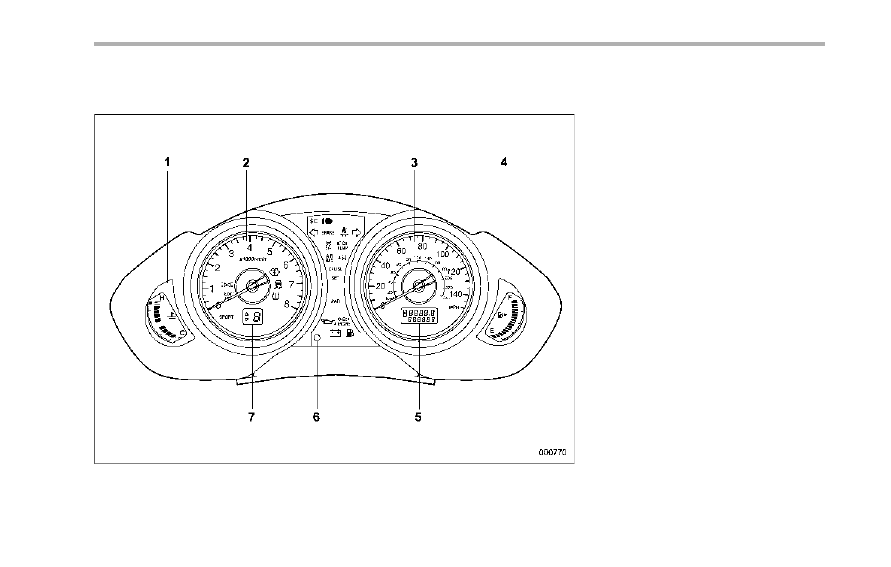
& Combination meter
! U.S.-spec. models
1)
Temperature gauge (page 3-8)
2)
Tachometer (page 3-7)
3)
Speedometer (page 3-6)
4)
Fuel gauge (page 3-8)
5)
Trip meter and odometer
(page 3-6/page 3-7)
6)
Trip meter A/B selection and trip meter
reset knob (page 3-7)
7)
Select lever/Gear position indicator
(page 3-21)
19
– CONTINUED –