Subaru Outback (2019 year). Instruction - part 17


  Index      Subaru     Subaru Outback - instruction 2019 year in english


Search            


Content   ..  15  16  17  18   ..


Subaru Outback (2019 year). Instruction - part 17


(272,1)

北米Model "A2550BE-A" EDITED: 2018/ 5/ 9

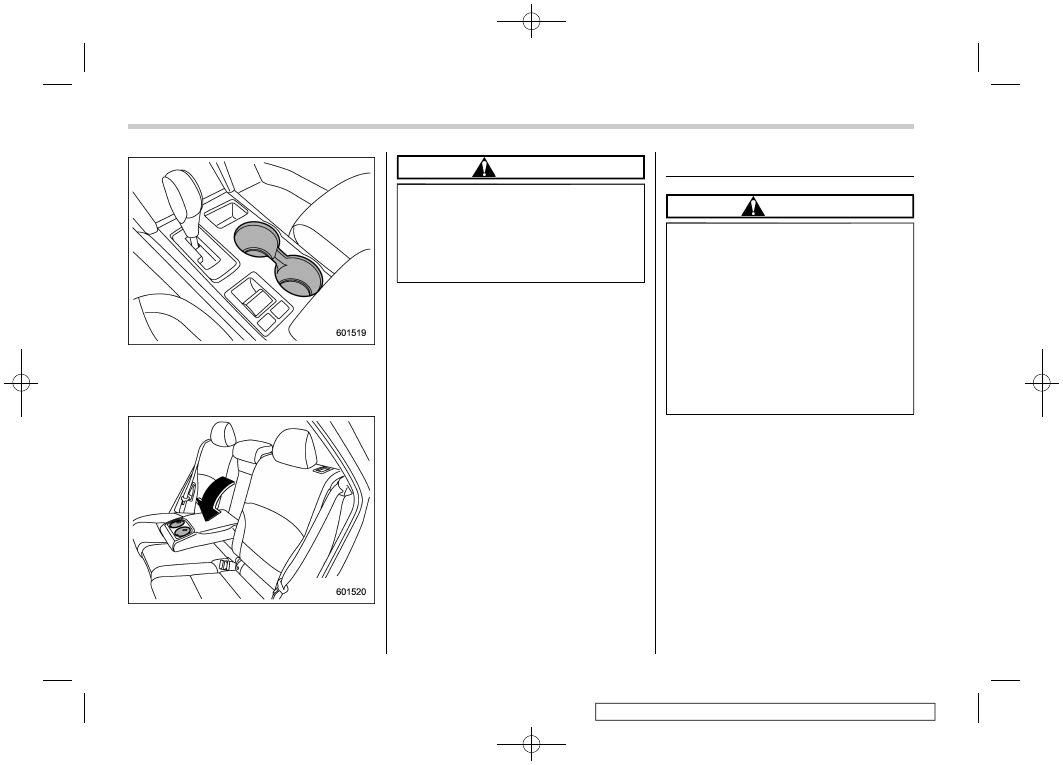
The dual cup holder is built into the center
console.

&

Rear passenger’s cup holder

A dual cup holder is built into the armrest.

CAUTION

When a cup containing a beverage is
in the cup holder, do not fold down
or recline any seat. Otherwise, the
beverage could spill while driving
and, if the beverage is hot, it could
burn you and/or your passengers.

Bottle holders

CAUTION

.

Do not pick up a bottle from the

bottle holder or put a bottle in the
holder while you are driving, as
this may distract you and lead to
an accident.

.

When placing a beverage in a

bottle holder, make sure it is
capped. Otherwise, the beverage
could spill when opening/closing
the door or while driving and, if
the beverage is hot, it could burn
you and/or your passengers.

Interior equipment/Bottle holders

6-8

(273,1)

北米Model "A2550BE-A" EDITED: 2018/ 5/ 9

The bottle holder equipped on each door
trim can be used to hold beverage bottles
and other items.

Accessory power outlets

Power outlet below the climate control

Power outlet in the center console (if
equipped)

Power outlet in the cargo area (Outback)

Accessory power outlets are provided
below the climate control, in the center
console and in the cargo area. Electrical
power (12 V DC) from the battery is
available at any of the outlets when the
ignition switch is in either the “ACC” or
“ON” position.
You can use an in-vehicle electrical appli-
ance by connecting it to an outlet.
The maximum power rating of an appli-
ance that can be connected is 120 W. Do
not use an appliance which exceeds the
indicated wattage for each outlet.
When using appliances connected to two
or more outlets simultaneously, the total
power consumed by them must not ex-
ceed 120 W.

– CONTINUED –

Interior equipment/Accessory power outlets

6-9

6

(274,1)

北米Model "A2550BE-A" EDITED: 2018/ 5/ 9

CAUTION

.

Do not attempt to use a cigarette

lighter in the accessory power
outlet.

.

Do not place any foreign objects,

especially metal ones such as
coins or aluminum foil, into the
accessory power outlet. That
could cause a short circuit. Al-
ways put the cap on the acces-
sory power outlet when it is not in
use.

.

Use only electrical appliances

which are designed for 12 V DC.

The maximum power rating of an
appliance that can be connected
is 120 W. Do not use an appliance
which exceeds the indicated wat-
tage for each outlet.

When using appliances con-
nected to two or more outlets
simultaneously, the total power
consumed by them must not
exceed 120 W. Overloading the
accessory power outlet can
cause a short circuit. Do not use
double adapters or more than
one electrical appliance.

.

If the plug on your electric appli-

ance is either too loose or too

tight for the accessory power
outlet, this can result in a poor
contact or cause the plug to get
stuck. Only use plugs that fit
properly.

.

Use of an electric appliance in the

accessory power outlet for a long
period of time while the engine is
not running can cause battery
discharge.

.

Before driving your vehicle, make

sure that the plug and the cord on
your electrical appliance will not
interfere with your shifting gears
and operating the accelerator
and brake pedals. If they do, do
not use the electrical appliance
while driving.

Upper compartment

Lower compartment

NOTE

When the lid of the center console is
closed, a gap remains between the
center console and the lid to allow the

Interior equipment/Accessory power outlets

6-10

(275,1)

北米Model "A2550BE-A" EDITED: 2018/ 5/ 9

power outlet in the center console to be
used. Pass the cord of the electrical
appliance through this gap.

USB power supply (if
equipped)

CAUTION

.

The specification of a USB term-

inal that can be used is the A-
type. If a different specification of
terminal is connected, power
supply or charging may not be
possible, or the device may mal-
function.

.

There is no guarantee even when

a connected device malfunctions
or data is damaged. The connec-
tion of a device shall be per-
formed at your responsibility.

.

To avoid an electric shock or a

malfunction, observe the follow-
ing precautions.

– Do not connect a USB hub.

– Do not insert any metal or

other foreign object into the
USB terminal.

– Do not spill water or other

liquid on the USB terminal.

.

When you have connected a

cable, pay attention not to pull
on the connected cable with your
legs. Otherwise, it may result in

injury to you by falling over, or a
malfunction of the connected
device.

.

If a device is connected for a long

time when the engine is not
running, doing so may cause the
risk of a discharged battery. Even
when the engine is running, we
recommend that you do not con-
nect a device for an unnecessa-
rily long time.

.

Do not connect a malfunctioning

device. Doing so may cause the
risk of smoke and fire.

NOTE

.

The USB power supply is designed

to supply a maximum rated power of 5
V/2.1 A (The available electricity of the
two USB terminals is a maximum of 4.2
A.). Before connecting a device, be sure
to read the instruction manual of the
device and check whether or not this
specification of the output is supported
by the device. If a device that requires
power exceeding the maximum rating
is connected, power supply or charging
may not be possible. Even if charging
could be completed, the time required
for charging may be longer than when
the genuine charger for that device is

– CONTINUED –

Interior equipment/USB power supply

6-11

6

(276,1)

北米Model "A2550BE-A" EDITED: 2018/ 5/ 9

used.
.

Depending on the device, charging

may be possible only when a special
cable is used. In this case, be sure to
connect the device using the special
cable.
.

When a device that communicates

with a PC is connected, power supply
or charging may not be possible.
.

When connect a device for charging,

disconnect the device promptly after
charging is completed.

Front seat USB power supply (An audio
device can be connected and used)

Console USB power supply (power supply
function only) (if equipped)

When the ignition switch is in the “ACC” or
“ON” position and a USB electronic device
is connected to the USB terminal, 5 V DC
power can be supplied to the device. Use
the USB terminal to use or charge an
electronic device.
When using the terminal, open the USB
power supply cover. After use, close the
USB power supply cover.

Ashtray (if equipped)

CAUTION

Observe the following precautions.
Not doing so could result in a fire.

.

Always extinguish matches and

cigarettes before putting them
into the ashtray, and then close
the ashtray securely.

.

Do not put flammable material in

the ashtray.

.

Do not leave a lighted cigarette in

the ashtray.

.

Do not leave a lot of cigarette

butts in the ashtray.

Interior equipment/Ashtray

6-12

(277,1)

北米Model "A2550BE-A" EDITED: 2018/ 5/ 9

The portable ashtray can be installed in
each cup holder. For the locations of the
cup holders, refer to “Cup holder” F6-7.
When using the ashtray, open the lid of the
ashtray. When removing the ashtray from
a cup holder, pull the ashtray upwards.
Fully close the lid after using the ashtray to
help reduce residual smoke.

NOTE

Particles of ash and tobacco will accu-
mulate around the hinges of the ash-
tray’s inner lid. Clean them off using a
toothbrush or another narrow-ended
implement.

Coat hook

WARNING

Obey the following instructions.

.

Do not hang coat hangers or

other hard or pointed objects on
the coat hooks. Hang clothing
directly on the coat hooks with-
out using hangers.

.

Before hanging clothing on the

coat hooks, make sure there are
no pointed objects in the pock-
ets.

If these instructions are ignored, the
following may occur in sudden
stops or in a collision.

.

serious injuries by the items

thrown through the cabin.

.

incorrect SRS curtain airbag de-

ployment

CAUTION

Never hang anything on the coat
hook that might obstruct the driver’s
view or that could cause injury in
sudden stops or in a collision. And
do not hang items on the coat hook
that weigh 11 lbs (5 kg) or more.

The coat hook is attached to each rear
passenger’s hand grip.

Interior equipment/Coat hook

6-13

6

(278,1)

北米Model "A2550BE-A" EDITED: 2018/ 5/ 9

Shopping bag hook

CAUTION

Do not hang items on the shopping
bag hook that weigh 11 lbs (5 kg) or
more.

&

Legacy

A shopping bag hook is attached to each
inner side wall of the trunk near the trunk
lid opening.

&

Outback

A shopping bag hook is attached to each
side of the cargo area.
To use the hook, push the upper portion
and the shopping bag hook will appear.
Store the hook after using it.

Convenient grip (Outback)

CAUTION

.

Do not hang items on the con-

venient grip that weigh 6 lbs (3
kg) or more. Depending on the
conditions of use (for example, in
low temperatures, etc.), the rear
gate may lower even with lighter
loads. However, this is not a
malfunction. Be careful not to hit
your head or other body parts.

.

When using the convenient grip,

do not try to close the rear gate.
Doing so may cause the item on
the grip to be jammed in the rear
gate and damaged. Remove the
item from the grip before closing
the rear gate.

Interior equipment/Shopping bag hook

6-14

(279,1)

北米Model "A2550BE-A" EDITED: 2018/ 5/ 9

A convenient grip is attached to the rear
gate trim. When the rear gate is open, you
can hang a candle lantern, wet suit, etc. on
the grip.

Floor mat

CAUTION

If the floor mat slips forward and
interferes with the movement of the
pedals during driving, it could cause
an accident. Observe the following
precautions to prevent the floor mat
from slipping forward.

.

Be sure to use a genuine
SUBARU floor mat designed with
grommets in the correct loca-
tions.

.

Make sure that the driver’s floor

mat is placed back in its proper
location and is correctly secured
on its retaining pins.

.

Do not use more than one floor

mat.

Retaining pins are located on the driver’s
side floor.
The floor mat should be properly secured
using the built-in grommets, by placing the
grommets over the pins and pushing them
downward.

Interior equipment/Floor mat

6-15

6

(280,1)

北米Model "A2550BE-A" EDITED: 2018/ 5/ 9

Cargo area cover
(Outback – if equipped)

The cargo area cover is provided for
covering the cargo area and to protect its
contents from direct sunlight. This cover is
detachable to make room for additional
cargo.

&

Using the cover

To extend the cargo area cover:

1)

Stopper

1. Hold the handle located at the center of
the cargo area cover and lift the handle
upward slightly to unlock the stoppers that
are located at the right and left end of the
cover.

2. Pull the handle toward you to extend
the cargo area cover. Then insert its hooks
into the catches as shown.

To rewind the cargo area cover:
1. Hold the handle located at the center of
the cargo area cover, pull it toward you and
lift up slightly to unlock the cargo area
cover from the catches.

1)

Stopper

2. Slowly rewind the cargo area cover
completely. Then lift the handle upward
slightly to lock the stoppers.

WARNING

Do not place anything on the ex-
tended cover. Putting excessive
weight on the extended cover can
break it and an object on the cover
could tumble forward in the event of
a sudden stop or collision. This
could cause serious injury.

Interior equipment/Cargo area cover (Outback – if equipped)

6-16

(281,1)

北米Model "A2550BE-A" EDITED: 2018/ 5/ 9

CAUTION

.

Be careful not to scratch the rear

gate stays while extending and
rewinding the cover. Scratches
on the stays could cause leakage
of gas from the stays, which may
result in their inability to hold the
rear gate open.

.

When reclining the rear seatback,

move the front cover backward
so that the cover is not damaged.

&

To install the front cover

CAUTION

When reclining the rear seatback,
move the front cover backward so
that the cover is not damaged.

1. Align the right side of the front cover
with the triangle mark before fixing the
cover in place.
2. Push the front cover to the right side
and shorten the bar.
3. Align the left side of the front cover with
the triangle mark before fixing the cover in
place.

&

To remove the front cover

1. Push the front cover to the right side
and shorten the bar.
2. Remove the front cover.

&

To remove the cover housing

1. Rewind the cover.

2. Hold down the button on the right-hand
rear quarter panel and lift up the right-hand
cover housing.
3. Remove the cover housing.

– CONTINUED –

Interior equipment/Cargo area cover (Outback – if equipped)

6-17

6

(282,1)

北米Model "A2550BE-A" EDITED: 2018/ 5/ 9

&

Stowage of the cargo area
cover

The cargo area cover can be stowed in
under the cargo floor.

1. To open the lid, pull the handle up.

2. To keep the lid open, hang the hook
(provided on the back of the lid) on the rear
edge of the roof.

3. Remove the left and right parts of the
cargo floor lid.

4. Turn the cover housing 180 degrees
toward the front.

5. Insert the left end of the cover housing
into the retainer.

Interior equipment/Cargo area cover (Outback – if equipped)

6-18

(283,1)

北米Model "A2550BE-A" EDITED: 2018/ 5/ 9

6. Stow the cover housing in the cargo
area end.

&

To take out the stowed cover
housing

1. Raise the right side of the cover
housing.
2. Take out the cover housing by pulling it
toward you.

&

To install the cover housing

1. Insert both ends of the cover housing
into the retainers.

2. Make sure to fix the front part of the
cargo area cover behind the rear seat.

Interior equipment/Cargo area cover (Outback – if equipped)

6-19

6

(284,1)

北米Model "A2550BE-A" EDITED: 2018/ 5/ 9

Convenient tie-down hooks
(Outback)

CAUTION

The convenient tie-down hooks are
designed only for securing light
cargo. Never try to secure cargo that
exceeds the capacity of the hooks.
The maximum load capacity is 110
lbs (50 kg) per hook.

The cargo area is equipped with four tie-
down hooks so that cargo can be secured
with a luggage net or ropes.

When using the tie-down hooks, turn them
down out of the storing recesses. When
not in use, put the hooks up into the storing
recesses.

Under-floor storage compart-
ment

The subfloor storage compartment is
located under the floor of the trunk or
cargo area and can be used to store small
items. To open the lid, pull the tab or
handle up.

NOTE

When storing a flat tire, put the subfloor
storage in the trunk or cargo area.

CAUTION

.

Always keep the lid of the sub-

floor storage compartment
closed while driving to reduce
the risk of injury in the event of
sudden stop or an accident.

.

Do not store spray cans, contain-

ers with flammable or corrosive
liquids or any other dangerous
items in the subfloor storage
compartment.

Interior equipment/Convenient tie-down hooks (Outback)

6-20

(285,1)

北米Model "A2550BE-A" EDITED: 2018/ 5/ 9

Legacy

Outback

For Outback, hang the hook provided on
the underside of the lid on the rear edge of
the roof to keep the lid open.

Interior equipment/Under-floor storage compartment

6-21

6

(2,1)

Model "ALL_MODEL_MEMO" EDITED: 2017/ 11/ 6

Left Page

— — — — — — — — — — — — — — — — — — — — — — — — — — — — — — — — — — — — — — — —

— — — — — — — — — — — — — — — — — — — — — — — — — — — — — — — — — — — — — — — —

— — — — — — — — — — — — — — — — — — — — — — — — — — — — — — — — — — — — — — — —

— — — — — — — — — — — — — — — — — — — — — — — — — — — — — — — — — — — — — — — —

— — — — — — — — — — — — — — — — — — — — — — — — — — — — — — — — — — — — — — — —

— — — — — — — — — — — — — — — — — — — — — — — — — — — — — — — — — — — — — — — —

— — — — — — — — — — — — — — — — — — — — — — — — — — — — — — — — — — — — — — — —

— — — — — — — — — — — — — — — — — — — — — — — — — — — — — — — — — — — — — — — —

— — — — — — — — — — — — — — — — — — — — — — — — — — — — — — — — — — — — — — — —

— — — — — — — — — — — — — — — — — — — — — — — — — — — — — — — — — — — — — — — —

— — — — — — — — — — — — — — — — — — — — — — — — — — — — — — — — — — — — — — — —

— — — — — — — — — — — — — — — — — — — — — — — — — — — — — — — — — — — — — — — —

— — — — — — — — — — — — — — — — — — — — — — — — — — — — — — — — — — — — — — — —

(287,1)

北米Model "A2550BE-A" EDITED: 2018/ 5/ 9

Fuel .......................................................................... 7-3

Fuel requirements .................................................. 7-3
Fuel filler lid and cap ............................................. 7-4

State emission testing (U.S. only) ......................... 7-7
Preparing to drive ................................................... 7-8
Starting and stopping the engine (models

without push-button ignition switch) ................. 7-9

General precautions when starting/stopping

engine ................................................................. 7-9

Starting engine ...................................................... 7-9
Stopping the engine.............................................. 7-10
Steering lock ........................................................ 7-11

Starting and stopping engine (models with

push-button start system)................................. 7-11

Safety precautions ................................................ 7-11
Operating range for push-button start system ....... 7-11
Starting engine ..................................................... 7-11
Stopping engine.................................................... 7-13
When access key fob does not operate properly ... 7-13
Steering lock ........................................................ 7-13

Remote engine start system (dealer option) ...... 7-14

Models with “keyless access with push-button

start system” ...................................................... 7-15

Models without “keyless access with push-button

start system” ...................................................... 7-16

Entering the vehicle while it is running via remote

start.................................................................... 7-19

Entering the vehicle following remote engine start

shutdown............................................................ 7-19

Pre-heating or pre-cooling the interior of the

vehicle................................................................ 7-19

Service mode (models without “keyless access

with push-button start system”) ......................... 7-19

Remote transmitter program (models without

“keyless access with push-button start
system”)............................................................ 7-20

System maintenance............................................. 7-20
Certification for remote engine starter................... 7-22

Continuously variable transmission ................... 7-22

Select lever .......................................................... 7-23
Shift lock function ................................................ 7-25
Selection of manual mode .................................... 7-27
Driving tips........................................................... 7-28

Power steering...................................................... 7-28
Braking .................................................................. 7-29

Braking tips.......................................................... 7-29
Brake system ....................................................... 7-30
Disc brake pad wear warning indicators................ 7-30

ABS (Anti-lock Brake System)............................. 7-31

ABS self-check ..................................................... 7-31
ABS warning light................................................. 7-31

Electronic Brake Force Distribution (EBD)

system ................................................................ 7-31

Steps to take if EBD system malfunctions............. 7-32

Vehicle Dynamics Control system ...................... 7-33

Vehicle Dynamics Control system monitor ............ 7-34
Vehicle Dynamics Control OFF switch................... 7-34

X-MODE (Outback)................................................ 7-35

To activate/deactivate the X-MODE ........................ 7-36
Hill descent control function ................................. 7-37

Tire pressure monitoring system (TPMS)

(if equipped) ....................................................... 7-38

Starting and operating

7


Content   ..  15  16  17  18   ..