Subaru Impreza 3 / Impreza WRX / Impreza WRX STI. Manual - part 499


  Index      Subaru     Subaru Impreza 3 / Impreza WRX / Impreza WRX STI - service repair manual 2008-2014 year


Search            


Content   ..  497  498  499  500   ..


Subaru Impreza 3 / Impreza WRX / Impreza WRX STI. Manual - part 499


DI-41

Rear Differential (T-type)

DIFFERENTIALS

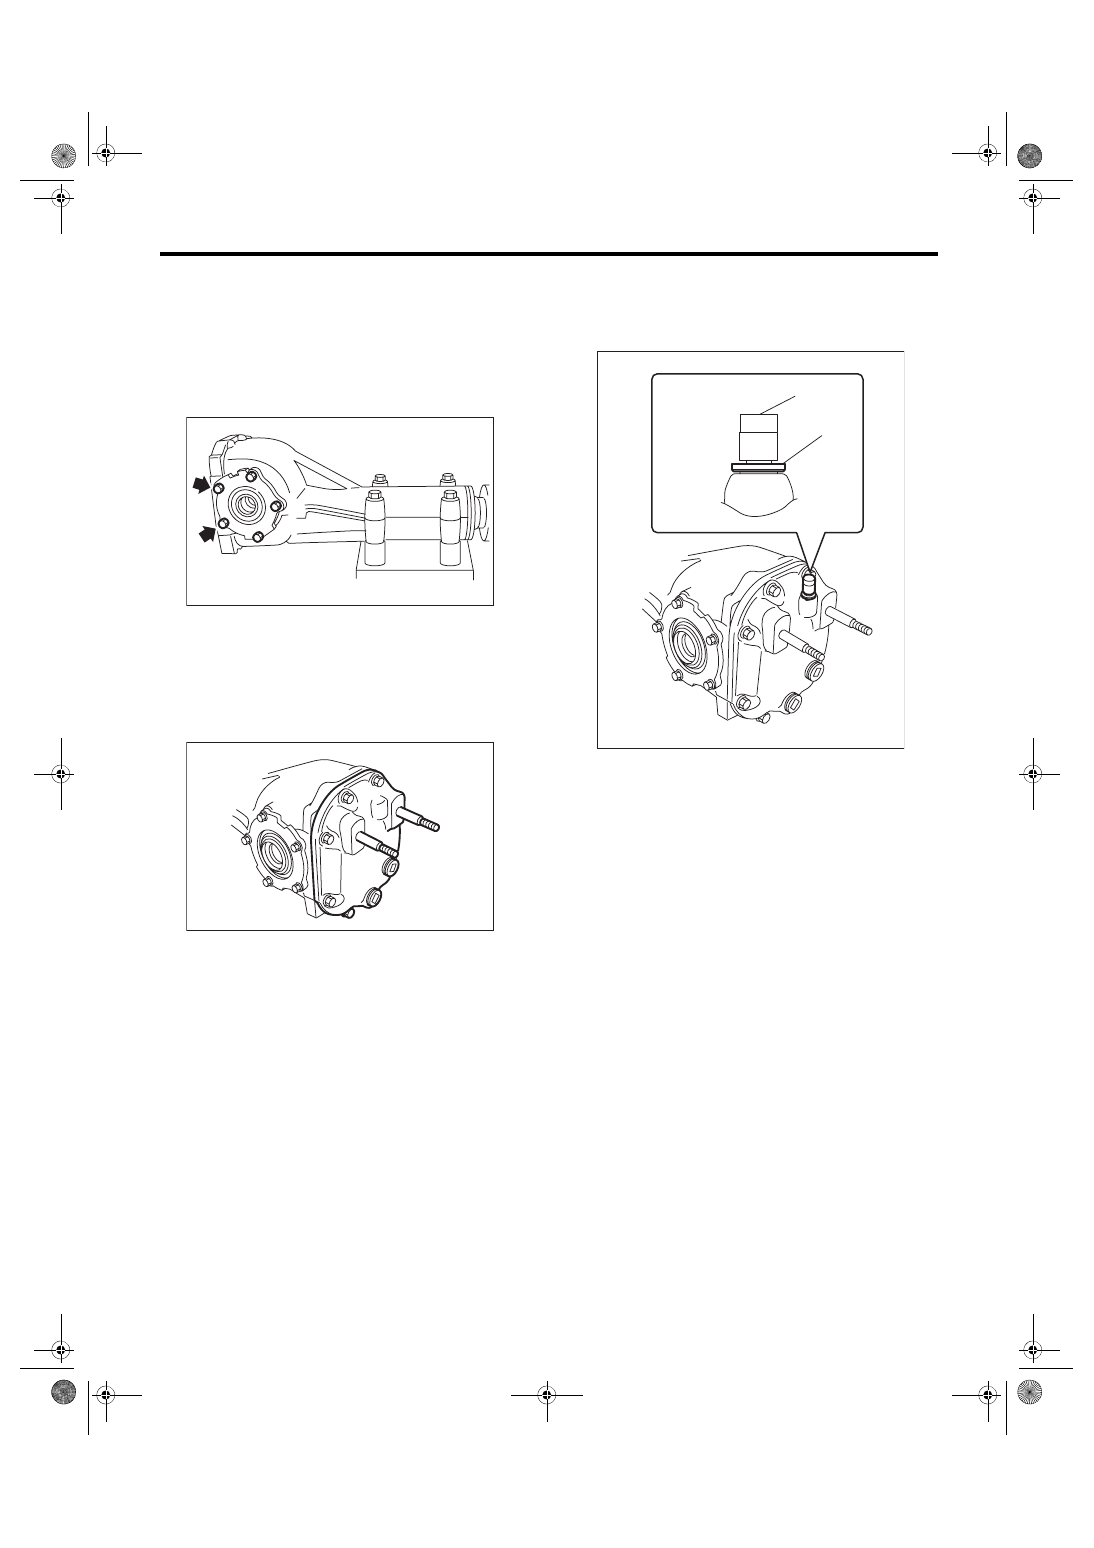
25) Apply liquid gasket to the bolts indicated by ar-

rows, and tighten the bolts.
Liquid gasket:

THREE BOND 1110F (Part No. K0879Y0021), 

THREE BOND 1110B or equivalent

Tightening torque:

10.5 N·m (1.1 kgf-m, 7.7 ft-lb)

26) Install  the  gasket  and  rear  cover,  and  tighten

the bolts to specified torque.
NOTE:

Use a new gasket.
Tightening torque:

29.5 N·m (3.0 kgf-m, 21.8 ft-lb)

27) Install the air breather cap.
NOTE:

When installing the air breather cap, do not tap sec-

tion (A). Be sure to tap section (B) to install.

28) Install the drain plug.
NOTE:

Apply liquid gasket to the drain plug.
Liquid gasket:

THREE BOND 1105 (Part No. 004403010) or 

equivalent

Tightening torque:

49 N·m (5.0 kgf-m, 36.1 ft-lb)

29) Install the filler plug.
NOTE:

After installing the rear differential assembly to the

vehicle,  fill  the  gear  oil,  then  apply  liquid  gasket,

and tighten to the specified torque. <Ref. to DI-19,

REPLACEMENT, Differential Gear Oil.>

DI-00461

DI-00490

DI-00674

(A)

(B)

DI-42

Rear Differential (T-type)

DIFFERENTIALS

2. T-TYPE (H3)

NOTE:

• Assemble in the reverse order of disassembly.

• Check and adjust each part during assembly.

• Keep  the  shims  and  washers  in  order,  so  that

they are not improperly installed.

• Thoroughly  clean  the  surfaces  on  which  the

shims, washers and bearings are to be installed.

• Apply gear oil when installing the bearings and

thrust washers.

• Be careful not to mix up the RH and LH bearing

races.

• Use a new O-ring and gasket.

• Replace the oil seal with a new part at every dis-

assembly.

• Be careful not to mix up the oil seal RH and LH.

• Apply differential gear oil to the lips when install-

ing the oil seal.

1) Adjusting preload for front and rear bearings
NOTE:

Adjust the bearing preload between front and rear

bearings with spacer and washer. Pinion height ad-

justing  washer  is  not  affected  by  this  adjustment.

The adjustment must not be carried out with oil seal

inserted.

2) Using the ST, press-fit the rear bearing race to

the differential carrier.

ST 398417700

DRIFT

3) Using the ST, press-fit the front bearing race to

the differential carrier.
NOTE:

Use a new front bearing race.

ST 398477702

DRIFT

4) Selecting the pinion height adjusting washer

(1) Measure the thickness of the inserted pinion

height adjusting washer.

(2) Read the markings on both the current drive

pinion gear and the new pinion gear.

NOTE:

No marking means 0 (zero).

DI-00697

ST

DI-00318

DI-00319

0

0

5

5

10

10

15

DI-00320

+2

DI-00321

DI-43

Rear Differential (T-type)

DIFFERENTIALS

(3) Calculate the thickness of pinion height ad-

justing washer to be inserted from the following

formula, and replace the installed washer with a

new washer of the calculated thickness.

T = T1 + (T2 × 0.01 – T3 × 0.01)

(Example of calculation)

T1 = 3.30 mm (0.1299 in), T2 = +2, T3 = –1

T = 3.30 mm (0.1299 in) + {(2 × 0.01) – (–1 ×

0.01)} = 3.33 mm (0.1311 in)

Result: Thickness = 3.33 mm (0.1311 in)

The  washer  with  part  number  38336AA310  is

used.

5) Install the selected pinion height adjusting wash-

er on drive pinion, and push the rear bearing cone

into position with ST.

ST 18674AA000 INSTALLER

6) Insert the drive pinion into the differential carrier,

and install the originally attached preload adjusting

spacer and washer.

7) Install the front bearing cone.
NOTE:

Use new front bearing cone.

T

Thickness of selected pinion height adjusting 
washer mm (in)


T1

Thickness of inserted pinion height adjusting 
washer mm (in)


T2

Number of the installed drive pinion gear mark-
ing mm (in)


T3

Number of new drive pinion gear marking mm 
(in)


Memo:

Pinion height adjusting washer

Part No.

Thickness mm (in)

38336AA230

3.09 (0.1217)

38336AA240

3.12 (0.1228)

38336AA250

3.15 (0.1240)

38336AA260

3.18 (0.1252)

38336AA270

3.21 (0.1264)

38336AA280

3.24 (0.1276)

38336AA290

3.27 (0.1287)

38336AA300

3.30 (0.1299)

38336AA310

3.33 (0.1311)

38336AA320

3.36 (0.1323)

38336AA330

3.39 (0.1335)

38336AA340

3.42 (0.1346)

38336AA350

3.45 (0.1358)

38336AA360

3.48 (0.1370)

38336AA370

3.51 (0.1382)

38336AA380

3.54 (0.1394)

38336AA390

3.57 (0.1406)

38336AA400

3.60 (0.1417)

38336AA410

3.63 (0.1429)

38336AA420

3.66 (0.1441)

(A) Drive pinion
(B) Preload adjusting spacer

(C) Preload adjusting washer
(D) Differential carrier

DI-00085

ST

DI-00704

(A)

(B)

(C)

(D)

DI-44

Rear Differential (T-type)

DIFFERENTIALS

8) Insert the spacer and press-fit the pilot bearing

using ST.
NOTE:

Use a new pilot bearing.

ST1 399780104

WEIGHT

ST2 899580100

INSTALLER

ST3 398507703

DUMMY COLLAR

ST4 498937110

HOLDER DRIVE PINION

9) Press-fit  the  companion  flange  with  ST1,  ST2,

and ST3.
NOTE:

Be careful not to damage the bearing.

ST1 899874100

INSTALLER

ST2 399780104

WEIGHT

ST3 498937110

HOLDER DRIVE PINION

10) Attach the self-locking nut and use the ST to fix

the  companion  flange  in  place,  then  tighten  the

self-locking nut.
Tightening torque:

181.5 N·m (18.5 kgf-m, 133.9 ft-lb)

ST 18633AA000 WRENCH COMPL

11) Rotate the drive pinion shaft 10 times or more

to  fit  it  in  the  respective  taper  roller  bearing,  and

then measure the initial load or initial torque.
Initial load:

24.1 — 38.6 N (2.5 — 3.9 kgf, 5.4 — 8.7 lbf)

Initial torque:

0.98 — 1.57 N·m (0.10 — 0.16 kgf-m, 0.72 — 

1.16 ft-lb)

ST2

ST3

ST1

ST4

ST1

ST4

DI-00322

ST3

ST1

ST2

ST2

DI-00323

DI-00091

ST

DI-00715

DI-00481


Content   ..  497  498  499  500   ..