Content .. 1010 1011 1012 1013 ..
Subaru Legacy (2005 year). Manual - part 1012
EB-25
EXTERIOR BODY PANELS
Trunk Lid
8. Trunk Lid
A: REMOVAL
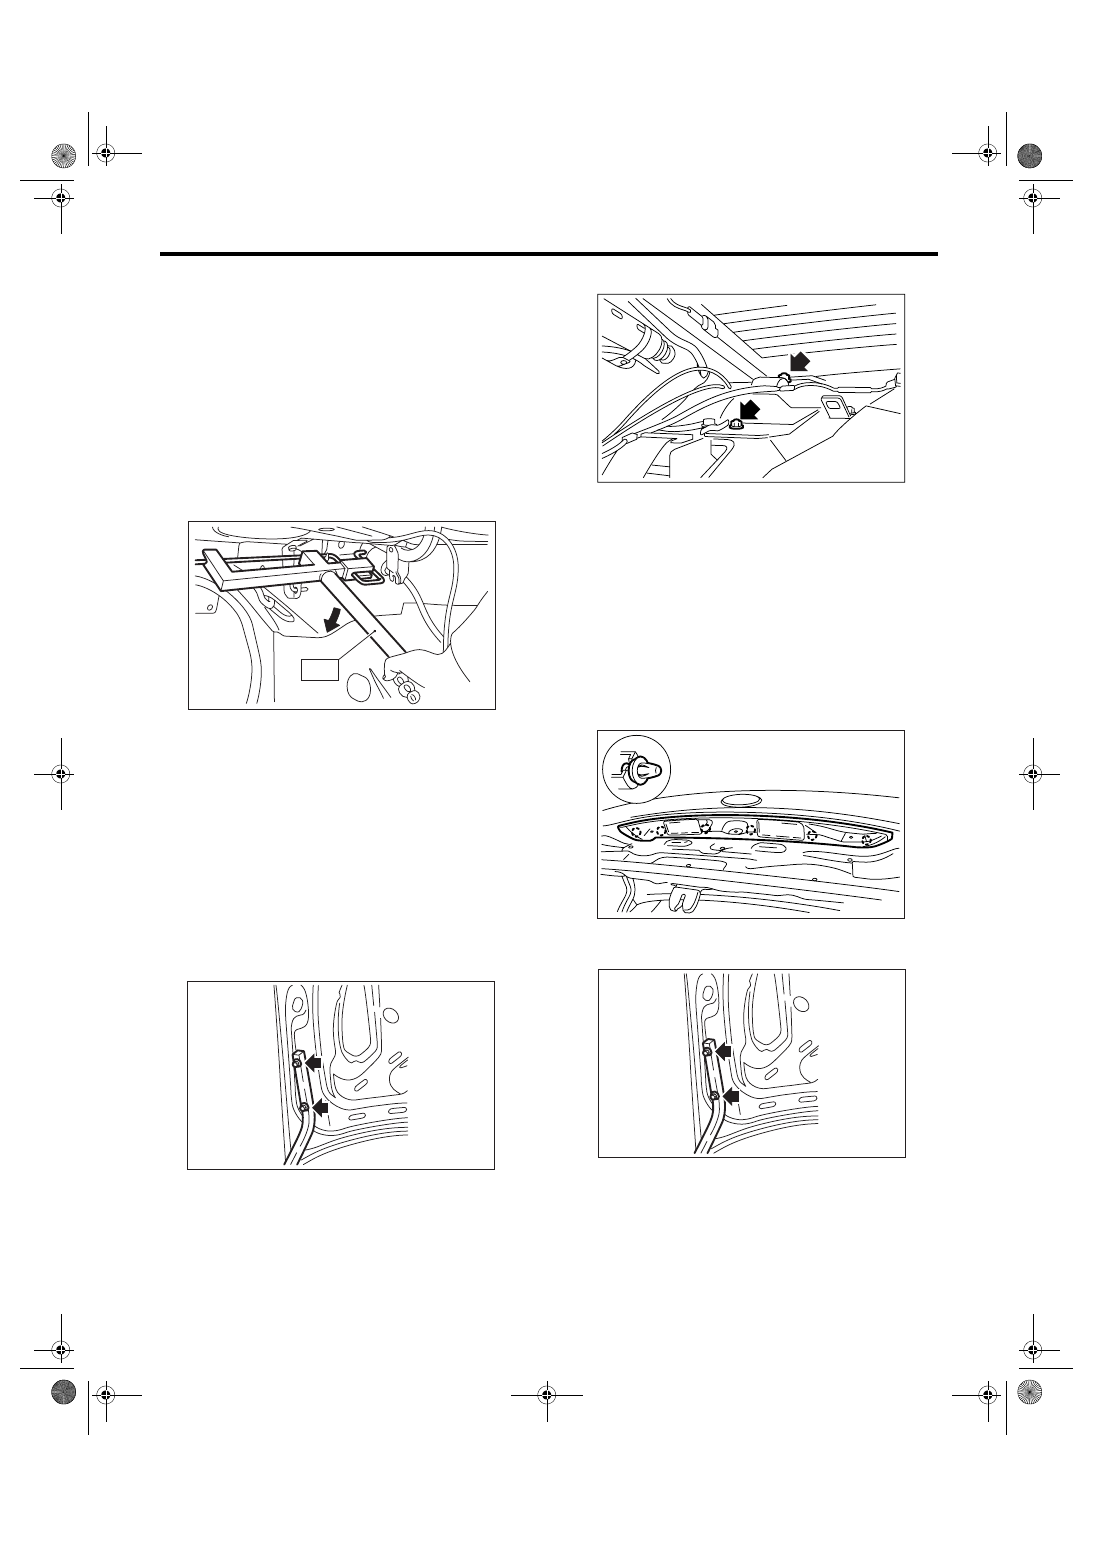
1. TORSION BAR
1) Open the trunk lid.
2) Using the ST, remove the torsion bar from the
trunk lid hinge link.
ST
927780000
REMOVER
CAUTION:
During removal and installation, carefully han-
dle the torsion bar, because it will generate re-
active force.
3) Remove the right/left torsion bars.
2. TRUNK LID ARM
1) Disconnect the ground cable from battery.
2) Open the trunk lid to remove the trunk lid trim,
trunk lid arm cover and trunk room trim. <Ref. to EI-
71, TRUNK ROOM TRIM, REMOVAL, Trunk Room
Trim.>
3) Disconnect the trunk lid release cable. <Ref. to
SL-37, REMOVAL, Trunk Lid Lock Assembly.>
4) Disconnect each connector, and remove the
harness clip.
5) Remove the trunk lid mounting bolts to remove
the trunk lid panel from trunk lid arm.
6) Remove the torsion bar from the trunk lid hinge
link. <Ref. to EB-25, TORSION BAR, REMOVAL,
Trunk Lid.>
7) Remove the rear shelf trim. <Ref. to EI-70, RE-
MOVAL, Rear Shelf Trim.>
8) Remove the bolts to remove the trunk lid arm.
3. TRUNK LID PANEL
1) Disconnect the ground cable from battery.
2) Open the trunk lid to remove the trunk lid trim
and trunk lid arm cover. <Ref. to EI-71, TRUNK
ROOM TRIM, REMOVAL, Trunk Room Trim.>
3) Disconnect the connector to remove the trunk lid
harness.
4) Remove the trunk lid lock assembly. <Ref. to SL-
37, REMOVAL, Trunk Lid Lock Assembly.>
5) Remove the trunk lid garnish. <Ref. to EI-75,
REMOVAL, Trunk Lid Garnish.>
6) Remove the license plate light cover.
7) Remove the bolts to remove the trunk lid panel
from the trunk lid arm.
EB-00067
ST
EB-00066
EB-00157
EB-00159
EB-00066