Subaru Legacy (2005 year). Manual - part 86
CO(H4SO 2.0)-19
COOLING
Thermostat
Tightening torque:
12 N
⋅
m (1.2 kgf-m, 8.9 ft-lb)
2) Connect the radiator outlet hose to thermostat
cover.
3) Install the under cover.
4) Lower the vehicle.
5) Fill with engine coolant. <Ref. to CO(H4SO 2.0)-
13, FILLING OF ENGINE COOLANT, REPLACE-
MENT, Engine Coolant.>
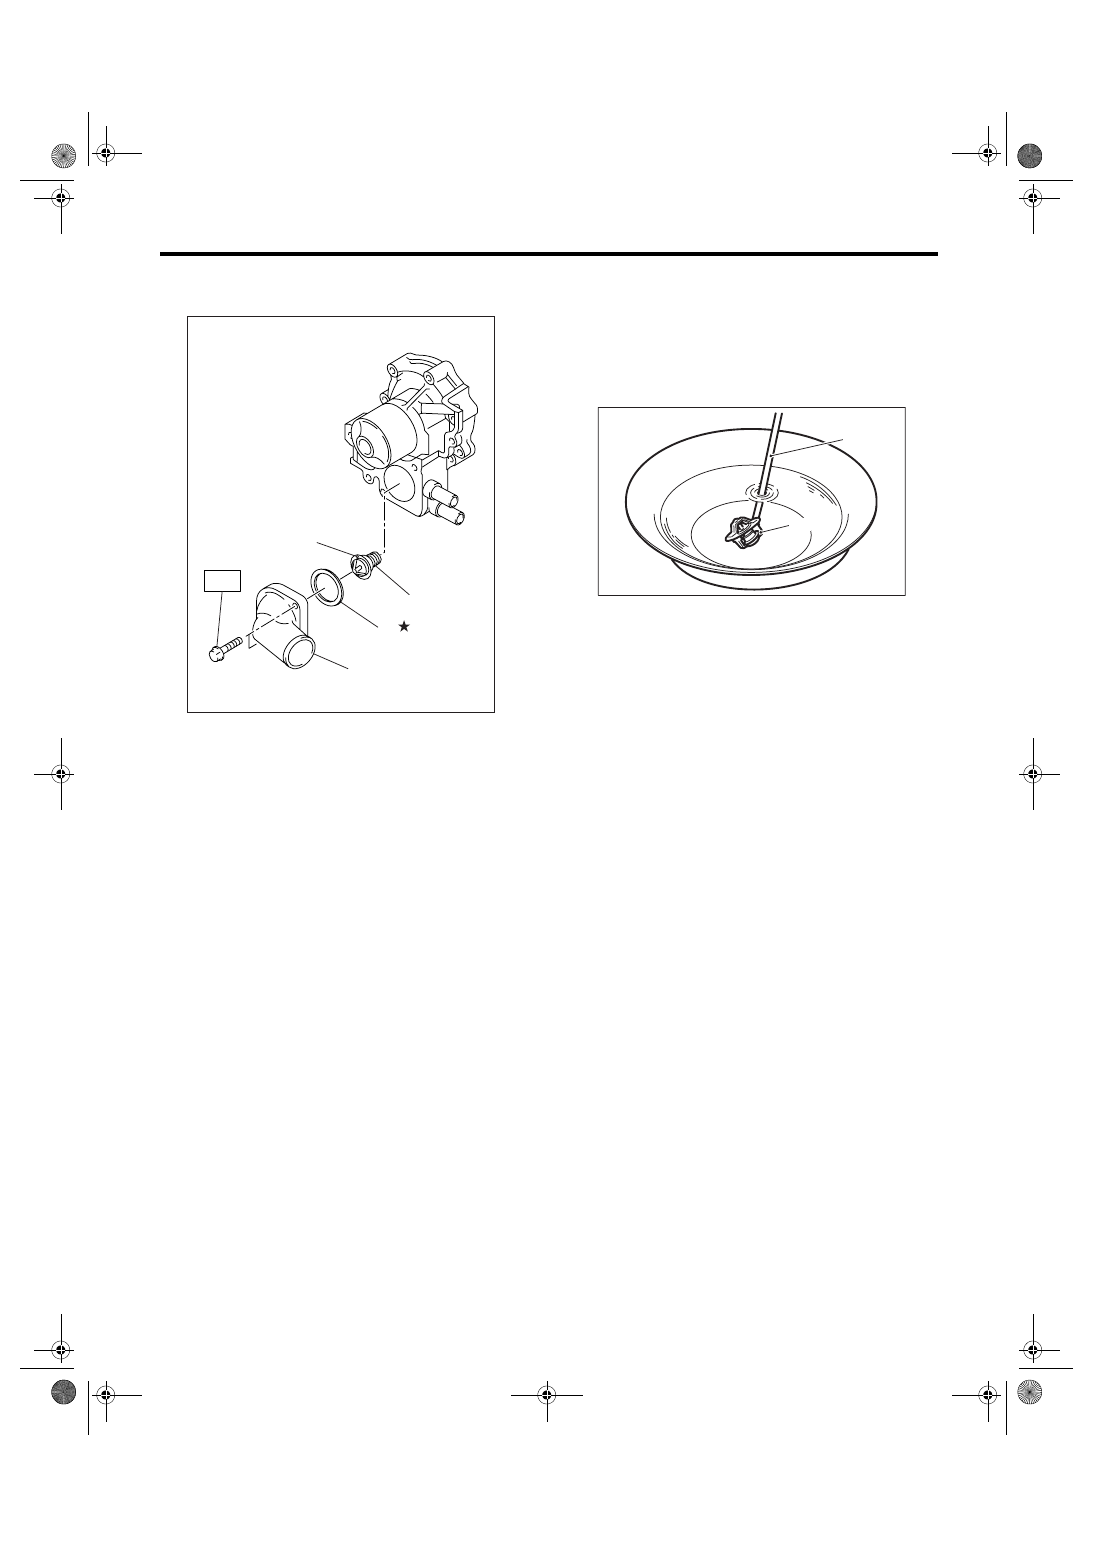
C: INSPECTION
Replace the thermostat if the valve does not close
completely at an ambient temperature or if the fol-
lowing test shows unsatisfactory results.
• Inspection method
Immerse the thermostat and a thermometer in wa-
ter. Raise water temperature gradually, and mea-
sure the temperature and valve lift when the valve
begins to open and when the valve is fully opened.
During the test, agitate the water for even temper-
ature distribution. The measurement should be to
the specification.
NOTE:
• Leave the thermostat in the boiling water for
more than five minutes before measuring the valve
lift.
• Hold the thermostat with a wire or the like to
avoid contacting with container bottom.
Starting temperature to open:
80 — 84
°
C (176 — 183
°
F)
Fully opens:
95
°
C (203
°
F)
Valve lift:
9.0 mm (0.354 in) or more
(A) Thermostat cover
(B) Gasket
(C) Thermostat
(D) Jiggle pin
CO-02167
(A)
T
(B)
(C)
(D)
(A) Thermometer
(B) Thermostat
CO-00033
( A )
( B )