Dacia SuperNova (engine E7J). Manual - part 58


  Index      Dacia     Dacia SuperNova (engine E7J) - service repair manual 2004 year


Search            


Content   ..  56  57  58  59   ..


Dacia SuperNova (engine E7J). Manual - part 58


DRIVE SHAFTS

29

BELLOWS TO WHEEL

Catch the steering knuckle casing in a vice

with soft jaws.

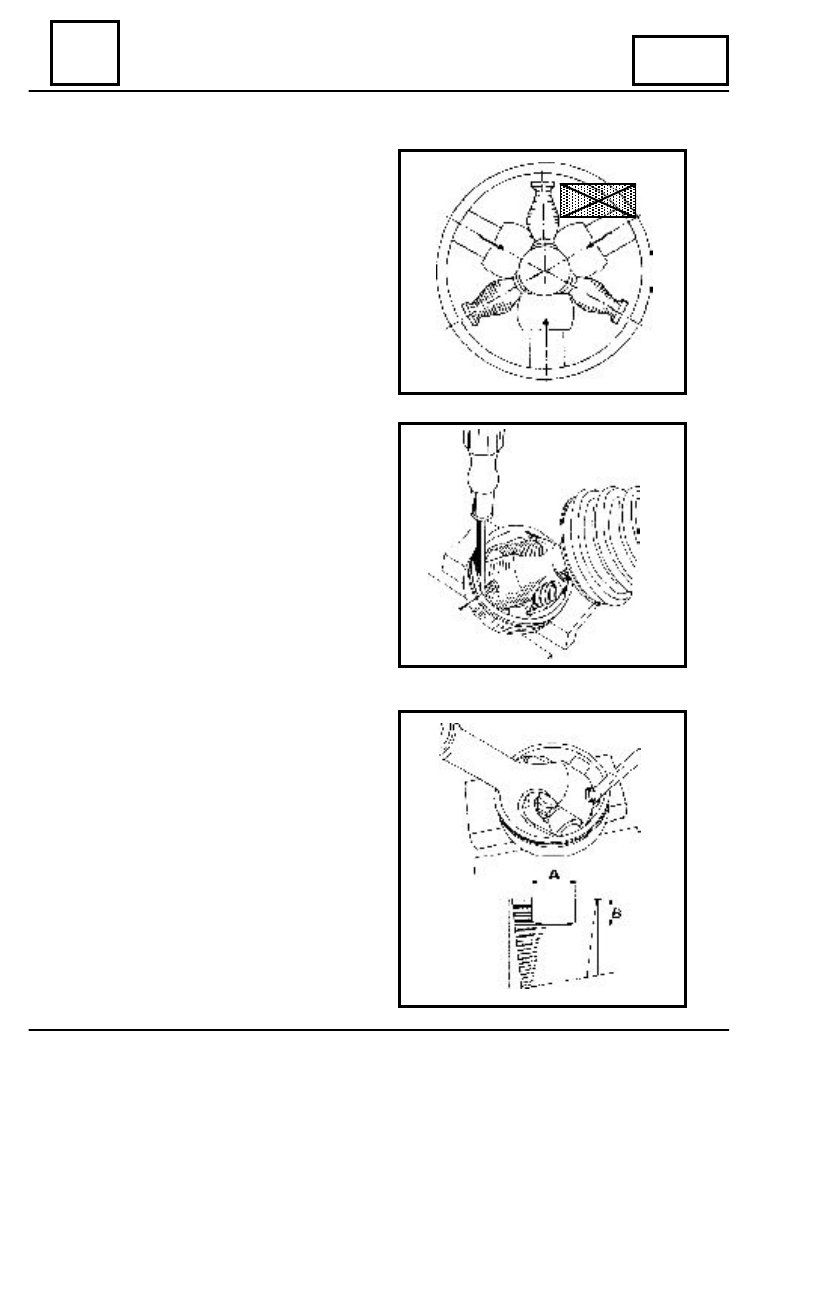
Put the spring and head in the tripod

groove.

Brings the clogs to the center.
Position the retaining star (s), and each of

its arms, being at the bisecting lines of the
angles formed by the tripod arms.

Introduce the transmission shaft in the

steering knuckle casing, positioning it, subject
to the marks (the three clogs penetrating in
the three rolling routes of the shaft).

Slide slowly the transmission shaft, in

order to engage one arm of the retaining star
in the marked point of  the  transmission shaft,
and press it for correct centering.

Placing the other retaining star two arms,

it will be made easy by a screwdriver, with its
end modified as per drawing:

A = 5 mm B = 3 mm
Ensure that retaining star arms are correctly

positioned in the shaft marks.

Check by hand, the joint operation.
Must not exist any hard point.
Distribute in the bellows and in the steering

knuckle casing the grease prescribed dosage.

NOTE

It is obligatory to observe the quantity and

type of the prescribed grease, 2 l +1 cl,  ELF
CARDREXA RNT 2.

29 - 10

Left

transmission

S

DRIVE SHAFTS

29

BELLOWS TO WHEEL

Position the two bellows beads in the grooves of the steering knuckle casing,

consequently on the transmission shaft tube.

Place a non-cutting, round headed rod between the transmission shaft and the bellows

in order to dose the amount of air inside.

Mount the two collars, by means of the two rods used also at the dismounting operation.

29 - 11

Left

transmission

DRIVE SHAFTS

29

BELLOWS TO GEARBOX

JOINT TOWARDS GEARBOX - GI

1. Tulip
2. Tripod
3. Blocking ring
4. Rubber bellows
5. Maintaining collars

DISMOUNTING

Cut the maintaining collar.

Cut by means of a saw the existent collar,

taking care not to scratch the tulip in the
mounting area with the bellows.

29 - 12

Right

transmissi

on

DRIVE SHAFTS

29

Cut the bellows.

Remove maximum of grease.

NOTE :
The tulip not being equipped with a

hood having retainin g wings,
dismounting is to be performed without
forcing.

It is avoided the cams exit from the

trunnions (tripod arms) because the roll-
needles and the cams are paired and must
be not reversed.

Never use thinner to wash the

component parts.

Dismount the blocking ring.

BELLOWS TO GEARBOX

29 - 13

Right

transmissi

on


Content   ..  56  57  58  59   ..