Peugeot Bipper Dag (2009 year). Instruction - part 4
3
8
Steering wheel controls
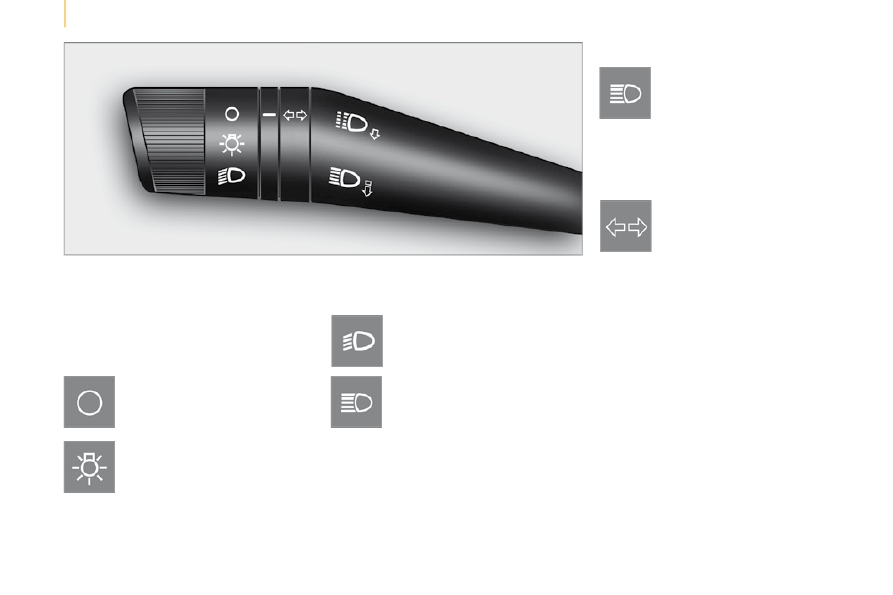
LIGHTING STALK
Selection is by rotation of the white mark
on the ring, when the ignition key is in the
RUNNING position.
All lamps off
Sidelamps on
This is indicated on the instrument
panel by lighting of the warning lamp.
Dipped headlamps/main beam
headlamps on
Dipped headlamps/main beam
headlamps change
Pull the lighting stalk fully towards you.
Headlamp fl ash
Direction indicators
"Motorway" function
System which indicates a change of lane on
high-speed roads.
Press the lighting stalk up or down once,
without passing the point of resistance; the
corresponding direction indicators will flash
three times.
Pull the lighting stalk towards you
gently, regardless of the position
of the ring.
Left: push downwards. The green
direction arrow warning lamp
flashes on the instrument panel.
Right: push upwards. The green
direction arrow warning lamp flashes on the
instrument panel.
Turn the ring into position.