Opel Zafira (2017 year). Manual - part 9
134
Lighting
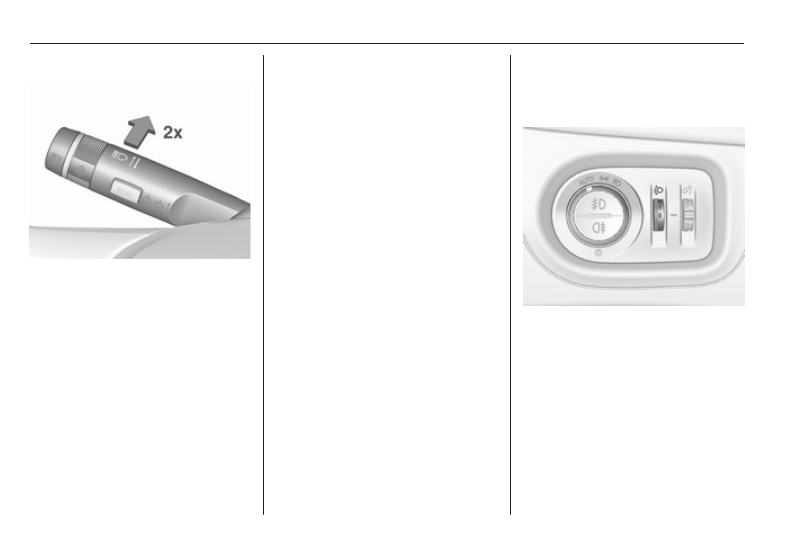
Activation
The high beam assist is activated by
pushing the indicator lever twice with
a speed above 40 km/h.
The green control indicator f
illuminates continuously when the
assist is activated, the blue one 7
illuminates when high beam is on.
Control indicator f 3 116.
Deactivation
Push indicator lever once. It is also
deactivated when front fog lights are
switched on.
If a headlight flash is activated when
the high beam is on, the high beam
assist will be deactivated.
If a headlight flash is activated when
the high beam is off, the high beam
assist will remain activated.
The latest setting of the high beam
assist will remain after the ignition is
switched on again.
Headlight flash
To activate the headlight flash, pull
lever.
Pulling lever deactivates high beam.
LED headlights 3 136.
Headlight range adjustment
Manual headlight range
adjustment
To adapt headlight range to the
vehicle load to prevent dazzling: turn
thumb wheel ? to required position.
0 : front seats occupied
1 : all seats occupied
2 : all seats occupied and load
compartment laden
3 : driver's seat occupied and load
compartment laden
Dynamic automatic headlight