Nissan Pathfinder (2024 year). Manual in english - page 17
 

  Index      Manuals     Nissan Pathfinder (2024 year). Manual in english


Search            copyright infringement  


Content      ..     15      16      17      18     ..


Nissan Pathfinder (2024 year). Manual in english - page 17


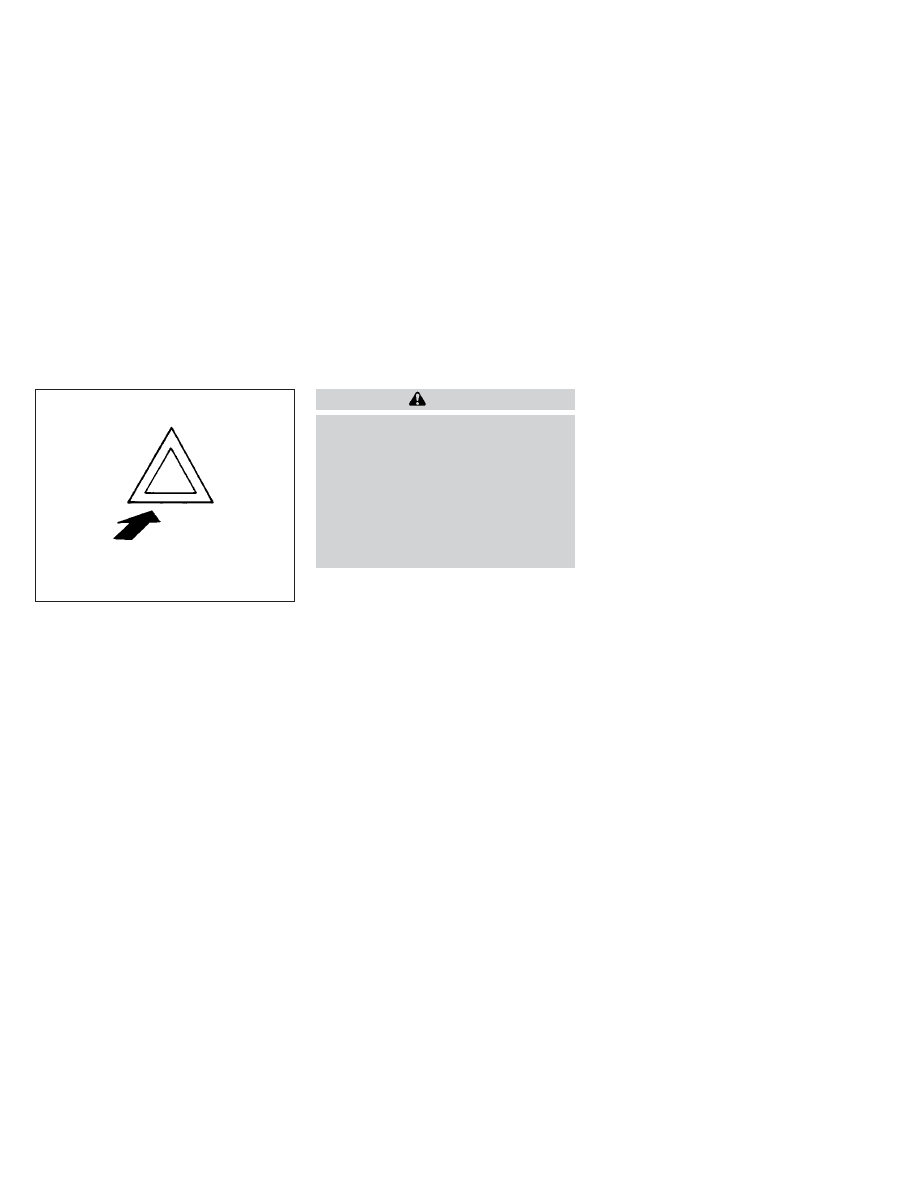
Push the switch on to warn other drivers
when you must stop or park under emer-
gency conditions. All turn signal lights flash.

WARNING

If stopping for an emergency, be sure
to move the vehicle well off the road.

Do not use the hazard warning flash-
ers while moving on the highway un-
less unusual circumstances force
you to drive so slowly that your ve-
hicle might become a hazard to other
traffic.

Turn signals do not work when the
hazard warning flasher lights are on.

The flashers will operate with the ignition
switch placed in any position.

Some jurisdictions may prohibit the use
of the hazard warning flasher switch
while driving.

To shut off the engine in an emergency
situation while driving, perform the follow-
ing procedure:
– Rapidly push the push-button ignition

switch three consecutive times in less
than 1.5 seconds, or

– Push and hold the push-button ignition

switch for more than 2 seconds.

LIC0394

HAZARD WARNING FLASHER SWITCH

EMERGENCY ENGINE SHUT OFF

6-2

In case of emergency

TIRE PRESSURE MONITORING
SYSTEM (TPMS)

This vehicle is equipped with Tire Pressure
Monitoring System (TPMS). It monitors tire
pressure of all tires except the spare. When
the low tire pressure warning light is lit, and
the “Tire Pressure Low - Add Air” warning
appears in the vehicle information display,
one or more of your tires is significantly
under-inflated. If equipped, the system also
displays pressure of all tires (except the
spare tire) on the display screen by sending
a signal from a sensor that is installed in
each wheel. If the vehicle is being driven
with low tire pressure, the TPMS will acti-
vate and warn you of it by the low tire pres-
sure warning light. This system will activate
only when the vehicle is driven at speeds
above 16 mph (25 km/h). For additional in-
formation, see “Warning lights, indicator
lights and audible reminders” (P. 2-13) and
the

“Tire

Pressure

Monitoring

System

(TPMS)” (P. 5-5).

WARNING

Radio waves could adversely affect
electric medical equipment. Those
who use a pacemaker should contact
the

electric

medical

equipment

manufacturer for the possible influ-
ences before use.

If the low tire pressure warning light
illuminates while driving, avoid sud-
den steering maneuvers or abrupt
braking, reduce vehicle speed, pull
off the road to a safe location and
stop the vehicle as soon as possible.
Driving with under-inflated tires may
permanently damage the tires and
increase the likelihood of tire failure.
Serious vehicle damage could occur
and may lead to an accident and
could result in serious personal in-
jury. Check the tire pressure for all
four tires. Adjust the tire pressure to
the recommended COLD tire pres-
sure shown on the Tire and Loading
Information label to turn the low tire
pressure warning light OFF. If the
light still illuminates while driving af-
ter adjusting the tire pressure, a tire
may be flat or the TPMS may be mal-

functioning. If you have a flat tire, re-
place it with a spare tire as soon as
possible, If no tire is flat and all tires
are properly inflated, have the vehicle
checked. It is recommended that you
visit a NISSAN dealer for this service.

When using a wheel without TPMS
such as the spare tire, the TPMS will
not function and the low tire pres-
sure warning light will flash for ap-
proximately 1 minute. The light will
remain on after 1 minute. Have your
tires replaced and/or TPMS system
reset as soon as possible. It is recom-
mended that you visit a NISSAN
dealer for these services.

Replacing tires with those not origi-
nally specified by NISSAN could af-
fect the proper operation of the
TPMS.

Do not inject any tire liquid or aerosol
tire sealant into the tires, as this may
cause a malfunction of the tire pres-
sure sensors.

FLAT TIRE

In case of emergency

6-3

CHANGING A FLAT TIRE

If you have a flat tire, follow the instructions
below:

Stopping the vehicle

1. Safely move the vehicle off the road and

away from traffic.

2. Turn on the hazard warning flashers.

3. Park on a level surface and apply the

parking brake. Press the park button to
shift to the P (Park) position.

4. Turn off the engine.

5. Raise the hood to warn other traffic and

to signal professional road assistance
personnel that you need assistance.

6. Have all passengers get out of the ve-

hicle and stand in a safe place, away
from traffic and clear of the vehicle.

WARNING

Make sure the parking brake is se-
curely applied and the shift position
is placed in the P (Park) position.

Never change tires when the vehicle
is on a slope, ice or slippery areas.
This is hazardous.

Never change tires if oncoming traf-
fic is close to your vehicle. Wait for
professional road assistance.

Blocking wheels

Place suitable blocks at both the front and
back of the wheel diagonally opposite the
flat tire to prevent the vehicle from moving
when it is jacked up.

WARNING

Be sure to block the wheel as the ve-
hicle may move and result in personal
injury.

LCE2142

A. Blocks

B. Flat tire

6-4

In case of emergency

Getting the spare tire and tools

1. Open the liftgate and lift the luggage

board in the cargo area using the strap.

2. Remove the jack and tool kit cover by

lifting up using the handles.

3. Remove the tool kit

O

A

by releasing the

Velcro straps

O

B

.

LCE2483

LCE2473

LIC5478

In case of emergency

6-5

4. Remove the jack.
• The jack is secured by a fastener

O

C

. To

release the fastener, assemble the jack-
ing rod

O

D

into the wheel nut wrench

O

E

and rotate counterclockwise to release.

• Insert the flat end of the wheel nut

wrench

O

E

into the slot of the fastener

O

C

,

and rotate counterclockwise to release
the jack.

5. The lowering mechanism for the spare

tire is located on the passenger side of
the cargo area. Remove the cover

O

F

to

access the lowering mechanism.

6. Attach the spare tire winch socket

O

G

to

the lowering mechanism nut.

7. To lower the spare tire, insert the wheel

nut wrench

O

E

into the jacking rod

O

D

and insert the T-shaped end of the jack-
ing rod into the winch socket

O

G

and

rotate counterclockwise.

8. Once the spare tire is lowered, release it

from the vehicle by guiding the lowering
cable and winch through the center of
the tire.

NOTE:
Fully lower the spare tire below the ve-
hicle before attempting to remove the
winch from the spare tire.

9. After removing the spare tire from under

the vehicle, be sure to crank the cable up
by rotating the winch socket clockwise
to stow it.

LIC5479

LIC5480

6-6

In case of emergency

CAUTION

Make sure safety cable is coiled
above spare tire when reinstalling
spare tire/wheel.

When re-installing the spare tire under
the vehicle after use, be sure to secure it
with the tire stem facing down toward
the ground. If the spare tire is improp-
erly secured with the stem facing up
towards the bottom of the vehicle,
there is an increased risk of separating
from the vehicle in the event of a crash
which may pose a hazard in traffic or
risk of injury to others.

Jacking up vehicle and removing
the damaged tire

WARNING

Never get under the vehicle while it is
supported only by the jack. If it is nec-
essary to work under the vehicle,
support it with safety stands.

Use only the jack provided with your
vehicle to lift the vehicle. Do not use
the jack provided with your vehicle
on other vehicles. The jack is de-
signed for lifting only your vehicle
during a tire change.

LCE2488

In case of emergency

6-7

Use the correct jack-up points. Never
use any other part of the vehicle for
jack support.

If your vehicle is equipped with Run-
ning Boards use the Jack Point lo-
cated on the front or rear mounting
brackets.

Never jack up the vehicle more than
necessary.

Never use blocks on or under the
jack.

Do not start or run the engine while
vehicle is on the jack. It may cause
the vehicle to move. This is especially
true for vehicles with limited slip
differentials.

Do not allow passengers to stay in
the vehicle while it is on the jack.

Never run the engine with a wheel(s)
off the ground. It may cause the ve-
hicle to move.

Always refer to the illustration for the cor-
rect placement and jack-up points for your
specific vehicle model and jack type.

Carefully read the caution label attached
to the jack body and the following
instructions.

LIC4866

Vehicle shown without running boards

6-8

In case of emergency

WARNING

If your vehicle is equipped with Run-
ning Boards use the Jack Point lo-
cated on the front or rear mounting
brackets.

The Jack Point is located directly be-
hind the triangle shaped protrusion
near the front and rear of the Run-
ning Board stepping surface.

1. Loosen each wheel nut one or two turns

by turning counterclockwise with the
wheel nut wrench.

Do not remove the

wheel nuts until the tire is off the
ground.

2. Place the jack directly under the jack-up

point as illustrated so the top of the jack
contacts the vehicle at the jack-up point.
The jack-up points are indicated by the
notches under the frame.

If the vehicle is equipped with NISSAN
Running Boards, the jack-up points are
indicated on the running board step-
ping surface and the running board
mounting brackets.

The jack should be used on firm and
level ground.

LCE2469

Vehicle shown with running boards

In case of emergency

6-9

3. Install the assembled jack rod into the

jack as shown.

4. To lift the vehicle, securely hold the jack

lever and rod. Carefully raise the vehicle
until the tire clears the ground.

NOTE:

If the lug nut wrench/jack handle con-
tacts the ground while raising the ve-
hicle, disassemble the lug nut wrench
from the jack extension rod, rotate it 90
degrees and reassemble.

5. Remove the wheel nuts and then re-

move the tire.

Installing the spare tire

The spare tire is designed for emergency
use. For additional information, see
“Wheels and tires” (P. 8-29).

1. Clean any mud or dirt from the surface

between the wheel and hub.

2. Carefully put the spare tire on and

tighten the wheel nuts finger tight.

3. With the wheel nut wrench, tighten

wheel nuts alternately and evenly in the
sequence illustrated (

O

A

,

O

B

,

O

C

,

O

D

,

O

E

)

until they are tight.

LCE0087

LCE2043

WCE0056

6-10

In case of emergency

4. Lower the vehicle slowly until the tire

touches the ground. Then, with the
wheel nut wrench, tighten the wheel
nuts securely in the sequence illustrated
(

O

A

,

O

B

,

O

C

,

O

D

,

O

E

). Lower the vehicle

completely.

WARNING

Incorrect wheel nuts or improperly
tightened wheel nuts can cause the
wheel to become loose or come off.
This could cause an accident.

Do not use oil or grease on the wheel
studs or nuts. This could cause the
nuts to become loose.

Retighten the wheel nuts when the
vehicle has been driven for 621 miles
(1,000 km) (also in cases of a flat tire,
etc.).

As soon as possible, tighten the wheel
nuts to the specified torque with a
torque wrench.

Wheel nut tightening torque:

83 ft-lb (113 N·m)

The wheel nuts must be kept tightened to
specification at all times. It is recom-
mended that wheel nuts be tightened to
specifications at each lubrication interval.

Adjust tire pressure to the COLD pressure.

COLD pressure: After vehicle has been
parked for 3 hours or more or driven less
than 1 mile (1.6 km).

COLD tire pressures are shown on the
Tire and Loading Information label af-
fixed to the driver side center pillar.

5. Securely store the flat tire, tools and

jacking equipment in the vehicle.

6. Close the liftgate.

WARNING

Always make sure that the spare tire
and jacking equipment are properly
secured after use. Such items can be-
come dangerous projectiles in an ac-
cident or sudden stop.

The spare tire is designed for emer-
gency use. For additional informa-
tion, see “Wheels and tires” (P. 8-29).

To start your engine with a booster battery,
the instructions and precautions below
must be followed.

WARNING

If done incorrectly, jump starting can
lead to a battery explosion, resulting
in severe injury or death. It could also
damage your vehicle.

Explosive hydrogen gas is always
present in the vicinity of the battery.
Keep all sparks and flames away
from the battery.

Do not allow battery fluid to come
into contact with eyes, skin, clothing
or painted surfaces. Battery fluid is a
corrosive sulfuric acid solution which
can cause severe burns. If the fluid
should come into contact with any-
thing, immediately flush the con-
tacted area with water.

Keep battery out of the reach of
children.

The booster battery must be rated at
12 volts. Use of an improperly rated
battery can damage your vehicle.

JUMP STARTING

In case of emergency

6-11

Whenever working on or near a bat-
tery, always wear suitable eye pro-
tectors (for example, goggles or in-
dustrial

safety

spectacles)

and

remove rings, metal bands, or any
other jewelry. Do not lean over the
battery when jump starting.

Do not attempt to jump start a frozen
battery. It could explode and cause
serious injury.

Your vehicle has an automatic engine
cooling fan. It could come on at any
time. Keep hands and other objects
away from it.

WARNING

Always follow the instructions below.
Failure to do so could result in damage
to the charging system and cause per-
sonal injury.

1. If the booster battery is in another ve-

hicle, position the two vehicles to bring
their batteries near each other.

Do not allow the two vehicles to touch.

2. Apply the parking brake. Press the park

button to shift to the P (Park) position.
Switch off all unnecessary electrical sys-
tems (lights, heater, air conditioner, etc.).

3. Place the ignition switch to the LOCK or

OFF position.

4. Connect the jumper cables in the se-

quence illustrated (

O

A

,

O

B

,

O

C

,

O

D

).

CAUTION

Always connect positive (+) to posi-
tive (+) and negative (−) to body
ground (for example, strut mounting
bolt, engine lift bracket, etc.) — not to
the battery.

LCE2223

6-12

In case of emergency

Make sure the jumper cables do not
touch moving parts in the engine
compartment and that the cable
clamps do not contact any other
metal.

5. Start the engine of the booster vehicle

and let it run for a few minutes.

6. Keep the engine speed of the booster

vehicle at about 2,000 rpm and start the
engine

of

the

vehicle

being

jump

started.

CAUTION

Do not keep the starter motor engaged
for more than 10 seconds. If the engine
does not start right away, place the ig-
nition switch in the OFF position and
wait 3 to 4 seconds before trying again.

7. After starting the engine, carefully dis-

connect the negative cable and then the
positive cable.

CAUTION

Automatic transmission models can-
not be push-started. Attempting to do
so may cause transmission damage.

WARNING

Do not continue to drive if your ve-
hicle overheats. Doing so could cause
engine damage or a vehicle fire.

To avoid the danger of being scalded,
never remove the radiator or coolant
reservoir cap while the engine is still
hot. When the radiator or coolant res-
ervoir cap is removed, pressurized
hot water will spurt out, possibly
causing serious injury.

Do not open the hood if steam is
coming out.

If your vehicle is overheating (indicated by
an extremely high temperature gauge
reading), or if you feel a lack of engine
power, detect abnormal noise, etc. take the
following steps:

1. Move the vehicle safely off the road, ap-

ply the parking brake.

2. Press the park button to shift to the P

(Park) position.

Do not stop the engine.

3. Turn off the air conditioner. Open all the

windows, move the heater or air condi-
tioner temperature control to maximum
hot and fan control to high speed.

PUSH STARTING

IF YOUR VEHICLE OVERHEATS

In case of emergency

6-13

4. Get out of the vehicle. Look and listen for

steam or coolant escaping from the ra-
diator before opening the hood. If steam
or coolant is escaping, turn off the en-
gine. Do not open the hood further until
no steam or coolant can be seen.

5. Open the engine hood.

WARNING

If steam or water is coming from the
engine, stand clear to prevent getting
burned.

6. Visually check drive belts for damage or

looseness. Also check if the cooling fan
is running. The radiator hoses and radia-
tor should not leak water. If coolant is
leaking, the water pump belt is missing
or loose, or the cooling fan does not run,
stop the engine.

WARNING

Be careful not to allow your hands, hair,
jewelry or clothing to come into con-
tact with, or get caught in, engine belts
or the engine cooling fan. The engine
cooling fan can start at any time.

7. After the engine cools down, check the

coolant level in the engine coolant reser-
voir tank with the engine running. Add
coolant to the engine coolant reservoir
tank if necessary. Have your vehicle re-
paired. It is recommended that you visit a
NISSAN dealer for this service.

When towing your vehicle, all jurisdictional
and local regulations for towing must be
followed.

Incorrect

towing

equipment

could damage your vehicle. Towing in-
structions are available from a NISSAN
dealer. Local service operators are gener-
ally familiar with the applicable laws and
procedures for towing. To assure proper
towing and to prevent accidental damage
to your vehicle, NISSAN recommends hav-
ing a service operator tow your vehicle. It is
advisable to have the service operator
carefully read the following precautions:

WARNING

Never ride in a vehicle that is being
towed.

Never get under your vehicle after it
has been lifted by a tow truck.

CAUTION

When towing, make sure that the
transmission, axles, steering system
and powertrain are in working condi-
tion. Use dollies or flatbed if any of
the listed systems are not working.

Always attach safety chains before
towing.

TOWING YOUR VEHICLE

6-14

In case of emergency

For additional information about towing
your vehicle behind a Recreational Vehicle,
see “Flat towing for 4–Wheel drive vehicle”
(P. 10-31) or “Flat towing for front wheel drive
vehicle” (P. 10-32).

TOWING RECOMMENDED BY
NISSAN

NISSAN recommends towing your vehicle
based upon the type of drivetrain. For addi-
tional information, refer to the diagrams in
this section to ensure that your vehicle is
properly towed.

Four-Wheel Drive (4WD) models
with automatic transmission

NISSAN recommends that towing dollies
be used when towing your vehicle or place
the vehicle on a flatbed truck as illustrated.

CAUTION

Never tow 4WD models equipped with
an automatic transmission with any of
the wheels on the ground as this may
cause serious and expensive damage
to the powertrain.

LIC4863

In case of emergency

6-15

NOTE:

If the battery is completely drained the
transmission will not manually shift to
other positions.

Two-Wheel Drive models with
automatic transmission

NISSAN recommends that your vehicle be
towed with the driving (front) wheels off the
ground or place the vehicle on a flatbed
truck as illustrated.

CAUTION

Never tow automatic transmission
models with the front wheels on the
ground or four wheels on the ground
(forward or backward), as this may
cause serious and expensive dam-
age to the transmission. If it is neces-
sary to tow the vehicle with the rear
wheels raised always use towing dol-
lies under the front wheels.

When towing automatic transmis-
sion models with the rear wheels on
the ground or on towing dollies:

LIC4864

6-16

In case of emergency

Place the ignition switch in the
OFF

position,

and

secure

the

steering wheel in a straight-ahead
position with a rope or similar de-
vice. Never secure the steering
wheel by placing the ignition
switch in the LOCK position. This
may damage the steering lock
mechanism (for models with a
steering lock mechanism).

NOTE:

If the battery is completely drained the
transmission will not manually shift to
other positions.

VEHICLE RECOVERY (freeing a
stuck vehicle)

WARNING

To avoid vehicle damage, serious per-
sonal injury or death when recovering a
stuck vehicle:

Contact a professional towing ser-
vice to recover the vehicle if you have
any questions regarding the recov-
ery procedure.

Tow chains or cables must be at-
tached only to main structural mem-
bers of the vehicle.

Do not use the vehicle tie-downs to
tow or free a stuck vehicle.

Only use devices specifically de-
signed for vehicle recovery and fol-
low the manufacturer's instructions.

Always

pull

the

recovery

device

straight out from the front of the ve-
hicle. Never pull at an angle.

Route recovery devices so they do
not touch any part of the vehicle ex-
cept the attachment point.

If your vehicle is stuck in sand, snow, mud,
etc., use a tow strap or other device de-
signed specifically for vehicle recovery.
Always follow the manufacturer's instruc-
tions for the recovery device.

Rocking a stuck vehicle

WARNING

Stand clear of a stuck vehicle.

Do not spin your tires at high speed.
This could cause them to explode
and result in serious injury. Parts of
your vehicle could also overheat and
be damaged.

If your vehicle is stuck in sand, snow, mud,
etc., use the following procedure:

1. Turn off the Vehicle Dynamic Control

(VDC) system or place the Drive Mode
Selector in MUD/RUT (4WD models) or
SAND (4WD models) mode.

2. Make sure the area in front and behind

the vehicle is clear of obstructions.

3. Turn the steering wheel right and left to

clear an area around the front tires.

In case of emergency

6-17

4. Slowly rock the vehicle forward and

backward.

• Shift back and forth between R (Re-

verse) and D (Drive).

• Apply the accelerator as little as pos-

sible to maintain the rocking motion.

• Release the accelerator pedal before

shifting between R (Reverse) and D
(Drive).

• Do not spin the tires above 35 mph

(55 km/h).

5. If the vehicle cannot be freed after a few

tries, contact a professional towing ser-
vice to remove the vehicle.

6-18

In case of emergency

7 Appearance and care

Cleaning exterior . . . . . . . . . . . . . . . . . . . . . . . . . . . . . . . . 7-2

Washing . . . . . . . . . . . . . . . . . . . . . . . . . . . . . . . . . . . . . 7-2
Waxing . . . . . . . . . . . . . . . . . . . . . . . . . . . . . . . . . . . . . . . 7-3
Removing spots . . . . . . . . . . . . . . . . . . . . . . . . . . . . . . 7-3
Underbody . . . . . . . . . . . . . . . . . . . . . . . . . . . . . . . . . . . 7-3
Glass . . . . . . . . . . . . . . . . . . . . . . . . . . . . . . . . . . . . . . . . . 7-3
Aluminum alloy wheels . . . . . . . . . . . . . . . . . . . . . . . 7-3
Chrome parts . . . . . . . . . . . . . . . . . . . . . . . . . . . . . . . . 7-4
Tire dressings . . . . . . . . . . . . . . . . . . . . . . . . . . . . . . . . 7-4

Cleaning interior . . . . . . . . . . . . . . . . . . . . . . . . . . . . . . . . 7-4

Air fresheners . . . . . . . . . . . . . . . . . . . . . . . . . . . . . . . . 7-5

Power moonroof (if so equipped) . . . . . . . . . . . . . 7-5
Floor mats (if so equipped) . . . . . . . . . . . . . . . . . . . 7-6
Seat belts . . . . . . . . . . . . . . . . . . . . . . . . . . . . . . . . . . . . 7-7
Cleaning the seat tracks . . . . . . . . . . . . . . . . . . . . . 7-7

Corrosion protection . . . . . . . . . . . . . . . . . . . . . . . . . . . . 7-7

Most common factors contributing to
vehicle corrosion . . . . . . . . . . . . . . . . . . . . . . . . . . . . . 7-7
Environmental factors influence the
rate of corrosion . . . . . . . . . . . . . . . . . . . . . . . . . . . . . 7-7
Protect your vehicle from corrosion . . . . . . . . . . 7-8

In order to maintain the appearance of
your vehicle, it is important to take proper
care of it.

To protect the paint surfaces, wash your
vehicle as soon as you can:
• After a rainfall to prevent possible dam-

age from acid rain.

• After driving on coastal roads.
• When contaminants such as soot, bird

droppings, tree sap, metal particles or
bugs get on the paint surface.

• When dust or mud builds up on the

surface.

Whenever possible, store or park your ve-
hicle inside a garage or in a covered area.

When it is necessary to park outside, park in
a shady area or protect the vehicle with a
body cover.

Be careful not to scratch the paint sur-
face when putting on or removing the
body cover.

WASHING

Wash dirt off with a wet sponge and plenty
of water. Clean the vehicle thoroughly us-
ing a mild soap, a special vehicle soap or
general purpose dishwashing liquid mixed
with clean, lukewarm (never hot) water.

CAUTION

Do not concentrate water spray di-
rectly on the sonar sensors (if so
equipped) on the bumper as this will
result in damage to the sensors. Do
not use pressure washers capable of
spraying water over 1,200 psi (8,274
kPa) to wash your vehicle. Use of
high-pressure washers over 1,200 psi
(8,274 kPa) can result in damage to or
removal of paint or graphics. Avoid
using a high-pressure washer closer
than 12 inches (30 cm) to the vehicle.
Always use a wide-angle nozzle only,
keep the nozzle moving and do not
concentrate the water spray on any
one area.

Do not use car washes that use acid
in the detergent. Some car washes,
especially brushless ones, use some
acid for cleaning. The acid may react
with some plastic vehicle compo-
nents, causing them to crack. This
could affect their appearance, and
also could cause them not to func-
tion properly. Always check with your
car wash to confirm that acid is not
used.

Do not wash the vehicle with strong
household soap, strong chemical de-
tergents, gasoline or solvents.

Do not wash the vehicle in direct sun-
light or while the vehicle body is hot,
as the surface may become water-
spotted.

Avoid using tight-napped or rough
cloths, such as washing mitts. Care
must

be

taken

when

removing

caked-on dirt or other foreign sub-
stances so the paint surface is not
scratched or damaged.

Rinse the vehicle thoroughly with plenty of
clean water.

Inside edges, seams and folds on the
doors, hatches and hood are particularly
vulnerable to the effects of road salt. There-
fore, these areas must be cleaned regularly.
Take care that the drain holes in the lower
edge of the door are open. Spray water
under the body and in the wheel wells to
loosen the dirt and wash away road salt.

A damp chamois can be used to dry the
vehicle to avoid water spots.

CLEANING EXTERIOR

7-2

Appearance and care

WAXING

Regular waxing protects the paint surface
and helps retain new vehicle appearance.
Polishing is recommended to remove
built-up wax residue and to avoid a weath-
ered appearance before re-applying wax.

A NISSAN dealer can assist you in choosing
the proper product.
• Wax your vehicle only after a thorough

washing. Follow the instructions supplied
with the wax.

• Do not use a wax containing any abra-

sives, cutting compounds or cleaners
that may damage the vehicle finish.

Machine compounding or aggressive pol-
ishing on a base coat/clear coat paint fin-
ish may dull the finish or leave swirl marks.

REMOVING SPOTS

Remove tar and oil spots, industrial dust,
insects, and tree sap as quickly as possible
from the surface of the paint to avoid last-
ing damage or staining. Special cleaning
products are available at a NISSAN dealer
or any automotive accessory store. It is
recommended that you visit a NISSAN
dealer for these products.

UNDERBODY

In areas where road salt is used in winter, it
is necessary to clean the underbody regu-
larly in order to prevent dirt and salt from
building up and causing the acceleration of
corrosion on the underbody and suspen-
sion. Before the winter period and again in
the spring, the underseal must be checked
and, if necessary, re-treated.

GLASS

Use glass cleaner to remove smoke and
dust film from the glass surfaces. It is nor-
mal for glass to become coated with a film
after the vehicle is parked in the hot sun.
Glass cleaner and a soft cloth will easily
remove this film.

CAUTION

When cleaning the inside of the win-
dows, do not use sharp-edged tools,
abrasive cleaners or chlorine-based
disinfectant cleaners. They could dam-
age the electrical conductors, radio an-
tenna elements or rear window de-
froster elements.

ALUMINUM ALLOY WHEELS

Wash the wheels regularly with a sponge
dampened in a mild soap solution, espe-
cially during winter months in areas where
road salt is used. If not removed, road salt
can discolor the wheels.

CAUTION

Follow the directions below to avoid
staining or discoloring the wheels:

Do not use a cleaner that uses strong
acid or alkali contents to clean the
wheels.

Do not apply wheel cleaners to the
wheels when they are hot. The wheel
temperature should be the same as
ambient temperature.

Rinse the wheel to completely re-
move the cleaner within 15 minutes
after the cleaner is applied.

Appearance and care

7-3

CHROME PARTS

Clean all chrome parts regularly with a
non-abrasive chrome polish to maintain
the finish.

CAUTION

Follow the directions below to avoid
staining or discoloring the chrome
parts:

Do not use a cleaner that uses strong
acid or alkali contents to clean the
chrome parts.

TIRE DRESSINGS

NISSAN does not recommend the use of
tire dressings. Tire manufacturers apply a
coating to the tires to help reduce discolor-
ation of the rubber. If a tire dressing is ap-
plied to the tires, it may react with the coat-
ing and form a compound. This compound
may come off the tire while driving and
stain the vehicle paint.

If you choose to use a tire dressing, take the
following precautions:
• Use a water-based tire dressing. The

coating on the tire dissolves more easily
than with an oil-based tire dressing.

• Apply a light coat of tire dressing to help

prevent it from entering the tire tread/
grooves (where it would be difficult to
remove).

• Wipe off excess tire dressing using a dry

towel. Make sure the tire dressing is com-
pletely removed from the tire tread/
grooves.

• Allow the tire dressing to dry as recom-

mended by the tire dressing manufacturer.

Occasionally remove loose dust from the
interior trim, plastic parts and seats using a
vacuum cleaner or soft bristled brush. Wipe
the vinyl and leather (if so equipped) sur-
faces with a clean, soft cloth dampened in
mild soap solution, then wipe clean with a
dry, soft cloth.

Regular care and cleaning is required in
order to maintain the appearance of the
leather (if so equipped).

Before using any fabric protector, read the
manufacturer's recommendations. Some
fabric protectors contain chemicals that
may stain or bleach the seat material.

Use a cloth dampened only with water to
clean the meter and gauge lens.

WARNING

Do not use wax or silicone based
products in the interior of the vehicle.
Doing so may cause damage to inte-
rior

parts,

electrical

devices,

or

electronics.

Do not use water or acidic cleaners
(hot steam cleaners) on the seat. This
can damage the seat or occupant clas-
sification sensor. This can also affect
the operation of the air bag system
and result in serious personal injury.

CLEANING INTERIOR

7-4

Appearance and care

CAUTION

Never use benzine, thinner or any
similar material.

Small dirt particles can be abrasive
and damaging to leather surfaces
and should be removed promptly. Do
not use saddle soap, car waxes, pol-
ishes, oils, cleaning fluids, solvents,
detergents

or

ammonia-based

cleaners as they may damage the
leather’s natural finish.

Never use fabric protectors unless
recommended by the manufacturer.

Do not use glass or plastic cleaner on
meter or gauge lens covers. It may
damage the lens cover.

Never use chloride solutions for
cleaning aluminum decoratives (if so
equipped), damage may occur.

AIR FRESHENERS

Most air fresheners use a solvent that
could affect the vehicle interior. If you use
an

air

freshener,

take

the

following

precautions:
• Hanging-type air fresheners can cause

permanent discoloration when they con-
tact vehicle interior surfaces. Place the air
freshener in a location that allows it to
hang free and not contact an interior
surface.

• Liquid-type air fresheners typically clip on

the vents. These products can cause im-
mediate

damage

and

discoloration

when spilled on interior surfaces.

Carefully read and follow the manufactur-
er's instructions before using the air
fresheners.

POWER MOONROOF (if so
equipped)

The sunshade is made from a tricot
material.

CAUTION

To help prevent damaging the moon-
roof while cleaning:

Do not rub the material with a cloth.
Doing so can damage the surface of
the material or cause a stain to
spread.

Never use benzine, thinner or any
similar chemical to clean the sun-
shade. This may discolor the moon-
roof and damage the surface.

Clean water based stains by patting
the surface with a clean soft cloth
dampened in warm water. Press a
clean dry cloth onto the surface to
remove as much dampness as pos-
sible and then let air dry.

Clean oil based stains by patting the
surface with a clean soft cloth damp-
ened in warm water. Press a clean dry
cloth onto the surface to remove as
much dampness as possible and
then let air dry.

Appearance and care

7-5

FLOOR MATS (if so equipped)

WARNING

To avoid potential pedal interference
that may result in a collision, injury or
death:

NEVER place a floor mat on top of
another floor mat in the driver front
position or install them upside down
or backwards.

Use only Genuine NISSAN floor mats,
or equivalent floor mats, that are
specifically designed for use in your
vehicle model and model year.

Properly position the mats in the
floorwell using the floor mat posi-
tioning hook. For additional informa-
tion, see “Floor mat installation”
(P. 7-6 
).

Make sure the floor mat does not in-
terfere with pedal operation.

Periodically check the floor mats to
make sure they are properly installed.

After cleaning the vehicle interior,
check the floor mats to make sure
they are properly installed.

The use of Genuine NISSAN floor mats can
extend the life of your vehicle carpet and
make it easier to clean the interior. Mats
should be maintained with regular clean-
ing and replaced if they become exces-
sively worn.

Floor mat installation

Your vehicle is equipped with floor mat po-
sitioning hook(s). The number and shape of
the floor mat positioning hooks for each
seating position varies depending on the
vehicle.

When installing Genuine NISSAN floor mats,
follow the installation instructions provided
with the mat and the following:

1. With the ignition in the OFF position, the

shift position in P (Park) position and with
the parking brake fully applied, position
the floor mat in the floorwell so that the
floor mat grommet holes are aligned
with the hook(s).

2. Secure the grommet holes into the

hook(s) and ensure that the floor mat is
properly positioned.

3. Make sure the floor mat does not inter-

fere with pedal operation. With the igni-
tion still in the OFF position, the shift po-
sition in the P (Park) position and with
the parking brake applied, fully apply and
release all pedals. The floor mat must
not interfere with pedal operation or
prevent the pedal from returning to its
normal position.

It is recommended that you visit a NISSAN
dealer for details about installing the floor
mats in your vehicle.

LAI2094

7-6

Appearance and care

The illustration shows the location of the
floor mat positioning hooks.

SEAT BELTS

The seat belts can be cleaned by wiping
them with a sponge dampened in a mild
soap solution. Allow the belts to dry com-
pletely in the shade before using them. For
additional information, see “Seat belt main-
tenance” (P. 1-30).

WARNING

Do not allow wet seat belts to roll up in
the retractor. NEVER use bleach, dye or
chemical solvents to clean the seat
belts, since these materials may se-
verely weaken the seat belt webbing.

CLEANING THE SEAT TRACKS

CAUTION

Periodically clean the seat tracks to
prevent reduction of ability to move the
seats.

Clean periodically with a high-powered
vacuum cleaner. Dirt and debris may re-
duce the ability to adjust the seat. A wet
cleansing agent may be used if necessary.

MOST COMMON FACTORS
CONTRIBUTING TO VEHICLE
CORROSION

Most vehicle corrosion is caused by:
• The accumulation of moisture-retaining

dirt and debris in body panel sections,
cavities, and other areas.

• Damage to paint and other protective

coatings caused by gravel and stone
chips or minor traffic collisions.

ENVIRONMENTAL FACTORS
INFLUENCE THE RATE OF
CORROSION

Moisture

Accumulation of sand, dirt and water on
the vehicle body underside can accelerate
corrosion. Wet floor coverings will not dry
completely inside the vehicle and should
be removed for drying to avoid floor panel
corrosion.

Relative humidity

Corrosion will be accelerated in areas of
high relative humidity, especially those ar-
eas where the temperatures stay above
freezing and where atmospheric pollution
exists and road salt is used.

LCE2481

Positioning hooks

CORROSION PROTECTION

Appearance and care

7-7

Temperature

High temperatures accelerate the rate of
corrosion to those parts which are not well
ventilated.

Air pollution

Industrial pollution, the presence of salt in
the air in coastal areas, or heavy road salt
use accelerates the corrosion process.
Road salt also accelerates the disintegra-
tion of paint surfaces.

PROTECT YOUR VEHICLE FROM
CORROSION

• Wash and wax your vehicle often to keep

the vehicle clean.

• Always check for minor damage to the

paint and repair it as soon as possible.

• Keep drain holes at the bottom of the

doors open to avoid water accumulation.

• Check the underbody for accumulation

of sand, dirt or salt. If present, wash with
water as soon as possible.

CAUTION

NEVER remove dirt, sand or other de-
bris from the passenger compart-
ment by washing it out with a hose.
Remove dirt with a vacuum cleaner
or broom.

Never allow water or other liquids to
come in contact with electronic com-
ponents inside the vehicle as this
may damage them.

Chemicals used for road surface de-icing
are extremely corrosive. They accelerate
corrosion and deterioration of underbody
components such as the exhaust system,
fuel and brake lines, brake cables, floor pan
and fenders.

In winter, the underbody must be cleaned
periodically.

For additional protection against rust and
corrosion, which may be required in some
areas, it is recommended that you visit a
NISSAN dealer.

7-8

Appearance and care

8 Do-it-yourself

Maintenance precautions . . . . . . . . . . . . . . . . . . . . . . . 8-2
Engine compartment check locations . . . . . . . . . . . 8-4
Engine cooling system . . . . . . . . . . . . . . . . . . . . . . . . . . 8-5

Checking engine coolant level . . . . . . . . . . . . . . . . 8-6
Changing engine coolant . . . . . . . . . . . . . . . . . . . . 8-6

Engine oil . . . . . . . . . . . . . . . . . . . . . . . . . . . . . . . . . . . . . . . 8-7

Checking engine oil level . . . . . . . . . . . . . . . . . . . . . 8-7
Changing engine oil and oil filter . . . . . . . . . . . . . . 8-7

Automatic Transmission Fluid (ATF) . . . . . . . . . . . . . .8-11
Brake fluid . . . . . . . . . . . . . . . . . . . . . . . . . . . . . . . . . . . . . . 8-12
Windshield-washer fluid . . . . . . . . . . . . . . . . . . . . . . . . 8-12

Windshield-washer fluid reservoir . . . . . . . . . . . 8-12

Battery . . . . . . . . . . . . . . . . . . . . . . . . . . . . . . . . . . . . . . . . . 8-14

Jump starting . . . . . . . . . . . . . . . . . . . . . . . . . . . . . . . 8-15

Variable voltage control system . . . . . . . . . . . . . . . . 8-16
Drive belt . . . . . . . . . . . . . . . . . . . . . . . . . . . . . . . . . . . . . . . 8-16
Spark plugs . . . . . . . . . . . . . . . . . . . . . . . . . . . . . . . . . . . . 8-17

Replacing spark plugs . . . . . . . . . . . . . . . . . . . . . . . 8-17

Air cleaner . . . . . . . . . . . . . . . . . . . . . . . . . . . . . . . . . . . . . 8-18

In-cabin microfilter (if so equipped) . . . . . . . . . . 8-18

Windshield wiper blades . . . . . . . . . . . . . . . . . . . . . . . . 8-19

Cleaning . . . . . . . . . . . . . . . . . . . . . . . . . . . . . . . . . . . . 8-19
Replacing . . . . . . . . . . . . . . . . . . . . . . . . . . . . . . . . . . . 8-19

Brakes . . . . . . . . . . . . . . . . . . . . . . . . . . . . . . . . . . . . . . . . . 8-21
Fuses . . . . . . . . . . . . . . . . . . . . . . . . . . . . . . . . . . . . . . . . . . 8-21

Engine compartment . . . . . . . . . . . . . . . . . . . . . . . 8-22
Passenger compartment . . . . . . . . . . . . . . . . . . . 8-23

Battery replacement . . . . . . . . . . . . . . . . . . . . . . . . . . . 8-25

NISSAN Intelligent Key® . . . . . . . . . . . . . . . . . . . . . . 8-25

Lights . . . . . . . . . . . . . . . . . . . . . . . . . . . . . . . . . . . . . . . . . . 8-27

Headlights . . . . . . . . . . . . . . . . . . . . . . . . . . . . . . . . . . 8-27
Fog lights (if so equipped) . . . . . . . . . . . . . . . . . . . 8-27
Exterior and interior lights . . . . . . . . . . . . . . . . . . . 8-27

Wheels and tires . . . . . . . . . . . . . . . . . . . . . . . . . . . . . . . 8-29

Tire pressure . . . . . . . . . . . . . . . . . . . . . . . . . . . . . . . . 8-29
Tire labeling . . . . . . . . . . . . . . . . . . . . . . . . . . . . . . . . . 8-34
Types of tires . . . . . . . . . . . . . . . . . . . . . . . . . . . . . . . . 8-37
Tire chains . . . . . . . . . . . . . . . . . . . . . . . . . . . . . . . . . . 8-38
Changing wheels and tires . . . . . . . . . . . . . . . . . . 8-39

When performing any inspection or main-
tenance work on your vehicle, always take
care to prevent serious accidental injury to
yourself or damage to the vehicle. The fol-
lowing are general precautions which
should be closely observed.

WARNING

Park the vehicle on a level surface,
apply the parking brake securely and
block the wheels to prevent the ve-
hicle from moving. Press the park
button to shift to the P (Park)
position.

Be sure the ignition switch is in the
OFF or LOCK position when perform-
ing any parts replacement or repairs.

If you must work with the engine run-
ning, keep your hands, clothing, hair
and tools away from moving fans,
belts and any other moving parts.

It is advisable to secure or remove
any loose clothing and remove any
jewelry, such as rings, watches, etc.
before working on your vehicle.

Always wear eye protection when-
ever you work on your vehicle.

Your vehicle is equipped with an au-
tomatic engine cooling fan. It may
come

on

at

any

time

without

warning, even if the ignition switch is
in the OFF position and the engine is
not running. To avoid injury, always
disconnect

the

negative

battery

cable before working near the fan.

If you must run the engine in an en-
closed space such as a garage, be
sure there is proper ventilation for
exhaust gases to escape.

Never get under the vehicle while it is
supported only by a jack. If it is nec-
essary to work under the vehicle,
support it with safety stands.

Keep smoking materials, flame and
sparks away from the fuel tank and
battery.

Because the fuel lines on gasoline
engine models are under high pres-
sure even when the engine is off, it
is recommended that you visit a
NISSAN dealer for service of the fuel
filter or fuel lines.

CAUTION

Do not work under the hood while
the engine is hot. Turn the engine off
and wait until it cools down.

Avoid contact with used engine oil
and coolant. Improperly disposed
engine oil, engine coolant and/or
other vehicle fluids can damage the
environment. Always conform to lo-
cal regulations for disposal of vehicle
fluid.

Never leave the engine or automatic
transmission

related

component

harnesses disconnected while the
ignition switch is in the ON position.

Never connect or disconnect the bat-
tery or any transistorized compo-
nent while the ignition switch is in
the ON position.

NOTE:

If the battery is completely drained the
transmission will not manually shift to
other positions.

This “Do-it-yourself ” section gives instruc-
tions regarding only those items which are
relatively easy for an owner to perform.

MAINTENANCE PRECAUTIONS

8-2

Do-it-yourself

A Genuine NISSAN service manual is also
available. For additional information, see
“Owner’s Manual/Service Manual order in-
formation” (P. 10-37).

You should be aware that incomplete or
improper servicing may result in operating
difficulties or excessive emissions, and
could affect warranty coverage.

If in doubt

about any servicing, it is recommended
that you have it done by a NISSAN dealer.

Do-it-yourself

8-3

3.5L 6 cylinder (VQ35DD engine model)

1.

Engine coolant reservoir

2.

Drive belt location

3.

Engine oil filler cap

4.

Brake fluid reservoir

5.

Air cleaner

6.

Fuse box

7.

Fuse/Fusible link box

8.

Battery

9.

Engine oil dipstick

10.

Radiator cap

11.

Windshield-washer fluid reservoir

NOTE:
Your vehicle may not be equipped
with an engine cover.

LDI3596

ENGINE COMPARTMENT CHECK
LOCATIONS

8-4

Do-it-yourself

The engine cooling system is filled at the
factory with a pre-diluted mixture of 50%
Genuine

NISSAN

Long

Life

Antifreeze/

Coolant (blue) and 50% water to provide
year-round antifreeze and coolant protec-
tion. The antifreeze solution contains rust
and corrosion inhibitors. Additional engine
cooling system additives are not necessary.

WARNING

Never remove the radiator or coolant
reservoir cap when the engine is hot.
Wait until the engine and radiator
cool down. Serious burns could be
caused by high pressure fluid escap-
ing from the radiator. For additional
information, see “If your vehicle over-
heats” (P. 6-13).

The radiator is equipped with a pres-
sure type radiator cap. To prevent en-
gine damage, use only a Genuine
NISSAN radiator cap.

CAUTION

Never use any cooling system addi-
tives such as radiator sealer. Addi-
tives may clog the cooling system
and cause damage to the engine,
transmission and/or cooling system.

When adding or replacing coolant, be
sure to use only Genuine NISSAN
Long Life Antifreeze/Coolant (blue)
or equivalent. Genuine NISSAN Long
Life Antifreeze/Coolant (blue) is pre-
diluted to provide antifreeze protec-
tion to -34° F (-37° C). If additional
freeze protection is needed due to
weather where you operate your ve-
hicle, add Genuine NISSAN Long Life
Antifreeze/Coolant

(blue)

concen-

trate following the directions on the
container. If an equivalent coolant
other than Genuine NISSAN Long Life
Antifreeze/Coolant (blue) is used, fol-
low the coolant manufacturer’s in-
structions to maintain minimum an-
tifreeze protection to -34° F (-37° C).
The use of other types of coolant so-
lutions other than Genuine NISSAN
Long Life Antifreeze/Coolant (blue)
or equivalent may damage the en-
gine cooling system.

The life expectancy of the factory-fill
coolant is 105,000 miles (168,000 km)
or 7 years. Mixing any other type of
coolant other than Genuine NISSAN
Long Life Antifreeze/Coolant (blue)
(or

equivalent

coolant),

including

Genuine NISSAN Long Life Antifreeze/
Coolant (green), or the use of non-
distilled water may reduce the life ex-
pectancy of the factory-fill coolant.
For additional information, see "Main-
tenance and schedules" section of this
manual.

ENGINE COOLING SYSTEM

Do-it-yourself

8-5

CHECKING ENGINE COOLANT
LEVEL

Check the coolant level

in the reservoir

when the engine is cold.

If the coolant

level is below the MIN level

O

B

, add coolant

to the MAX level

O

A

. If the reservoir is empty,

check the coolant level in the radiator

when the engine is cold.

If there is insuffi-

cient coolant in the radiator, fill the radiator
with coolant up to the filler opening and
also add it to the reservoir up to the MAX
level

O

A

.

This vehicle contains Genuine NISSAN Long
Life Antifreeze/Coolant (blue). The life ex-
pectancy of the factory-fill coolant is
105,000 miles (168,000 km) or 7 years. Mixing
any other type of coolant or the use of
non-distilled water will reduce the life ex-
pectancy of the factory-fill coolant. For ad-
ditional information, see "Maintenance and
schedules" section of this manual.

If the cooling system frequently requires
coolant, have it checked. It is recom-
mended that you visit a NISSAN dealer
for this service.

For additional information on the location
of the engine coolant reservoir, see “Engine
compartment check locations” (P. 8-4).

CHANGING ENGINE COOLANT

A NISSAN dealer can change the engine
coolant. The service procedure can be
found in the NISSAN Service Manual.

Improper servicing can result in reduced
heater performance and engine over-
heating.

WARNING

To avoid the danger of being scalded,
never change the coolant when the
engine is hot.

Never remove the radiator or engine
coolant reservoir cap when the en-
gine is hot. Serious burns could be
caused by high pressure fluid escap-
ing from the radiator.

Avoid direct skin contact with used
coolant. If skin contact is made, wash
thoroughly

with

soap

or

hand

cleaner as soon as possible.

Keep coolant out of the reach of chil-
dren and pets.

Engine coolant must be disposed of prop-
erly. Check your local regulations.

LDI2860

8-6

Do-it-yourself

CHECKING ENGINE OIL LEVEL

1. Park the vehicle on a level surface and

apply the parking brake.

2. Start the engine and let it idle until it

reaches operating temperature.

3. Turn off the engine.

Wait more than 10

minutes for the oil to drain back into
the oil pan.

4. Remove the dipstick and wipe it clean.

Reinsert it all the way.

5. Remove the dipstick again and check

the oil level. It should be between the H
(High) and L (Low) marks

O

B

. This is the

normal operating oil level range. If the oil
level is below the L (Low) mark

O

A

, re-

move the oil filler cap and pour recom-
mended oil through the opening.

Do not

fill oil level above H (High) mark

O

C

.

6. Recheck the oil level with the dipstick.

It is normal to add some oil between oil
maintenance intervals or during the
break-in period, depending on the sever-
ity of operating conditions.

CAUTION

Oil level should be checked regularly.
Operating the engine with an insuffi-
cient amount of oil can damage the en-
gine, and such damage is not covered
by warranty.

CHANGING ENGINE OIL AND OIL
FILTER

For additional information on engine oil
and oil filter change, refer to the instruc-
tions outlined in this section.

Vehicle set-up

1. Park the vehicle on a level surface and

apply the parking brake.

2. Run the engine until it reaches operating

temperature.

3. Turn the engine off and wait for 15

minutes.

4. Raise and support the vehicle using a

suitable floor jack and safety jack
stands.

• Place the safety jack stands under the

vehicle jack-up points.

• A suitable adapter should be attached to

the jack stand saddle.

LDI3014

WDI0214

ENGINE OIL

Do-it-yourself

8-7


Content      ..     15      16      17      18     ..