Nissan Versa Hatchback (2012 year). Instruction - part 6


  Index      Nissan     Nissan Versa Hatchback - instruction 2012 year in english


Search            


Content   ..  4  5  6  7   ..


Nissan Versa Hatchback (2012 year). Instruction - part 6


Your vehicle may have two types of security sys-
tems:

● Vehicle security system (if so equipped)
● NISSAN Vehicle Immobilizer System

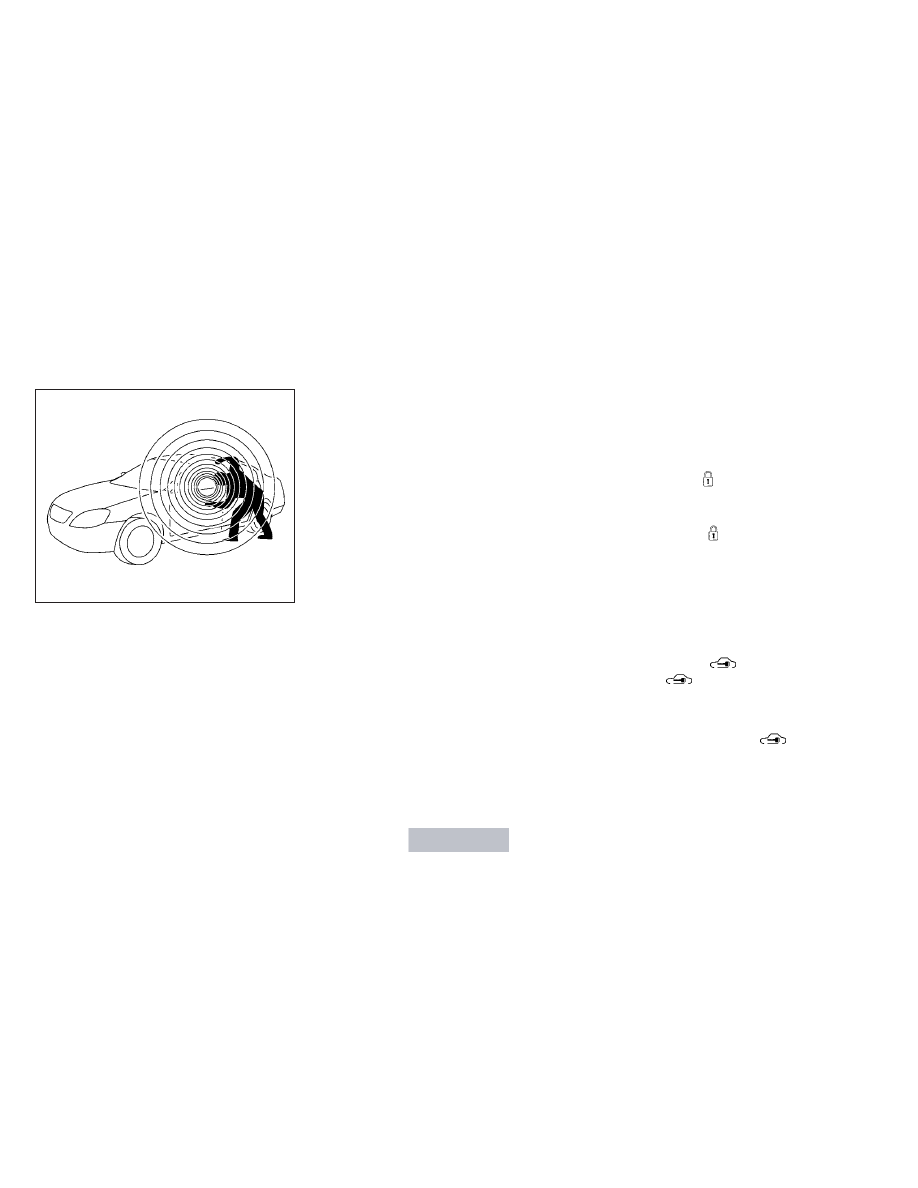
VEHICLE SECURITY SYSTEM (if so
equipped)

The vehicle security system provides visual and
audible alarm signals if someone opens the doors
when the system is armed. It is not, however, a
motion detection type system that activates when
a vehicle is moved or when a vibration occurs.

The system helps deter vehicle theft but cannot
prevent it, nor can it prevent the theft of interior or
exterior vehicle components in all situations. Al-
ways secure your vehicle even if parking for a
brief period. Never leave your keys in the ignition,
and always lock the vehicle when unattended. Be
aware of your surroundings, and park in secure,
well-lit areas whenever possible.

Many devices offering additional protection, such
as component locks, identification markers, and
tracking systems, are available at auto supply
stores and specialty shops. Your NISSAN dealer
may also offer such equipment. Check with your
insurance company to see if you may be eligible
for discounts for various theft protection features.

How to arm the vehicle security
system

1. Close all windows. (The system can be

armed even if the windows are open.)

2. Place the ignition switch in the LOCK posi-

tion and remove the key.

3. Close all doors. Lock all doors. The doors

can be locked with:

● the power door lock switch (if the door is

opened, locked and then closed).

● the key — master or mechanical (Intelli-

gent Key models).

● any request switch (Intelligent Key models).
● the keyfob (if so equipped) or Intelligent

Key (if so equipped).

Keyfob and Intelligent Key operation:

● Push the

button. All doors lock.

The hazard lights flash twice and the horn
beeps once to indicate all doors are locked.

● When the

button is pushed with

all doors locked, the hazard lights flash
twice and the horn beeps once as a re-
minder that the doors are already locked.

The horn may or may not beep. Refer to
“Silencing the horn beep feature” in the
“Pre-driving checks and adjustments” sec-
tion later in this manual.

4. Confirm that the

indicator light comes

on. The

light stays on for about 30

seconds. The vehicle security system is now
pre-armed. After about 30 seconds the ve-
hicle security system automatically shifts
into the armed phase. The

light begins

to flash once every 3 seconds. If, during the
30-second pre-arm time period, the driver’s
door is unlocked by the key, a request
switch, the keyfob or Intelligent Key, or if the
ignition switch is placed in the ACC or ON
position, the system will not arm.

LIC0301

SECURITY SYSTEMS

2-16

Instruments and controls

● If the key is turned slowly when locking

the driver’s door, the system may not
arm. Furthermore, if the key is turned
beyond the vertical position toward the
unlock position to remove the key, the
system may be disarmed when the key
is removed. If the indicator light fails to
glow for a period of time, unlock the
door once and lock it again.

● Even when the driver and/or passen-

gers are in the vehicle, the system will
arm with all doors closed and locked
with the ignition switch placed in the
OFF position.

Vehicle security system activation

The vehicle security system will give the following
alarm:

● The headlights blink and the horn sounds

intermittently.

● The alarm automatically turns off after a pe-

riod of time. However, the alarm reactivates if
the vehicle is tampered with again. The alarm
can be shut off by unlocking the driver’s door
with the key, a request switch or by pressing
the

button on the keyfob or Intelligent

Key.

The alarm is activated by:

● opening a door without using the key, a

request switch, keyfob or Intelligent Key
(even if the door is unlocked by using the
inside lock knob or the power door lock
switch).

How to stop an activated alarm

The alarm stops only by unlocking the driver’s door
with the key, pressing the

button on the

keyfob or Intelligent Key, or by unlocking all doors
with any request switch (Intelligent Key models).

NISSAN VEHICLE IMMOBILIZER
SYSTEM

The NISSAN Vehicle Immobilizer System will not
allow the engine to start without the use of a
registered key.

If the engine fails to start using a registered key (for
example, when interference is caused by another
registered key, an automated toll road device or
automatic payment device on the key ring), restart
the engine using the following procedures:

1. Leave the ignition switch placed in the ON

position for approximately 5 seconds.

2. Place the ignition switch in the OFF or

LOCK position and wait approximately 10
seconds.

3. Repeat steps 1 and 2.

4. Restart the engine while holding the device

(which may have caused the interference)
separate from the registered key.

If the no start condition re-occurs, NISSAN rec-
ommends placing the registered key on a sepa-
rate key ring to avoid interference from other
devices.

Statement related to Section 15 of FCC
Rules for NISSAN Vehicle Immobilizer Sys-
tem (CONT ASSY — IMMOBILIZER, ANT
ASSY — IMMOBILIZER)

This device complies with part 15 of the
FCC

Rules

and

RSS-210

of

Industry

Canada. Operation is subject to the follow-
ing two conditions;

(1) This device may not cause harmful in-
terference, and (2) this device must accept
any interference received, including inter-
ference that may cause undesired opera-
tion of the device.

CHANGES OR MODIFICATIONS NOT EX-
PRESSLY APPROVED BY THE PARTY RE-
SPONSIBLE FOR COMPLIANCE COULD
VOID THE USER’S AUTHORITY TO OPER-
ATE THE EQUIPMENT.

Instruments and controls

2-17

Security indicator light

For vehicles without Intelligent Key: This light
blinks whenever the ignition switch is placed in
the LOCK, OFF or ACC position.

For vehicles with Intelligent Key: This light blinks
when the ignition switch is placed in the LOCK
position with the key removed from the ignition
switch.

This function indicates the NISSAN Vehicle Im-
mobilizer System is operational.

If the NISSAN Vehicle Immobilizer System is mal-
functioning, the light will remain on while the
ignition switch is placed in the ON position.

If the light still remains on and/or the en-
gine will not start, see a NISSAN dealer for
NISSAN Vehicle Immobilizer System ser-
vice as soon as possible. Please bring all
registered keys that you have when visiting
your NISSAN dealer for service.

SWITCH OPERATION

The windshield wiper and washer operates when
the ignition switch is placed in the ON position.

Push the lever down to operate the wiper at the
following speed:

1

Intermittent (INT) — intermittent operation
can be adjusted by turning the knob toward

A

(Slower) or

B

(Faster).

2

Low (LO) — continuous low speed operation

3

High (HI) — continuous high speed opera-
tion

LIC0474

LIC1342

WINDSHIELD WIPER AND WASHER
SWITCH

2-18

Instruments and controls

Push the lever up

4

to have one sweep opera-

tion (MIST) of the wiper.

Pull the lever toward you

5

to operate the

washer. The wiper will also operate several times.

WARNING

In freezing temperatures the washer solu-
tion may freeze on the windshield and
obscure your vision which may lead to an
accident. Warm the windshield with the
defroster before you wash the windshield.

CAUTION

● Do not operate the washer continu-

ously for more than 30 seconds.

● Do not operate the washer if the

windshield-washer fluid reservoir is
empty.

● Do not fill the windshield-washer fluid

reservoir with windshield-washer fluid
concentrates at full strength. Some
methyl

alcohol

based

windshield-

washer fluid concentrates may perma-
nently stain the grille if spilled while
filling

the

windshield-washer

fluid

reservoir.

● Pre-mix windshield-washer fluid con-

centrates with water to the manufactur-
er’s recommended levels before pour-
ing the fluid into the windshield-washer
fluid

reservoir.

Do

not

use

the

windshield-washer fluid reservoir to
mix the windshield-washer fluid con-
centrate and water.

The rear window wiper and washer operate when
the ignition switch is placed in the ON position.

Turn the switch clockwise from the OFF position
to operate the wiper.

1

Intermittent (INT) – intermittent operation
(not adjustable)

2

ON – continuous low speed operation

Push the switch forward

3

to operate the

washer. The wiper will also operate several times.

LIC0966

REAR WINDOW WIPER AND
WASHER SWITCH

Instruments and controls

2-19

WARNING

In freezing temperatures the washer solu-
tion may freeze on the window and ob-
scure your vision. Warm the rear window
with the defroster before you wash the
rear window.

CAUTION

● Do not operate the washer continu-

ously for more than 30 seconds.

● Do not operate the washer if the reser-

voir is empty.

● Do not fill the windshield-washer fluid

reservoir with washer fluid concen-
trates at full strength. Some methyl al-
cohol based washer fluid concentrates
may permanently stain the grille if
spilled while filling the windshield-
washer fluid reservoir.

● Pre-mix washer fluid concentrates with

water to the manufacturer’s recom-
mended levels before pouring the fluid
into the windshield-washer fluid reser-
voir. Do not use the windshield-washer
fluid reservoir to mix the washer fluid
concentrate and water.

To defrost the rear window glass and outside
mirrors (if so equipped), start the engine and
push the rear window defroster switch on. The
rear window defroster indicator light on the
switch comes on. Push the switch again to turn
the defroster off.

The rear window defroster automatically turns off
after approximately 15 minutes.

CAUTION

When cleaning the inner side of the rear
window, be careful not to scratch or dam-
age the rear window defroster.

HEADLIGHT CONTROL SWITCH

Lighting

1

When turning the switch to the

posi-

tion, the front parking, tail, license plate and
instrument panel lights come on.

2

When turning the switch to the

posi-

tion, the headlights come on and all the other
lights remain on.

LIC0388

Type A

SIC2745

REAR WINDOW AND OUTSIDE
MIRROR (if so equipped)
DEFROSTER SWITCH

HEADLIGHT AND TURN SIGNAL
SWITCH

2-20

Instruments and controls

CAUTION

Use the headlights with the engine run-
ning to avoid discharging the vehicle
battery.

Headlight beam select

1

To select the high beam function, push the
lever forward. The high beam lights come on
and the

light illuminates.

2

Pull the lever back to select the low beam.

3

Pulling and releasing the lever flashes the
headlight high beams on and off.

Battery saver system

If the ignition switch is placed in the OFF position
while the headlight switch is in the
or

position, the headlights will turn off after

a period of time.

CAUTION

Even though the battery saver feature au-
tomatically turns off the headlights after a
period of time, you should turn the head-
light switch to the OFF position when the
engine is not running to avoid discharging
the vehicle battery.

DAYTIME RUNNING LIGHT SYSTEM
(Canada only)

The headlights automatically illuminate at a re-
duced intensity when the engine is started with
the parking brake released. The daytime running
lights operate with the headlight switch in the
OFF position or in the

position. Turn the

headlight switch to the

position for full

illumination when driving at night.

If the parking brake is applied before the engine is
started, the daytime running lights do not illumi-
nate. The daytime running lights illuminate when
the parking brake is released. The daytime run-
ning lights will remain on until the ignition switch
is placed in the OFF position.

Type B

SIC3019

LIC0967

Instruments and controls

2-21

WARNING

When the daytime running light system is
active, tail lights on your vehicle are not
on. It is necessary at dusk to turn on your
headlights. Failure to do so could cause
an accident injuring yourself and others.

INSTRUMENT BRIGHTNESS
CONTROL

The instrument brightness control operates when
the headlight control switch is in the
or

position.

Turn the control to adjust the brightness of instru-
ment panel lights when driving at night.

TURN SIGNAL SWITCH

Turn signal

1

Move the lever up or down to signal the
turning direction. When the turn is com-
pleted, the turn signals cancel automatically.

Lane change signal

2

To signal a lane change, move the lever up or
down to the point where the indicator light
begins to flash, but the lever does not latch.

LIC0392

LIC0968

2-22

Instruments and controls

FOG LIGHT SWITCH (if so equipped)

To turn the fog lights on, turn the headlight switch
to the

position, then turn the fog light

switch to the

position.

To turn the fog lights off, turn the fog light switch
to the OFF position.

The headlights must be on and the low beams
selected for the fog lights to operate. The fog
lights automatically turn off when the high beam
headlights are selected.

Push the switch on to warn other drivers when
you must stop or park under emergency condi-
tions. All turn signal lights flash.

WARNING

● If stopping for an emergency, be sure to

move the vehicle well off the road.

● Do not use the hazard warning flashers

while moving on the highway unless
unusual circumstances force you to
drive so slowly that your vehicle might
become a hazard to other traffic.

● Turn signals do not work when the haz-

ard warning flasher lights are on.

The flashers will operate with the ignition switch
placed in any position.

Some state laws may prohibit the use of
the hazard warning flasher switch while
driving.

SIC3020

LIC0394

HAZARD WARNING FLASHER
SWITCH

Instruments and controls

2-23

To sound the horn, push near the horn icon of the
steering wheel.

WARNING

Do not disassemble the horn. Doing so
could affect proper operation of the
supplemental front air bag system. Tam-
pering with the supplemental front air bag
system may result in serious personal
injury.

The vehicle should be driven with the Vehicle
Dynamic Control (VDC) system on for most driv-
ing conditions.

If the vehicle is stuck in mud or snow, the VDC
system reduces the engine output to reduce
wheel spin. The engine speed will be reduced
even if the accelerator is depressed to the floor. If
maximum engine power is needed to free a stuck
vehicle, turn the VDC system off.

To turn off the VDC system, push the VDC OFF
switch. The

indicator will come on.

Push the VDC OFF switch again or restart the
engine to turn on the system. See “Vehicle Dy-
namic Control (VDC) system” in the “Starting and
driving” section.

LIC0604

LIC1548

HORN

VEHICLE DYNAMIC CONTROL (VDC)
OFF SWITCH

2-24

Instruments and controls

The power outlet is for powering electrical acces-
sories such as cellular telephones. The outlet is
rated at 12 volt, 120 W (10A) maximum.

CAUTION

● The outlet and plug may be hot during

or immediately after use.

● Only certain power outlets are designed

for use with a cigarette lighter unit. Do
not use any other power outlet for an
accessory lighter. See your NISSAN
dealer for additional information.

● Do not use with accessories that ex-

ceed a 12 volt, 120W (10A) power draw.
Do not use double adapters or more
than one electrical accessory.

● Use power outlets with the engine run-

ning to avoid discharging the vehicle
battery.

● Avoid using power outlets when the air

conditioner, headlights or rear window
defroster is on.

● Before inserting or disconnecting a

plug, be sure the electrical accessory
being used is turned OFF.

● Push the plug in as far as it will go. If

good contact is not made, the plug may
overheat or the internal temperature
fuse may open.

● When not in use, be sure to close the

cap. Do not allow water or any other
liquid to contact the outlet.

MAP POCKETS

LIC0969

LIC2164

POWER OUTLET

STORAGE

Instruments and controls

2-25

STORAGE TRAYS

WARNING

Do not place sharp objects in the trays to
help prevent injury in an accident or sud-
den stop.

Coin holders

LIC0979

Front

LIC0980

Rear

LIC0981

2-26

Instruments and controls

SUNGLASSES HOLDER (if so
equipped)

To open the sunglasses holder, push and release
the rear center portion

A

of the holder.

WARNING

Keep the sunglasses holder closed while
driving to prevent an accident.

CAUTION

● Do not use for anything other than

sunglasses.

● Do not leave sunglasses in the sun-

glasses holder while parking in direct
sunlight. The heat may damage the
sunglasses.

CUP HOLDERS

CAUTION

● Avoid abrupt starting and braking when

the cup holder is being used to prevent
spilling the drink. If the liquid is hot, it
can scald you or your passenger.

● Use only soft cups in the cup holder.

Hard objects can injure you in an
accident.

WIC1002

Front

LIC0972

Instruments and controls

2-27

CAUTION

● Do not use bottle holder for any other

objects that could be thrown about in
the vehicle and possibly injure people
during sudden braking or an accident.

● Do not use bottle holder for open liquid

containers.

Lower the rear center armrest to access the cup
holders.

Bottle holder

LIC2165

Rear — Type A (if so equipped)

LIC0973

Rear — Type B (if so equipped)

LIC0974

2-28

Instruments and controls

GLOVE BOX

Open the glove box by pulling the handle.

WARNING

Keep glove box lid closed while driving to
help prevent injury in an accident or a
sudden stop.

CONSOLE BOX (if so equipped)

Fold down

1

the console box.

To open the console box, pull up on the lever

2

and raise the lid

3

.

To close, push the lid down until the lock latches.

NOTE:

Do not fold the console box up when it is
used for storage.

COVERED STORAGE BIN

Raise the lid to access the storage bin.

CARGO COVER (if so equipped)

WARNING

● Never put anything on the cargo cover,

no matter how small. Any object on it
could cause an injury in an accident or
sudden stop.

● Do not leave the cargo cover in the

vehicle with it disengaged from the
holder.

WIC0255

SIC2861

LIC0976

Instruments and controls

2-29

● Properly secure all cargo with ropes or

straps to help prevent it from sliding or
shifting. Do not place cargo higher than
the seatbacks. In a sudden stop or col-
lision, unsecured cargo could cause
personal injury.

● Your child could be seriously injured or

killed in a collision if the child restraint
top tether strap is damaged.

– If the cargo cover contacts the top

tether strap when it is attached to the
top tether anchor, remove the cargo
cover from the vehicle or secure it on
the cargo floor below its attachment
location. If the cargo cover is not
removed, it may damage the top
tether strap during a collision.

– Do not allow cargo to contact the top

tether strap when it is attached to the
top tether anchor. Properly secure
the cargo so it does not contact the
top tether strap. Cargo that is not
properly secured or that contacts the
top tether strap may damage the top
tether strap during a collision.

The cargo cover keeps the luggage compartment
contents hidden from the outside.

Only attach the hook and loop fastener on the
cargo cover privacy cloth to the area on the rear
seatback where it is supposed to be attached.
Otherwise, the seat surface could be damaged.

To remove the cargo cover:

1

Remove the straps from the rear hatch.

2

Remove the edge of the cargo cover privacy
cloth from the rear seatback.

3

Remove the cargo cover holders from the
rear pillar.

WIC1003

2-30

Instruments and controls

POWER WINDOWS

WARNING

● Make sure that all passengers have

their hands, etc. inside the vehicle while
it is in motion and before closing the
windows. Use the window lock switch
to prevent unexpected use of the power
windows.

● Do not leave children unattended inside

the vehicle. They could unknowingly ac-
tivate switches or controls and become
trapped in a window. Unattended chil-
dren could become involved in serious
accidents.

The power windows operate when the ignition
switch is placed in the ON position, or for a
period of time after the ignition switch is placed in
the OFF position. If the driver’s or passenger’s
door is opened during this period of time, the
power to the windows is canceled.

1.

Window lock button

2.

Power door lock switch

3.

Front passenger’s side window switch

4.

Right rear passenger’s window switch

5.

Left rear passenger’s window switch

6.

Driver’s side automatic switch

Driver’s side power window switch

The driver’s side control panel is equipped with
switches to open or close the front and rear
passenger windows.

To open a window, push the switch and hold it
down. To close a window, pull the switch and
hold it up. To stop the opening or closing function
at any time, simply release the switch.

WIC0872

WINDOWS

Instruments and controls

2-31


Content   ..  4  5  6  7   ..