Nissan Juke (2017 year). Instruction - part 2
JVC0747X
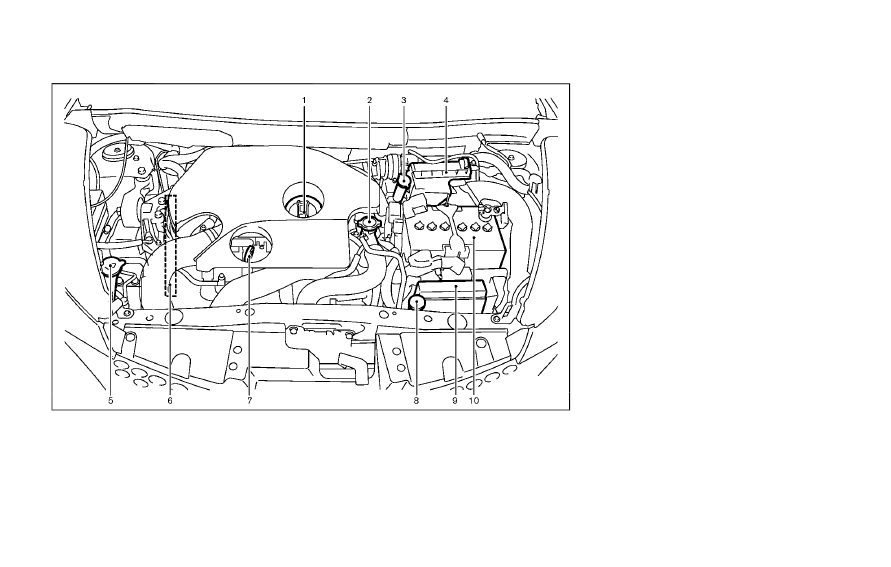
MR16DDT ENGINE
1.
Engine oil filler cap (P.8-5)
2.
Radiator filler cap (P.8-5)
— Vehicle overheat (P.6-11)
3.
Brake and clutch* fluid reservoir (P.8-9)
4.
Air cleaner (P.8-14)
5.
Window washer fluid reservoir (P.8-9)
6.
Engine drive belt location (P.8-12)
7.
Engine oil dipstick (P.8-5)
8.
Engine coolant reservoir (P.8-5)
9.
Fuse/fusible link holder (P.8-17)
10.
Battery (P.8-10)
— Jump starting (P.6-9)
*:
for Manual Transmission (MT) models
Illustrated table of contents
0-11
ENGINE COMPARTMENT