Nissan Altima L32. Manual - part 855


  Index      Nissan     Nissan Altima L32 (2007-2009 year) - Service and Repair Manual


Search            


Content   ..  853  854  855  856   ..


Nissan Altima L32. Manual - part 855


DOOR FINISHER

INT-13

< ON-VEHICLE REPAIR >

[COUPE]

C

D

E

F

G

H

I

K

L

M

A

B

INT

N

O

P

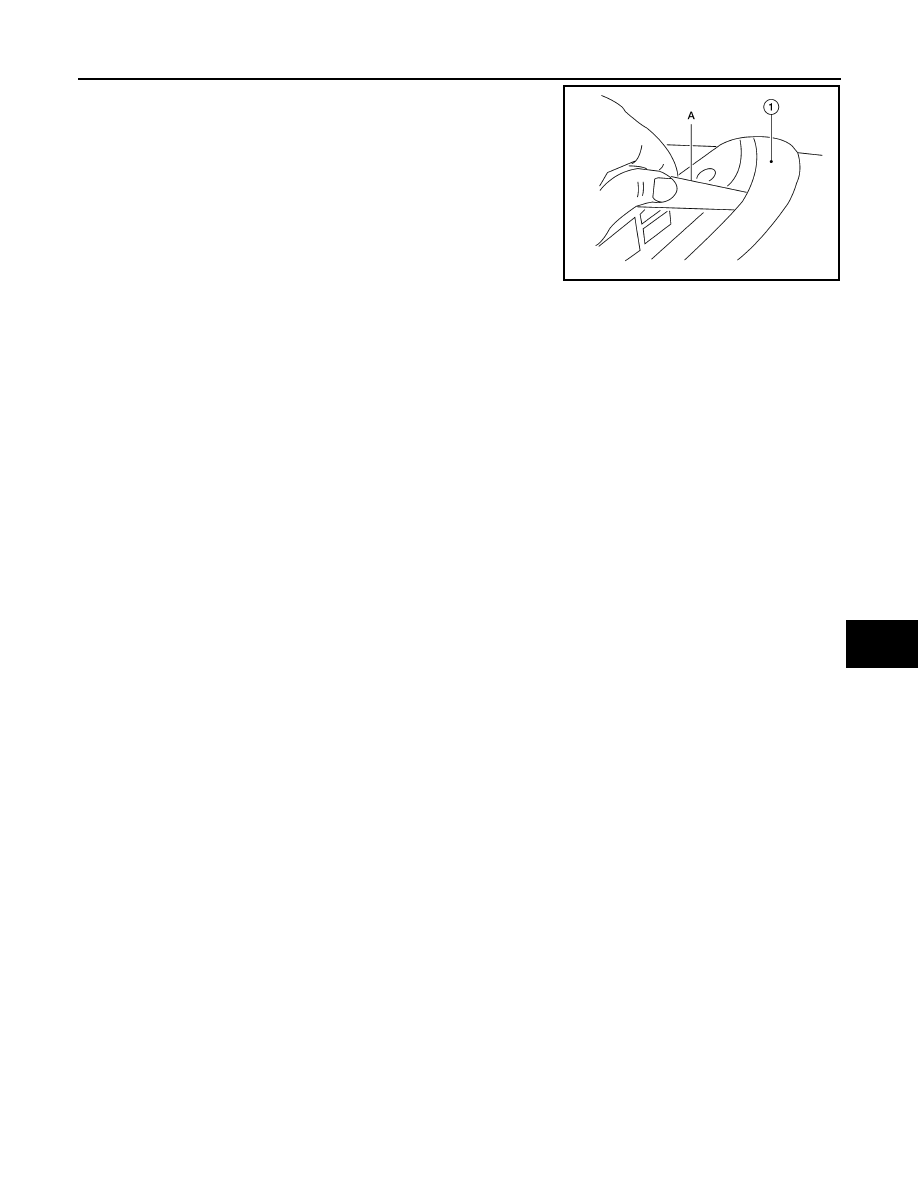
4. Continue to move the suitable tool (A) and disengage the upper

metal clip and remove armrest finisher (1).

5. Remove the front door finisher screw beneath armrest finisher.
6. Release the clips around outer edge, then remove front door finisher.
7. Disconnect inside release handle and lock knob cables from back of front door finisher.

Installation

Installation is in the reverse order of removal.

ALJIA0241ZZ

INT-14

< ON-VEHICLE REPAIR >

[COUPE]

BODY SIDE TRIM

BODY SIDE TRIM

Exploded View

INFOID:0000000004205957

1.

Front pillar finisher

2.

Front body side welt

3.

Front kicking plate

ALJIA0220ZZ

BODY SIDE TRIM

INT-15

< ON-VEHICLE REPAIR >

[COUPE]

C

D

E

F

G

H

I

K

L

M

A

B

INT

N

O

P

Removal and Installation

INFOID:0000000004205958

CAUTION:

• Wrap the tip of flat-bladed screwdriver with a cloth when removing metal clips from garnishes.

• When removing or installing body side welts, do not allow butyl seal to come in contact with pillar

finishers.

REMOVAL

FRONT PILLAR FINISHER

1. Remove front body side welt. 

CAUTION:

Insert a suitable clip removing tool wrapped with a shop

cloth inserted into the part shown by the arrow (between

the clip and the body side panel), then release the clip.

2. Release the clips, then remove front pillar finisher.

FRONT KICKING PLATE

Release the clip and pawls, then remove front kicking plate.    

FRONT BODY SIDE WELT

1. Remove front kicking plate. 
2. Release welt from the body opening, then remove front body side welt.

REAR PILLAR FINISHER

1. Remove front body side welt. 
2. Remove finisher tether.
3. Release the clips, then remove rear finisher.

UPPER PILLAR FINISHER

1. Remove front body side welt. 
2. Remove front pillar finisher. 
3. Remove seat belt anchor. Refer to 

SB-12

4. Release the clips, then remove upper pillar finisher.

FRONT PILLAR FINISHER

1. Remove front body side welt. 
2. Remove screw.
3. Release the clips, then remove rear pillar finisher.

REAR LOWER FINISHER

1. Remove front body side welt. 
2. Release the clips, then remove rear pillar finisher.

SILL PLATE COVER

Release the pawls, then remove the sill plate cover.

INSTALLATION

Installation is in the reverse order of removal.

CAUTION:

4.

Front sill cover

5.

Rear lower finisher

6.

Upper pillar finisher

7.

Rear pillar finisher

Clip C101

Metal clip

PIIB2768J

INT-16

< ON-VEHICLE REPAIR >

[COUPE]

BODY SIDE TRIM

Make sure that clips are fully aligned with panel holes on body when installing, then press them in

completely.


Content   ..  853  854  855  856   ..