Nissan Quest E52. Manual - part 892
MIR-32
< REMOVAL AND INSTALLATION >
[WITH ADP]
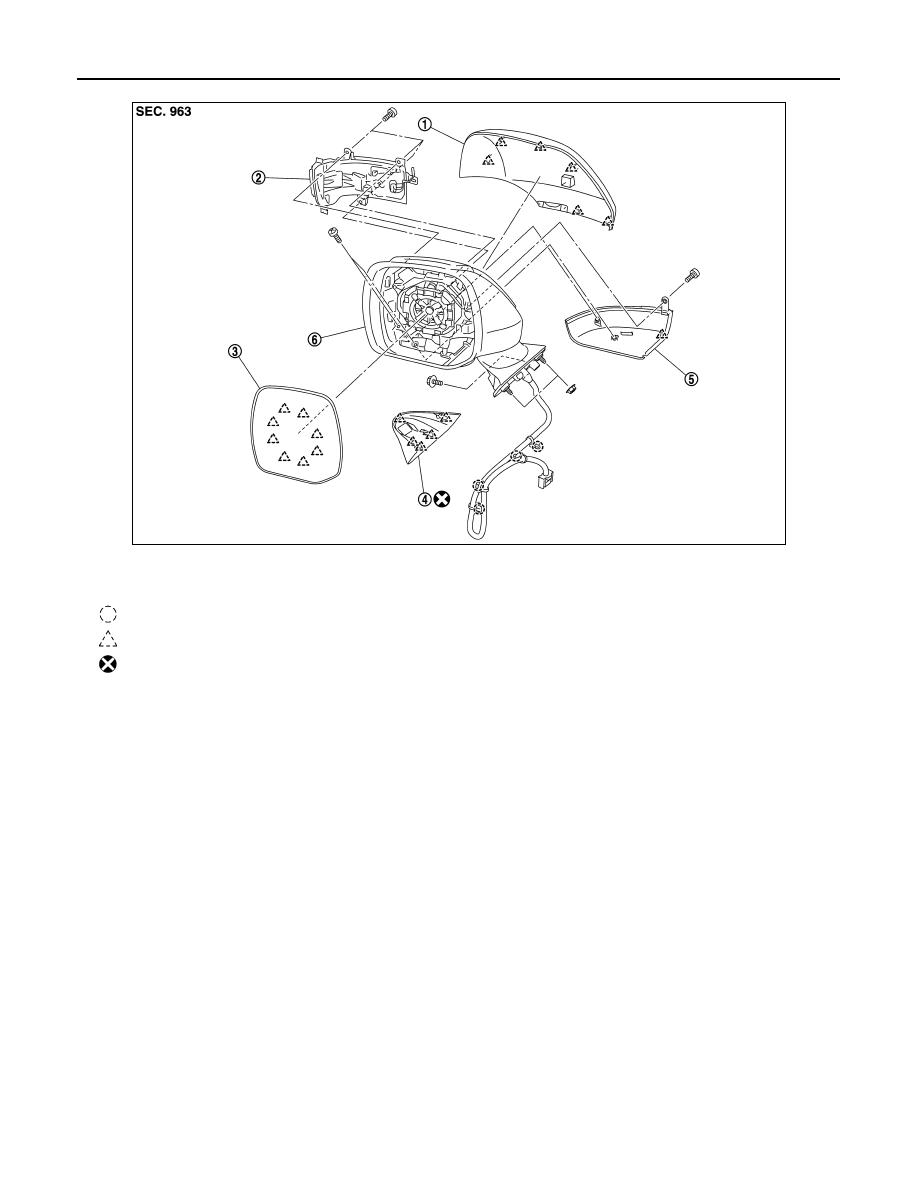
DOOR MIRROR
Models with side turn signal lamp
JMLIA2186ZZ
1.
Door mirror cover
2.
Side turn signal lamp
3.
Glass mirror
4.
Door mirror corner cover
5.
Door mirror under cover
6.
Door mirror
: Clip
: Pawl
: Always replace after every disassembly.