Nissan Note E12. Manual - part 95


  Index      Nissan     Nissan Note E12 - Service and Repair Manual


Search            


Content   ..  93  94  95  96   ..


Nissan Note E12. Manual - part 95


WHEEL SENSOR

BRC-71

< REMOVAL AND INSTALLATION >

[ABS]

C

D

E

G

H

I

J

K

L

M

A

B

BRC

N

O

P

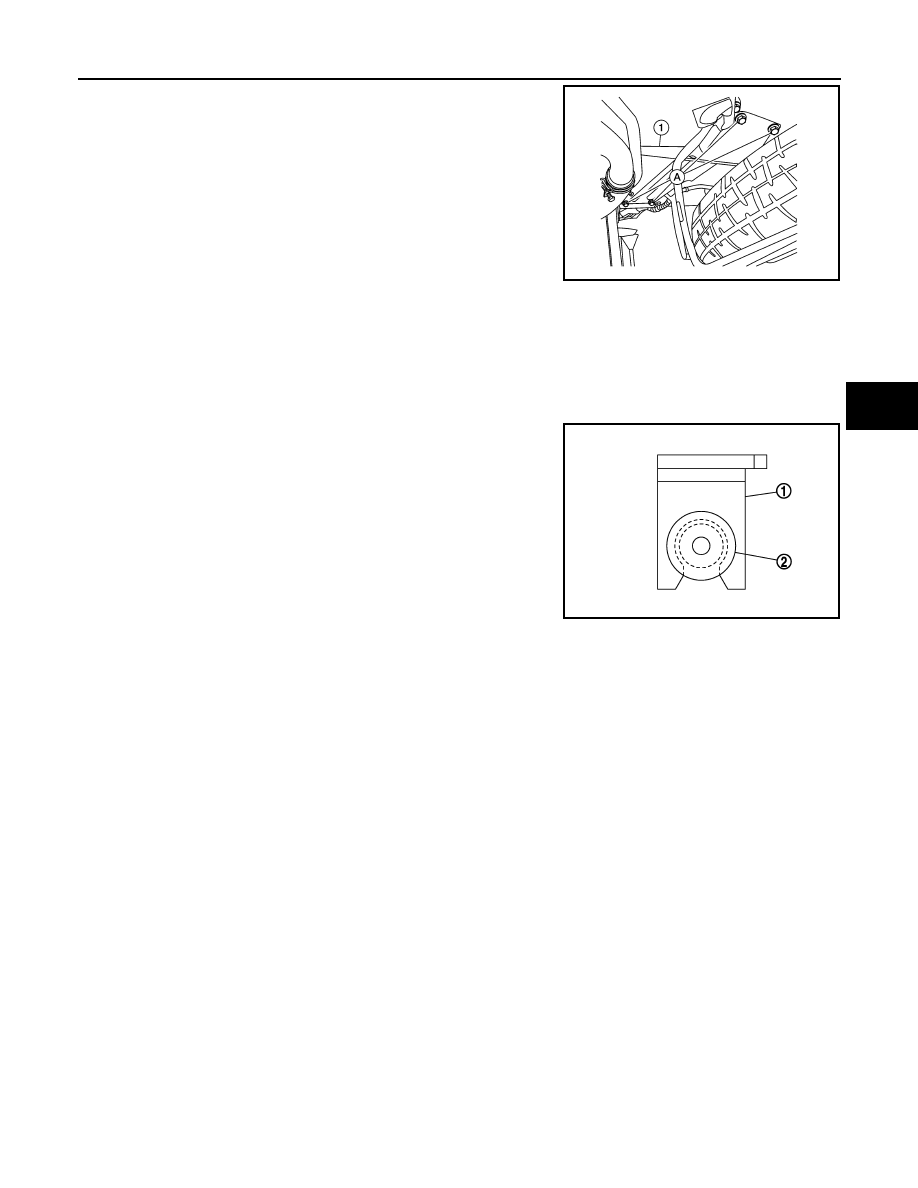
1. Remove bolts (A) and support bracket (1) (LH side only). 

2. Disconnect the harness connector from the rear wheel sensor.
3. Release rear wheel sensor harness clips from the vehicle.
4. Remove bolts and rear wheel sensor from back plate.

INSTALLATION

Installation is in the reverse order of removal.

CAUTION:

Do not twist rear wheel sensor harness when installing rear

wheel sensor. Check that grommet (2) is fully inserted to

bracket (1). Check that rear wheel sensor harness is not twisted

after installation.

ALFIA0391ZZ

JPFIC0209ZZ

BRC-72

< REMOVAL AND INSTALLATION >

[ABS]

SENSOR ROTOR

SENSOR ROTOR

FRONT SENSOR ROTOR
FRONT SENSOR ROTOR : Removal and Installation

INFOID:0000000009619493

REMOVAL

Remove sensor rotor from steering knuckle. Refer to 

FAX-9, "Exploded View"

.

INSTALLATION

Installation is in the reverse order of removal.

REAR SENSOR ROTOR
REAR SENSOR ROTOR : Removal and Installation

INFOID:0000000009619494

REMOVAL

Remove sensor rotor from brake drum. Refer to 

BR-40, "Exploded View"

.

CAUTION:

Do not reuse rear sensor rotor.

INSTALLATION

Installation is in the reverse order of removal.

ABS ACTUATOR AND ELECTRIC UNIT (CONTROL UNIT)

BRC-73

< REMOVAL AND INSTALLATION >

[ABS]

C

D

E

G

H

I

J

K

L

M

A

B

BRC

N

O

P

ABS ACTUATOR AND ELECTRIC UNIT (CONTROL UNIT)

Exploded View

INFOID:0000000009619495

Removal and Installation

INFOID:0000000009619496

REMOVAL

CAUTION:

• Before servicing, disconnect the battery cable from negative terminal.

• Do not remove acuator by holding harness.

NOTE:

When removing components such as hoses, tubes/lines, etc., cap or plug openings to prevent fluid from spill-

ing.
1. Disconnect negative battery cable. Refer to 

PG-69, "Removal and Installation (Battery)"

.

2. Disconnect vacuum hose from intake manifold. Refer to 

BR-32, "Exploded View"

.

1.

ABS actuator and electric unit (con-
trol unit)

2.

ABS actuator and electric unit (con-
trol unit) harness connector

3.

Bracket

4.

Bushing

5.

Insulating clip

6.

Bolt

A.

To master cylinder secondary side

B.

To rear brake tube (RH)

C.

To front brake tube (LH)

D.

To front brake tube (RH)

E.

To rear brake tube (LH)

F.

To master cylinder primary side

AWFIA1025ZZ

BRC-74

< REMOVAL AND INSTALLATION >

[ABS]

ABS ACTUATOR AND ELECTRIC UNIT (CONTROL UNIT)

3. Remove ground harness bolt (A) and ground harness from radi-

ator core support.

4. Disconnect high-pressure pipe from expansion valve. Refer to 

HA-27, "Exploded View"

.

CAUTION:

Cap or wrap the joint of the A/C piping and expansion valve with suitable material such as vinyl

tape to avoid the entry of air.

5. Remove low-pressure flexible hose. Refer to 

HA-27, "LOW-PRESSURE FLEXIBLE HOSE : Removal and

Installation"

.

6. Loosen flare nut from brake tubes using a flare nut wrench, then remove brake tubes from ABS actuator

and electric unit (control unit). Refer to 

BR-21, "FRONT : Exploded View"

.

7. Disconnect the harness connector from the ABS actuator and electric unit (control unit).
8. Remove ABS actuator and electric unit (control unit) bracket bolts.
9. Remove the ABS actuator and electric unit (control unit) and bracket as an assembly.
10. Remove bracket and bushing from ABS actuator and electric unit (if necessary).

INSTALLATION

Installation is in the reverse order of removal.

• Bleed the brake system. Refer to 

BR-12, "Bleeding Brake System"

.

CAUTION:

• Replace the ABS actuator and electric until (control unit) if it has been dropped or sustained an

impact.

• Do not install actuator by holding harness.

• After installing harness connector in the ABS actuator and electric unit (control unit), make sure har-

ness connector is securely locked.

ALKIA3174ZZ


Content   ..  93  94  95  96   ..