Nissan PULSAR N13 Series / ASTRA LD Series. Manual - part 43
 

  Index      Nissan     Nissan PULSAR N13 Series / ASTRA LD Series (1.6 and 1.8 Liter) 1987 – 1991 year - Service Manual


Search            


Content   ..  41  42  43  44   ..


Nissan PULSAR N13 Series / ASTRA LD Series. Manual - part 43


Brakes


173


Inspect the handbrake cable for chafing or fraying. 

(4)   Seized handbrake cables: Renew the hand- 

brake cables.


NOTE: Raise the vehicle and spin the 
wheels one at a time to check for binding. If 
the wheels are not binding, have an assistant 
apply and release the brakes. Check if the 
brakes release immediately. A clogged mas- 
ter cylinder port will cause binding on the 
two wheels fed by that particular circuit 
from the master cylinder. Open the bleeder 
valve on one of the offending wheels to check 
if pressure build up is the cause of the 
binding. A seized handbrake cable will  usu- 
ally cause binding on a rear wheel. Discon- 
nect the handbrake cable and check if the 
wheel will then turn freely.


LOW SPONGY BRAKE PEDAL


(1)   Incorrectly adjusted brake shoes: Check and 

adjust the brake shoes.


(2)  Insufficient fluid in the system: Check for 

leaks, replenish the fluid to the specified level and 
bleed the hydraulic system. 

(3)  Air in the brake hydraulic system: Bleed the 

hydraulic system. 

(4)  Master cylinder faulty: Repair or renew as 

necessary. 

NOTE: A spongy brake pedal in most cases 
is caused by air in the hydraulic system. For 
air to enter the system one or more of the 
sealing rubbers or brake lines must be 
sucking in air. Always rectify the cause of 
the trouble before bleeding the hydraulic 
system. Faulty components usually show up 
as fluid leakage.


BRAKES LOCK ON APPLICATION


(1)  Gummy linings or brake pads due to oil or 

fluid contamination: Renew the linings or brake pads 
and rectify the source of contamination. 

(2)  Scored or eccentric brake drum or warped 

disc: Check and machine or renew the drum or disc as 
necessary. 

(3)  Incorrect or distorted linings or disc pads: 

Check and renew as necessary. 

(4)  Brake servo unit faulty: Repair or renew the 

brake servo unit. 

(5)  Broken   or   stretched   brake   shoe   return 

springs: Check and renew the faulty brake springs. 

(6)  Faulty brake pressure proportioning valve: 

Renew the brake pressure proportioning valve. 

NOTE: If this condition arises, remove all 
the wheels and check the condition of the 
friction material for oil contamination and 
excessive wear. Check the shoe return 
springs for stretching by comparing their 
free length with new springs. An eccentric- 
brake drum or warped disc will be indicated 
by pulsating of the brake pedal when the 
brakes are lightly applied.


BRAKE PEDAL PULSATES


(1)  Eccentric brake drums or warped disc: Check 

and machine or renew the drum or disc as required. 

(2)  Loose or worn hub bearings: Renew the hub 

bearings as necessary. 

NOTE: Brake drums or discs that are run- 
ning out must be machined. This job is best 
entrusted to a brake specialist who will also 
be able to determine if a new disc or drum 
needs to be installed.


BRAKE FADE


(1)  Incorrect shoe adjustment: Check and adjust 

the shoe to drum clearance. 

(2)  Eccentric brake drum: Check and machine or 

renew the brake drum. 


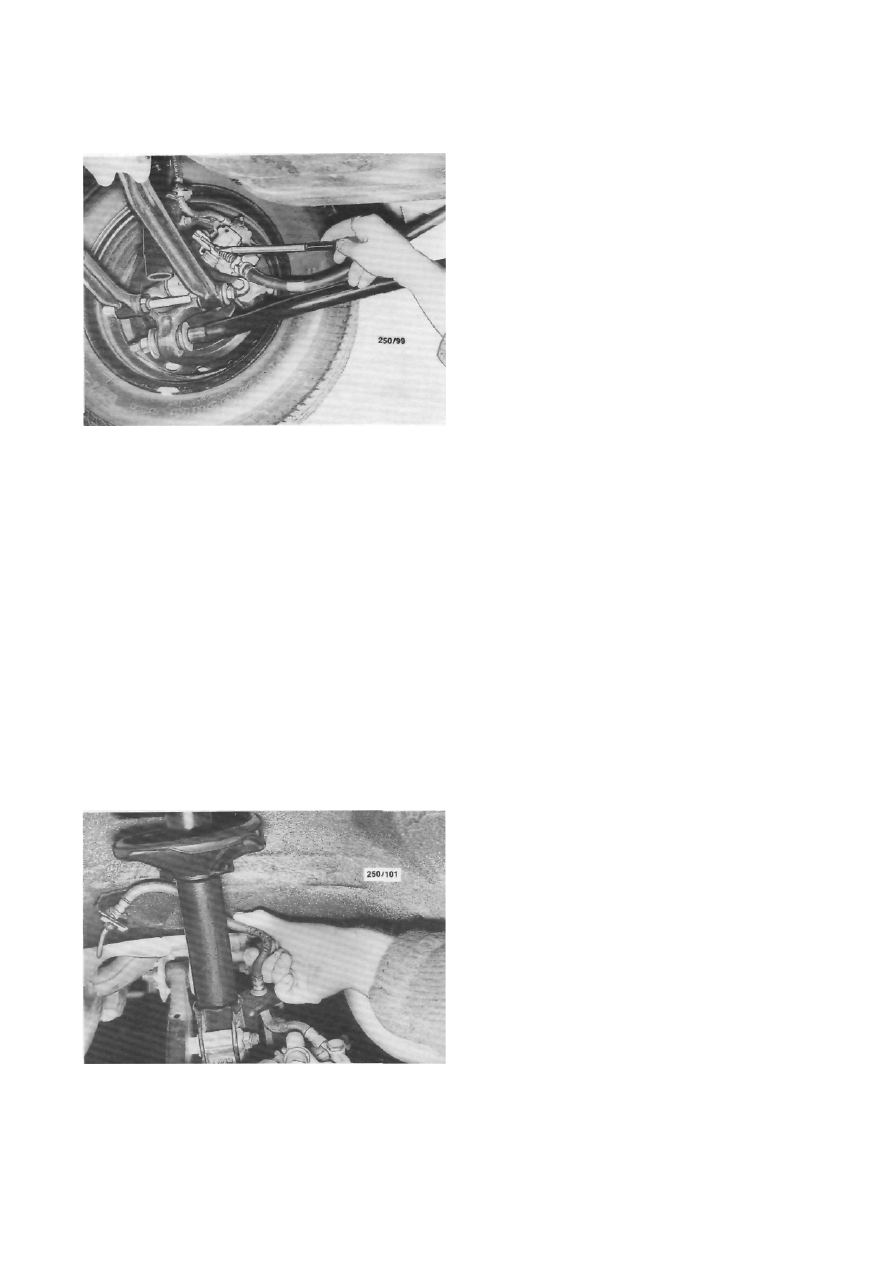
Check the brake hoses for deterioration, chafing and

leaks. 

174


Brakes


(3)  Linings saturated with hydraulic fluid: Re- 

new the linings in sets. 

(4)  Incorrect linings installed: Check and install 

the recommended linings in sets. 

NOTE: In most cases brake fade is caused 
by overuse of the footbrake, which in turn 
causes a build up of heat at the friction 
material and drums or disc. Once this 
excessive build up of heat is allowed to 
dissipate the brakes should again function 
normally.


BRAKES OVERHEAT


(1)  Incorrect shoe adjustment: Check and adjust 

the shoe to drum clearance. 

(2)  Broken   shoe   return   springs:   Renew   any 

faulty springs. 

(3)  Faulty handbrake cables or incorrect adjust- 

ment: Check and renew or adjust the cables. 

(4)  Frozen wheel cylinder or caliper pistons: 

Overhaul the cylinders or calipers. 

(5)  Obstructed or damaged hydraulic hose or 

line: Remove the obstruction or renew the hydraulic 
hose or line. 

(6)  Obstructed   master   cylinder   compensating 

port: Clean the compensating port. 

(7)  Blocked vent in the master cylinder reservoir 

cap; Check and remove the obstruction in the vent. 

(8)  Overuse of footbrake: Revise driving habits. 

NOTE: To check for brake binding raise the 
vehicle and spin each wheel in turn by hand. 
If it is found that one wheel cylinder or 
caliper piston is sticking it is advisable to 
overhaul all the wheel cylinders and calipers.


BRAKE FAILURE


(1)  Faulty master cylinder: Remove and over- 

haul the master cylinder. 

(2)  Loss of fluid due to a leaking wheel cylinder: 

Overhaul or renew the wheel cylinders and bleed the 
hydraulic system. 

(3)  Loss of fluid due to a leaking caliper: Over- 

haul or renew the caliper assemblies and bleed the 
hydraulic system. 

(4)  Loss of fluid due to a fractured pipe or faulty 

union: Renew the faulty components as necessary and 
bleed the hydraulic system. 

(5)  Air  in  the  hydraulic  system:   Locate  the 

source of the air leak, rectify the problem and bleed 
the hydraulic system. 

(6)  Water in the hydraulic fluid: Drain, flush, 

refill and bleed the hydraulic system. 

NOTE: To locate the source of a fluid leak, 
fill the master cylinder reservoir with fluid 
and check for obvious signs of external 
leakage while an assistant pumps the brake 
pedal.


Check the brake pipe unions for leaks. 

BRAKE NOISE


(1)  Brakes squeal on application: Glazed friction 

material or missing or damaged disc pad anti-squeal 
shims. 

(2)  Grinding noise on application: Friction ma- 

terial worn out. Check the friction  material and 
discs/drums. Renew the brake pads/shoes and ma- 
chine or renew the brake discs/drums as necessary. 


Inspect the brake discs for scoring and wear. 

2.    DESCRIPTION


The brakes are operated by hydraulic pressure in 

two independent circuits by means of a tandem dual 
circuit master cylinder coupled to a brake servo unit 
mounted on the bulkhead between the brake pedal 
and master cylinder.


The brake circuits are split diagonally. The left 

hand front and right hand rear brakes are connected 
to the primary circuit, and the right hand front and 
left hand rear brakes are connected to the secondary 
circuit. Should a malfunction occur in one circuit, the 
remaining circuit is capable of stopping the vehicle.


Brakes


175


A pressure proportioning valve is incorporated in 

each circuit to prevent premature locking of the rear 
wheels during severe braking.


The four wheel hydraulically operated brakes 

utilize disc brakes on each front wheel and disc brakes 
or leading and trailing drum brake shoes on each rear 
wheel.


The front disc brakes comprise a disc attached to 

the hub assembly and a caliper bolted to the steering 
knuckle.


The rear disc brakes comprise a disc and hub 

assembly attached to the rear stub axle and a caliper 
and anchor plate bolted to the backing plate.


The front and rear calipers are of the sliding type. 

As pad wear takes place, the caliper piston is allowed 
to slide outwards through the seal to take up a new 
position in the caliper bore. Elastic deformation of the 
seal takes place when the brakes are applied, which 
returns the piston slightly when the brakes are re- 
leased. Thus a constant clearance is maintained 
between the pads and the disc when the brakes are in 
the off position.


The disc brakes do not require periodical adjust- 

ment in service to compensate for pad wear as they 
are self adjusting.


The leading and trailing shoe drum brakes on the 

rear wheels use a double ended wheel cylinder to 
operate both brake shoes at the top. The lower end of 
each brake shoe abuts a fixed anchor point. The brake 
shoes are automatically adjusted when the brakes are 
operated.


The handbrake operates the rear brakes via 

cable arrangement.


3.    MASTER CYLINDER 

Special Equipment Required: 

To Install New Seals — Suitable machined drift 

TO REMOVE 

(1)   Depress the brake pedal several times to 

deplete the vacuum from the system.


(2)  Raise the bonnet and install covers to 

both 
the front mudguards. Cover the areas of paintwork 
beneath the master cylinder with absorbent cloth. 

(3)  Disconnect the  wiring from the pressure 

sensing switch. 

(4)  Disconnect the brake pipes from the master 

cylinder and plug the outlets and pipes to prevent the 
loss of fluid and the ingress of dirt. 

(5)  Remove the nuts retaining the master cylin- 

der to the brake servo unit and remove the master 
cylinder from the vehicle. 

TO DISMANTLE


(1)  Remove the master cylinder as previously 

described. 

(2)  Remove the reservoir cap and diaphragm, 

drain and discard the brake fluid from the reservoir. 

(3)  Carefully  remove  the  reservoir  from   the 

master cylinder by  pulling it   from  the reservoir 
retainers by hand. Remove and discard the retainers 
from the master cylinder. 

(4)  Using internal snap ring pliers, remove the 

snap ring from the primary reservoir port. 

(5)  Remove the fast fill valve assembly and the 

O ring from the port. Remove and discard the valve 
washer from the fast fill valve. 

(6)  Remove the proportioning valve plugs and 

the O rings. Discard the O rings. Withdraw the springs 
and valve plungers from the master cylinder. Remove 
and discard the seals from the valve plungers. 

(7)  Remove the pressure sensing switch  and 

lever assembly from the master cylinder. 

{8) Remove the cylinder end plug from the 

master cylinder. Remove and discard the O ring from 
the plug.


(9)  Carefully tap the front of the master cylinder 

vertically on a block of wood and remove the pressure 
differential pistons from the master cylinder. Remove 
and discard the O rings from the pistons. 

(10)  Push   the  primary  piston   forward   in   the 

cylinder with a blunt  rod and while holding the 
pressure, remove the stop pin from the master cylin- 
der. 

(11)  The primary piston may now be withdrawn 

from the cylinder bore. The secondary piston, retainer 
and spring can also be withdrawn by carefully tapping 
the master cylinder on a block of wood. 

(12)  Prise the legs of the seal retainer upwards 

and remove it from the primary piston. Remove the 
seal and guide. Discard the seal and retainer. 

NOTE: The secondary piston must no! be 
dismantled by removing the screw. This 
assembly has a factory preset length and the 
screw must not be altered in service.


(13)  Remove the main seal and the guide from 

the front of the secondary piston. Stretch the rear seal 
from the groove and remove it from the piston. Take


Installed view of the master cylinder and servo unit. Air 

duct removed for clarity. 1.8 liter model. 

176


Brakes


care not to damage the piston surfaces where the inner 
diameter of the piston seals locate.


(14)  Remove the garter springs, back up rings, 

seals and the retainer from the master cylinder, noting 
the installed direction of the seals to aid assembly.


NOTEIt is important that care is taken not 
to damage the bore surface or the seal 
surfaces during removal of these parts. Note 
the order and direction during removal,


(15)  Remove the external O ring from the master 

cylinder body.


TO CLEAN AND INSPECT


(1)  Wash all components thoroughly in methyl- 

ated spirits.  Do not use petrol, kerosene or other 
cleaning solvents. 

(2)  Check the master cylinder bore for wear, 

scoring or pitting. 

NOTE: Do not hone the master cylinder 
bore. If the bore is pitted or worn, renew the 
master cylinder as an assembly.


(3)  Ensure that all the inlet and compensating 

ports between the reservoir and the cylinder bore are 
free of any obstructions.


(4)    Discard all rubber parts and if applicable, the 

piston assemblies.


NOTE: Where possible use a genuine major 
repair kit which contains pre-assembled rub- 
ber seals and pistons when overhauling a 
master cylinder. The use of a major kit will 
ensure a thorough overhaul and long service 
from the unit.


TO ASSEMBLE


(1)  Liberally  coat   the  cylinder bore  and  all 

internal parts with clean brake fluid.


NOTE: Install all parts supplied with the 
repair kit.


(2)  Install the seal retainer in the mouth of 

the 
master cylinder, small diameter first. 

(3)  Install  the seal,  in  the direction  rioted 

on 
removal, against the seal retainer, followed by the first 
back up ring, large diameter first. 

(4)  Install the garter spring against the back up 

ring. Insert a machined drift into the bore and lightly 
push the garter spring into its locating groove. 

(5)  Install the remaining seal, in the 

direction 
noted on removal, against the garter spring already 

PRIMARY PISTON        SEAL 

BACK UP RING


Dismantled view of the master cylinder. 


Content   ..  41  42  43  44   ..