Nissan Murano Z51 (2013 year). Manual - part 52
PB-8
< REMOVAL AND INSTALLATION >
PARKING BRAKE SHOE
PARKING BRAKE SHOE
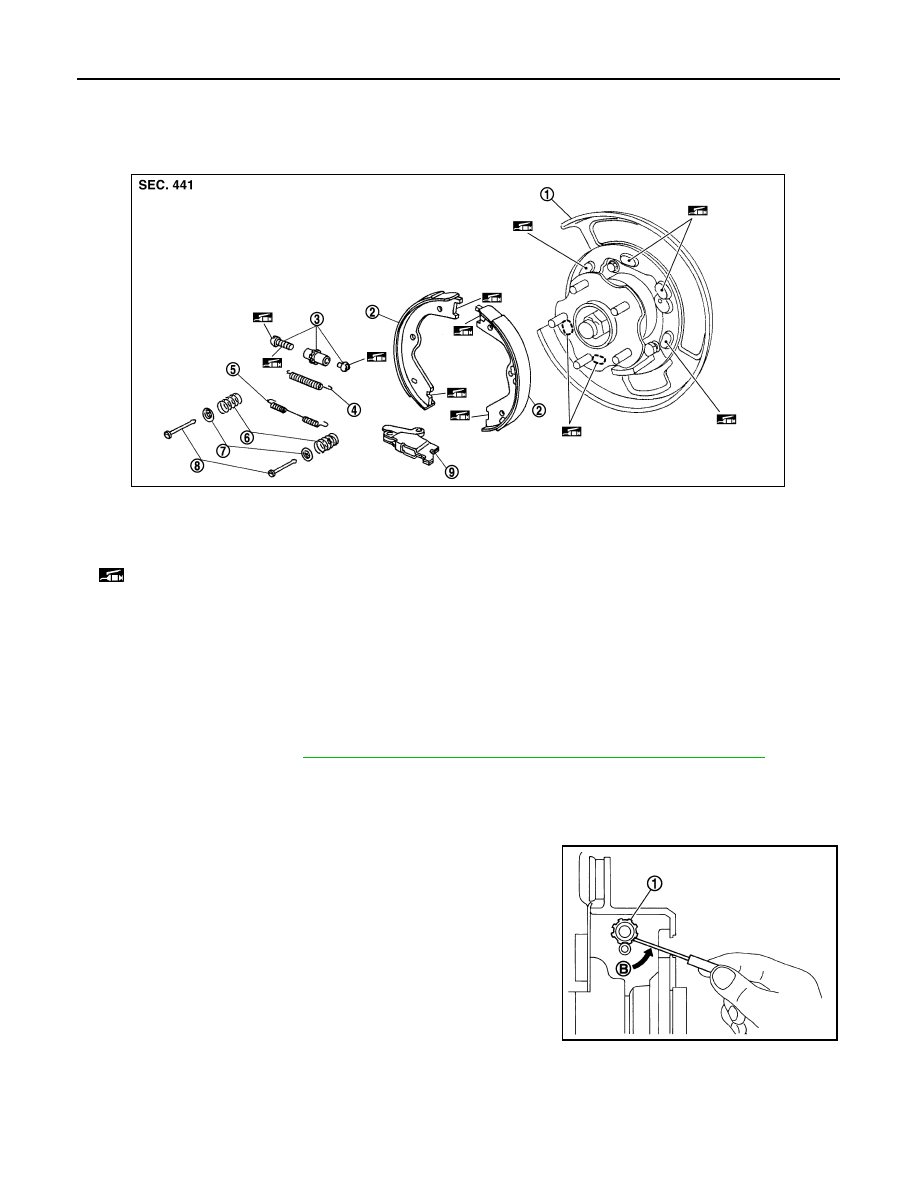
Exploded View
INFOID:0000000008456256
Removal and Installation
INFOID:0000000008456257
REMOVAL
WARNING:
Since dust covering the parking brake has an affect on human body, the dust must be removed with a
dust collector. Never splatter the dust with an air blow gun.
1.
Remove rear tires with power tool.
2.
Remove disc rotor. Refer to
BR-48, "BRAKE CALIPER ASSEMBLY : Removal and Installation"
.
CAUTION:
Parking brake completely in the released position.
3.
If disc rotor cannot be removed, remove as follows:
a.
Fix the disc rotor with wheel nuts and remove the adjusting hole plug.
b.
Using suitable tool, rotate adjuster (1) in direction (B) to retract
and loosen parking brake shoe.
4.
Remove anti-rattle pins, retainers, anti-rattle spring, adjuster
spring and return springs.
CAUTION:
Never drop the removed parts.
5.
Remove parking brake shoes, adjuster assembly and toggle
lever.
CAUTION:
• The parking brake shoes for the front side are made of dif-
ferent materials from those for the rear side. Never misi-
dentify them when removing.
• Never drop the removed parts.
INSTALLATION
Install in the reverse order of removal.
• Apply PBC (Poly Butyl Cuprysil) grease or silicone-based grease to the back plate and brake shoe.
1.
Back plate
2.
Parking brake shoe
3.
Adjuster
4.
Adjuster spring
5.
Return spring
6.
Anti-rattle spring
7.
Retainer
8.
Anti-rattle pin
9.
Toggle lever
: Apply PBC (Poly Butyl Cuprysil) grease or silicone-based grease.
JPFIB0046ZZ
JPFIB0007ZZ
Revision: 2012 September
2013 MURANO