Mitsubishi L200 (2020 year). Manual in english - page 10
Brake assist system
NOTE
NOTE
NOTE
• On vehicles with M/T, the gearshift lever
• ASTC warning lamp: ON
z Once the brake assist system is operational,
is placed in the forward gear except the 1st
• Brake system: brake temperature high
it maintains great braking force even if the
position.
brake pedal is lightly released.
To stop its operation, completely remove
z When the Hill Descent Control is activated,
you may feel the vehicle body, the steering
your foot from the brake pedal.
Brake assist system
wheel and the brake pedal vibrate and hear
z When the brake assist system is in use while
the operation noise. You may also feel the
driving, you may feel the brake pedal at-
The brake assist system is a device assisting
depressed brake pedal is solid or loose. This
tempt to resist, the pedal moves in small mo-
drivers who cannot depress the brake pedal
does not indicate a malfunction and the Hill
tions in conjunction with the operation
6
firmly when it is necessary to do so such as
Descent Control is operating normally.
noise, or the vehicle body and the steering
in emergency stop situations and provides
wheel vibrate. This occurs when the brake
z The Hill Descent Control indication lamp
blinks on a flat road, but this does not indi-
greater braking force.
assist system is operating normally and does
cate a malfunction.
not indicate faulty operation. Continue to
firmly depress the brake pedal.
If the brake pedal is depressed suddenly, the
z When the active stability & traction control
brakes will be applied with more force than
To deactivate
(ASTC) indication lamp is illuminated, the
usual.
brake assist system may not function.
1. Press the Hill Descent Control switch.
The Hill Descent Control will be gradu-
CAUTION
ally released.
Emergency stop signal
2. Make sure that the Hill Descent Control
z The brake assist system is not a device de-
system*
indication lamp is off.
signed to exercise braking force greater than
its capacity. Make sure to always keep a suf-
ficient distance between your vehicle and a
This is a device that reduces the possibility of
NOTE
vehicle in front of you without relying too
rear end collisions by the rapid and automatic
much on the brake assist system.
blinking of the hazard warning lamps to alert
z The Hill Descent Control turns off automati-
cally and the Hill Descent Control indication
vehicles approaching from behind during
lamp in the meter goes off without pressing
sudden braking. When the emergency stop
the Hill Descent Control switch in the fol-
signal system operates, the hazard warning
lowing conditions.
indication lamp in the instrument cluster
• Vehicle speed: More than approximately
blinks rapidly at the same time.
80 km/h (50 mph)
• Rear differential lock (if so equipped): ac-
tivating
6-72
Starting and driving
Anti-lock brake system (ABS)
z
When the ABS is activated, you may
CAUTION
Anti-lock brake system
feel the brake pedal pulsation and the vi-
z
If the ABS warning lamp or ASTC indica-
(ABS)
brations of the vehicle body and steering
tion lamp illuminates, the emergency stop
wheel. It may also feel as if the pedal re-
signal system may not operate. Refer to
The anti-lock brake system (ABS) helps pre-
sists being pressed.
“ABS warning lamp/display” on page 6-74.
vent the wheels from locking during braking.
Refer to “ASTC warning lamp/display” on
In this situation, simply hold the
This helps maintain vehicle drivability and
page 6-79.
brake pedal down firmly. Do not
steering wheel handling.
pump the brake, which will result in
reduced braking performance.
NOTE
Driving hints
6
z
[Activating condition for the emergency stop
z
An operation noise is emitted from the
z
Always keep a safe distance from the ve-
signal system]
engine compartment or you can feel a
hicle in front of you. Even if your vehi-
It activates when all of the following condi-
shock from the brake pedal when start-
tions are met.
cle is equipped with ABS, leave a great-
ing to drive immediately after starting
• The vehicle speed is approximately
er braking distance when:
the engine. These are normal sounds or
55 km/h (34 mph) or higher.
• Driving on gravel or snow-covered
operations that the ABS makes when
• The brake pedal has been depressed, and
roads.
the system judges that it was sudden brak-
performing a self-check. It does not indi-
• Driving with tyre chains installed.
ing from the vehicle deceleration and the
cate a malfunction.
• Driving on roads where the road sur-
operating condition of the anti-lock brake
z
The ABS can be used after the vehicle
face is pitted or has other differences
system (ABS).
has reached a speed over approximately
[Deactivating condition for the emergency
in surface height.
10 km/h (6 mph). It stops working when
stop signal system]
• Driving on uneven road surfaces.
the vehicle slows below 7 km/h.
It deactivates when one of the following
z
Operation of ABS is not restricted to sit-
conditions is met.
uations where brakes are applied sud-
• The brake pedal is released.
denly. This system may also prevent the
CAUTION
• The hazard warning flasher switch is
wheels from locking when you drive
z
The ABS cannot prevent accidents. It is your
pressed.
over manholes, steel roadwork plates,
responsibility to take safety precautions and
• The system judges that it was not sudden
road markings, or any uneven road sur-
to drive carefully.
braking from the vehicle deceleration and
face.
z
To prevent failure of the ABS, be sure all 4
the operating condition of the anti-lock
wheels and tyres are the same size and the
brake system (ABS).
same type.
Starting and driving
6-73
Anti-lock brake system (ABS)
If the warning lamp/display il-
CAUTION
CAUTION
luminate while driving
z Do not install any aftermarket limited-slip
z
Any of the following warning lamp/display
differential (LSD) on your vehicle. The ABS
indicate that the ABS is not functioning and
may stop functioning properly.
only the standard brake system is working.
If only the ABS warning lamp illuminates
(The standard brake system is functioning
Avoid hard braking and high-speed driving.
normally.) If this happens, take your vehicle
ABS warning lamp/display
Stop the vehicle in a safe place.
to a MITSUBISHI MOTORS Authorized
Restart the engine and check to see whether
Service Point.
the lamp goes out after a few minutes driv-
Warning lamp
• When the ignition switch is turned to the
“ON” position or the operation mode is
ing; if it then remains off during driving,
6
put in ON, the warning lamp does not
there is no problem.
come on or it remains on and does not go
However, if the warning lamp/display do not
off
disappear, or if they come on again when the
• The warning lamp comes on while driving
vehicle is driven, we recommend you to have
Warning display
• The warning display appears while driv-
the vehicle checked as soon as possible.
ing
If the ABS warning lamp/
NOTE
display and brake warning
lamp/display illuminate at the
z
On vehicles with the rear differential lock
same time
and the active stability & traction control
If there is a malfunction in the system, the
(ASTC), the ASTC and ABS functions are
The ABS and brake force distribution func-
suspended while the rear differential lock is
ABS warning lamp will come on and the
tion may not work, so hard braking could
activated.
warning display will appear on the informa-
make the vehicle unstable.
ASTC indication lamp, ASTC OFF indica-
tion screen in the multi information display.
Avoid hard braking and high-speed driving.
tion lamp and ABS warning lamp are illumi-
Under normal conditions, the ABS warning
Stop the vehicle in a safe place and we rec-
nated while these functions are suspended.
lamp comes on when the ignition switch is
It does not indicate a problem. When the
ommend you to have it checked.
turned to the “ON” position or the operation
rear differential lock is disengaged, these
lamps go out and function again.
Warning lamp
mode is put in ON and goes off a few sec-
onds later.
Refer to “ASTC indication lamp or ASTC
OFF indication lamp” on page 6-78.
6-74
Starting and driving
Power steering system
Warning display
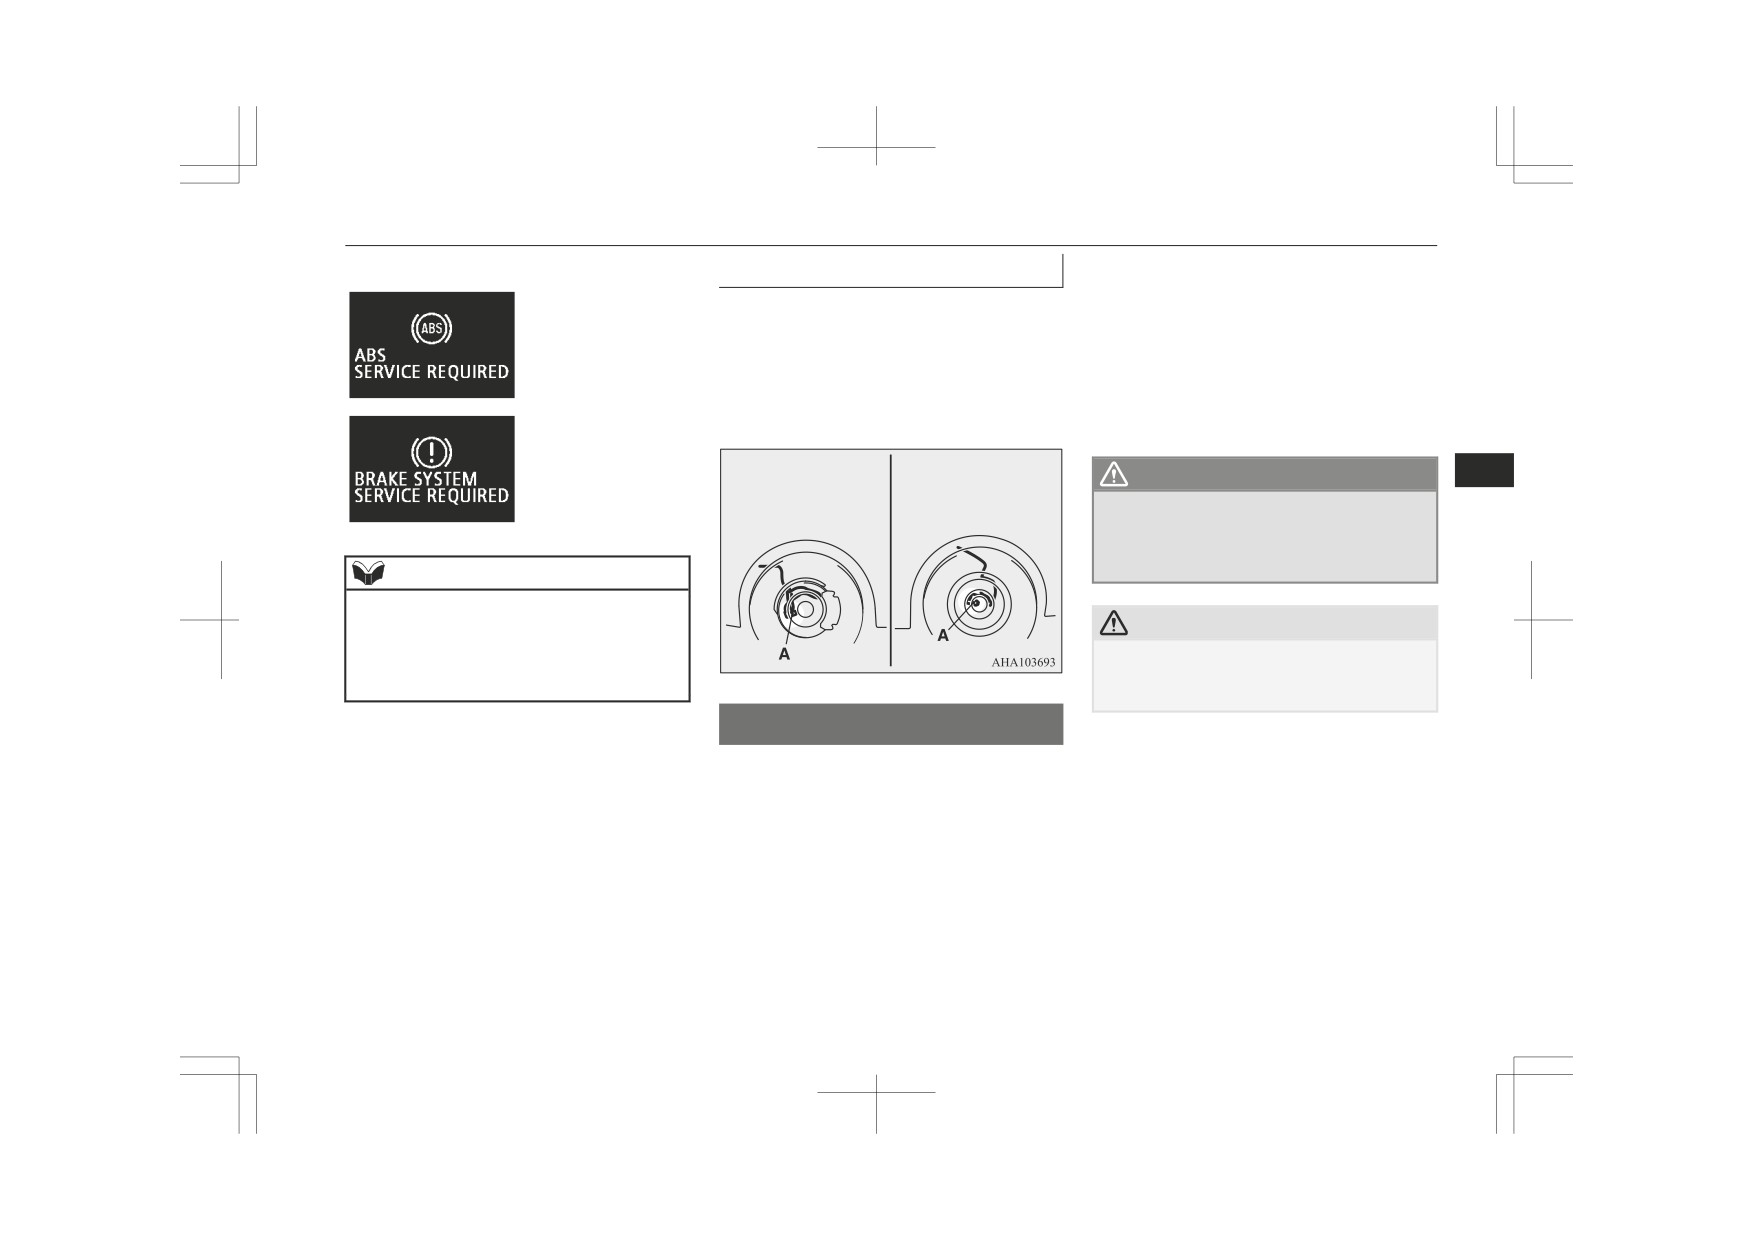
After driving on icy roads
The power steering system has mechanical
steering capability in case the power assist is
After driving on snow or icy roads, remove
lost. If the power assist is lost for some rea-
any snow and ice which may have accumula-
son, you will still be able to steer your vehi-
ted around the wheels. On vehicles that have
cle, but you will notice it takes much more
an ABS, be careful not to damage the wheel
effort to steer. If this happens, have your ve-
speed sensors (A) or the cables located at
hicle inspected at a MITSUBISHI MOTORS
each wheel.
Authorized Service Point.
Front
Rear
WARNING
6
z Do not stop the engine while the vehicle is
moving. Stopping the engine would make
the steering wheel extremely hard to turn,
possibly resulting in an accident.
NOTE
z
The ABS warning lamp and brake warning
lamp illuminate at the same time and the
CAUTION
warning displays appear alternately on the
z Do not leave the steering wheel turned all
information screen in the multi information
the way in one direction. This can cause
display.
damage to the power steering system.
Power steering system
The power steering system operates while the
engine is running. It helps reduce the effort
needed to turn the steering wheel.
Starting and driving
6-75

Active Stability & Traction Control (ASTC)
Active Stability & Traction
CAUTION
NOTE
Control (ASTC)
z
Do not install any aftermarket limited-slip
z On vehicles with the rear differential lock,
differential (LSD) on your vehicle. The Ac-
the ASTC and ABS functions are suspended
tive Stability Control function may stop
while the rear differential lock is activated.
The active stability & traction control
functioning properly.
ASTC indication lamp, ASTC OFF indica-
(ASTC) takes overall control of the anti-lock
tion lamp and ABS warning lamp are illumi-
brake system, Active Stability Control func-
nated while these functions are suspended. It
tion and active traction control function to
NOTE
does not indicate a problem. When the rear
help maintain the vehicle’s control and trac-
differential lock is disengaged, these lamps
z
An operation noise may be emitted from the
tion. Please read this section in conjunction
go out and function again.
6
engine compartment in the following situa-
with the pages on the anti-lock brake system,
Refer to
“ABS warning lamp/display” on
tions. The sound is associated with checking
Active Stability Control function and active
page 6-74, “ASTC indication lamp or ASTC
the operations of the ASTC. At this time,
OFF indication lamp” on page 6-78.
traction control function.
you may feel a shock from the brake pedal if
you depress it. These do not indicate a mal-
Anti-lock brake system (ABS) ® p. 6-73
function.
Active Stability Control func-
Active Stability Control function ® p. 6-76
• When the ignition switch is set to the
tion
“ON” position or the operation mode is
Active Traction Control function ® p. 6-78
put in ON.
The Active Stability Control function is de-
• When the vehicle is driven for a while af-
signed to help the driver maintain control of
CAUTION
ter the engine is turned on.
the vehicle on slippery roads or during rapid
z
When the ASTC is activated, you may feel a
steering manoeuvres. It works by controlling
z Do not over-rely on the ASTC. Even the
vibration in the vehicle body or hear a whin-
ASTC cannot prevent the natural laws of
the engine output and brake on each wheel.
ing sound from the engine compartment.
physics from acting on the vehicle.
This indicates that the system is operating
This system, like any other system, has lim-
normally. It does not indicate a malfunction.
its and cannot help you to maintain traction
z
When the anti-lock brake system warning
and control of the vehicle in all circumstan-
lamp is illuminated, the ASTC is not active.
ces. Reckless driving may lead to accidents.
It is the driver’s responsibility to drive care-
fully. This means taking into account the
traffic, road and environmental conditions.
z Be sure to use the same specified type and
size of tyre on all 4 wheels. Otherwise, the
ASTC may not work correctly.
6-76
Starting and driving
Active Stability & Traction Control (ASTC)
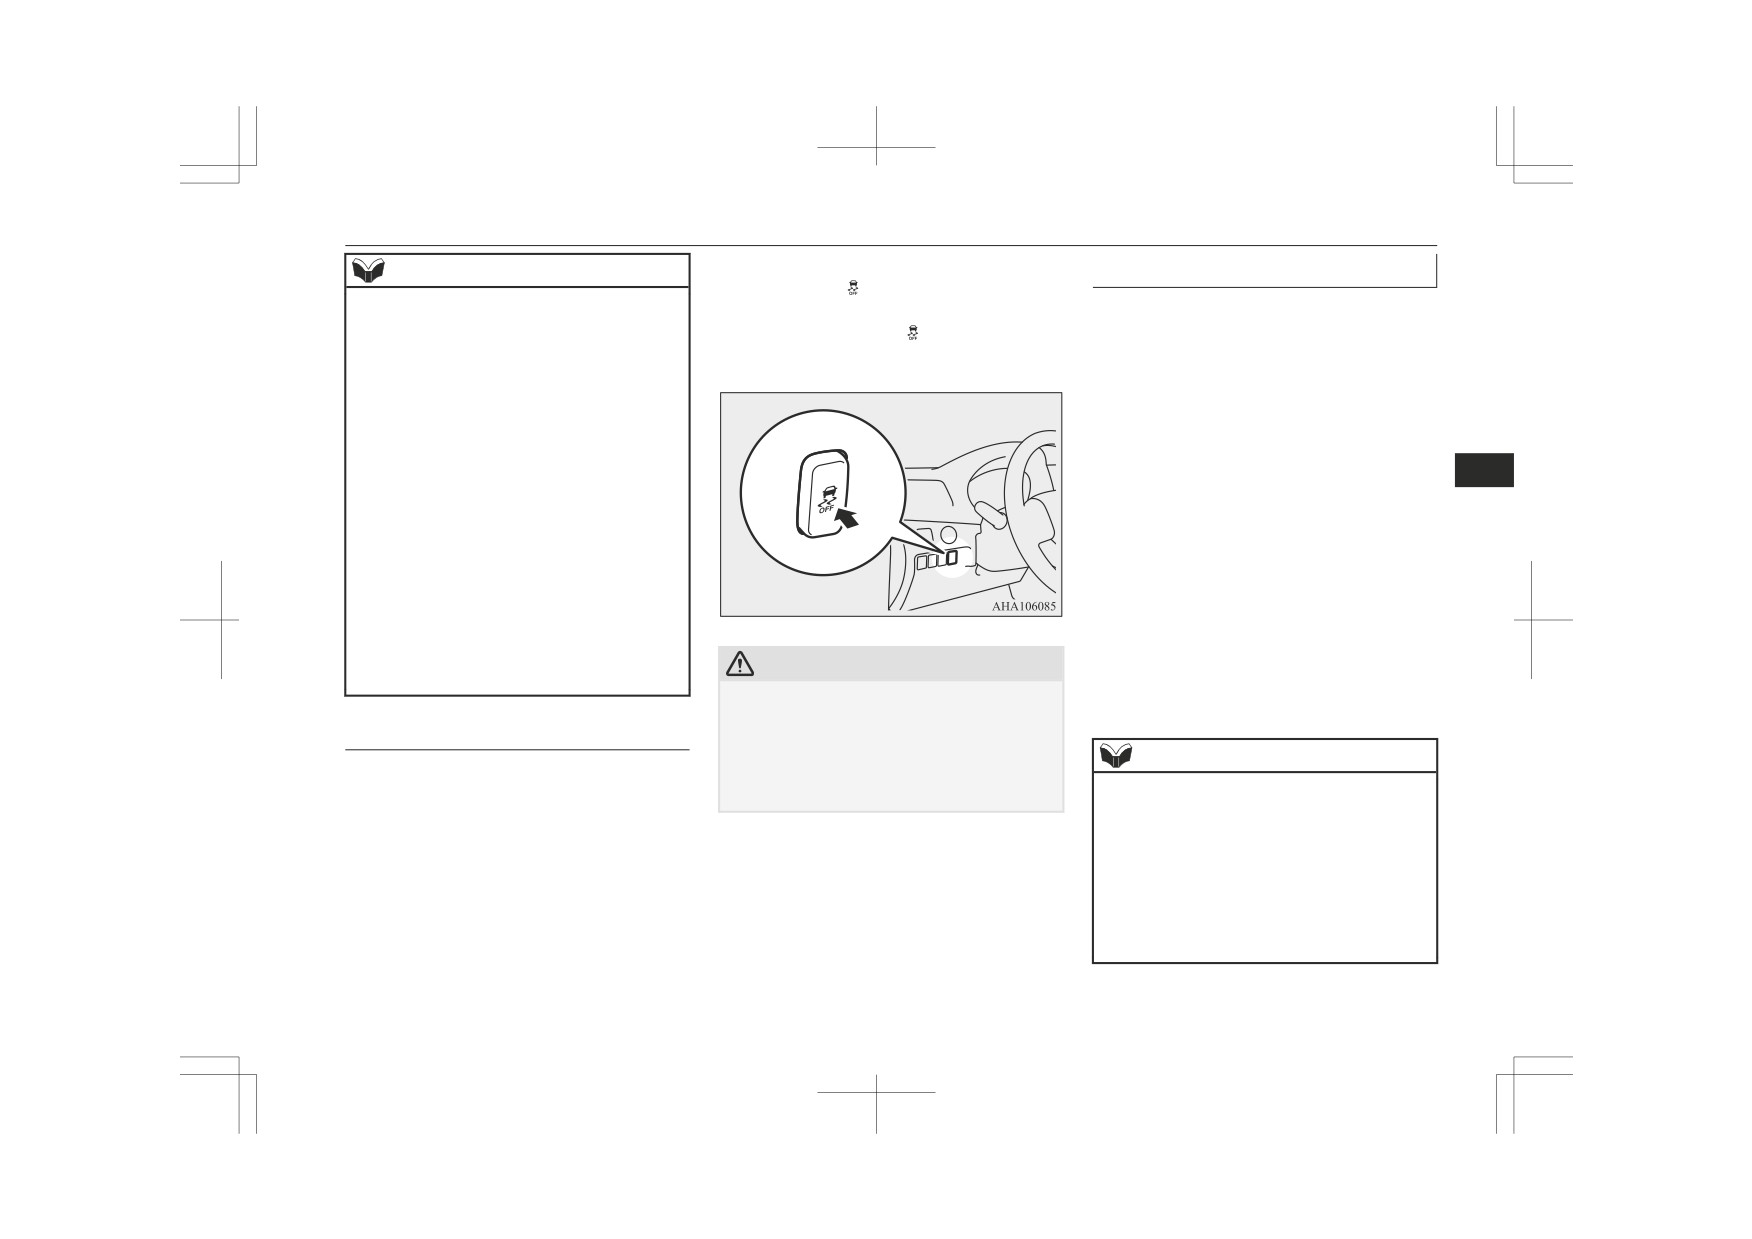
When the Active Stability Control function is
Driving hints
NOTE
deactivated, the
indicator will turn on. To
The Active Stability Control function does
When extricating the vehicle from mud, sand
z
reactivate the ASC, momentarily press the
not operate when the drive mode-selector is
or fresh snow with the drive mode-selector in
“ASC OFF” switch; the indicator is turned
in the
“4L” position
(Easy Select
4WD),
the
“2H” or
“4H” position
(Easy Select
off.
“4LLc” position
(Super Select
4WD II).
4WD) or “2H”, “4H” or “4HLc” position
When the Active Stability Control function
(Super Select 4WD II), you may find that the
is operating with the drive mode-selector in
operation of the ASTC prevents the engine
the
“2H” or
“4H” position
(Easy Select
speed from increasing in response to depress-
4WD), “2H”, “4H” or “4HLc” position (Su-
per Select 4WD II), setting the drive mode-
ing the accelerator pedal. If this happens and
6
selector to the
“4L” (Easy Select
4WD),
the vehicle remains stuck as a result, place
“4LLc” position (Super Select 4WD II) posi-
the drive mode-selector in the “4L” position
tion makes the Active Stability Control func-
(Easy Select 4WD), “4LLc” position (Super
tion deactivate automatically.
Select 4WD II), or turn the Active Stability
z
The Active Stability Control function oper-
Control switch OFF. The vehicle will then be
ates at speeds of about 15 km/h (9 mph) or
easier to extricate. (Brake control of the ac-
higher.
tive traction control function is still working
z
On vehicles with the rear differential lock,
the Active Stability Control function does
to prevent wheel spins when ASC OFF
not operate when the rear differential lock is
switch
“OFF”, “4L” position (Easy Select
CAUTION
activated.
4WD) or
“4LLc” position
(Super Select
z
For safety reasons, the “ASC OFF” switch
4WD II) selected.)
should only be operated when the vehicle is
“ASC OFF” switch
stopped.
The Active Stability Control function is auto-
z
Be sure to keep the Active Stability Control
NOTE
function on while driving in normal circum-
matically activated when the ignition switch
stances.
z If you continue to press the “ASC OFF”
is turned to the “ON” position or the opera-
switch after the Active Stability Control
tion mode is put in ON. You can deactivate
function is turned off, the “mistaken opera-
the system by pressing down the “ASC OFF”
tion protection function” will activate and
the Active Stability Control function will
switch for 3 seconds or longer.
turn back on.
z Even if the Active Stability Control function
is turned off, it may activate depending on
the vehicle’s movement.
Starting and driving
6-77
Active Stability & Traction Control (ASTC)
Active Traction Control func-
- ASTC OFF indication lamp
CAUTION
tion
This indication lamp will turn on
z
If the temperature in the braking system con-
when the Active Stability Control
On slippery surfaces, the active traction con-
tinues to increase due to continuous brake
function is deactivated by either of
control on a slippery road surface, the warn-
trol function prevents the drive wheels from
the following operations:
ing display will appear and the warning buz-
spinning excessive, thus helping the vehicle
zer may sound intermittently to give a warn-
to start moving from a stopped condition. It
z
The ASC OFF switch is pressed to deac-
ing to the driver. If the driver continues driv-
also provides sufficient driving force and
tivated the system.
ing even after the warning buzzer sounds
steering performance as the vehicle turns
z
The drive mode-selector is placed in the
and then the temperature is further in-
while pressing the acceleration pedal.
“4L” position
(Easy Select
4WD) or
creased, the
indication lamp blink or the
6
“4LLc” position (Super Select 4WD II).
warning display will appear again, and the
buzzer will sound continuously for several
CAUTION
seconds. To prevent the brake system from
CAUTION
overheating, the brake control of the active
z When driving a vehicle on a snowy or icy
road, be sure to install snow tyres and drive
traction control function will be temporarily
z
When indication lamp blinks, ASTC is
the vehicle at moderate speeds.
operating, which means that the road is slip-
suspended.
pery or that your vehicle’s wheels are begin-
At this time, the
indication lamp blinks
ning to slip. If this happens, drive slower
slowly.
ASTC indication lamp or
with less accelerator input.
The engine control of the active traction
ASTC OFF indication lamp
control function and normal brake operation
will not be affected. Park your vehicle in a
The indication lamps should illuminate when
safe place. When the temperature in the
the ignition switch is turned to the “ON” po-
braking system has come down, the
indi-
sition or the operation mode is put in ON and
cation lamp will be turned off and the active
should go off after a few seconds. If the indi-
traction control function will start operating
cation lamps stays on or do not illuminate
again.
when the ignition switch is turned to the
“ON” position or the operation mode is put in
ON, we recommend you to have your vehicle
inspected.
- ASTC indication lamp
The indication lamp will blink when
the ASTC is operating.
6-78
Starting and driving
Trailer Stability Assist (TSA)
NOTE
NOTE
CAUTION
z The indication lamp may turn on when
z The ASTC function indicator display illumi-
z The system may be malfunctioning.
you start the engine. This means that the bat-
nates only when the 2WD/4WD operation
Park your vehicle in a safe place and stop
tery voltage momentarily dropped when the
indicator display is selected.
(Vehicles
the engine.
engine was started. It does not indicate a
equipped with the colour liquid crystal dis-
Restart the engine and check whether the
malfunction, provided that the indication
play only)
display/ indication lamp goes out. If they go
lamp goes out immediately.
out, there is no abnormal condition. If they
do not go out or appear frequently, it is not
ASTC warning lamp/display
necessary to stop the vehicle immediately,
ASTC function indicator dis-
but we recommend you to have your vehicle
If an abnormal condition occurs in the sys-
6
inspected.
play
tem, the following warning lamp/warning
When the ASTC is operating, the indicator
display will turn on.
display of the wheels that are controlled by
Towing
Warning lamp
the ASTC will blink.
The indicator for the wheel being subjected
- ASTC indication lamp
CAUTION
to control antispin blinks.
- ASTC OFF indication lamp
z If the vehicle is towed with the ignition
switch in the “ON” position or the operation
mode in ON and only the front wheels or on-
ly the rear wheels raised off the ground, the
Warning display
ASTC may operate, resulting in an accident.
Refer to “Towing” on page 8-23.
Trailer Stability Assist
(TSA)
The trailer stability assist (TSA) system helps
safe driving while towing a trailer by control-
Example indication: ASTC function control-
ling the braking force of each wheel and en-
ling front-right wheel
gine power in order to stabilize the motion
while detecting the continuous sway of the
vehicle caused by a trailer.
Starting and driving
6-79
Cruise control*
When the TSA system operates the brakes,
NOTE
NOTE
the brake lamp turns on.
About the towing of the trailer, refer to page
z When the TSA system operates, the ASTC
z Your speed may decrease on a steep uphill.
operation indication lamp blinks on and off.
You may use the accelerator pedal if you
6-137.
z When the ASTC does not work, the TSA
want to stay at your set speed.
system does not operate.
z Your speed may increase to more than the
CAUTION
set speed on a steep downhill. You must use
the brake to control your speed. As a result,
z
Do not over-rely on TSA system.
Cruise control*
the set speed driving is deactivated.
Due to the slippery road surface, heavy side
wind, inappropriate weight and positioning
Cruise control is an automatic speed control
6
of luggage, and/or driving at high speed,
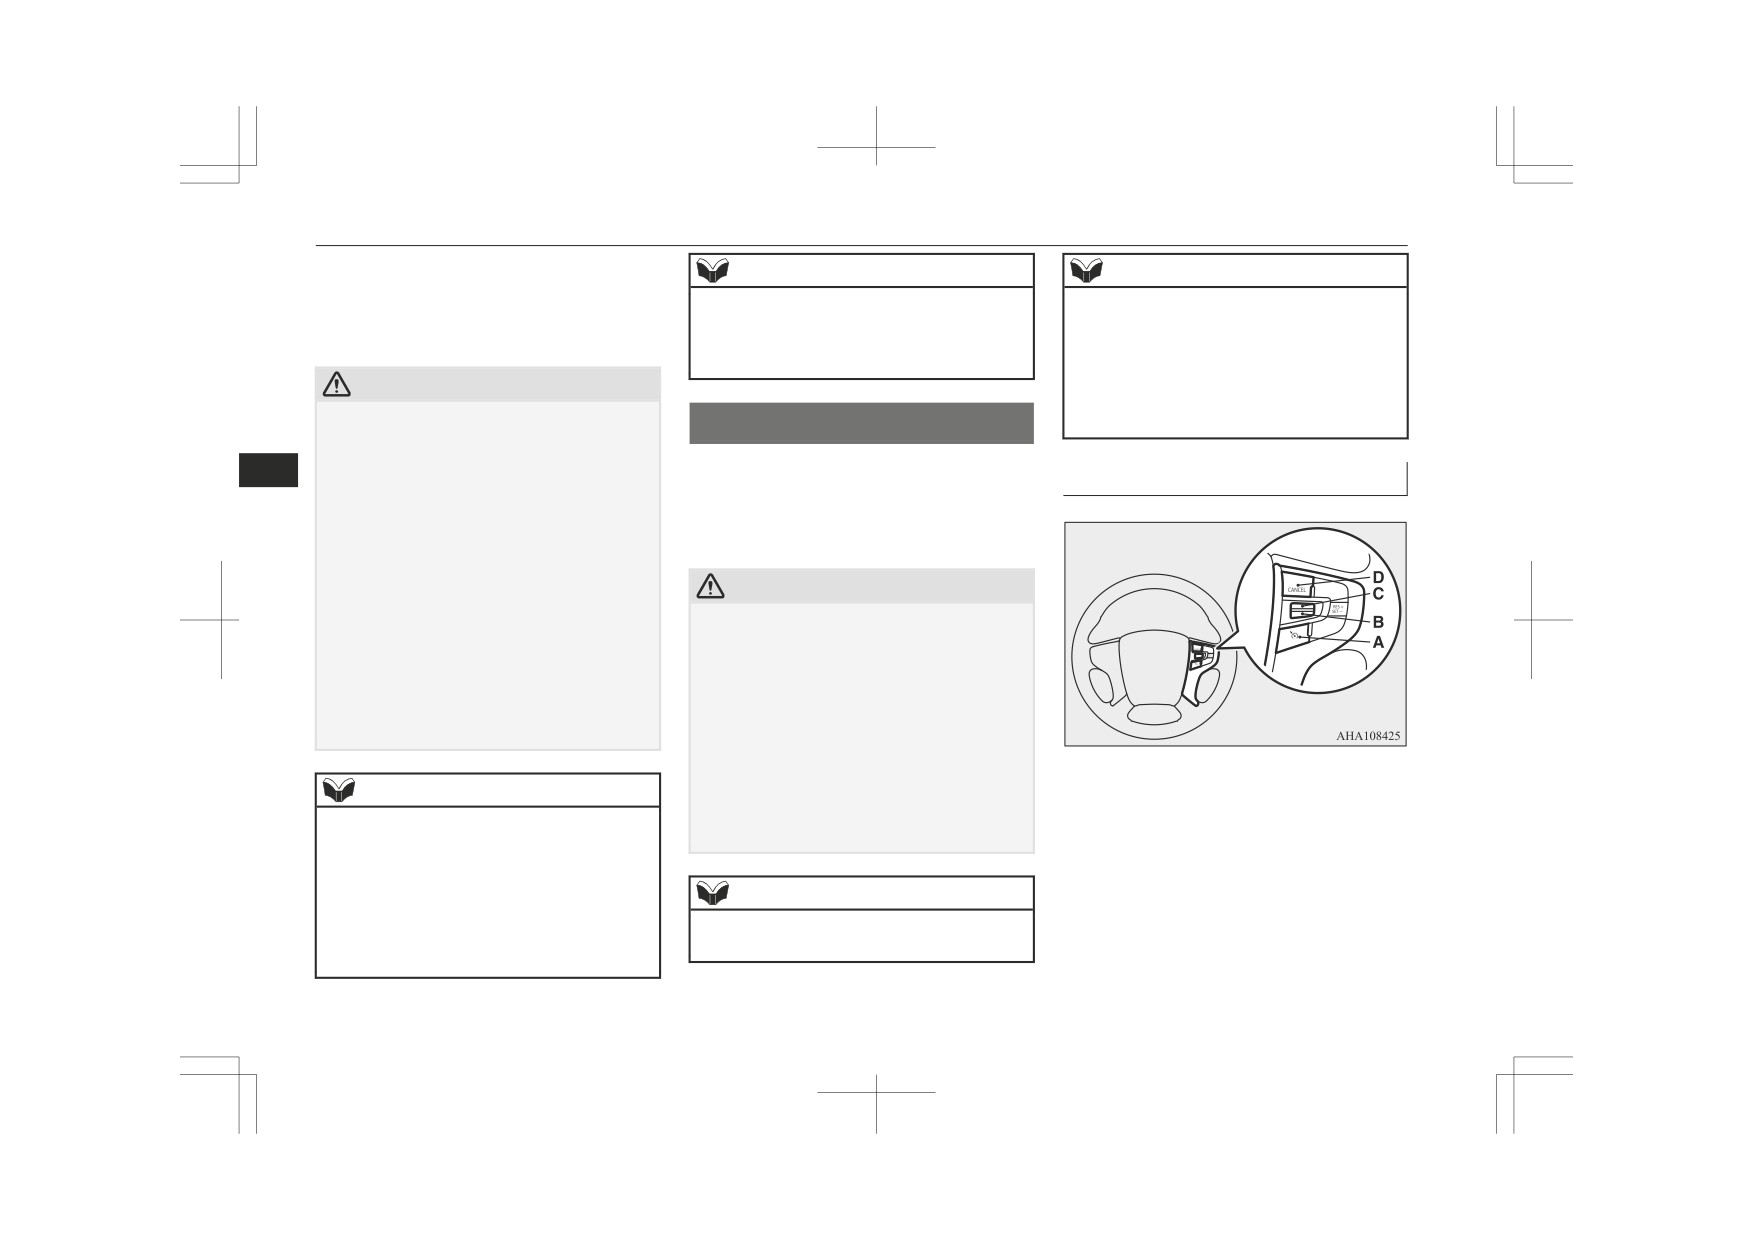
Cruise control switches
system that keeps a set speed. It can be acti-
TSA system may fail to secure the stability.
Always drive appropriately in accordance
vated at approximately 40 km/h (25 mph) or
with the condition of traffic, road surface
more.
condition, weather, and the weight and posi-
tioning of luggage.
CAUTION
z
The TSA system does not operate in the fol-
lowing cases:
z When you do not wish to drive at a set
• When sudden braking and braking while
speed, turn off the cruise control for safety.
driving downhill cause an abrupt motion
z On vehicles with M/T, do not move the gear-
of the vehicle which makes the vehicle
shift lever to the
“N” (Neutral) position
and the trailer form a dogleg shape.
while driving at a set speed without depress-
• When a sideslip occurs by sudden steer-
ing the clutch pedal. The engine will run too
ing.
fast and might be damaged.
z
Do not use cruise control when driving con-
ditions will not allow you to stay at the same
NOTE
A- CRUISE CONTROL ON/OFF switch
speed, such as in heavy traffic or on roads
Used to turn on and off the cruise control.
that are winding, icy, snow-covered, wet,
z
When TSA system operates, the vehicle
slippery, on a steep downhill slope.
body may vibrate and the operating sounds
B- “SET -” switch
from the engine compartment may be heard.
These motions indicate normal operation of
Used to reduce the set speed and to set the
the system, not abnormal operation.
NOTE
desired speed.
z
The TSA system operates when the vehicle
z Cruise control may not be able to keep your
speed is approximately 55 km/h (34 mph) or
speed on uphills or downhills.
C- “RES +” switch
higher.
Used to increase the set speed and to return to
the original set speed.
6-80
Starting and driving
Cruise control*
Indicator display
RES + switch
D- “CANCEL” switch
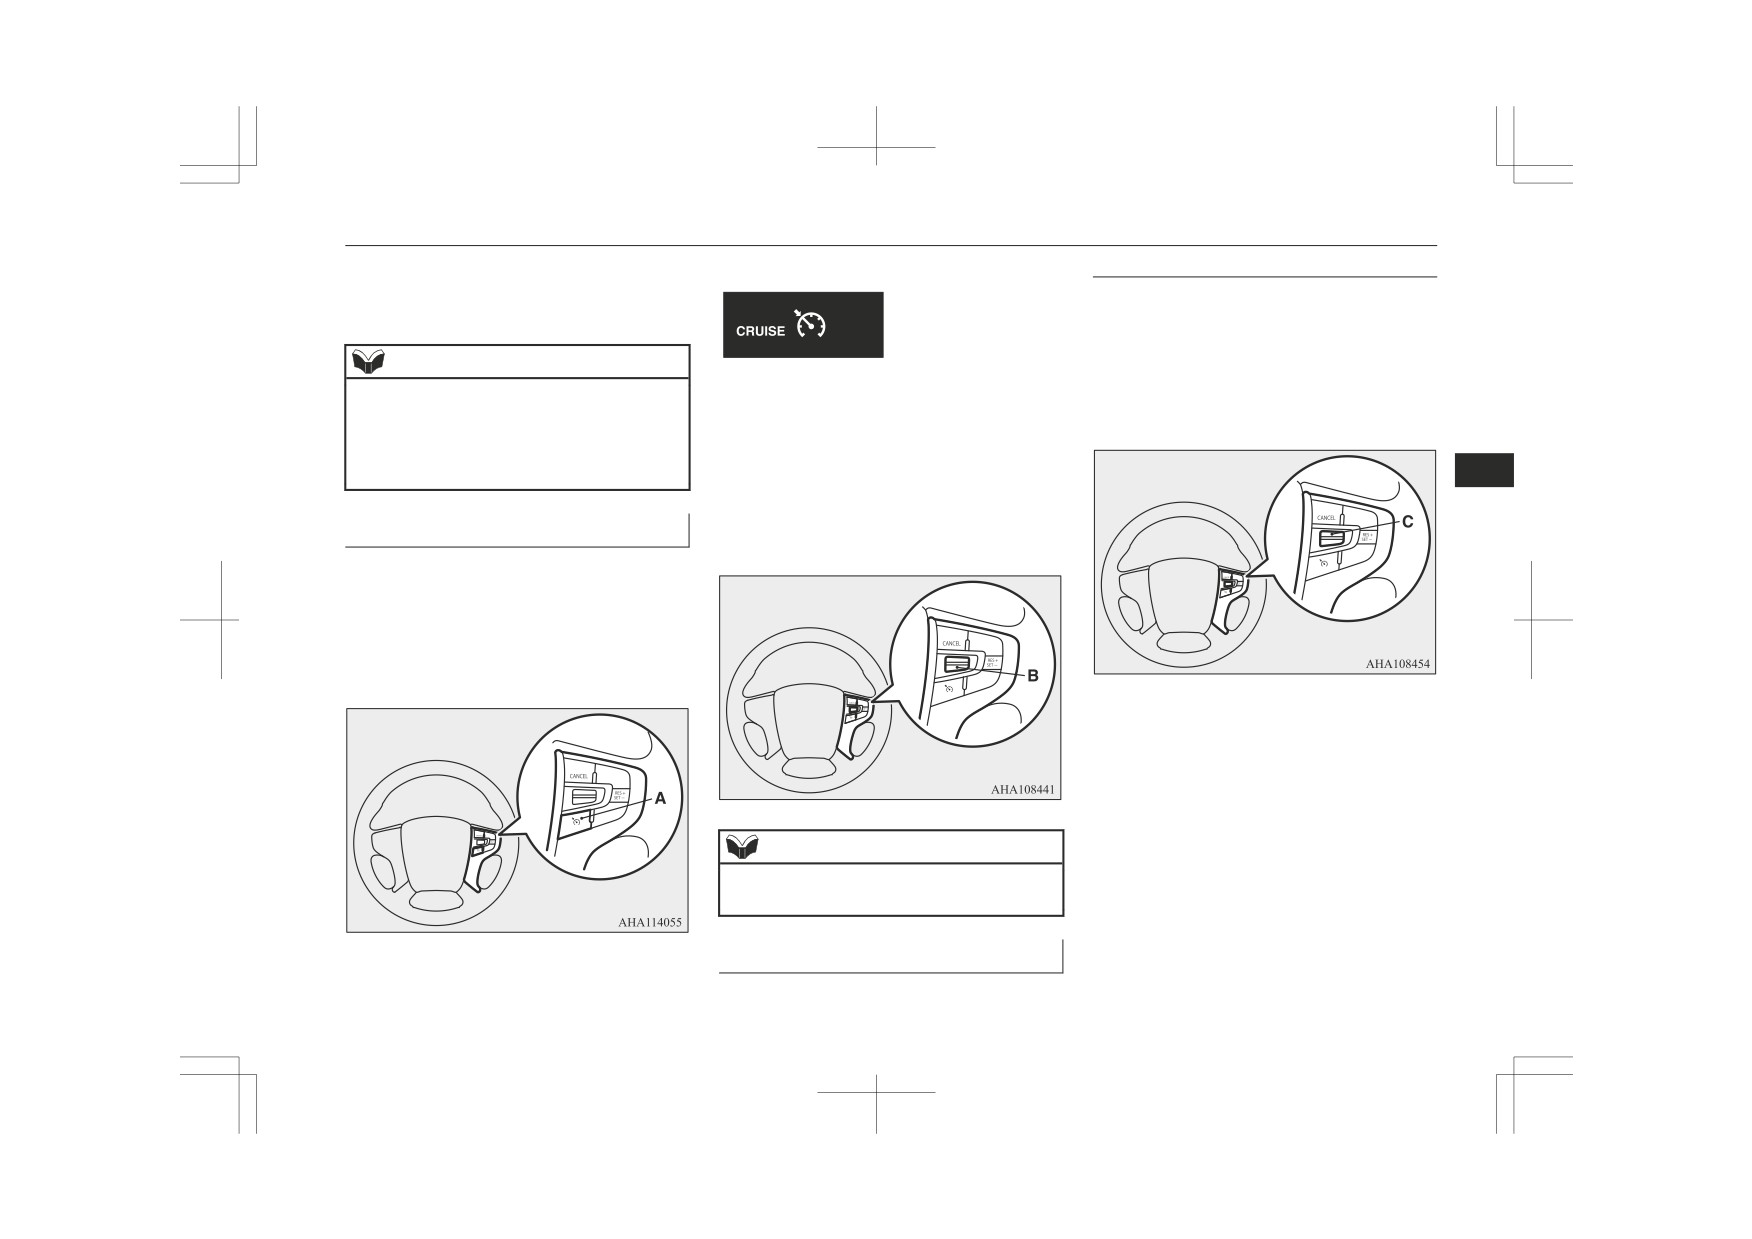
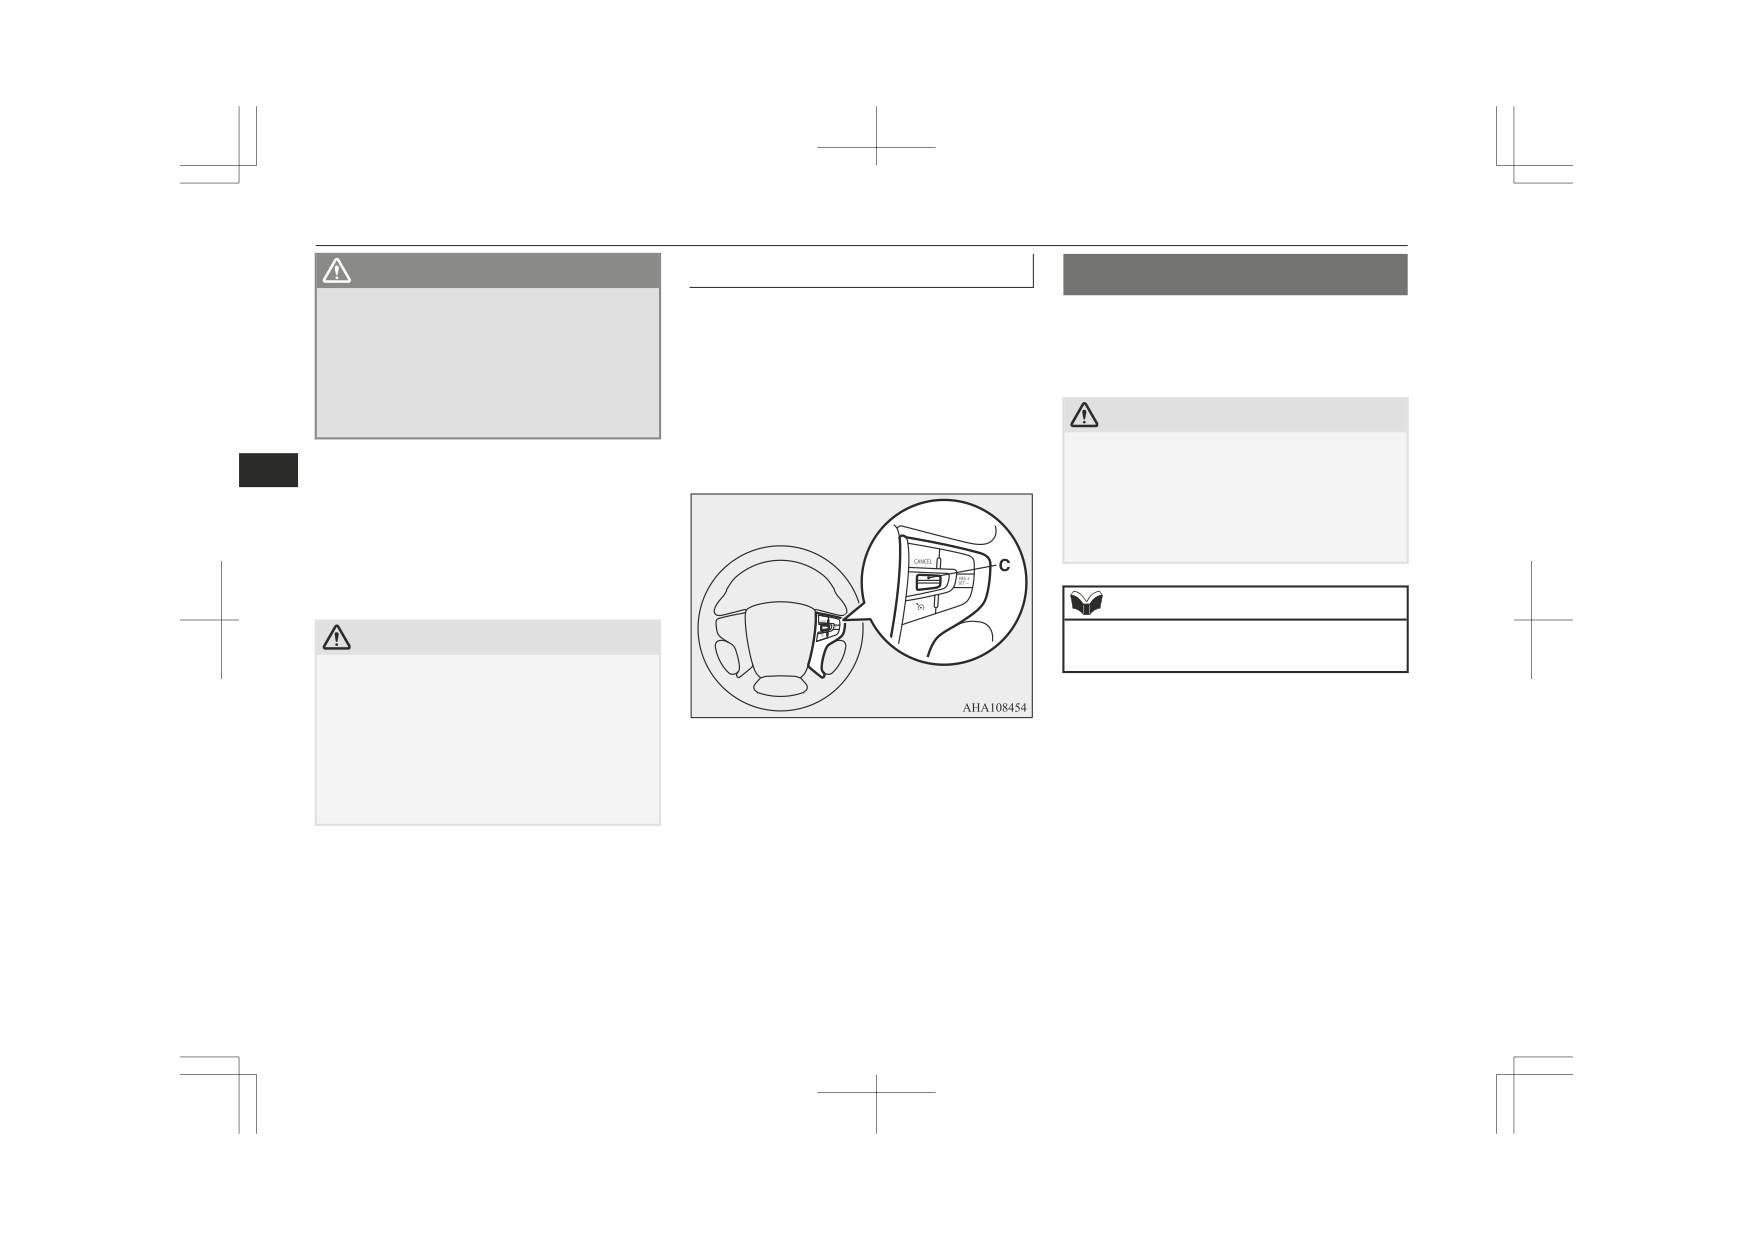
Push up and hold the “RES +” switch (C)
Used to deactivate the set speed driving.
while driving at the set speed, and your speed
will then gradually increase.
NOTE
When you reach your desired speed, release
the switch. Your new cruising speed is now
z When operating the cruise control switches,
2. Accelerate or decelerate to your desired
press the cruise control switches correctly.
set.
speed, then push down and release the
The set speed driving may be deactivated
automatically if two or more switches of the
“SET -” switch (B) when the indicator
cruise control are pressed at the same time.
display is illuminated. The vehicle will
6
then maintain the desired speed. The
“SET” indicator appears on the informa-
To activate
tion display in the meter cluster.
1. With the ignition switch in the “ON” po-
sition or the operation mode in ON,
press the CRUISE CONTROL ON/OFF
switch (A) to turn on the cruise control.
The indication display in the meter clus-
ter will come on.
To increase your speed in small amounts,
push up the “RES +” switch (C) for less than
approximately 1 second and release it.
Each time you push up the “RES +” switch
(C), your vehicle will go approximately
1.6 km/h (1 mph) faster.
NOTE
z
When you release the “SET -” switch (B),
the vehicle speed will be set.
To increase the set speed
There are 2 ways to increase the set speed.
Starting and driving
6-81
Cruise control*
Accelerator pedal
When you reach your desired speed, release
Brake pedal
the switch. Your new cruising speed is now
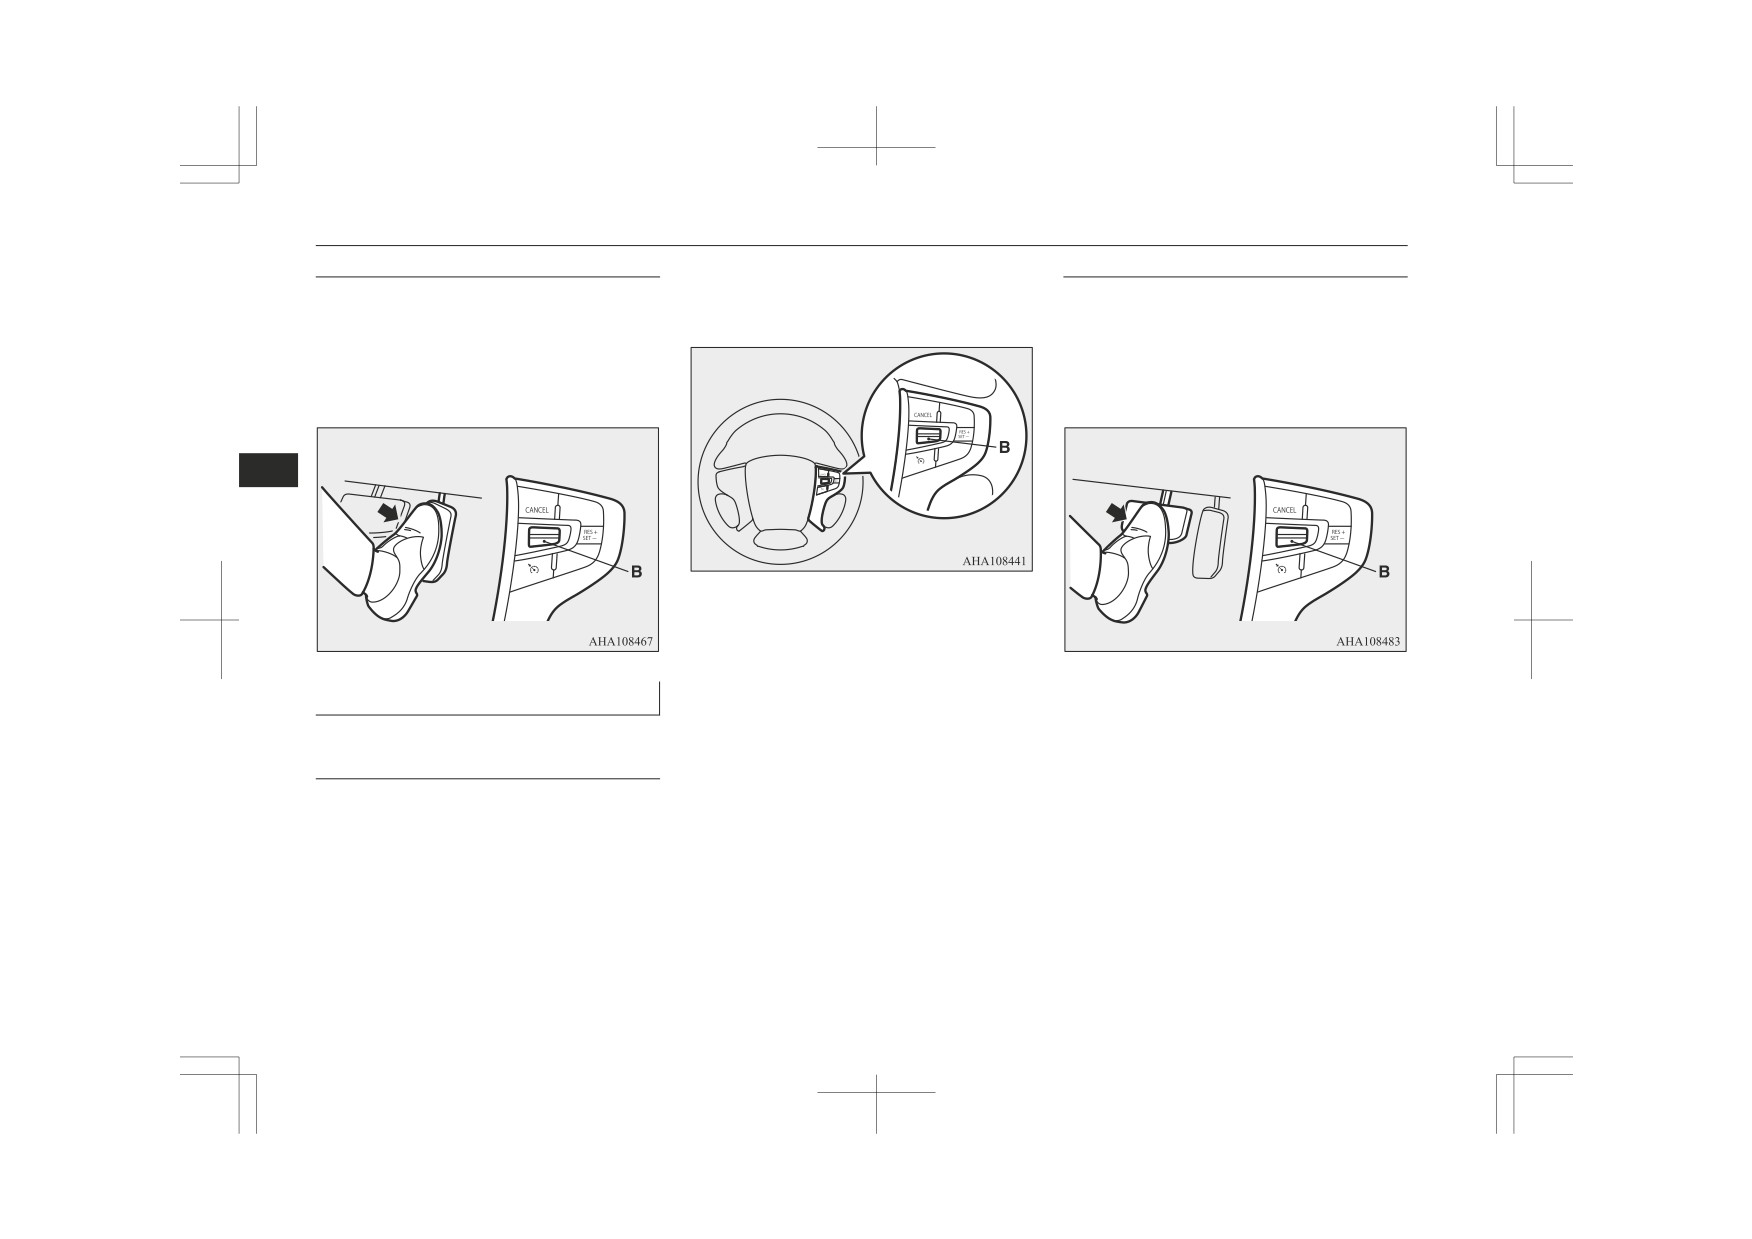
While driving at the set speed, use the accel-
While driving at the set speed, use the brake
set.
erator pedal to reach your desired speed and
pedal, which disengages the cruise control,
then push down the “SET -” switch (B) and
then push down the “SET -” switch (B) and
release the switch momentarily to set a new
release the switch momentarily to set a new
desired cruising speed.
desired cruising speed.
6
To slow down your speed in small amounts,
push down the “SET -” switch (B) for less
than approximately 1 second and release it.
Each time you push down the “SET -” switch
To decrease the set speed
(B), your vehicle will slow down by approxi-
There are 2 ways to decrease the set speed.
mately 1.6 km/h (1 mph).
SET - switch
Push down and hold the “SET -” switch (B)
while driving at the set speed, and your speed
will slow down gradually.
6-82
Starting and driving
Cruise control*
To temporarily increase or de-
Refer to “To resume the set speed” on page
6-84.
crease the speed
To temporarily increase the
speed
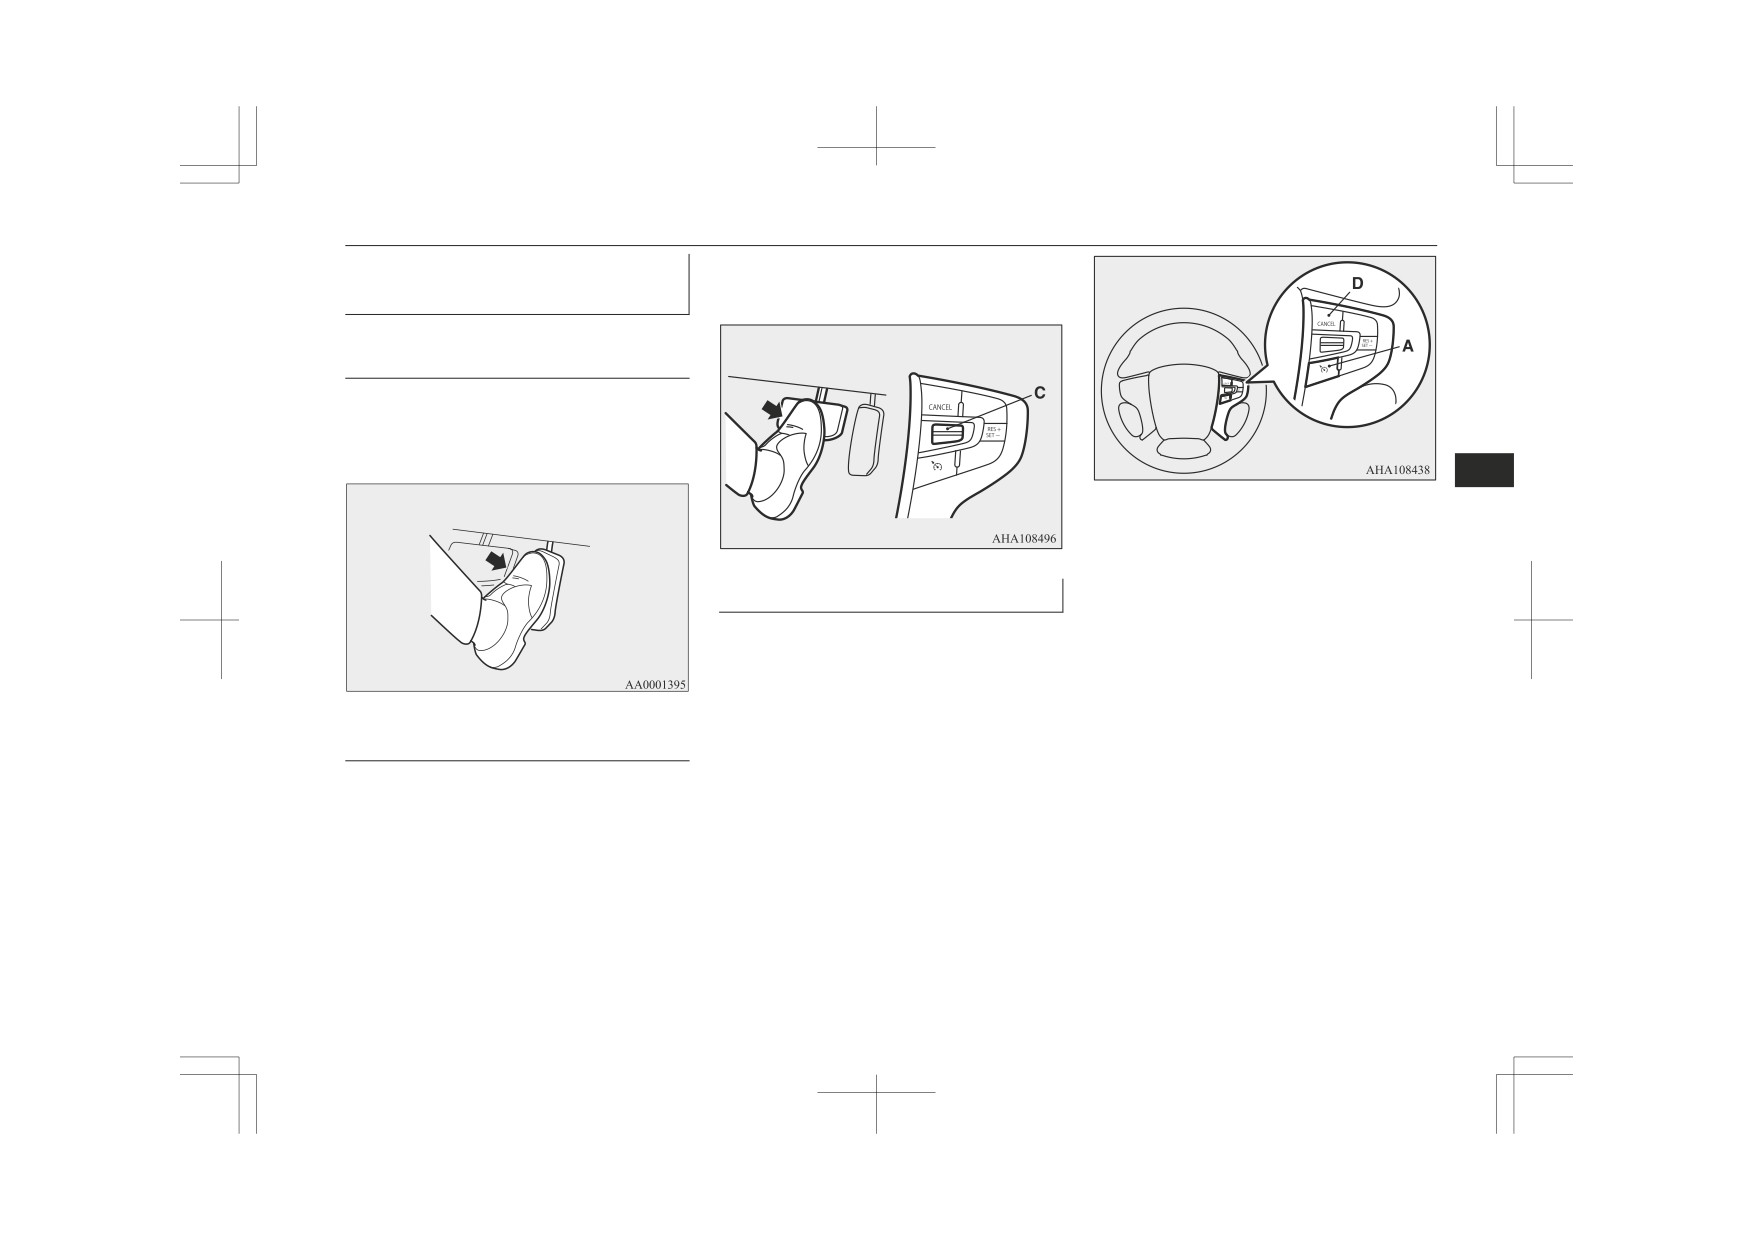
Depress the accelerator pedal as you would
normally. When you release the pedal, you
will return to your set speed.
6
The set speed driving is deactivated automat-
ically in any of the following ways.
z When you depress the clutch pedal (on
vehicles with M/T).
To deactivate
z When your speed slows to approximate-
The set speed driving can be deactivated as
ly 15 km/h (9 mph) or more below the
follows:
set speed because of a hill, etc.
z Press the CRUISE CONTROL ON/OFF
z When your speed slows to approximate-
switch (A) (Cruise control will be turned
ly 40 km/h (25 mph) or less.
off.)
To temporarily decrease the
z When the Active Stability & Traction
z Press the “CANCEL” switch (D).
speed
control (ASTC) starts operating.
z Depress the brake pedal.
Refer to
“Active Stability & Traction
Depress the brake pedal to decrease the
Control (ASTC)” on page 6-76.
speed. To return to the previously set speed,
push up the “RES +” switch (C).
Starting and driving
6-83
Speed Limiter*
WARNING
To resume the set speed
Speed Limiter*
If the set driving speed is deactivated by the
z On vehicles with A/T, although the set
speed driving will be deactivated when
condition described in
“To deactivate” on
The Speed Limiter is a driver assist function
shifting to the “N” (NEUTRAL) position,
page 6-83, you can resume the previously set
to prevent from exceeding the speed set by
never move the selector lever to the “N”
speed by pushing up the “RES +” switch (C)
driver while engine power control.
(NEUTRAL) position while driving.
while driving at a speed of approximately
You would have no engine braking and
40 km/h (25 mph) or higher. The “SET” indi-
could cause a serious accident.
CAUTION
cator appears on the information display in
z Because the system does not use service
the meter cluster.
brake (hydraulic brake), the vehicle speed
6
Also, the set speed driving may be deactiva-
may exceed the set speed on the downhill.
ted as follows:
If a driver wants to keep the vehicle speed in
z
When the engine speed rises and ap-
such a situation, he/she must put on a service
proaches the tachometer's red zone (the
brake or downshift.
red-coloured part of the tachometer di-
al).
NOTE
CAUTION
z If the clutch pedal (M/T) is depressed, the
Speed Limiter does not activate.
z
When the set speed driving is deactivated
automatically in any situation other than
those listed above, there may be a system
If the vehicle speed exceeds the set speed
malfunction.
(approximately
3 km/h), the indicator will
Press the CRUISE CONTROL ON/OFF
blink in the combination meter.
Under either of the following conditions,
switch to turn off the cruise control and have
If the vehicle speed exceeds the set speed ap-
however, using the switch does not allow you
your vehicle inspected by a MITSUBISHI
proximately +3 km/h more for approximately
MOTORS Authorized Service Point.
to resume the previously set speed. In these
5 seconds after the indicated alert message,
situations, repeat the speed setting procedure:
the beep alert sounds for approximately 10
z The CRUISE CONTROL ON/OFF
seconds at the most.
switch is pressed.
While running without alert message, if you
z The ignition switch is turned OFF or the
decrease the set speed and vehicle speed is
operation mode is put in OFF.
more than set speed approximately +3 km/h,
z Indication lamp go off.
alert message is displayed but beep alert is
delayed.
6-84
Starting and driving
Speed Limiter*
In this case, when vehicle speed keeps ex-
Speed Limiter control switches
NOTE
ceeding set speed approximately +3 km/h for
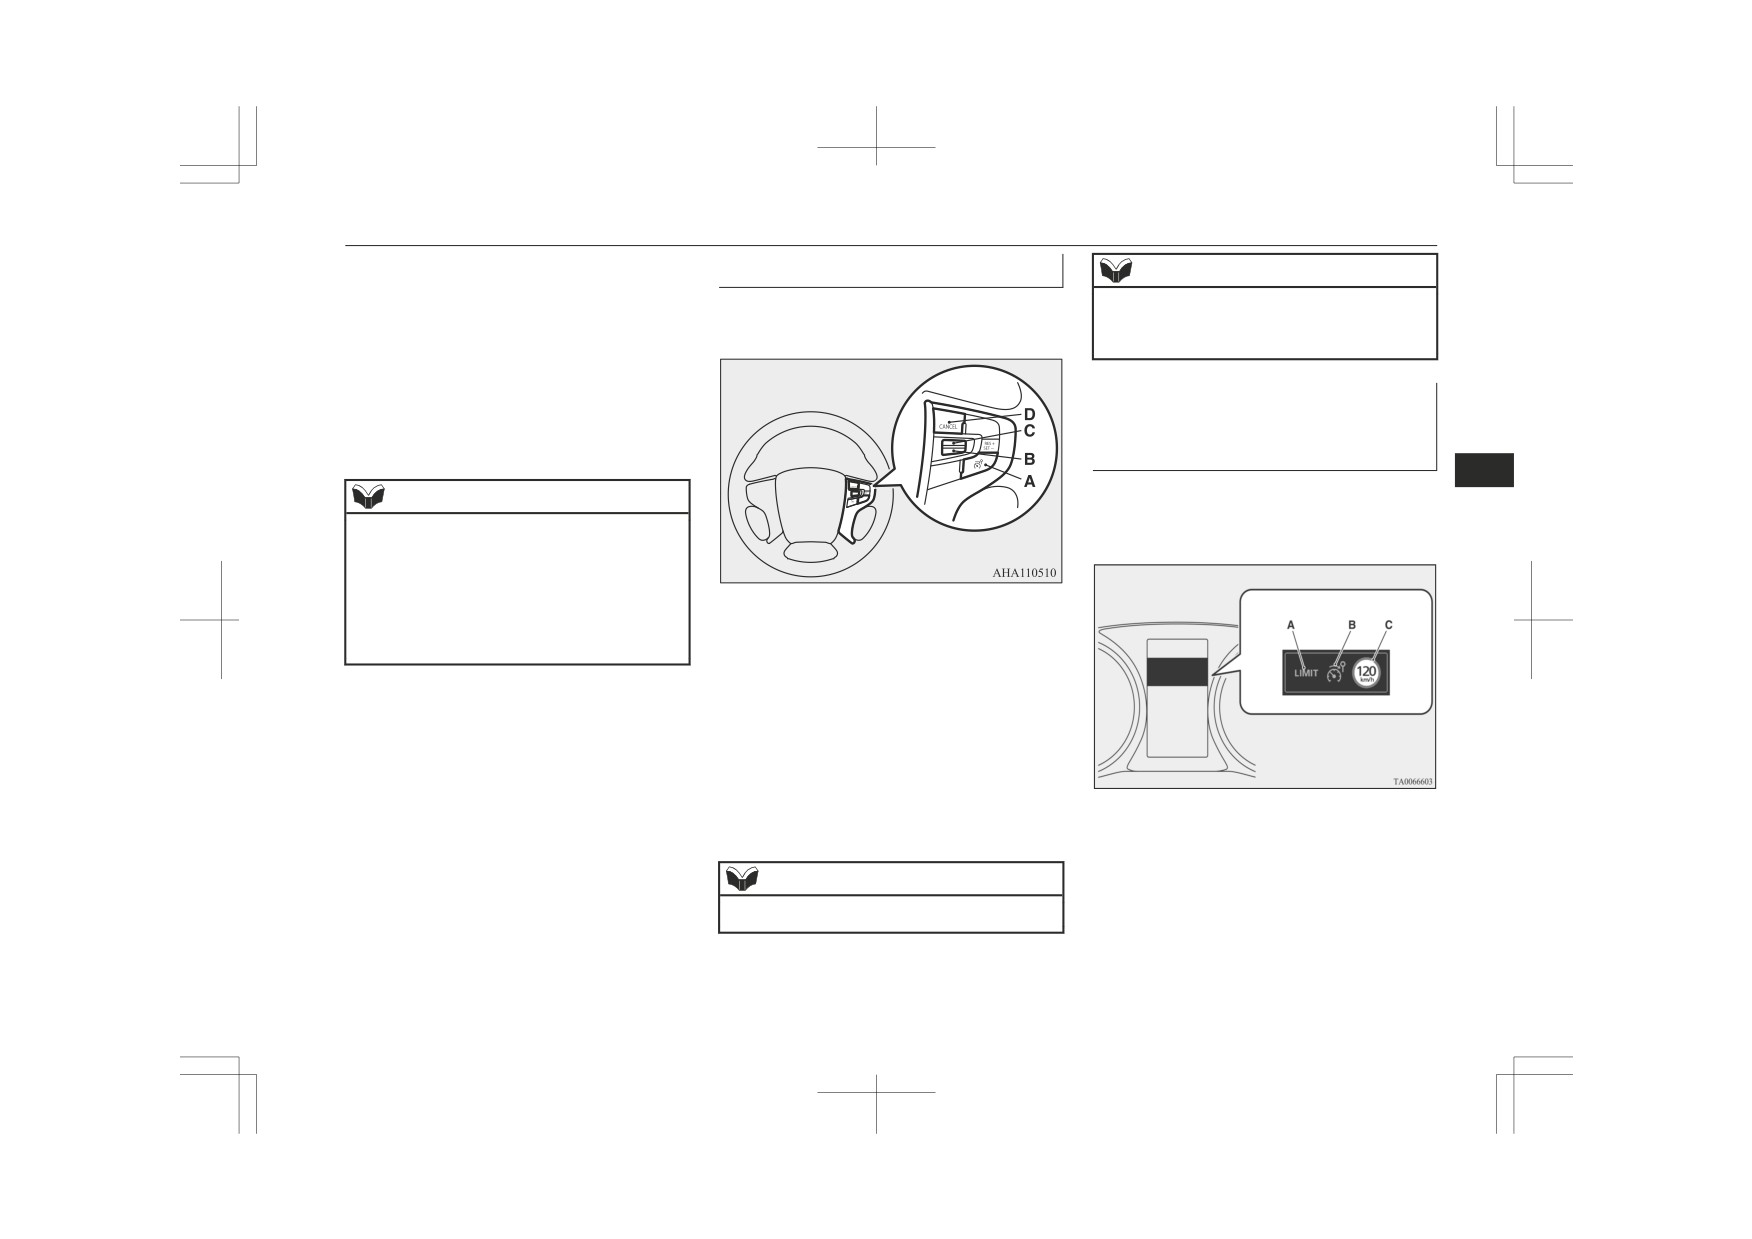
There are four switches which relate to the
approximately 30 seconds after the alert mes-
z The Speed Limiter may be cancelled auto-
Speed Limiter on the steering wheel.
matically, if two or more switches are press-
sage is appeared, beep alert is sounded for
ed at the same time.
approximately 10 seconds at the most.
If the vehicle speeds decreases less than set
speeds after the alert message is appeared,
Speed Limiter information on
the message is disappeared. When beep alert
the multi information display
is sounding, the beep alert also goes off.
area
6
The Speed Limiter information is displayed
NOTE
on the multi information display area in the
However, this gives priority to audio and
combination meter.
z
visual signal of safety reasons or driver’s de-
mand.
z
If the set speed is too lower based on current
shift position, the Speed Limiter may not
limit the vehicle speed to prevent engine
A-SPEED LIMITER ON/OFF switch
stall.
To turn on/off the Speed Limiter.
B- “SET -” switch
To set the current vehicle speed to a set speed
decrease the set speed.
C- “RES +” switch
To resume the Speed Limiter with set speed
memorized or increase the set speed.
D- “CANCEL” switch
To cancel the Speed Limiter.
A-Control state
There are three control states as below.
NOTE
z Press the switch one by one.
Starting and driving
6-85
Speed Limiter*
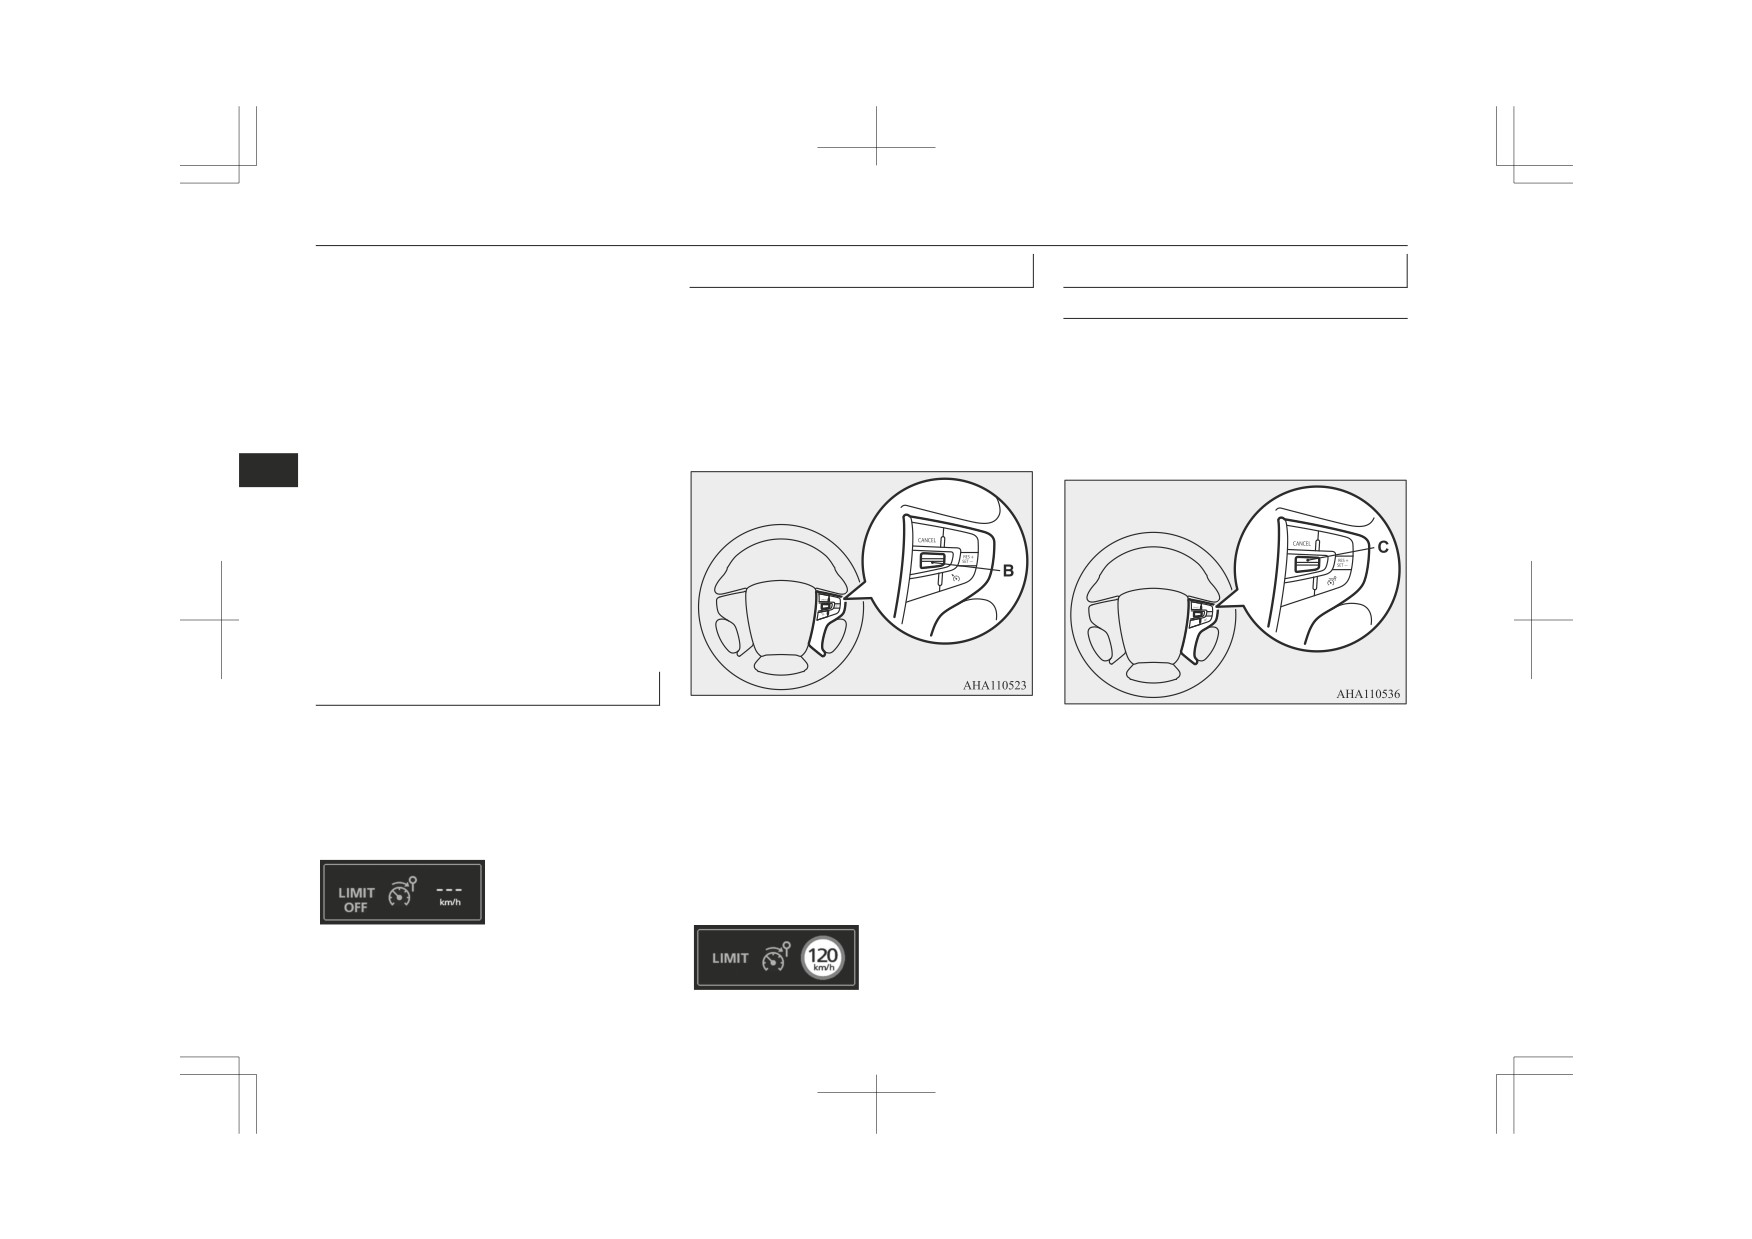
LIMIT OFF
To activate
To increase the set speed
When the Speed Limiter is in STAND-
Accelerate or decelerate to your desired
By using the “RES +” switch
BY, the vehicle speed can exceed the set
speed, and push down the “SET -” switch
speed
Push up the “RES +” switch continuously.
(B). The Speed Limiter memorizes the cur-
LIMIT
rent vehicle speed when you release the “SET
When the Speed Limiter is in operation.
Then the set speed displayed in the combina-
-” switch (B). Now, the Speed Limiter starts
The vehicle is controlled in order not to
tion meter is gradually increased.
controlling in order not to exceed the set
exceed the set speed.
If the set speed reaches your desired speed,
speed.
OVER LIMIT
release the “RES +” switch (C).
When the vehicle speed is exceeding the
6
set speed by more than approximately 3
km/h.
B-SPEED LIMITER ON indication
When the Speed Limiter is started up, the
Speed Limiter’s symbol is appeared.
C-Set speed
Set speed is appeared if it is stored.
To start up
First of all, press the ON/OFF switch in order
to power up the Speed Limiter when the igni-
If the current vehicle speed is lower than ap-
The set speed is increased each approximate-
tion switch in the “ON”, position or the oper-
proximately 30 km/h (19 mph) (settable min-
ly 5 km/h (3 mph) per approximately 0.5 sec-
ation mode in ON,
imum speed), the set speed is set at approxi-
ond.
The Speed Limiter indication will be ap-
mately 30 km/h (19 mph).
If a driver wants to increase the set speed a
peared in the combination meter.
The set speed is displayed in the combination
little, push up “RES +” switch for less than
meter.
approximately 0.5 second and release it.
And, control state “LIMIT” is displayed in
The set speed is increased 1 km/h each taps.
the combination meter.
6-86
Starting and driving
Speed Limiter*
Accelerate to driver’s desired vehicle speed
If the set speed reaches to your desired speed,
By using the “CANCEL”
and push down “SET -” switch (B) and re-
release the “SET -” switch (B).
switch, the accelerator pedal
lease.
and the “SET -” switch
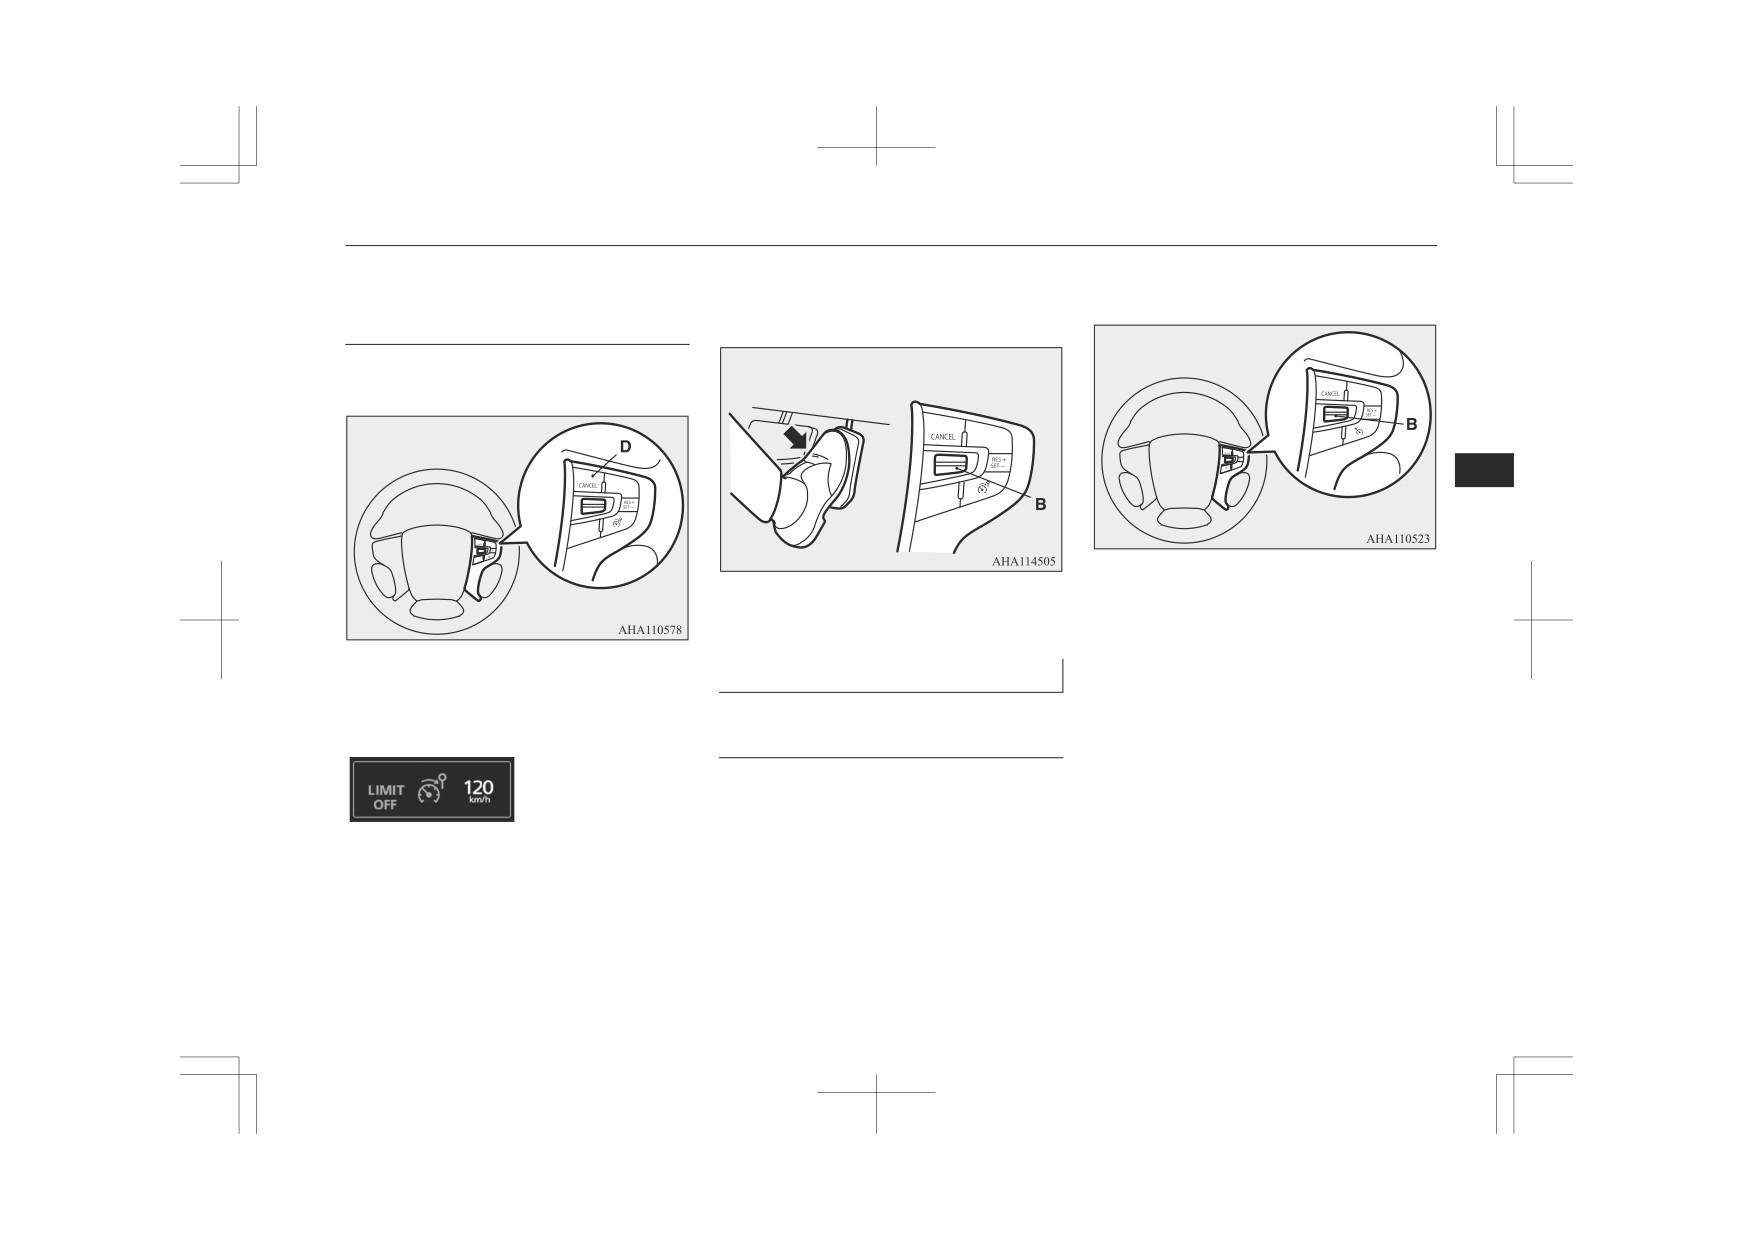
Press the “CANCEL” switch (D) to deacti-
vate the Speed Limiter.
6
The set speed decreases approximately
Control state “LIMIT” is displayed again and
5 km/h (3 mph) per approximately 0.5 sec-
the set speed is updated.
ond.
If a driver wants to decrease the set speed a
To decrease the set speed
Control state
“LIMIT” is disappeared and
little, press the “SET -” switch (B) for less
change control state
“LIMIT OFF” in the
than approximately 0.5 second and release it.
combination meter.
The set speed is decreased 1 km/h each taps.
By using the “SET -” switch
Push down the “SET -” switch (B).
Then the set speed displayed in the combina-
tion meter is gradually decreased.
Starting and driving
6-87
Speed Limiter*
Decelerate to driver’s desired speed and push
The Speed Limiter will resume when the ve-
By using the “CANCEL”
down “SET -” switch (B) and release.
hicle speed goes down to enough less than
switch, the service brake and
the set speed.
the “SET -” switch
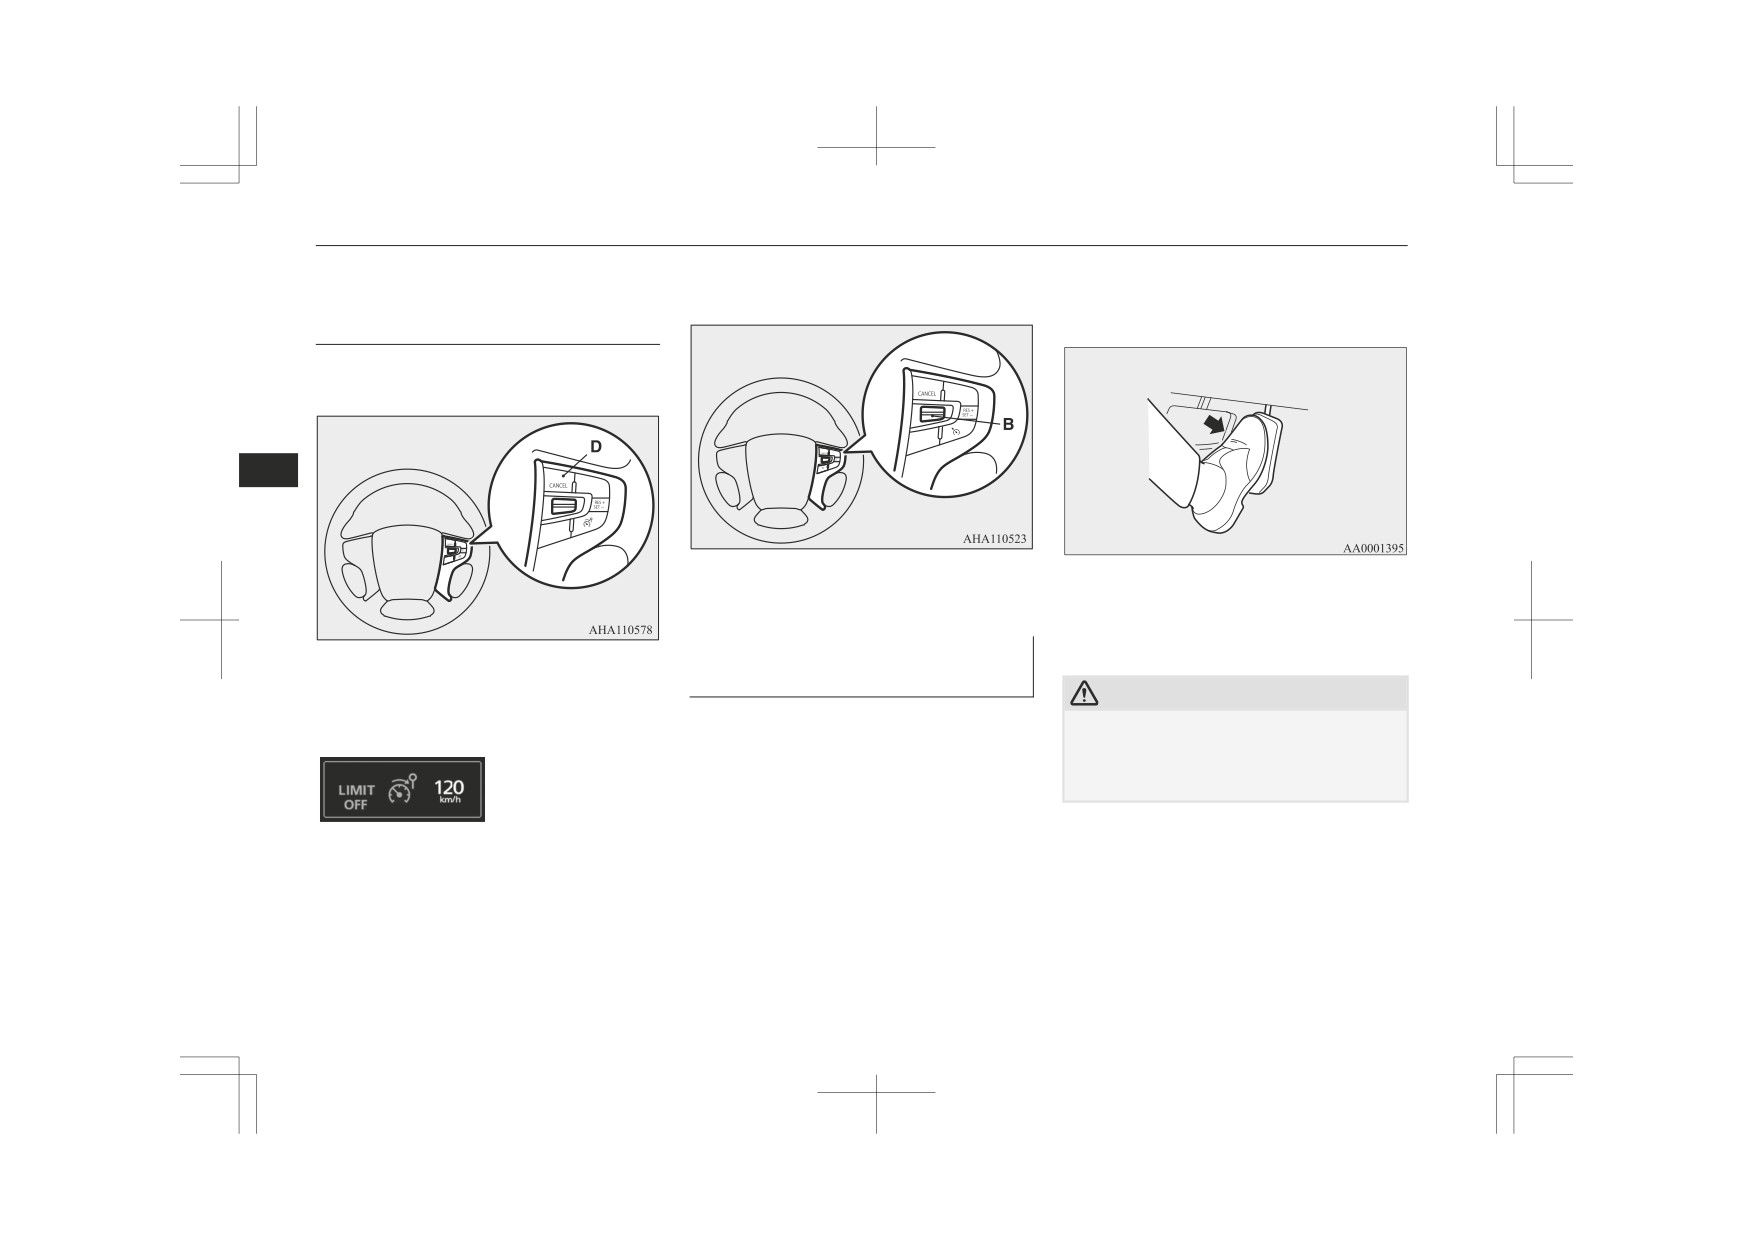
Press the “CANCEL” switch (D) to deacti-
vate the Speed Limiter.
6
The Speed Limiter indication is displayed
Put on an accelerator pedal to the pedal
again and the set speed is updated.
stroke end. (over a detent that makes pedal
reaction force bigger before pedal stroke end)
To increase the vehicle speed
Control state
“LIMIT” is disappeared and
temporarily
CAUTION
change control state
“LIMIT OFF” in the
A driver can temporarily accelerate for emer-
combination meter.
gency use.
z There is a possibility for the Speed Limiter
to allow abrupt acceleration corresponding
to accelerator pedal position. So be careful
The Speed Limiter is temporarily deactiva-
of the abrupt acceleration.
ted, and the vehicle speed can be increased.
If vehicle speed exceeds set speed approxi-
mately +3 km/h, alert messages are appeared
in the combination meter.
6-88
Starting and driving
Forward Collision Mitigation system (FCM)*
NOTE
CAUTION
z If the Speed Limiter is cancelled by other
z There is a possibility to occur jerk, depend-
states, it may be a system malfunction.
ing on a running resistance. Be careful.
Stop using the Speed Limiter and turn off
the Speed Limiter. Have your vehicle in-
spected by a MITSUBISHI MOTORS Au-
Forward Collision
CAUTION
thorized Service Point.
Mitigation system (FCM)*
z Be careful about over speed.
To resume
The Forward Collision Mitigation System
6
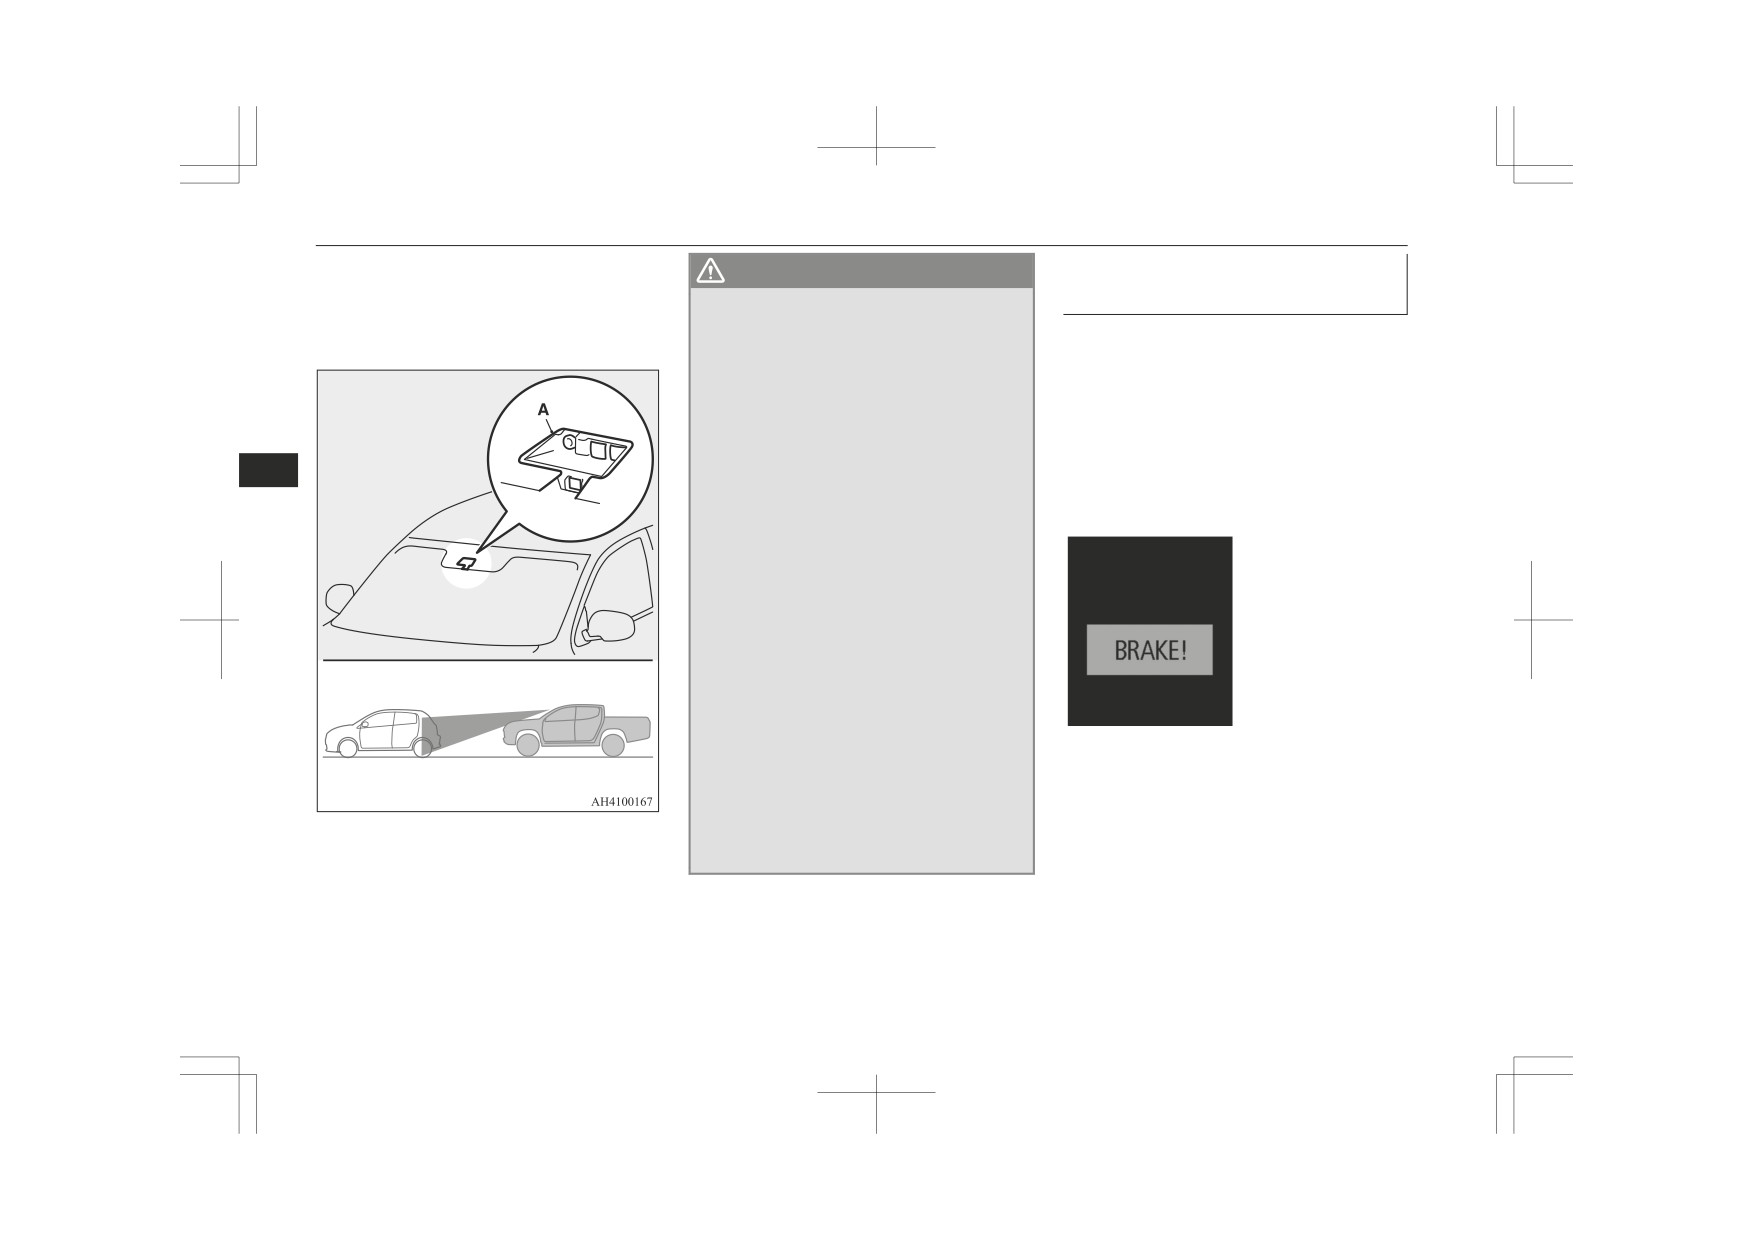
(FCM) uses a sensor (A) to determine the
The Speed Limiter memorizes the set speed
NOTE
distance and relative speed to a vehicle and a
when the system has been deactivated, the
pedestrian in front. When your vehicle is ap-
z A driver can change the set speed during this
Speed Limiter can resume by pushing up the
emergency use.
proaching a vehicle or a pedestrian straight-
“RES +” switch (C).
ahead in your path and the FCM judges that
there is the risk of a collision, the system
To deactivate
gives audible and visual warnings (forward
Use whichever following ways to deactivate.
collision warning function), increases the
z Press the “CANCEL” switch
brake fluid pressure (FCM brake prefill func-
z Press the Speed Limiter ON/OFF switch
tion), and also provides braking force assis-
tance when you depress the brake pedal
(FCM brake assist function) to avoid frontal
CAUTION
collision.
z There is a possibility for the Speed Limiter
When the risk of collision increases more, the
to allow abrupt acceleration corresponding
system causes the brakes to work moderately
to accelerator pedal position when the Speed
to encourage you to apply brakes. If the sys-
Limiter is deactivated. Be careful.
tem judges that a potential collision is immi-
However, the Speed Limiter immediately
nent, it initiates emergency braking to miti-
starts controlling and the vehicle decreases as
gate collision-caused damages or to avoid
if an accelerator pedal is closed fully, when
possible collision (FCM braking function).
the vehicle speed is higher than the set speed.
Stop lamps are illuminated during automatic
braking.
Starting and driving
6-89
Forward Collision Mitigation system (FCM)*
If you turn the FCM ON/OFF, the Ultrasonic
Forward collision warning
WARNING
misacceleration Mitigation System (UMS) al-
function
z
A driver is responsible for driving safely.
so turns ON/OFF at the same time. (Vehicles
The FCM is the system to mitigate colli-
If the system judges that there is a risk of
equipped with the UMS)
sion- caused damages or to avoid colli-
your vehicle colliding with a vehicle or a pe-
sions as much as possible.
destrian in front, this function warns you of
The system is not intended to compensate
the potential hazard with visual and audible
for driver’s loss of attention to the front
alarms.
during driving due to distraction or care-
lessness or supplement a drop in visibility
When this function is triggered, a buzzer
due to the rain and fog.
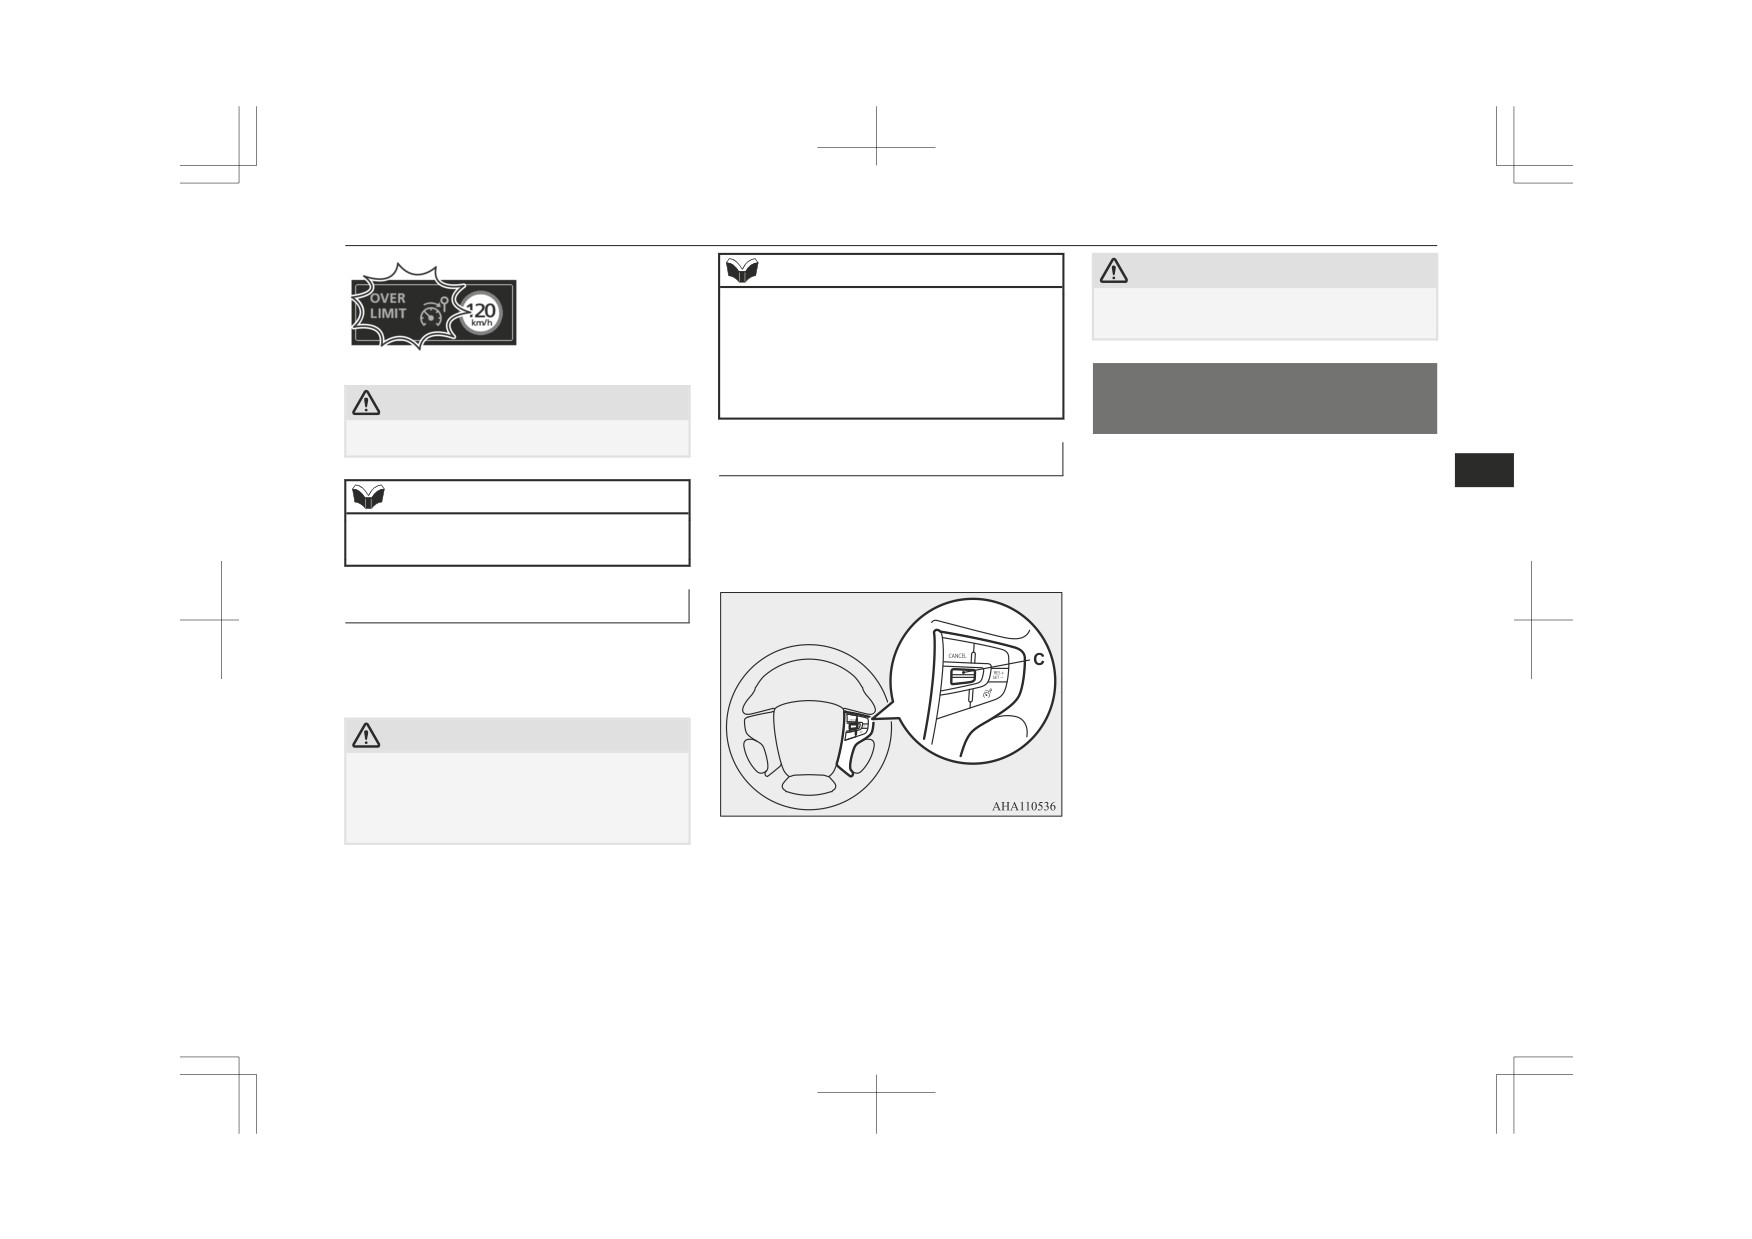
sounds and, at the same time, a “BRAKE!”
6
It is never a substitute for your safe and
message appears on the information screen of
careful driving. Always be ready to apply
the multi information display.
the brakes manually.
z
The FCM works to avoid frontal collisions
as much as possible. However, the effect of
its operation varies depending on situa-
tions and conditions, such as driving con-
ditions, road conditions, and steering, ac-
celeration and braking operations, so that
the performance the function can deliver
is not always the same.
If your vehicle is in danger of collision,
take all necessary collision-evading ac-
tions, such as depressing the brake pedal
strongly regardless of whether the system
The forward collision warning function oper-
is activated or not.
ates at the following vehicle speed:
z
Do not try to confirm the operation of the
z Against a vehicle: Approximately 15 to
FCM. In certain situations, this can cause
140 km/h (10 to 87 mph).
an accident resulting in serious injury or
z
Against a pedestrian: Approximately 7
death.
to 65 km/h (4 to 40 mph).
6-90
Starting and driving

Forward Collision Mitigation system (FCM)*
z Against a pedestrian: Approximately 15
CAUTION
to 65 km/h (10 to 40 mph).
z Under certain conditions, the audible alarm
may not work at all or may be scarcely audi-
ble. Do not overly rely on the system; if your
CAUTION
vehicle is in danger of collision, take all nec-
z The brake assist function may not be trig-
essary collision-evading actions, such as de-
gered when the brake pedal is operated in
pressing the brake pedal strongly regardless
certain ways.
of whether the system is activated or not.
Do not overly rely on the system; if your ve-
hicle is in danger of collision, take all neces-
sary collision-evading actions, such as de-
6
FCM brake prefill function
The FCM braking function operates at the
pressing the brake pedal strongly regardless
following vehicle speed:
If the system judges that there is a risk of
of whether the system is activated or not.
z
Against a vehicle: Approximately 5 to
your vehicle colliding with a vehicle or a pe-
80 km/h (3 to 50 mph).
destrian in front, this function prefills the
FCM braking function
z
Against a pedestrian: Approximately 5
brake line with additional brake fluid to make
to 65 km/h (3 to 40 mph).
the brakes more responsive to your brake
If the system judges that there is a high risk
pedal operation.
of your vehicle colliding with a vehicle or a
The FCM brake prefill function operates at
pedestrian in front, the system applies the
CAUTION
the following vehicle speed:
brakes moderately to encourage you to apply
z
Do not use the FCM as a normal braking.
z Against a vehicle: Approximately 5 to
the brakes.
z
After your vehicle has stopped following the
80 km/h (3 to 50 mph).
If the system judges that a collision is un-
activation of the FCM, automatic braking is
z Against a pedestrian: Approximately 5
avoidable, it initiates emergency braking con-
released. As the vehicle will then start creep-
to 65 km/h (3 to 40 mph).
trol to mitigate collision-caused damages or,
ing, be sure to depress the brake pedal to
if the situation permits, to avoid a collision.
hold the vehicle stationary.
While the FCM braking control is triggered,
When applying the brake during the auto-
FCM brake assist function
z
you are warned of the hazard with a
matic braking condition the pedal will feel
If the system judges that there is a risk of
firm.
“BRAKE!” message and audible alarms like
your vehicle colliding with a vehicle or a pe-
This is not abnormal.
with the forward collision warning function.
destrian in front, this function deploys the
You can apply more pressure to the pedal to
Once the FCM braking has activated, the fol-
brake assist sooner than the brake assist oper-
assist in braking.
lowing message will appear on the informa-
z
In the following situations, the system pro-
ation. The FCM brake assist function oper-
tion screen of the multi information display.
vides neither control nor alarming.
ates at the following vehicle speed:
z Against a vehicle: Approximately 15 to
80 km/h (10 to 50 mph).
Starting and driving
6-91
Forward Collision Mitigation system (FCM)*
CAUTION
CAUTION
CAUTION
• When a vehicle or a pedestrian suddenly
• The vehicle has a protruding load from
• When your vehicle changed lanes, and
cuts in front of your vehicle.
the carrier.
your vehicle approached immediately be-
• When the distance from a vehicle or a pe-
• The vehicle has a low vehicle height.
hind the vehicle in front.
destrian in front is extremely short.
• The vehicle has an extremely high ground
• If
windscreen
wipers
are
not
• To an oncoming vehicle.
clearance.
MITSUBISHI MOTORS GENUINE
• When the selector lever is in the
“P”
• When a vehicle in front is extremely dirty.
parts or equivalent.
(PARK) or
“R”
(REVERSE) position.
• When you are carrying extremely heavy
• When a vehicle in front is covered with
(A/T)
snow.
loads in the rear seats or luggage area.
• The gearshift lever is in the “R” (Reverse)
• After the engine has been running for an
6
• When a vehicle in front has a large glass
position. (M/T)
surface.
extended period of time.
• When the FCM has detected a problem in
• When using a windscreen washer.
• When a vehicle in front does not have re-
the system.
flectors (lamp reflector) or the position of
• When replacing the windscreen wipers
z
If the ASTC is deactivated, the FCM braking
the reflector is low.
without
using
the
MITSUBISHI
function will not operate. Refer to “Active
• When a vehicle in front is a car carrier or
MOTORS GENUINE parts.
Stability & Traction Control
(ASTC)” on
a similar shaped vehicle.
• When the sensor becomes extremely hot
page 6-76.
• When there is a different object near the
or cold.
z
The FCM may or may not detect a motorcy-
vehicle.
• If the battery becomes weak or runs
cle, bicycle or wall depending on the situa-
• When driving on a road with many and
down.
tion. The FCM is not designed to detect
successive curves, including when pass-
• When the sensor is affected by strong
these objects.
ing their entrances and outlets.
light, such as direct sunlight or the head-
z
The forward collision warning function
• When accelerating and decelerating
lamps of an oncoming vehicle.
and/or the FCM braking function may not
quickly.
• Under adverse weather conditions (rain,
activate in the following situations.
• When the system recognizes driver’s
snow, sand storms, etc.)
• When a vehicle suddenly appears just in
steering, accelerating, braking or gear
• When the windscreen of the sensor por-
front of your vehicle.
shifting actions as evasive actions to
tion is covered with dirt, water droplets,
• When a vehicle cuts in front of your vehi-
avoid collision.
snow and ice, etc.
cle very closely.
• When you are driving on a road with
• When water, snow or sand on the road are
• When the vehicle in front is offset to the
steep and alternating up and down slopes.
extorted by the vehicle in front or an on-
left or right.
• When driving on a slippery road covered
coming vehicle.
• When the vehicle in front is towing a
by rain water, snow, ice etc.
z
The FCM may not detect a pedestrian in cer-
trailer.
• When a road surface is surging, and there
tain situations. Some of these include:
• A freight trailer that is not carrying a con-
is unevenness.
• It the pedestrian is shorter than approxi-
tainer.
• When driving in dark areas, such as in a
mately 1 m or taller than approximately
tunnel or at night.
2 m.
6-92
Starting and driving
Forward Collision Mitigation system (FCM)*
CAUTION
CAUTION
CAUTION
• If the pedestrian is wearing loose-fitting
z
The FCM control and alarm functions may
• When passing close to a vehicle, pedes-
clothes.
be triggered in the following situations.
trian or object.
• If part of a pedestrian’s body is hidden,
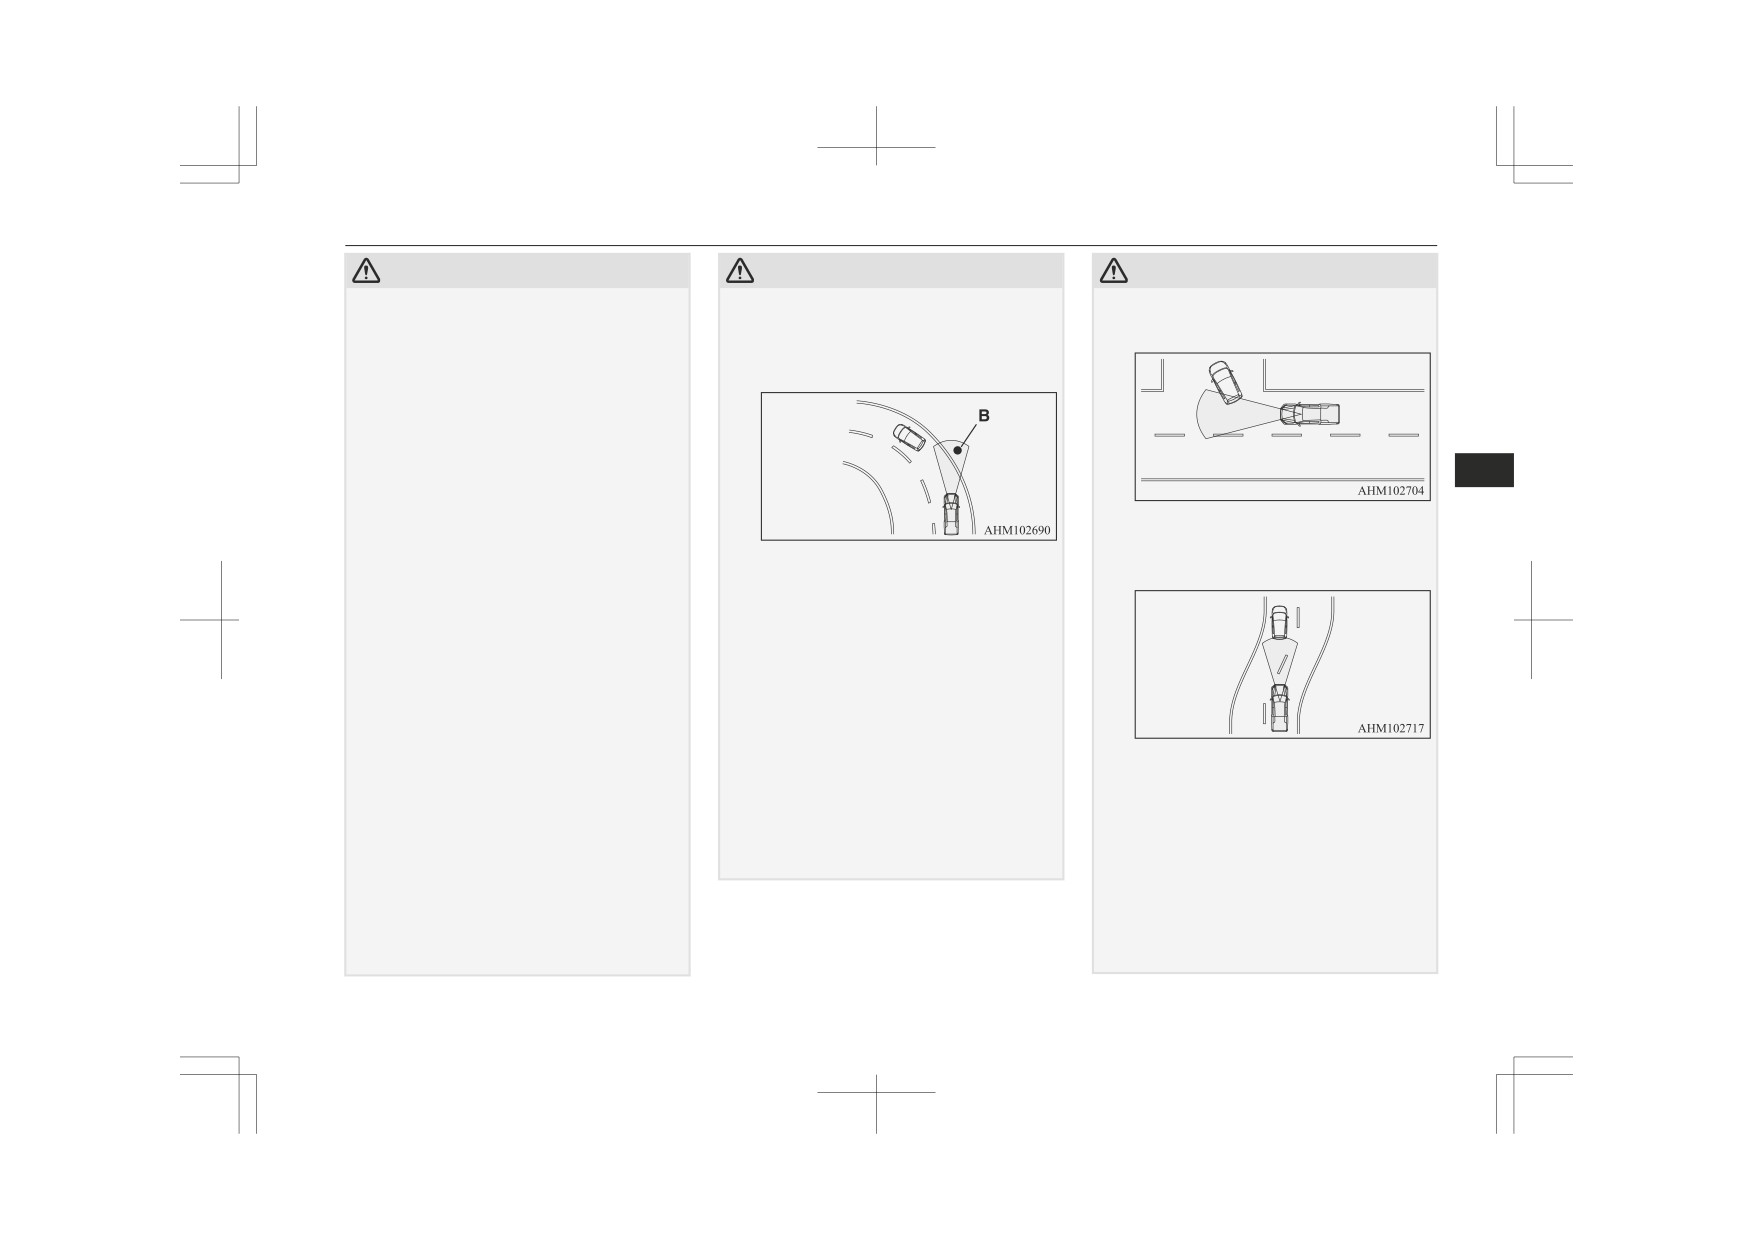
• When there is a structure (B) beside the
such as when holding an umbrella, large
entrance of a curve and intersection.
bag, etc.
• If a pedestrian bends forward, sits or lies
on the road.
• When a pedestrian is pushing/pulling
something, such as a stroller, bicycle or
6
wheelchair.
• When pedestrians gather in a group.
• When a pedestrian's clothing appears to
• When driving on the road that the vehicle
be nearly the same colour or brightness as
in front runs in offset position from your
its surroundings.
• When running on a narrow iron bridge.
vehicle.
• When a pedestrian is very close to an ob-
• When passing through a gate with small
ject, such as a vehicle.
head or side clearances.
• When a pedestrian is in a dark area, such
• When there are metallic objects, steps or
as at night or in a tunnel.
projections on the road surface.
• When the pedestrian is walking fast or
• When quickly approaching a vehicle in
running.
front to overtake it.
• When a pedestrian suddenly rushes in
• When passing an electronic toll collection
front of the vehicle.
gate.
• When the position of a pedestrian is close
• When running under an overpass, an pe-
to the edge of the vehicle.
destrian overpass or a small tunnel.
• When passing through an area where ob-
z
Factors such as the positional relationship
• When running in Multi-storey car park.
jects may contact the vehicle, such as
between your vehicle and a vehicle in front,
thick grass, tree branches, or a banner.
• When the road gradiently and suddenly
driver’s own technique of steering the vehi-
changes while running.
• When there are patterns on the road that
cle and irregularly moving traffic due to ac-
may be mistaken for a vehicle or a pedes-
• When stopping very close to a wall or a
cidents or vehicle trouble may deter the
vehicle in front.
trian.
FCM control and alarm from functioning.
• When a vehicle cuts into your path in the
z
When the system recognizes driver’s steer-
detecting range of the sensor.
ing or accelerating actions as evasive actions
• When an oncoming vehicle is positioned
to avoid a collision, the FCM control and
straight ahead of your vehicle on a curved
alarm functions may be cancelled.
road.
Starting and driving
6-93
Forward Collision Mitigation system (FCM)*
FCM and UMS ON/OFF
To turn on/off the system
CAUTION
switch
You can switch the system from OFF to ON
• When passing through a plastic curtain
etc.
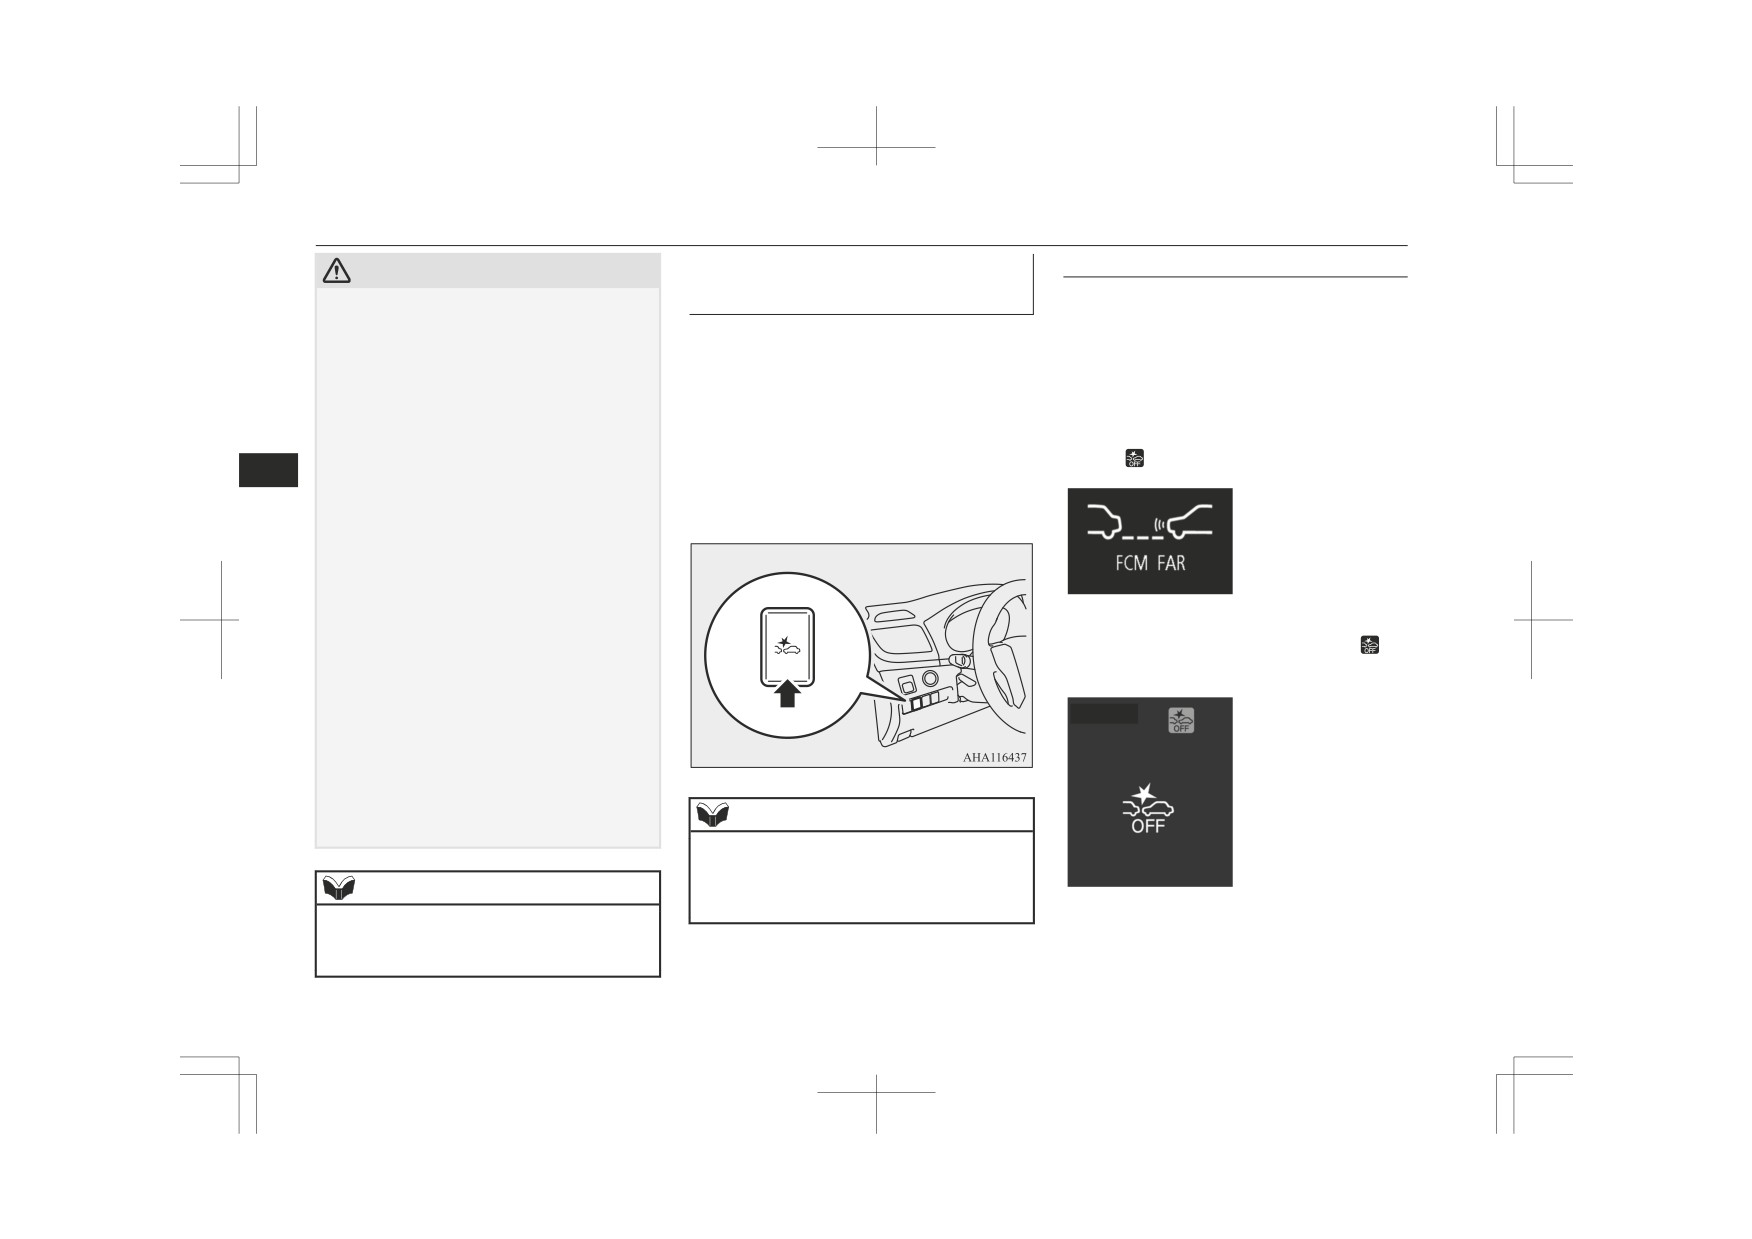
This switch is used to turn on and off the
or ON to OFF if you hold the FCM and UMS
• When the FCM detects a long object car-
FCM and UMS and also to select your de-
ON/OFF switch pressed when the operation
ried on your vehicle, such as skies or a
mode is set to “ON”.
sired collision alarm timing.
roof carrier.
When the switch is held pressed, the
Once the system is turned on, the information
• When driving through fog, steam, smoke
ON/OFF state of the FCM and UMS changes
screen of the multi information display shows
or dust.
from ON to OFF and vice versa. If you give
the collision alarm timing currently selected,
• When the windscreen of the sensor por-
tion is covered with dirt, water droplets,
the switch a short press with the FCM in the
and the
indicator on the screen goes out.
6
snow and ice, etc.
ON state, you can change the collision alarm
z
Turn off the system beforehand when the ve-
timing.
hicle is placed in any of the following situa-
tions as the system can operate unexpected-
ly.
• When using an automatic car wash.
• When your vehicle’s wheels are driven by
the engine on a lift.
When you turn off the system, the following
• When your vehicle is towed or your vehi-
message appears on the screen and the
in-
cle tows another vehicle.
dicator comes on.
• When your vehicle is carried on a truck.
• When enjoying sports driving on a circuit.
• When your vehicle is on a chassis dyna-
mometer or free rollers.
• When the tyre pressure is not correct.
• When the tyre chains are attached.
• If the windscreen on or surrounding the
NOTE
sensor is cracked or scratched.
z
When the FCM and UMS ON/OFF switch is
held pressed to change the ON/OFF state of
NOTE
the FCM, the ON/OFF state of the UMS is
also changed at the same time.
Cycling the operation mode to ON will set
z
A sound will be heard during the activation
of automatic braking, this is a function of the
the FCM back ON.
brake control and is not abnormal.
6-94
Starting and driving