Mitsubishi Montero (2002-2004). Manual - part 1075


  Index      Mitsubishi     Mitsubishi Montero - service repair manual 2002-2004 year


Search            


Content   ..  1073  1074  1075  1076   ..


Mitsubishi Montero (2002-2004). Manual - part 1075


RADIATOR

TSB Revision

ENGINE COOLING

14-9

REMOVAL SERVICE POINTS

.

<<A>> RADIATOR SHROUD UPPER COVER/RADIATOR 
SHROUD LOWER COVER REMOVAL

CAUTION

Be careful not to break or bend the fixing lever by tilting it 
outward too excessively.
Tilt the fixing lever at the shroud housing cover outward slightly, 
and remove the cover toward the fan axis from its four fixing 
points. 

.

<<B>> A/T OIL COOLER HOSE REMOVAL
After removing the hose from the radiator, plug the hose and 
the radiator nipple to prevent dust or foreign particles from get-
ting in.

.

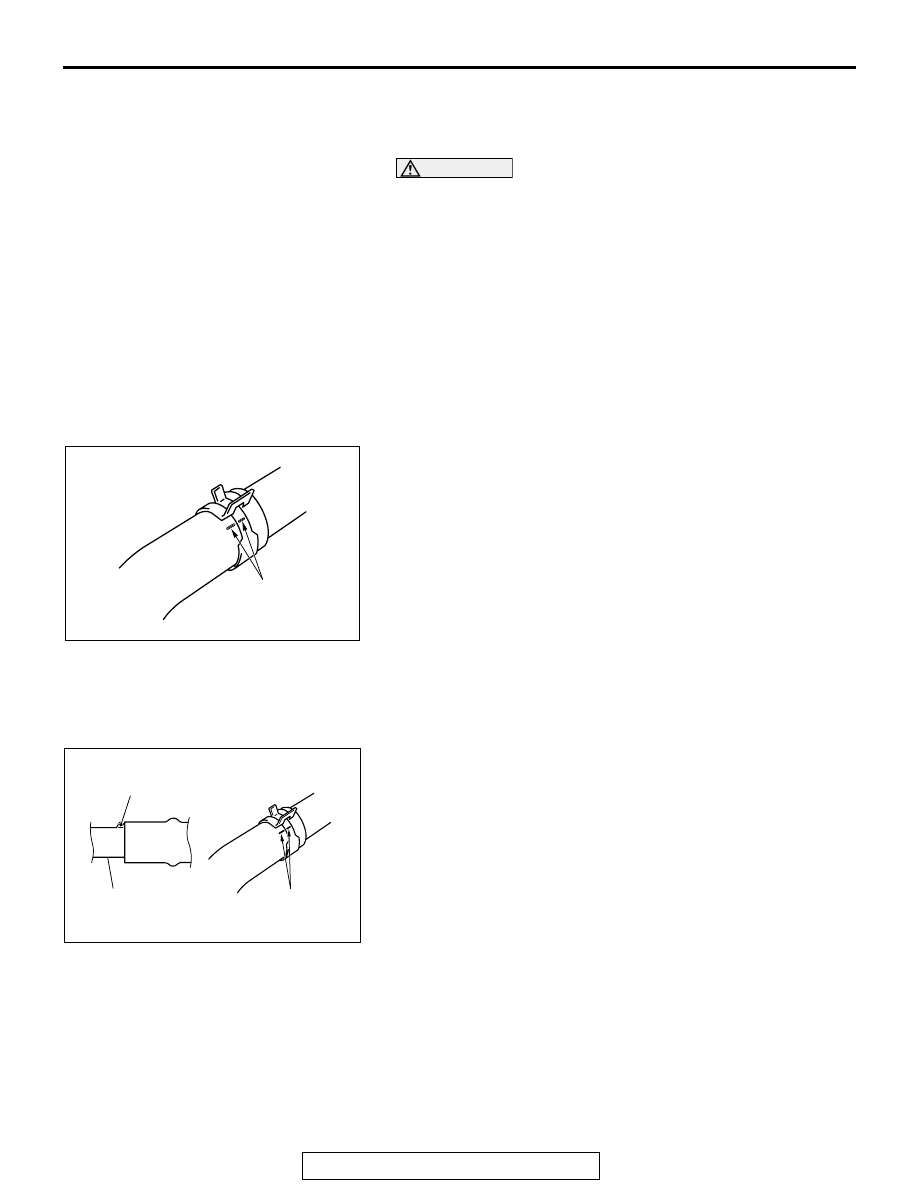
<<C>> RADIATOR UPPER HOSE/RADIATOR LOWER HOSE 
DISCONNECTION
Make mating marks on the radiator hose and the hose clamp. 
Disconnect the radiator hose.

INSTALLATION SERVICE POINTS

.

>>A<< RADIATOR LOWER HOSE/RADIATOR UPPER HOSE 
CONNECTION
1. Insert each hose as far as the projection of the water inlet 

fitting.

2. Align the mating marks on the radiator hose and hose 

clamp, and then connect the radiator hose.

.

AC200641AB

MATING MARKS

AC200642

MATING
MARKS

PROJECTION

WATER OUTLET
FITTING

AB

COOLING FAN

TSB Revision

ENGINE COOLING

14-10

>>B<< RADIATOR SHROUD UPPER COVER/RADIATOR 
SHROUD LOWER COVER INSTALLATION
1. Install the covers securely until the click can be heard from 

the four fixing points.

2. Two lugs around the circumference of the covers should be 

seen on the outside of the shroud.

3. After installation, check that the covers are fixed securely.

COOLING FAN

REMOVAL AND INSTALLATION

M1141002100106

ACX00404 AC

AC204071

1

2

3

4

5 6

AB

11 ± 1 N·m
93 ± 13 in-lb

11 ± 1 N·m
93 ± 13 in-lb

REMOVAL STEPS

>>B<<

1.

RADIATOR SHROUD UPPER 
COVER

<<A>> >>A<<

2.

DRIVE BELT

3.

COOLING FAN AND FAN 
CLUTCH ASSEMBLY

4.

FAN PULLEY

5.

COOLING FAN

6.

FAN CLUTCH

REMOVAL STEPS (Continued)

COOLING FAN

TSB Revision

ENGINE COOLING

14-11

REMOVAL SERVICE POINT

.

<<A>> DRIVE BELT REMOVAL
The following operations will be needed due to the introduction 
of the serpentine drive system with the drive belt auto ten-
sioner.
1. Insert a 12.7 mm (1/2 inch) breaker bar into the square hole 

on the drive belt auto tensioner, and rotate it clockwise until 
the tensioner touches the stopper. 

2. Align hole B with hole A, and insert a 5.0 mm (0.20 inch) 

Allen wrench to hold the tensioner. Then loosen the drive 
belt, and then remove the drive belt auto tensioner. 

INSTALLATION SERVICE POINTS

.

>>A<< DRIVE BELT INSTALLATION
1. Install the drive belt auto tensioner with the Allen wrench 

inserted. 

2. After the drive belt has been installed, remove the Allen 

wrench while holding the drive belt auto tensioner with a 
socket wrench drive. Then release the drive belt auto 
tensioner slowly.

3. Check for proper tension. (Refer to GROUP 00-

Maintenance Servic

P.00-38

.)

.

ACX01424AB

HOLE A

HOLE B

SQUARE 

HOLE

CLOCKWISE

ALLEN WRENCH

ACX01376AB

ALLEN WRENCH

COOLING FAN

TSB Revision

ENGINE COOLING

14-12

>>B<< RADIATOR SHROUD UPPER COVER 
INSTALLATION
1. Install the covers securely until the click can be heard from 

the four fixing points.

2. Two lugs around the circumference of the covers should be 

seen on the outside of the shroud.

3. After installation, check that the covers are fixed securely.

INSPECTION

M1141002200103

.

Cooling Fan Check

• Check the blades for damage and cracks.

• Check for cracks and damage around bolt holes in the fan 

hub.

• If any portion of the fan is damaged or cracked, replace the 

cooling fan.

.

Fan Clutch Check

• Check to ensure that fluid in the fan clutch is not leaking at 

the case joint and seals. If fluid quantity decreases due to 
leakage, the fan speed will decrease and engine overheat-
ing might result.

• When the fan attached to the engine is turned by hand, it 

should have some resistance. If the fan turns lightly or 
freely with no resistance, it is faulty.

• Check the bimetal strip for damage.

ACX00404 AC


Content   ..  1073  1074  1075  1076   ..