Mitsubishi Evolution X. Manual - part 499


  Index      Mitsubishi     Mitsubishi Evolution X - service repair manual 2008 year


Search            


Content   ..  497  498  499  500   ..


Mitsubishi Evolution X. Manual - part 499


DOOR

TSB Revision

BODY

42A-99

STEP 1. Check the power supply system.
With the ignition switch in the LOCK (OFF) position, check if 
the following function operates normally:

• Hazard warning lamp

Q: Is the check result normal?

YES : Go to Step 2.
NO :  Refer to GROUP 54A 

− Malfunction of ETACS-ECU 

power supply circuit 

P.54A-636

.

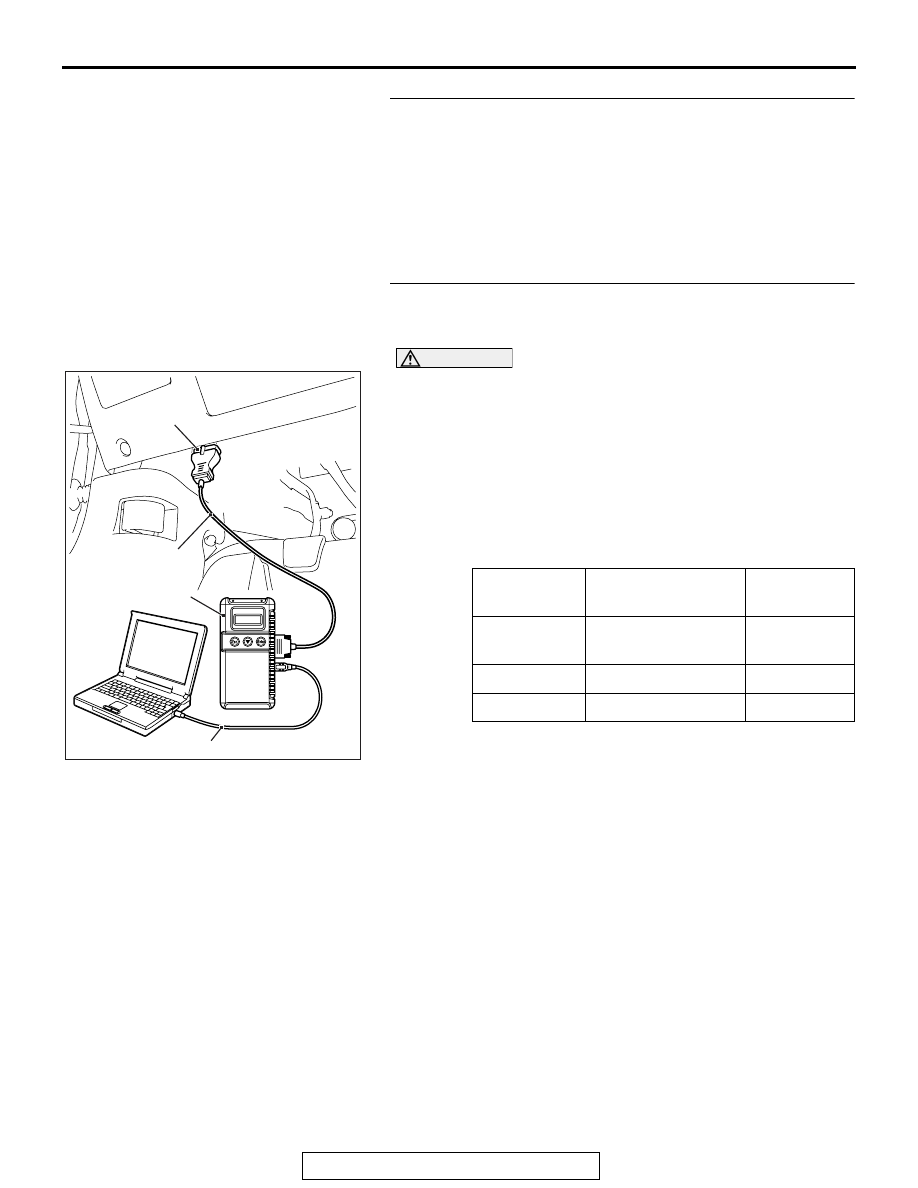
STEP 2. Using scan tool MB991958, check data list.
Check the signals related to the power window timer function 
operation.

CAUTION

To prevent damage to scan tool MB991958, always turn the 
ignition switch to the "LOCK" (OFF) position before con-
necting or disconnecting scan tool MB991958.
(1) Connect scan tool MB991958. Refer to "How to connect 

scan tool (M.U.T.-III) 

P.42B-10

."

(2) Turn the ignition switch to the "ON" position.
(3) Check the data list of the ETACS.

• Turn the ignition switch to the LOCK (OFF) position.

• Close the driver's door.

• Close the passenger's door.

(4) Turn the ignition switch to the "LOCK" (OFF) position.

OK: Normal condition is displayed.

Q: Is the check result normal?

YES <Normal conditions are displayed for all the 
items.> : 
Go to Step 3.
NO <Normal condition is not displayed for item No. 
254.> : 
Refer to GROUP 54A 

− inspection procedure 2: "The 

ignition switch (IG1) signal is not received 

P.54A-642

."

NO <Normal condition is not displayed for item No. 
256.> : 
Refer to GROUP 54A 

− inspection procedure 5: "The 

front door switch (driver’s side) signal is not received 

P.54A-656

."

NO <Normal condition is not displayed for item No. 
257.> : 
Refer to GROUP 54A 

− inspection procedure 6: the 

front door switch (passenger’s side) signal is not 
received. 

P.54A-654

.

Item No.

Item name

Normal 
condition

254

IG voltage

Battery 
voltage 

256

Dr door ajar switch

Close

257

As door ajar switch

Close

AC608435

Data link connector

MB991827

MB991824

MB991910

AB

DOOR

TSB Revision

BODY

42A-100

STEP 3. Retest the system.
Check that the power window timer function works normally.
Q: Is the check result normal?

YES : No action is necessary and testing is complete.
NO :  Replace the  power window main switch. Check that 

the power window timer function works normally.

INSPECTION PROCEDURE 6: Power Window Anti-trap Function does not work Normally. <Driver’s 
side seat>

.

COMMENTS ON TROUBLE SYMPTOM

Malfunction of the power window motor revolution 
detection sensor is suspected.

.

PROBABLE CAUSES

• Malfunction of the power window motor

• Damaged wiring harness and connectors

DIAGNOSTIC PROCEDURE

Required Special Tools:

• MB992006: Extra fine probe

• MB991223: Harness set

• MB991958: Scan Tool (M.U.T.-III Sub Assembly)

• MB991824: Vehicles Communication Interface (V.C.I.)

• MB991827: M.U.T.-III USB Cable

• MB991910: M.U.T.-III Main Harness A

DOOR

TSB Revision

BODY

42A-101

STEP 1. Using scan tool MB991958, read the diagnostic 
trouble code.

CAUTION

To prevent damage to scan tool MB991958, always turn the 
ignition switch to the "LOCK" (OFF) position before con-
necting or disconnecting scan tool MB991958.
(1) Connect scan tool MB991958. Refer to "How to connect 

scan tool (M.U.T.-III) 

P.42B-10

."

(2) Turn the ignition switch to the "ON" position.
(3) Check whether the power window main switch related DTC 

is set.

(4) Turn the ignition switch to the "LOCK" (OFF) position.
Q: Is the DTC set?

YES : Diagnose the power window main switch. Refer to 

Diagnostic trouble code chart 

P.42A-58

.

NO :  Go to Step 2.

STEP 2. Check the power window operating current.
Check that the power window operating current is normal 
(Refer to 

P.42A-116

). 

Q: Is the check result normal?

YES : Door window glass adjustment (Refer to 

P.42A-114

). 

Then go to Step 3.

NO :  Replace the power window motor. Verify that the 

power window anti-trap function works normally.

STEP 3. Confirm the power window learning function.
Check that the power window switch has learned the fully 
closed position of the windows.
Q: Is the check result normal?

YES : Go to Step 4.
NO :  Make the power window switch learn the fully closed 

position of the windows (Refer to 

P.42A-117

). Verify 

that the power window anti-trap function works 
normally.

AC608435

Data link connector

MB991827

MB991824

MB991910

AB

DOOR

TSB Revision

BODY

42A-102

STEP 4. Retest the system.
Check that the power window anti-trap function works.
Q: Is the check result normal?

YES : No action is necessary and testing is complete.
NO :  Replace the front power window motor (LH). Verify 

that the power window anti-trap function works 
normally.

INSPECTION PROCEDURE 7: The Window Glass Lowers Automatically while it is Rising.

.

COMMENTS ON TROUBLE SYMPTOM

If the sliding resistance is too great when the window 
is being raised or the window glass encounters an 
object, the window glass will lower by approximately 
150 mm (5.9 inches).

.

PROBABLE CAUSES

• Improper adjusted door window glass

• Incorrectly installed or warped glass slider

• Malfunction of the power window motor

• Malfunction of the window regulator

DIAGNOSTIC PROCEDURE

STEP 1. Determine a trouble spot.
Q: Which type of the power window is installed on vehicle?

Driver’s side seat : Go to Step 2.
Except driver’s side seat : Go to Step 3..

STEP 2. Check the power window anti-trap function.
Check that the power window anti-trap function works. Refer to 

P.42A-116

.

Q: Is the check result normal?

YES : Go to Step 3.
NO :  Refer to inspection procedure 6 "Power window 

anti-trap function does not work normally 

P.42A-100

."

STEP 3. Check that the door window glasses are installed 
correctly.
Check that the door window glasses are installed correctly. 
Refer to 

P.42A-114

.

Q: Is the check result normal?

YES : Go to Step 4.
NO :  Adjust the door window glass (Refer to 

P.42A-114

).

STEP 4. Retest the system.
Check that the power window does not lower while it is being 
raised.
Q: Is the check result normal?

YES : No action is necessary and testing is complete.
NO :  Replace the power window motor of the defective 

window.


Content   ..  497  498  499  500   ..