Mitsubishi Eclipse / Eclipse Spyder (2000-2002). Service and repair manual - part 564
 

  Index      Mitsubishi     Mitsubishi Eclipse / Eclipse Spyder (2000-2002). Service and repair manual


Search            


Content   ..  562  563  564  565   ..


Mitsubishi Eclipse / Eclipse Spyder (2000-2002). Service and repair manual - part 564


BASIC BRAKE SYSTEM DIAGNOSIS

TSB Revision

BASIC BRAKE SYSTEM

35A-5

B A SIC  B R A K E SYSTEM  D IA G N O SIS

INTRODUCTION TO BASIC BRAKE SYSTEM DIAGNOSIS

M1351009700085

Hydraulic brakes configured of the brake pedal, 
master cylinder, brake booster and drum or disc 
brakes, are incorporated. Malfunctions such as 
insufficient braking power or the generation of noise 
may occur due to wear, damage or incorrect 
adjustment of these parts.

BASIC BRAKE SYSTEM DIAGNOSTIC TROUBLESHOOTING STRATEGY

M1351009800082

Use these steps to plan your diagnostic strategy. If 
you follow them carefully, you will be sure that you 
have exhausted most of the possible ways to find a 
basic brake system fault.
1. Gather information from the customer.

2. Verify that the condition described by the 

customer exists.

3. Find the malfunction by following the symptom 

chart.

4. Verify malfunction is eliminated.

SYMPTOM CHART

M1351009900090

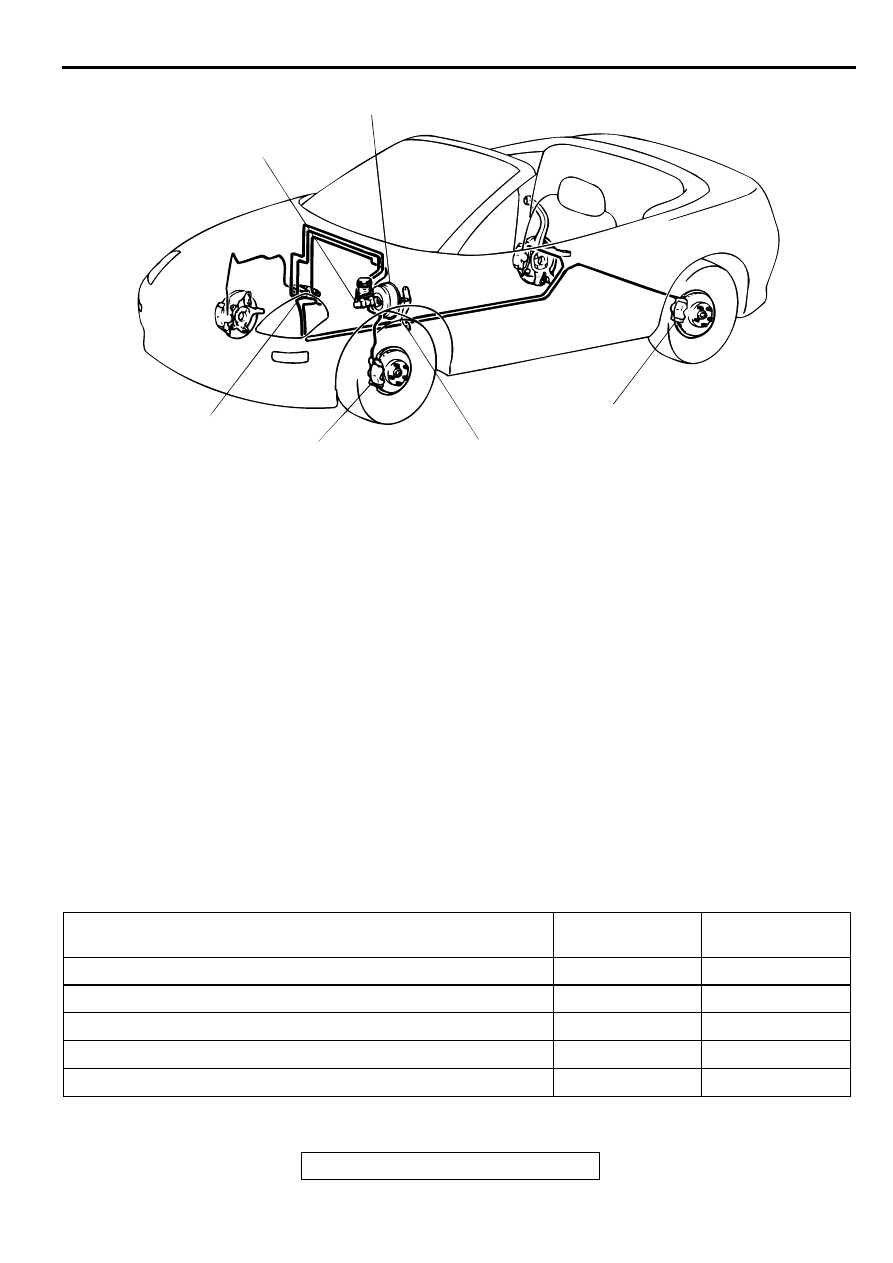
AC004196 AB

BRAKE BOOSTER

MASTER CYLINDER

PROPORTIONING VALVE

FRONT BRAKE

BRAKE PEDAL

REAR BRAKE

<ECLIPSE SPYDER>

SYMPTOMS

INSPECTION 
PROCEDURE

REFERENCE 
PAGE

Vehicle pulls to one side when brakes are applied

1

P.35A-6

Insufficient braking power

2

P.35A-7

Increased pedal stroke (Reduced pedal-to-floor board clearance)

3

P.35A-9

Brake drag

4

P.35A-10

Scraping or grinding noise when brake are applied

5

P.35A-12

BASIC BRAKE SYSTEM DIAGNOSIS

TSB Revision

BASIC BRAKE SYSTEM

35A-6

SYMPTOM PROCEDURES

INSPECTIONPROCEDURE 1: Vehicle Pulls to One Side when Brakes are Applied

DIAGNOSIS

STEP 1. Check for oil, water, etc., on the pad or lining 
contact surface of all brakes.

Q: Is oil, water, etc., on the pad or lining contact surface?

YES : Replace the part and determine and repair source/

cause of foreign material. Then go to Step 8.

NO :  Go to Step 2.

STEP 2. Check the lining and brake drum contact. 
<Vehicles equipped with rear drum brake>
(1) If equipped with rear disc brake, go to Step 5.
(2) Put chalk on the inner surface of the brake drum. Rub the 

lining against the drum inner surface.

NOTE: Clean off chalk after check.

Q: Does the lining wipe off or smudge the chalk across the 

full width of the lining?
YES : 
Go to Step 3.
NO :  Replace the shoe and lining assemblies on both 

sides. Then go to Step 4.

STEP 3. Check the auto adjuster function (Refer to 

P.35A-

29

.).

Q: Is there fault?

YES : Repair it. Then go to step 8.
NO :  Go to Step 4.

STEP 4. Check the brake drum inside diameter (Refer to 

P.35A-28

.).

Q: Is the brake drum inside diameter outside of 

specifications?
YES : 
Replace the part. Then go to Step 8.
NO :  Go to Step 5.

Squealing, groaning or chattering noise when brake are applied

6

P.35A-14

Squealing noise when brakes are not applied

7

P.35A-14

Groaning, clicking or rattling noise when brakes are not applied

8

P.35A-16

SYMPTOMS

INSPECTION 
PROCEDURE

REFERENCE 
PAGE

AC000856

BASIC BRAKE SYSTEM DIAGNOSIS

TSB Revision

BASIC BRAKE SYSTEM

35A-7

STEP 5. Check disc brake pistons for smooth operation.
(1) With engine not running, depress the brake pedal rapidly 

several times to deplete booster vacuum reserves.

(2) Test each disc brake assembly one at a time.

a. Remove the lower caliper bolt, then remove caliper from 

mount.

b. Have an assistant slowly depress the brake pedal. 

Confirm piston(s) extend slowly and smoothly with no 
jumpiness. Repeat for each disc brake assembly.

Q: Do (does) the piston(s) move correctly?

YES : Go to Step 6.
NO :  Disassemble and inspect brake assembly (Refer to 

P.35A-37

 and/or 

P.35A-44

.). Then go to Step 8.

STEP 6. Check brake disc(s) for run out (Refer to 

P.35A-25


or 

P.35A-26

.).

Q: Is runout outside of specifications?

YES : Repair and replace as necessary. Then go to Step 8.
NO :  Go to Step 7.

STEP 7. Check brake discs for correct thickness (Refer to 

P.35A-27

.).

Q: Is the thickness outside of specifications?

YES : Repair or replace as necessary. Then go to Step 8.
NO :  Go to Step 8.

STEP 8. Check symptoms.

Q: Is the symptom eliminated?

YES : Repair complete.
NO :  Start over at Step 1. If a new symptom appears, refer 

to the symptom chart.

INSPECTION PROCEDURE 2: Insufficient Braking Power

DIAGNOSIS

STEP 1. Check whether the brake fluid is low, is the correct 
fluid (A/T fluid, engine oil, etc.) or is contaminated (debris, 
sand, etc.).

Q: Is there fault?

YES : Refill or replace with the specified brake fluid DOT 3 

or DOT 4. Bleed the brakes if necessary (Refer to 

P.35A-22

). Then go to Step 9. 

NO :  Go to Step 2. 

BASIC BRAKE SYSTEM DIAGNOSIS

TSB Revision

BASIC BRAKE SYSTEM

35A-8

STEP 2. Check for spongy (not firm brakes).
(1) With engine not running, depress the brake pedal rapidly 

several times to deplete booster vacuum reserve.

(2) With the brake pedal fully released, depress the brake 

pedal slowly until it stops.

(3) With a measuring stick (ruler, etc.) next to the brake pedal, 

depress the pedal firmly and measure the distance the 
pedal traveled.

Q: Is the distance greater than 20 mm (0.8 inch)?

YES : Bleed the brakes to remove air in the fluid (Refer to 

P.35A-22

.). Then go to Step 9.

NO :  Go to Step 3. 

STEP 3. Check the lining and brake drum contact. 
<Vehicles equipped with rear drum brake>
(1) If equipped with rear disc brake, go to Step 5.
(2) Put chalk on the inner surface of the brake drum. Rub the 

lining against the drum inner surface.

NOTE: Clean off chalk after check.

Q: Does the lining wipe off or smudge the chalk across the 

full width of the lining?
YES : 
Go to Step 5.
NO :  Replace the shoe and lining assemblies on both 

sides. Go to Step 9.

STEP 4. Check the auto adjuster function. <Vehicles 
equipped with rear drum brake> 
Refer to 

P.35A-29

.

Q: Is there fault?

YES : Repair it. Then go to Step 9.
NO :  Go to Step 5.

STEP 5. Check the brake booster function.
Refer to 

P.35A-20

.

Q: Is there fault?

YES : Replace the part. Then go to Step 9.
NO :  Go to Step 6.

STEP 6. Check for pinched or restricted brake tube or 
hose.

Q: Is there pinched or restricted brake tube or hose?

YES : Replace that complete section of brake tube or brake 

hose. Then go to Step 9.

NO :  Go to Step 7.

AC000856


Content   ..  562  563  564  565   ..