Mitsubishi Colt Ralliart. Manual - part 513
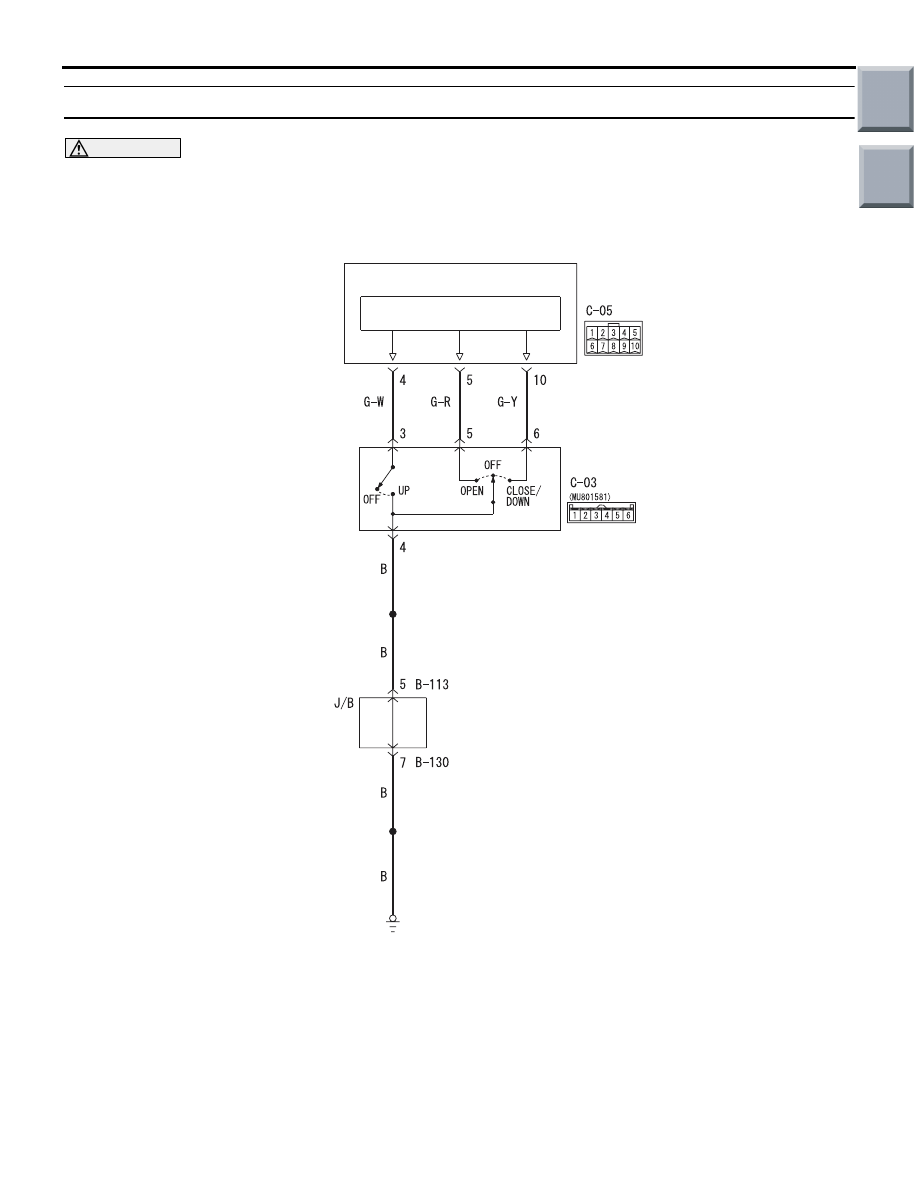
SUNROOF ASSEMBLY
BODY
42-74
Inspection Procedure 2: Any of the sunroof switch positions is defective.
CAUTION
Whenever the ECU is replaced, ensure that the
input and output signal circuits are normal.
AC510038
SUNROOF
MOTOR
ASSEMBLY
SUNROOF
SWITCH
CONTROL CIRCUIT
Wire colour code
B : Black LG : Light green G : Green L : Blue
W : White Y : Yellow SB : Sky blue BR : Brown
O : Orange GR : Grey R : Red P : Pink V : Violet
Sunroof Switch Circuit
AB
COMMENTS ON TROUBLE SYMPTOM
If any of the sunroof switch positions is defective, the
communication line between the sunroof switch and
the sunroof motor assembly (sunroof-ECU) may be
defective.
PROBALE CAUSES
• Malfunction of the sunroof switch
• Malfunction of the sunroof motor assembly (sun-
roof-ECU)
• Damaged harness wires and connectors
Main
Index
Group
TOC