Mitsubishi Colt Ralliart. Manual - part 500
WINDOW GLASS
BODY
42-22
REMOVAL SERVICE POINT
<<A>>DELTA WINDOW GLASS ASSEM-
BLY REMOVAL
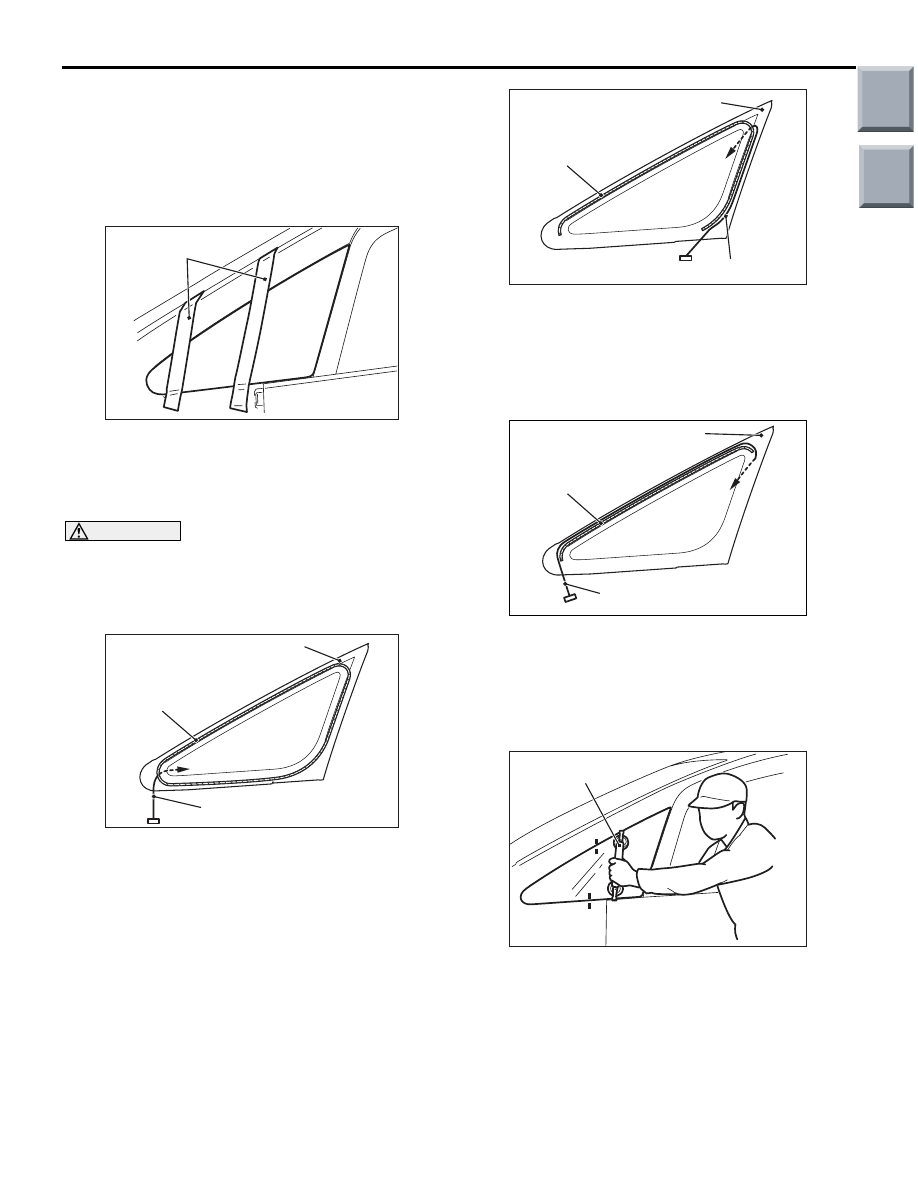
1. In order to protect the body (paint surface), apply
protective tape to all body areas around the
installed delta window glass.
AC303408AE
Protective tape
2. Stick adhesive tape to avoid the delta window
glass from dropping.
3. Using a sharp-point drill, make hole in the delta
window glass adhesive.
CAUTION
Do not let the piano wire touch the edge of the
delta window glass.
4. Cut off the delta window glass adhesive according
to the procedure below.
AC303409AC
Seal line
Delta window
glass assemble
Piano wire
(1) To remove the adhesive from the bottom of the
delta window glass, feed a piano wire into the
passenger compartment through the hole, and
then cut off the adhesive by pulling the piano
wire alternately from the inside and outside of
the vehicle.
AC303410 AC
Seal line
Delta window
glass assembly
Piano wire
(2) To remove the adhesive from the rear of the
delta window glass, feed a piano wire into the
passenger compartment through the hole, and
then cut off the adhesive by pulling the piano
wire alternately from the inside and outside of
the vehicle.
AC303411AC
Seal line
Delta window
glass assembly
Piano wire
(3) To remove the adhesive from the front of the
delta window glass, feed a piano wire into the
passenger compartment through the hole, and
then cut off the adhesive by pulling the piano
wire alternately from the inside and outside of
the vehicle.
AC303412 AC
MB990480
5. Make mating marks on the delta window glass
and body, and use the special tool (window glass
holder, MB990480) to remove the delta window
glass.
Main
Index
Group
TOC