Mazda CX-9 Grand Touring. Manual - part 29
1. Turn the ignition switch to the LOCK position.
2. Disconnect the negative battery cable and wait for 1 min or more .
3. Remove the following parts:
1. Front scuff plate inner (See FRONT SCUFF PLATE REMOVAL/INSTALLATION .)
2. Rear scuff plate inner (See REAR SCUFF PLATE REMOVAL/INSTALLATION .)
3. Front seat belt lower anchor installation bolt (Driver side) (See FRONT SEAT BELT
REMOVAL/INSTALLATION .)
4. B-pillar lower trim (See B-PILLAR LOWER TRIM REMOVAL/INSTALLATION .)
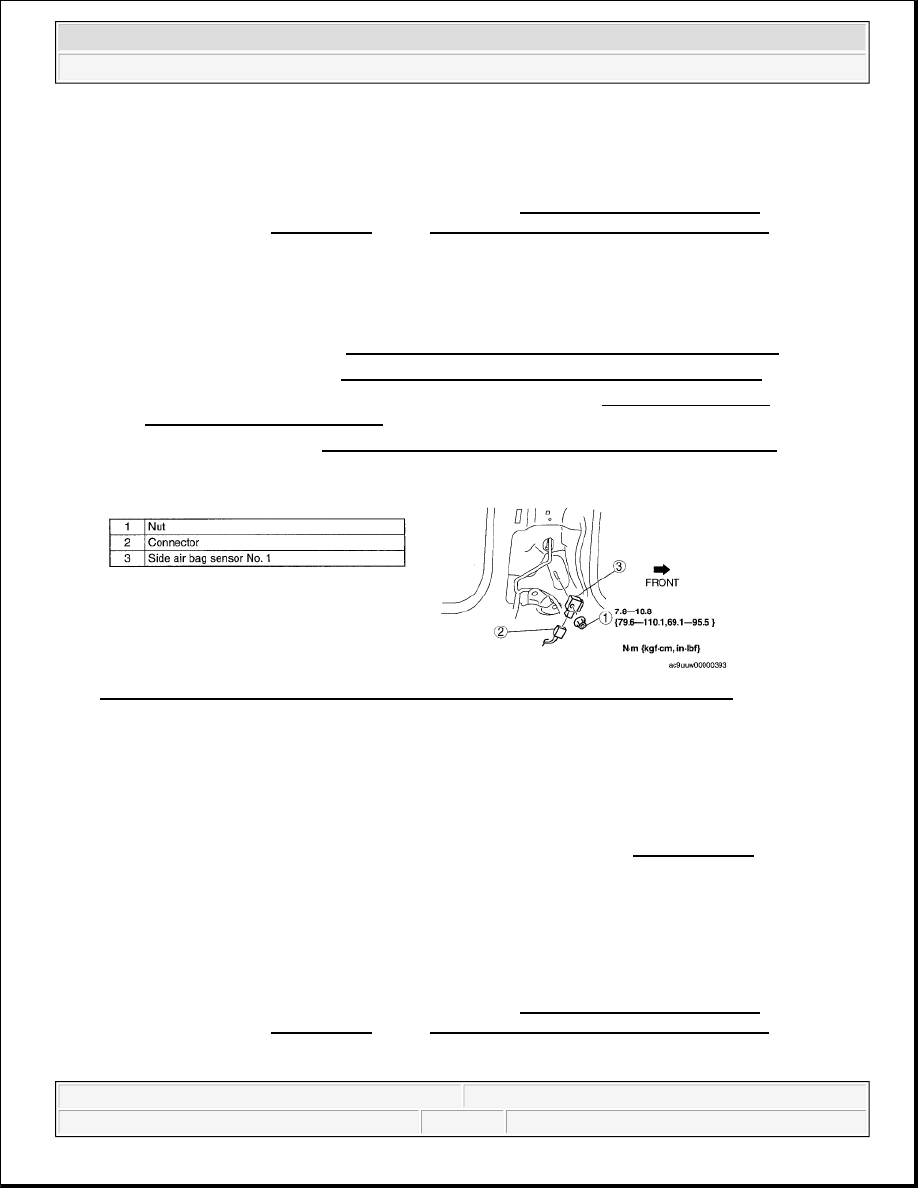
4. Remove in the order indicated in the table.
Fig. 24: Identifying Side Air Bag Sensor No. 1, Connector & Torque Specifications
Courtesy of MAZDA MOTORS CORP.
5. Install in the reverse order of removal.
6. Turn the ignition switch to the ON position and hold for 10 s or more .
7. Verify that the air bag system warning light illuminates for approx. 6 s and goes out.
If the air bag system warning light does not operate normally, refer to the on-board diagnostic
system (air bag system) and perform inspection of the system. (See FLOWCHART .)
SIDE AIR BAG SENSOR NO. 2 REMOVAL/INSTALLATION
1. Turn the ignition switch to the LOCK position.
WARNING:
Handling the side air bag sensor improperly can accidentally operate
(deploy) the air bag module, which may seriously injure you. Read
the air bag system service warnings and cautions before handling
the side air bag sensor. (See AIR BAG SYSTEM SERVICE
WARNINGS.) (See AIR BAG SYSTEM SERVICE CAUTIONS.)
WARNING:
Handling the side air bag sensor improperly can accidentally operate
(deploy) the air bag module, which may seriously injure you. Read
the air bag system service warnings and cautions before handling
the side air bag sensor. (See AIR BAG SYSTEM SERVICE
WARNINGS.) (See AIR BAG SYSTEM SERVICE CAUTIONS.)
2008 Mazda CX-9 Grand Touring
2008 RESTRAINTS Air Bag System - Mazda CX-9
Microsoft
Sunday, November 15, 2009 10:16:38 AM
Page 21
© 2005 Mitchell Repair Information Company, LLC.