Mazda 6. Manual - part 380
U–24
BASIC SYSTEM
A/C Compressor Installation Note
1. Remove the following amount of compressor oil from the new A/C compressor when replacing the A/C
compressor.
Compressor oil to be removed (approximate quantity)
120 ml {120 cc, 4.06 fl oz} – [compressor oil from old A/C compressor + 15 ml {15 cc, 0.5 fl oz}]
End Of Sie
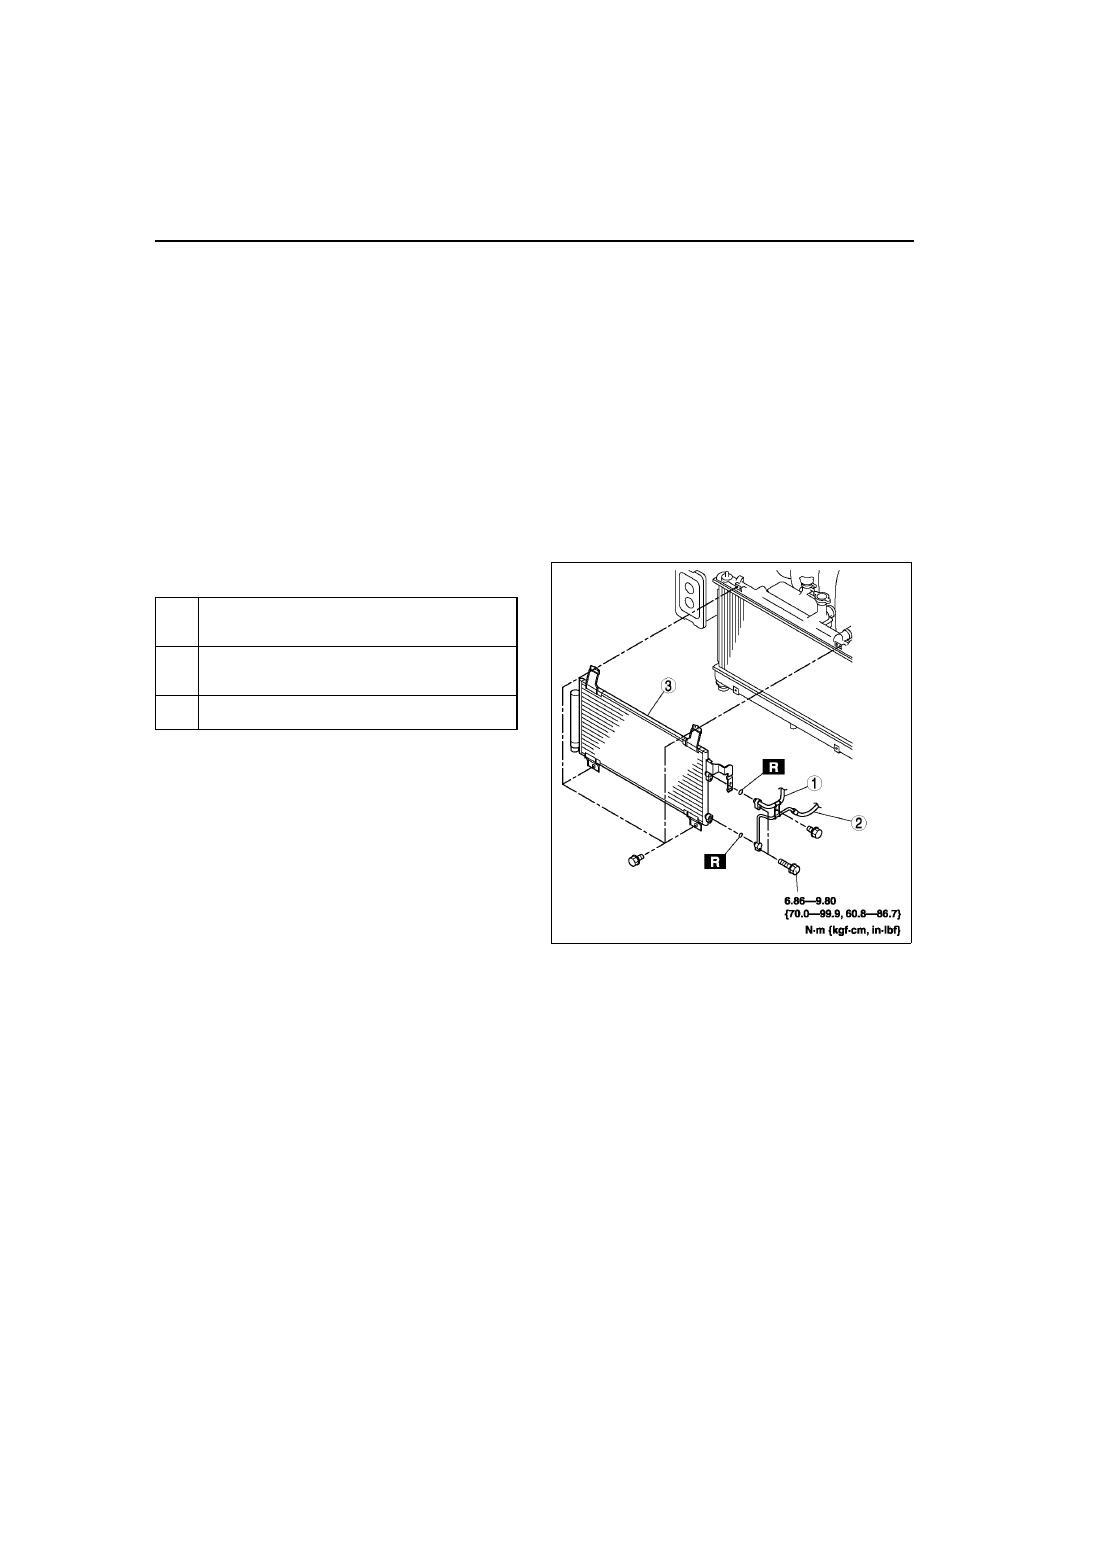
CONDENSER REMOVAL/INSTALLATION
A6E851661480W01
1. Disconnect the negative battery cable.
2. Discharge the refrigerant from the system. (See
.) (See
3. Remove the shroud panel. (See
S–119 SHROUD PANEL REMOVAL/INSTALLATION
Caution
• If moisture or foreign material enters the refrigeration cycle, cooling ability will be lowered and
abnormal noise will occur. Always immediately plug all open fittings after removing any
refrigeration cycle parts to keep moisture or foreign material out of the cycle.
4. Remove in the order indicated in the table. Do not
allow compressor oil to spill.
.
5. Install in the reverse order of removal.
6. Perform the refrigerant system performance test.
(See
Condenser Installation Note
1. When installing a new condenser, add a supplemental amount of ATMOS GU10 compressor oil inlet the
refrigerant cycle.
Supplemental amount (approximate quantity)
20 ml {20 cc, 0.7 fl oz}
End Of Sie
CONDENSER INSPECTION
A6E851661480W02
1. Inspect for cracks, damage, and oil leakage.
• If any are found, replace the condenser.
2. Inspect for fins clogged by dust.
• If any are clogged, remove the dust from the fins.
3. Inspect for bent fins.
• If any are bent, use a flathead screwdriver to straighten them.
End Of Sie
1
Cooler pipe No.1
(See
U–28 Refrigerant Lines Removal Note
)
(See
U–29 Refrigerant Lines Installation Note
2
Cooler pipe No.2
(See
U–28 Refrigerant Lines Removal Note
)
(See
U–29 Refrigerant Lines Installation Note
3
Condenser
(See
U–24 Condenser Installation Note
)
A6E8516W013