Mazda 6. Manual - part 367
 

  Index      Mazda     Mazda 6 - service repair manual 2002 year


Search            


Content   ..  365  366  367  368   ..


Mazda 6. Manual - part 367


ON-BOARD DIAGNOSTIC [AIR BAG SYSTEM] 

T–215

T

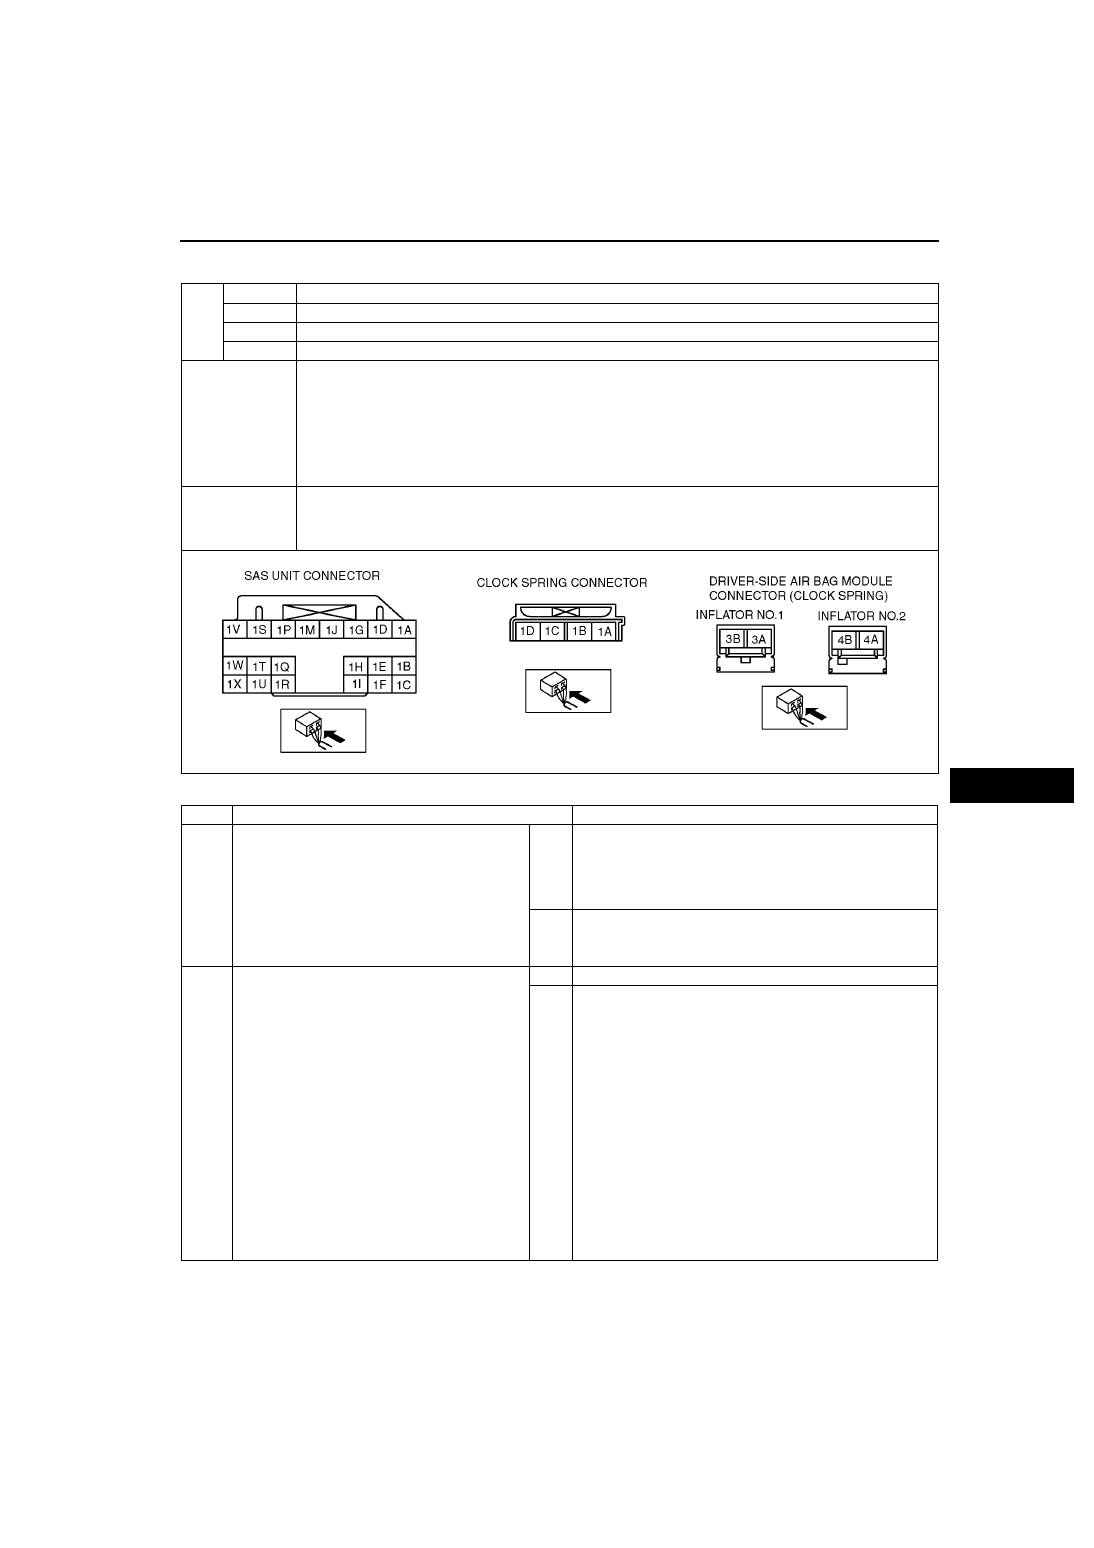
DTC B2228, B2230, B2232, B2234

A6E817401046W17

Diagnostic procedure

DTC

B2228

Driver-side air bag module (inflator No.2) system circuit short to ground

B2230

Driver-side air bag module (inflator No.2) system circuit short to power supply

B2232

Driver-side air bag module (inflator No.2) system resistance high

B2234

Driver-side air bag module (inflator No.2) system resistance low

DETECTION 

CONDITION

Warning
• Detection conditions are for understanding DTC outline before performing inspection. 

Performing inspection with only detection conditions may cause injury due to operating error 
or damage the system. When performing inspection, always follow inspection procedure.

• Abnormal resistance (other than 1.5—3.7 ohm) detected in driver-side air bag module (inflator No.2) 

circuit

• Malfunction in wiring harness between driver-side air bag module (inflator No.2) and SAS unit

POSSIBLE 

CAUSE

• Open or short circuit in wiring harness between clock spring and SAS unit

• Clock spring malfunction

• Driver-side air bag module (inflator No.2) malfunction

• SAS unit malfunction

STEP

INSPECTION

ACTION

1

INSPECT DRIVER-SIDE AIR BAG MODULE 
(INFLATOR NO.2)

• Check following PID/DATA monitor, using 

SST (WDS or equivalent).
(See 

T–195 PID/DATA MONITOR TABLE

)

— D_ABAGR2

• Is resistant value of driver-side air bag 

module normal?
— Resistance: 1.5—3.7 ohm

Yes

Present malfunction diagnosis:

• Replace SAS unit.

(See 

T–124 SAS UNIT REMOVAL/INSTALLATION

)

Past malfunction diagnosis:

• Troubleshooting completed.

No

Go to next step.

2

INSPECT DRIVER-SIDE AIR BAG MODULE 
CONNECTOR (CLOCK SPRING)

Warning
• Handling air bag system components 

improperly can accidentally deploy air 
bag modules and pre-tensioner seat 
belts, which may seriously injure you. 
Read AIR BAG SYSTEM SERVICE 
WARNINGS before handling air bag 
system components. 
(See 

T–117 SERVICE WARNINGS

)

• Turn ignition switch to LOCK position.

• Disconnect negative battery cable and wait 

for more than 1 minute.

• Remove driver-side air bag module.

• Is there cracking or chipping in driver-side air 

bag module connector?

Yes

Replace wiring harness.

No

Go to next step.

T–216

ON-BOARD DIAGNOSTIC [AIR BAG SYSTEM] 

End Of Sie

3

VERIFY WHETHER MALFUNCTION IS IN 
DRIVER-SIDE AIR BAG MODULE (INFLATOR 
NO.2) OR RELATED WIRING HARNESS

• Connect leads of SST (Fuel and 

thermometer checker) or apply 2 ohm 
resistor to driver-side air bag module (inflator 
No.1) connector terminal 3A and 3B, and 
driver-side air bag module (inflator No.2) 
connector terminal 4A and 4B.

• Set resistance of SST (Fuel and 

thermometer checker) to 2 ohm.

• Connect negative battery cable.

• Turn ignition switch to ON position.

• Check following PID/DATA monitor, using 

SST (WDS or equivalent).
(See 

T–195 PID/DATA MONITOR TABLE

)

— OD_DAB2_ST

• Is related wiring harness normal?

Yes

Replace driver-side air bag module.
(See 

T–120 DRIVER-SIDE AIR BAG MODULE REMOVAL/

INSTALLATION

)

No

Go to next step.

4

INSPECT CLOCK SPRING

• Inspect clock spring. 

(See 

T–126 CLOCK SPRING INSPECTION

)

• Is clock spring normal?

Yes

Go to next step.

No

Replace clock spring.
(See 

T–125 CLOCK SPRING REMOVAL/INSTALLATION

)

5

INSPECT WIRING HARNESS BETWEEN 
CLOCK SPRING AND SAS UNIT

• Turn ignition switch to LOCK position.

• Disconnect negative battery cable and wait 

for more than 1 minute.

• Remove column cover.

• Disconnect clock spring connector.

• Remove glove compartment.

• Disconnect passenger-side air bag module 

connector.

• Disconnect driver and passenger-side side 

air bag module connectors. (Vehicle with 
side air bag)

• Disconnect driver and passenger-side 

curtain air bag module connectors. (Vehicle 
with curtain air bag)

• Remove B-pillar lower trim. (Vehicle with pre-

tensioner seat belt)

• Disconnect driver and passenger-side pre-

tensioner seat belt connectors. (Vehicle with 
pre-tensioner seat belt)

• Turn up floor covering.

• Disconnect all SAS unit connectors.

• Inspect following wiring harnesses between 

SAS unit and clock spring terminals for short 
to ground, short to power supply, and open 
circuit:
— 1G—1B
— 1J—1A

• Is wiring harness okay?

Yes

Present malfunction diagnosis:

• Replace SAS unit.

(See 

T–124 SAS UNIT REMOVAL/INSTALLATION

)

Past malfunction diagnosis:

• Troubleshooting completed.

No

Replace wiring harnesses.

STEP

INSPECTION

ACTION

ON-BOARD DIAGNOSTIC [AIR BAG SYSTEM] 

T–217

T

DTC B2229, B2231, B2233, B2235

A6E817401046W18

Diagnostic procedure

DTC

B2229

Passenger-side air bag module (inflator No.2) system circuit short to ground

B2231

Passenger-side air bag module (inflator No.2) system circuit short to power supply

B2233

Passenger-side air bag module (inflator No.2) system resistance high

B2235

Passenger-side air bag module (inflator No.2) system resistance low

DETECTION 

CONDITION

Warning
• Detection conditions are for understanding DTC outline before performing inspection. 

Performing inspection with only detection conditions may cause injury due to operating error 
or damage the system. When performing inspection, always follow inspection procedure.

• Abnormal resistance (other than 1.4—2.9 ohm) detected in passenger-side air bag module circuit

• Malfunction in wiring harness between passenger-side air bag module (inflator No.2) and SAS unit

POSSIBLE 

CAUSE

• Open or short circuit in wiring harness between passenger-side air bag module (inflator No.2) and SAS 

unit

• Passenger-side air bag module (inflator No.2) malfunction

• SAS unit malfunction

STEP

INSPECTION

ACTION

1

INSPECT PASSENGER-SIDE AIR BAG 
MODULE (INFLATOR NO.2)

• Check following PID/DATA monitor, using 

SST (WDS or equivalent).
(See 

T–195 PID/DATA MONITOR TABLE

)

— P_ABAGR2

• Is resistant value of passenger-side air bag 

module normal?
— Resistance: 1.4—2.9 ohm

Yes

Present malfunction diagnosis:

• Replace SAS unit.

(See 

T–124 SAS UNIT REMOVAL/INSTALLATION

)

Past malfunction diagnosis:

• Troubleshooting completed.

No

Go to next step.

2

INSPECT PASSENGER-SIDE AIR BAG 
MODULE (INFLATOR NO.2) CONNECTOR

Warning
• Handling air bag system components 

improperly can accidentally deploy air 
bag modules and pre-tensioner seat 
belts, which may seriously injure you. 
Read AIR BAG SYSTEM SERVICE 
WARNINGS before handling air bag 
system components. 
(See 

T–117 SERVICE WARNINGS

)

• Turn ignition switch to LOCK position.

• Disconnect negative battery cable and wait 

for more than 1 minute.

• Remove glove compartment.

• Disconnect passenger-side air bag module 

connector.

• Is there cracking or chipping in passenger-

side air bag module connector?

Yes

Replace wiring harness.

No

Go to next step.

T–218

ON-BOARD DIAGNOSTIC [AIR BAG SYSTEM] 

End Of Sie

DTC B2296

A6E817401046W19

3

VERIFY WHETHER MALFUNCTION IS IN 
PASSENGER-SIDE AIR BAG MODULE 
(INFLATOR NO.2) OR RELATED WIRING 
HARNESS

• Connect leads of SST (Fuel and 

thermometer checker) or apply 2 ohm 
resistor to passenger-side air bag module 
(inflator No.1) connector terminal A and B, 
and passenger-side air bag module (inflator 
No.2) connector terminal A and B.

• Set resistance of SST (Fuel and 

thermometer checker) to 2 ohm.

• Connect negative battery cable.

• Turn ignition switch to ON position.

• Check following PID/DATA monitor, using 

SST (WDS or equivalent).
(See 

T–195 PID/DATA MONITOR TABLE

)

— DO_PAB2ST

• Is related wiring harness normal?

Yes

Replace passenger-side air bag module.
(See 

T–121 PASSENGER-SIDE AIR BAG MODULE 

REMOVAL/INSTALLATION

)

No

Replace wiring harness, then go to next step.

4

INSPECT SAS UNIT

• Turn ignition switch to LOCK position.

• Disconnect negative battery cable and wait 

for more than 1 minute.

• Connect passenger-side air bag module 

connector.

• Are DTCs B2229, B2231, B2233 and/or 

B2235 indicated?

Yes

Present malfunction diagnosis:

• Replace SAS unit.

(See 

T–124 SAS UNIT REMOVAL/INSTALLATION

)

Past malfunction diagnosis:

• Troubleshooting completed.

No

Troubleshooting completed.

STEP

INSPECTION

ACTION

DTC B2296

Crash zone sensor system (communication error, sensor internal circuit abnormal)

DETECTION 

CONDITION

Warning
• Detection conditions are for understanding DTC outline before performing inspection. 

Performing inspection with only detection conditions may cause injury due to operating error 
or damage the system. When performing inspection, always follow inspection procedure.

• Malfunction in wiring harness between crash zone sensor and SAS unit

• Malfunction in crash zone sensor circuit 

POSSIBLE 

CAUSE

• Open or short circuit in wiring harness between crash zone sensor and SAS unit

• SAS unit malfunction

• Crash zone sensor malfunction


Content   ..  365  366  367  368   ..