Lexus LC Cabriolet (2021 year). Manual in english - page 2
 

  Index      Manuals     Lexus LC Cabriolet (2021 year). Manual in english


Search            copyright infringement  


Content      ..      1      2      3      ..


Lexus LC Cabriolet (2021 year). Manual in english - page 2


46

1-1. For safe use

Before operating

After operating

Q

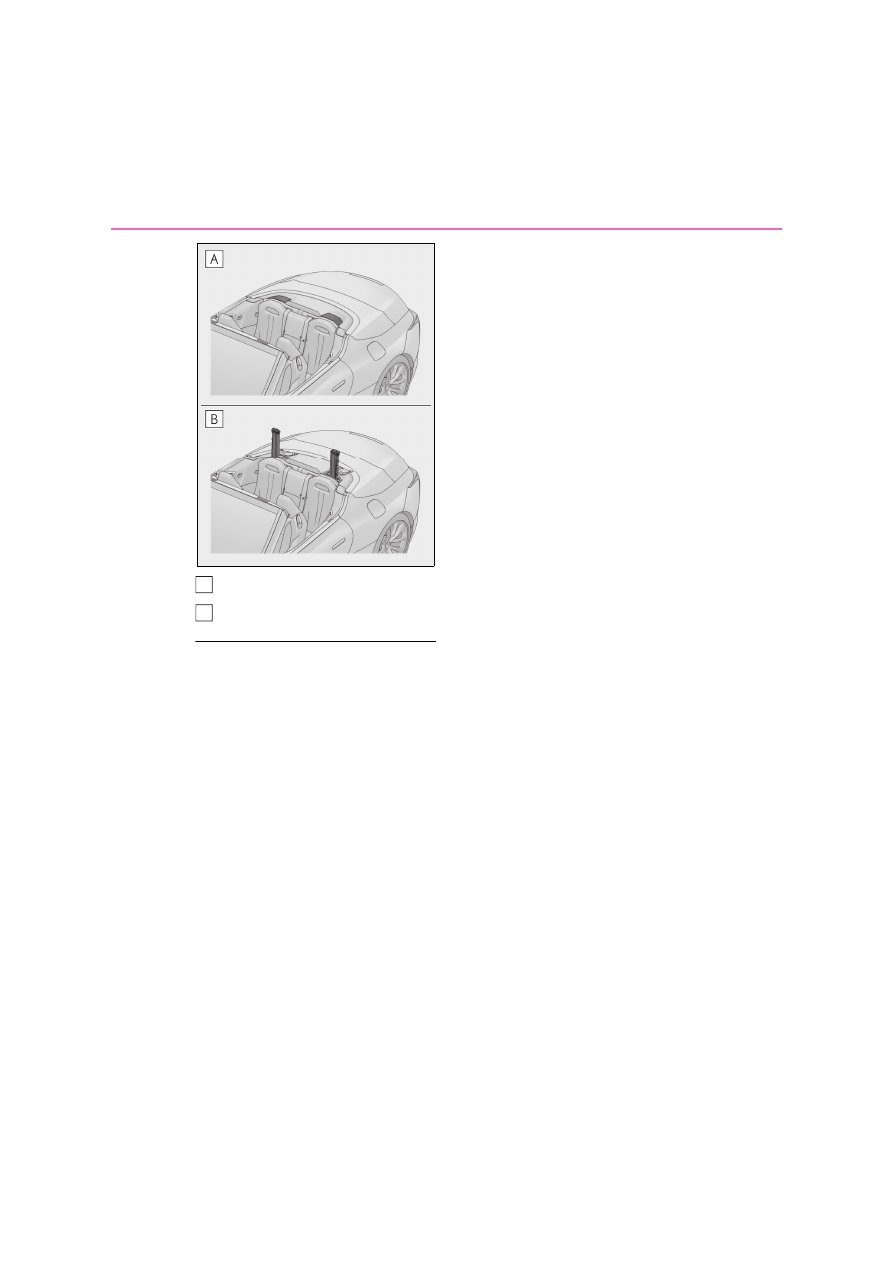
Active roll bar precautions

O

Before scrapping your vehicle, make 

sure to contact any authorized Lexus 

retailer or Lexus authorized repairer, or 

any reliable repairer.

O

If the active roll bar operates when the 

soft top roof is opened, the soft top roof 

cannot be closed.

O

The active roll bar cannot be reused once 

it has operated. Have it replaced by any 

authorized Lexus retailer or Lexus autho-

rized repairer, or any reliable repairer.

Q

Active roll bar operational conditions

O

The active roll bar operates regardless of 

the opening/closing state of the soft top 

roof.

O

The active roll bar will operate in the 

event of an impact that exceeds the set 

threshold level (the level of force corre-

sponding to an approximately 20 - 30 

km/h [12 - 18 mph] frontal collision with a 

fixed wall that does not move or deform, 

or the impact force produced by an 

approximately 1500 kg [3300 lb.] vehi-

cle colliding with the vehicle cabin from a 

direction perpendicular to the vehicle 

orientation at an approximate speed of 

20 - 30 km/h [12 - 18 mph]).

However, this threshold velocity will be 
considerably higher in the following situa-
tions:
• If the vehicle strikes an object, such as a 

parked vehicle or sign pole, which can 

move or deform on impact

• If the vehicle is involved in an underride 

collision, such as a collision in which the 

front of the vehicle underrides, or goes 

under, the bed of a truck

O

The active roll bar operates when the 

vehicle rolls over.

O

The active roll bar may also operate if a 

serious impact occurs to the underside of 

the vehicle, such as in the following situa-

tion.

• Hitting a curb, edge of pavement or hard 

surface

• Falling into or jumping over a deep hole

• Landing hard or falling

• The vehicle is leaning considerably to 

one side.

• The vehicle is subjected to certain types 

of severe impacts when the vehicle has 

slided sideways and collided with a curb, 

etc.

Q

Conditions under which the active roll 

bar may not operate

The active roll bar does not generally oper-

ate if the vehicle is involved in a rear colli-

sion, or if it is involved in a low-speed frontal 

or side collision. But, whenever a collision of 

any type causes sufficient forward deceler-

ation of the vehicle, operation of the active 

roll bar may occur.

O

Collision from the rear

O

Collision from the side to the vehicle 

body other than the passenger compart-

ment

O

Collision from the side at an angle

Q

When the active roll bar operates

The soft top roof cannot be opened or 

closed while the active roll bar is operating.

A
B

47

1

1-1. For safe use

For
 sa

fe

ty

 an

d s

ec

uri

ty

Q

Warning message

If “Active Roll Bar System Malfunction Visit 

Your Dealer” is displayed on the multi-

information display, have the vehicle 

inspected by any authorized Lexus retailer 

or Lexus authorized repairer, or any reli-

able repairer immediately.

WARNING

Q

Active roll bar precautions

Observe the following precautions 

regarding the active roll bar.
Failure to do so may cause death or seri-
ous injury.

O

Make sure that all passengers no not 

have any part of their body in the oper-

ating range of the active roll bar. Also, 

do not sit on the package tray.

O

Do not put anything on the package 

tray. An object on the package tray 

may fly when the active roll bar oper-

ates.

O

Do not strike or apply significant levels 

of force to the area of the active roll 

bar components.

O

If breathing becomes difficult after the 

active roll bar has operated, open a 

door or window to allow fresh air in, or 

leave the vehicle if it is safe to do so.

Wash off any residue as soon as possible 
to prevent skin irritation.

Q

When the active roll bar has oper-

ated

O

If the active roll bar has operated, have 

them replaced by any authorized 

Lexus retailer or Lexus authorized 

repairer, or any reliable repairer. If the 

active roll bar have operated, stop the 

vehicle in a safe place and contact any 

authorized Lexus retailer or Lexus 

authorized repairer, or any reliable 

repairer immediately.

O

Do not touch the active roll bar imme-

diately after it has operated, as the bars 

may be hot and burn you.

NOTICE

Q

Active roll bar precautions

Observe the following precautions to 

ensure the active roll bar can operate 

correctly.

O

If something has hit the area around 

the front bumper or front doors, the 

sensors may be damaged even if the 

active roll bar has not operated. Have 

the vehicle inspected by any autho-

rized Lexus retailer or Lexus autho-

rized repairer, or any reliable repairer 

immediately.

O

Do not remove or repair the parts or 

wiring of the active roll bar, as doing so 

may cause accidental operation or 

prevent the system from operating 

properly. If repair or replacement is 

necessary, contact any authorized 

Lexus retailer or Lexus authorized 

repairer, or any reliable repairer 

immediately.

O

Do not place anything on the package 

tray.

48

1-1. For safe use

Exhaust gas precautions

Harmful substance to the human 
body is included in exhaust gases if 
inhaled.

WARNING

Exhaust gases include harmful carbon 

monoxide (CO), which is colorless and 

odorless. Observe the following precau-

tions.

Failure to do so may cause exhaust gases 

enter the vehicle and may lead to an 

accident caused by light-headedness, or 

may lead to death or a serious health 

hazard.

Q

Important points while driving

O

Keep the trunk lid closed.

O

If you smell exhaust gases in the vehi-

cle even when the trunk lid is closed, 

open the windows and have the vehi-

cle inspected at any authorized Lexus 

retailer or Lexus authorized repairer, 

or any reliable repairer as soon as pos-

sible.

Q

When parking

O

If the vehicle is in a poorly ventilated 

area or a closed area, such as a 

garage, stop the engine.

O

Do not leave the vehicle with the 

engine running for a long time.

If such a situation cannot be avoided, 

park the vehicle in an open space and 

ensure that exhaust fumes do not enter 

the vehicle interior.

O

Do not leave the engine running in an 

area with snow build-up, or where it is 

snowing. If snowbanks build up around 

the vehicle while the engine is running, 

exhaust gases may collect and enter 

the vehicle.

Q

Exhaust pipe

The exhaust system needs to be checked 

periodically. If there is a hole or crack 

caused by corrosion, damage to a joint 

or abnormal exhaust noise, be sure to 

have the vehicle inspected and repaired 

by any authorized Lexus retailer or Lexus 

authorized repairer, or any reliable 

repairer.

49

1

1-2. Child safety

For
 sa

fe

ty

 an

d s

ec

uri

ty

1-2.Child safety

“PASSENGER AIR BAG” indica-
tor

“PASSENGER AIR BAG” and “ON” indi-
cator light turns on when the airbag system 
is on, and about after 60 seconds they go 
off. (only when the engine switch is in ON).

Airbag manual on-off switch

Q

“PASSENGER AIR BAG” indicator 

information

If any of the following problems occur, it is 

possible that there is a malfunction in the 

system. Have the vehicle inspected by any 

authorized Lexus retailer or Lexus autho-

rized repairer, or any reliable repairer.

O

The “OFF” indicator does not illuminate 

when the airbag manual on-off switch is 

set to “OFF”.

O

The indicator light does not change when 

the airbag manual on-off switch is 

switched to “ON” or “OFF”.

Insert the mechanical key into the cyl-
inder and turn to the “OFF” position.

The “OFF” indicator light turns on (only 
when the engine switch is in ON).

Airbag manual on-off system

This system deactivates the front 
passenger airbag and front passen-
ger knee airbag.
Only deactivate the airbags when 
using a child restraint system on the 
front passenger seat.

System components

A

B

Deactivating the airbags for the 
front passenger

WARNING

Q

When installing a child restraint sys-

tem

For safety reasons, always install a child 

restraint system in a rear seat. In the 

event that the rear seat cannot be used, 

the front seat can be used as long as the 

airbag manual on-off system is set to 

“OFF”.

If the airbag manual on-off system is left 

on, the strong impact of the airbag 

deployment (inflation) may cause serious 

injury or even death.

50

1-2. Child safety

WARNING

Q

When a child restraint system is not 

installed on the front passenger seat

Ensure that the airbag manual on-off sys-

tem is set to “ON”.

If it is left off, the airbag may not deploy in 

the event of an accident, which may 

result in serious injury or even death.

Riding with children

Observe the following precautions 
when children are in the vehicle.
Use a child restraint system appro-
priate for the child, until the child 
becomes large enough to properly 
wear the vehicle’s seat belt.

It is recommended that children 
sit in the rear seats to avoid acci-
dental contact with the shift lever, 
wiper switch, etc.

Use the window lock switch to 
avoid children operating the 
power window accidentally. 
(

P.174)

Do not let small children operate 
equipment which may catch or 
pinch body parts, such as the 
power window, hood, trunk, seats 
etc.

WARNING

Q

When children are in the vehicle

Never leave children unattended in the 

vehicle, and never allow children to have 

or use the key.
Children may be able to start the vehicle 

or shift the vehicle into neutral. There is 

also a danger that children may injure 

themselves by playing with the windows 

or other features of the vehicle. In addi-

tion, heat build-up or extremely cold 

temperatures inside the vehicle can be 

fatal to children.

51

1

1-2. Child safety

For
 sa

fe

ty

 an

d s

ec

uri

ty

Points to remember: P.51
When using a child restraint system: 
P.52
Child restraint system compatibility for 
each seating position: P.56
Child restraint system installation 
method: P.59
• Fixed with a seat belt:

P.60

• Fixed with an ISOFIX lower anchor-

age:

P.62

Prioritize and observe the warnings, 
as well as the laws and regulations 
for child restraint systems.

Use a child restraint system until the 
child becomes large enough to 
properly wear the vehicle’s seat 
belt.

Choose a child restraint system 
appropriate to the age and size of 
the child.

Note that not all child restraint sys-
tems can fit in all vehicles. Before 
using or purchasing a child restraint 
system, check the compatibility of 
the child restraint system with seat 
positions. (

P.56)

Child restraint systems

Before installing a child restraint 
system in the vehicle, there are pre-
cautions that need to be observed, 
different types of child restraint sys-
tems, as well as installation meth-
ods, etc., written in this manual.

Use a child restraint system when 
riding with a small child that can-
not properly use a seat belt. For 
the child’s safety, install the child 
restraint system to a rear seat. Be 
sure to follow the installation 
method that is in the operation 
manual enclosed with the 
restraint system.

The use of a Lexus genuine child 
restraint system is recommended, 
as it is safer to use in this vehicle. 
Lexus genuine child restraint sys-
tems are made specifically for 
Lexus vehicles. They can be pur-
chased at a Lexus dealer.

Table of contents

Points to remember

WARNING

Q

When a child is riding

Observe the following precautions.

Failure to do so may result in death or 

serious injury.

O

For effective protection in automobile 

accidents and sudden stops, a child 

must be properly restrained, using a 

seat belt or child restraint system 

which is correctly installed. For instal-

lation details, refer to the operation 

manual enclosed with the child 

restraint system. General installation 

instruction is provided in this manual.

O

Lexus strongly urges the use of a 

proper child restraint system that con-

forms to the weight and size of the 

child, installed on the rear seat. 

According to accident statistics, the 

child is safer when properly restrained 

in the rear seat than in the front seat.

52

1-2. Child safety

Q

When installing a child restraint 
system to a front passenger seat

For the safety of a child, install child 
restraint system to the rear seats. 
When installing child restraint system 
to a front passenger seat is unavoid-
able, adjust the seat as follows and 
install the child restraint system.

Raise the seatback as much as pos-
sible

Move the seat to the rearmost posi-
tion

Raise the seat to the highest position

If the head restraint interferes with 
the child restraint system installa-
tion, put the head restraint in the 
upper most position.

WARNING

O

Holding a child in your or someone 

else’s arms is not a substitute for a child 

restraint system. In an accident, the 

child can be crushed against the wind-

shield or between the holder and the 

interior of the vehicle.

Q

Handling the child restraint system

If the child restraint system is not prop-

erly fixed in place, the child or other pas-

sengers may be seriously injured or even 

killed in the event of sudden braking, 

sudden swerving, or an accident.

O

If the vehicle were to receive a strong 

impact from an accident, etc., it is pos-

sible that the child restraint system has 

damage that is not readily visible. In 

such cases, do not reuse the restraint 

system.

O

Depending on the child restraint sys-

tem, installation may be difficult or 

impossible. In those cases, check 

whether the child restraint system is 

suitable for installment in the vehicle. 

(

P.56) Be sure to install and 

observe the usage rules after carefully 

reading the child restraint system fix-

ing method in this manual, as well as 

the operation manual enclosed with 

the child restraint system.

O

Keep the child restraint system prop-

erly secured on the seat even if it is not 

in use. Do not store the child restraint 

system unsecured in the passenger 

compartment.

O

If it is necessary to detach the child 

restraint system, remove it from the 

vehicle or store it securely in the trunk.

When using a child restraint sys-
tem

WARNING

Q

When installing a child restraint sys-

tem

Observe the following precautions.

Failure to do so may result in death or 

serious injury.

53

1

1-2. Child safety

For
 sa

fe

ty

 an

d s

ec

uri

ty

WARNING

O

Never use a rear-facing child restraint 

system on the front passenger seat 

when the airbag manual on-off switch 

is on. (

P.49)

The force of the rapid inflation of the 

front passenger airbag can cause 

death or serious injury to children in 

the event of an accident.

O

There is a label(s) on the passenger 

side sun visor, indicating it is forbidden 

to attach a rear-facing child restraint 

system to the front passenger seat.

Details of the label(s) are shown in the 

illustration below.

54

1-2. Child safety

WARNING

WARNING

O

When unavoidably installing a for-

ward-facing child restraint system on 

the front passenger seat, make sure to 

pass the seat belt through the seat belt 

guide and fasten the button.

O

Only put a forward-facing child 

restraint system on the front seat when 

unavoidable. When installing a for-

ward-facing child restraint on the front 

passenger seat, move the seat as far 

back as possible. Failing to do so may 

result in death or serious injury if the 

airbags deploy (inflate).

O

Do not allow the child to lean his/her 

head or any part of his/her body 

against the door or the area of the seat 

from which the SRS side airbags 

deploy even if the child is seated in the 

child restraint system. It is dangerous if 

the SRS side airbags inflate, and the 

impact could cause death or serious 

injury to the child.

55

1

1-2. Child safety

For
 sa

fe

ty

 an

d s

ec

uri

ty

Q

Child restraint system compatibil-
ity for each seating position

Compatibility of each seating position 
with child restraint systems (

P.56) 

displays the type of child restraint sys-
tems that can be used and possible 
seating positions for installation using 
symbols. Also, the recommended child 
restraint system that is suitable for your 
child can be selected.
Check the selected child restraint sys-
tem together with the following 
“Before confirming the compatibility of 

each seating position with child 
restraint systems”.

Q

Before confirming the compatibil-
ity of each seating position with 
child restraint systems

1

Checking the child restraint system 
standards.
Use a child restraint system that 
conforms to UN(ECE) R44

*1

.

The following approval mark is dis-
played on child restraint systems 
which are conformed.
Check for an approval mark 
attached to the child restraint sys-
tem.

Example of the displayed regulation Num-
ber

UN(ECE) R44 approval mark

*2

The weight range of the child who is 
applicable for an UN(ECE) R44 
approval mark is indicated.

2

Checking the category of the child 
restraint system.
Check the approval mark of the 
child restraint system for which of 

WARNING

O

When a junior seat is installed, always 

ensure that the shoulder belt is posi-

tioned across the center of the child’s 

shoulder. The belt should be kept away 

from the child’s neck, but not so that it 

could fall off the child’s shoulder.

O

Use a child restraint system suitable to 

the age and size of the child and install 

it to the rear seat.

O

If the driver’s seat interferes with the 

child restraint system and prevents it 

from being attached correctly, attach 

the child restraint system to the right-

hand rear seat (left-hand drive vehi-

cles) or the left-hand rear seat (right-

hand drive vehicles). (

P.59)

Child restraint system compati-
bility for each seating position

56

1-2. Child safety

the following categories the child 
restraint system is suitable.
Also, if there are any uncertainties, 
check the user’s guide included 
with the child restraint system or 
contact the retailer of the child 
restraint system.

• “universal”
• “semi-universal”
• “restricted”
• “vehicle specific”

*1

: UN(ECE) R44 is U.N. regulations for 

child restraint systems.

*2

: The displayed mark may differ depend-

ing on the product.

Q

Compatibility of each seating posi-
tion with child restraint systems

Left-hand drive vehicles

Right-hand drive vehicles

*1

: Move the front seat fully rearward. If the 

passenger seat height can be adjusted, 
move it to the upper most position.

*2

: Adjust the seatback angle to the most 

upright position. When installing a for-
ward-facing child seat, if there is a gap 
between the child seat and the seat-
back, adjust the seatback angle until 

*1, 2, 3

*4


Suitable for “universal” category 
child restraint system fixed with 
the seat belt.
Suitable for child restraint sys-
tems given on recommended 
child restraint systems and com-
patibility table (

P.58).

Suitable for ISOFIX child restraint 
system.
Never use a rear-facing child 
restraint system on the front pas-
senger seat when the airbag man-
ual on-off switch is on.

57

1

1-2. Child safety

For
 sa

fe

ty

 an

d s

ec

uri

ty

good contact is achieved.

*3

: If the head restraint interferes with the 

child restraint system installation, put 
the head restraint in the upper most 
position.

*4

: Use only a front-facing child restraint 

system when the airbag manual on-off 
switch is on.

Q

Detail information for CRS installation

ISOFIX child restraint systems are divided into different “fixture”. The child 
restraint system can be used in the seating positions for “fixture” mentioned in the 
table above. For kind of “fixture” relation, confirm the following table.
If your child restraint system has no kind of “fixture” (or if you cannot find informa-
tion in the table below), please refer to the child restraint system “vehicle list” for 
compatibility information or ask the retailer of your child seat.

Seating position

Seat position number

Airbag manual on-

off switch

ON

OFF

Seating position suitable for universal 

belted (Yes/No)

Yes

For-

ward-
facing 

only

Yes

No

No

i-Size seating position (Yes/No)

No

No

No

No

Seating position suitable for lateral fixture 

(L1/L2/No)

No

No

No

No

Suitable rearward facing fixture 

(R1/R2X/R2/R3/No)

No

No

No

No

Suitable forward facing fixture 

(F2X/F2/F3/No)

No

No

F2X

F2X

Suitable junior seat fixture (B2/B3/No)

No

No

No

No

58

1-2. Child safety

Q

Recommended child restraint systems and Compatibility table

The child restraint systems mentioned in the table may not be available outside the 
EU area.

Fixture

Description

F3

Full-height, forward-facing child restraint systems

F2

Reduced-height forward-facing child restraint systems

F2X

Reduced-height forward-facing child restraint systems

R3

Full-size, rearward-facing child restraint systems

R2

Reduced-size, rearward-facing child restraint systems

R2X

Reduced-size, rearward-facing child restraint systems

R1

Rearward-facing infant seat

L1

Left lateral-facing (carrycot) infant seat

L2

Right lateral-facing (carrycot) infant seat

B2

Junior seat

B3

Junior seat

Mass groups

Recommended Child Restraint Sys-

tem

Seating position

Airbag manual 

on-off switch

ON

OFF

0, 0+
Up to 13 kg
(28 lb.)

G0+, BABY SAFE PLUS (Yes/No)

No

Yes

Belt Fix 

Only

No

No

G0+ BABY SAFE PLUS with SEAT 
BELT FIXATION, BASE PLAT-
FORM (Yes/No)

No

No

No

No

I
9 to 18 kg
(20 to 39 lb.)

DUO PLUS (Yes/No)

Yes

Belt Fix 

Only

Yes

Belt Fix 

Only

No

No

59

1

1-2. Child safety

For
 sa

fe

ty

 an

d s

ec

uri

ty

When installing a child restraint in 
the rear seats, adjust the front seat 
so that it does not interfere with the 
child or child restraint system.

When installing a child seat with 
support base, if the child seat inter-
feres with the seatback when latch-
ing it into the support base, adjust 
the seatback rearward until there is 
no interference.

If the seat belt shoulder anchor is 
ahead of the child seat belt guide, 
move the seat cushion forward.

When installing a junior seat, if the 
child in your child restraint system is 
in a very upright position, adjust the 
seatback angle to the most comfort-
able position. And if the seat belt 
shoulder anchor is ahead of the 
child seat belt guide, move the seat 
cushion forward.

Confirm with the operation manual enclosed with the child restraint system about 
the installation of the child restraint system.

Child restraint system installation method

60

1-2. Child safety

Q

Installing child restraint system 
using a seat belt

Install the child restraint system in 
accordance to the operation manual 
enclosed with the child restraint sys-
tem.
If the child restraint system on hand is 
not within the “universal” category (or 
the necessary information is not in the 
table), refer to the “Vehicle List” pro-
vided by the child restraint system 
maker for various possible installation 
positions, or check the compatibility 
after asking the retailer of the child 
seat. (

P.55, 56)

1

If installing the child restraint sys-
tem to the front passenger seat is 
unavoidable, refer to P.52 for front 
passenger seat adjustment.

2

If the head restraint interferes with 
the child restraint system installa-
tion, put the head restraint in the 
upper most position. (

P.165)

3

Run the seat belt through the child 
restraint system and insert the plate 
into the buckle. Make sure that the 
belt is not twisted. Securely fix the 
seat belt to the child restraint sys-
tem in accordance to the directions 

Installation method

Page

Seat belt attachment

P.60

ISOFIX lower anchorage 

attachment

P.62

Child restraint system fixed with 
a seat belt

61

1

1-2. Child safety

For
 sa

fe

ty

 an

d s

ec

uri

ty

enclosed with the child restraint 
system.

4

If your child restraint system is not 
equipped with a lock-off (a seat belt 
locking feature), secure the child 
restraint system using a locking 
clip.

5

After installing the child restraint 
system, rock it back and forth to 
ensure that it is installed securely. 
(

P.61)

Q

Removing a child restraint system 
installed with a seat belt

Press the buckle release button and 
fully retract the seat belt.

When releasing the buckle, the child 
restraint system may spring up due to the 
rebound of the seat cushion. Release the 
buckle while holding down the child 
restraint system.
Since the seat belt automatically reels itself, 

slowly return it to the stowing position.

Q

When installing a child restraint system

You may need a locking clip to install the 

child restraint system. Follow the instruc-

tions provided by the manufacturer of the 

system. If your child restraint system does 

not provide a locking clip, you can purchase 

the following item from any authorized 

Lexus retailer or Lexus authorized repairer, 

or any reliable repairer: 

Locking clip for child restraint system (Part 

No. 73119-22010)

WARNING

Q

When installing a child restraint sys-

tem

Observe the following precautions.

Failure to do so may result in death or 

serious injury.

O

Do not allow children to play with the 

seat belt. If the seat belt becomes 

twisted around a child’s neck, it may 

lead to choking or other serious inju-

ries that could result in death. If this 

occurs and the buckle cannot be 

unfastened, scissors should be used to 

cut the belt.

O

Ensure that the belt and plate are 

securely locked and the seat belt is not 

twisted.

O

Shake the child restraint system left 

and right, and forward and backward 

to ensure that it has been securely 

installed.

O

After securing a child restraint system, 

never adjust the seat.

O

When a junior seat is installed, always 

ensure that the shoulder belt is posi-

tioned across the center of the child’s 

shoulder. The belt should be kept away 

from the child’s neck, but not so that it 

could fall off the child’s shoulder.


Content      ..      1      2      3      ..